Fostruder-S (dual motor extruder)


Fostruder-S (dual motor extruder)
Published 2016-02-18T11:30:41+00:00
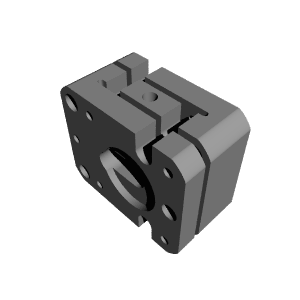
1.75mm dual Nema 17 extruder design, inspired by Elliot Foster's design, I mostly created out of curiosity but I've used it for a few weeks and it's worked with all the filaments I've tried (PLA, ABS, PC, NinjaFlex, TPU, Nylon). The block has two hinges that can be adjusted with tensioning screws to set the gap between the drive gears.
Motors were connected in series (driven with 24V, 1.3A). Whether you want it hooked up in series or parallel will depend on your particular setup (I'm not sure you can drive motors in series with 12V and if you want to hook them up in parallel, you may need high current stepper drivers to get enough torque).
Parts:
2 - Nema17 motors (max 22mm shaft)
1 - 1/8" threaded bowden coupling
2 - M3 x 25mm screws
8 - M3 x 10mm screws
1 - optional series motor connector (I got mine from Peter Stoneham)
Print Settings
Printer: Eustathios
Rafts: Doesn't Matter
Supports: Doesn't Matter
Notes:
Can be printed with or without support, but the filament path has some diaphragms that will need to be removed (run a 2mm drill bit through the filament path).
Post-Printing
Assembly
- Remove any diaphragms in the filament path.
- Install the M3 threaded inserts.
- Use the 20mm screws to adjust the tension (you might be able to use longer screws and springs instead if you prefer).
- Install the Hobgoblin drive gears on the motors (do not tighten) - the set screws may need to be trimmed if they stick out too much.
- Attach both motors to the extruder block, aligning the set screws so they're accessible through the gap in the hinges.
- Tighten the set screws through the gaps, keeping them aligned with the center of the gap.
- Install the threaded bowden coupling.
- Wire up the motors however you like (in series with an adapter board in my case)
- Run the motors, check for extrusion direction, make sure there isn't any interference between the motors, adjust the tension, and check the tooth marks in the filament are deep enough and symmetric. I usually tighten the tension screws until the hinge gap is about 1.5mm.
How I Designed This
You can edit the design in OnShape if you need to make any changes (different drive gears, filament diameter, bowden coupling, etc.). I did not use the more commonly available (and cheaper) MK8 gears since they're cut too deeply to dual drive 1.75mm filament without offsetting them.


| 发表的日期 | 18/02/2016 |
| 打印工艺 | FDM |