Peggy's Secret - Agent Carter Fan Art


Peggy's Secret - Agent Carter Fan Art
Published 2021-11-09T08:52:15+00:00
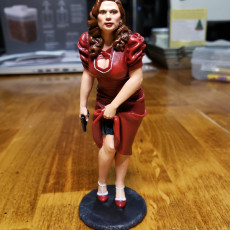
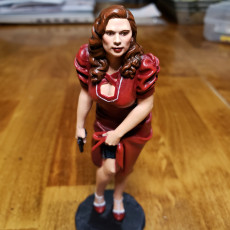
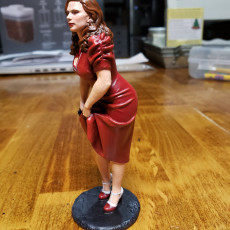
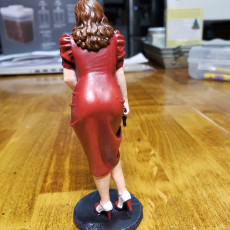
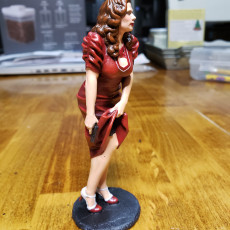
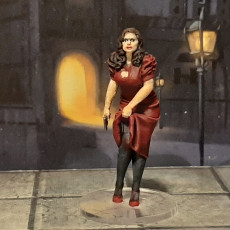
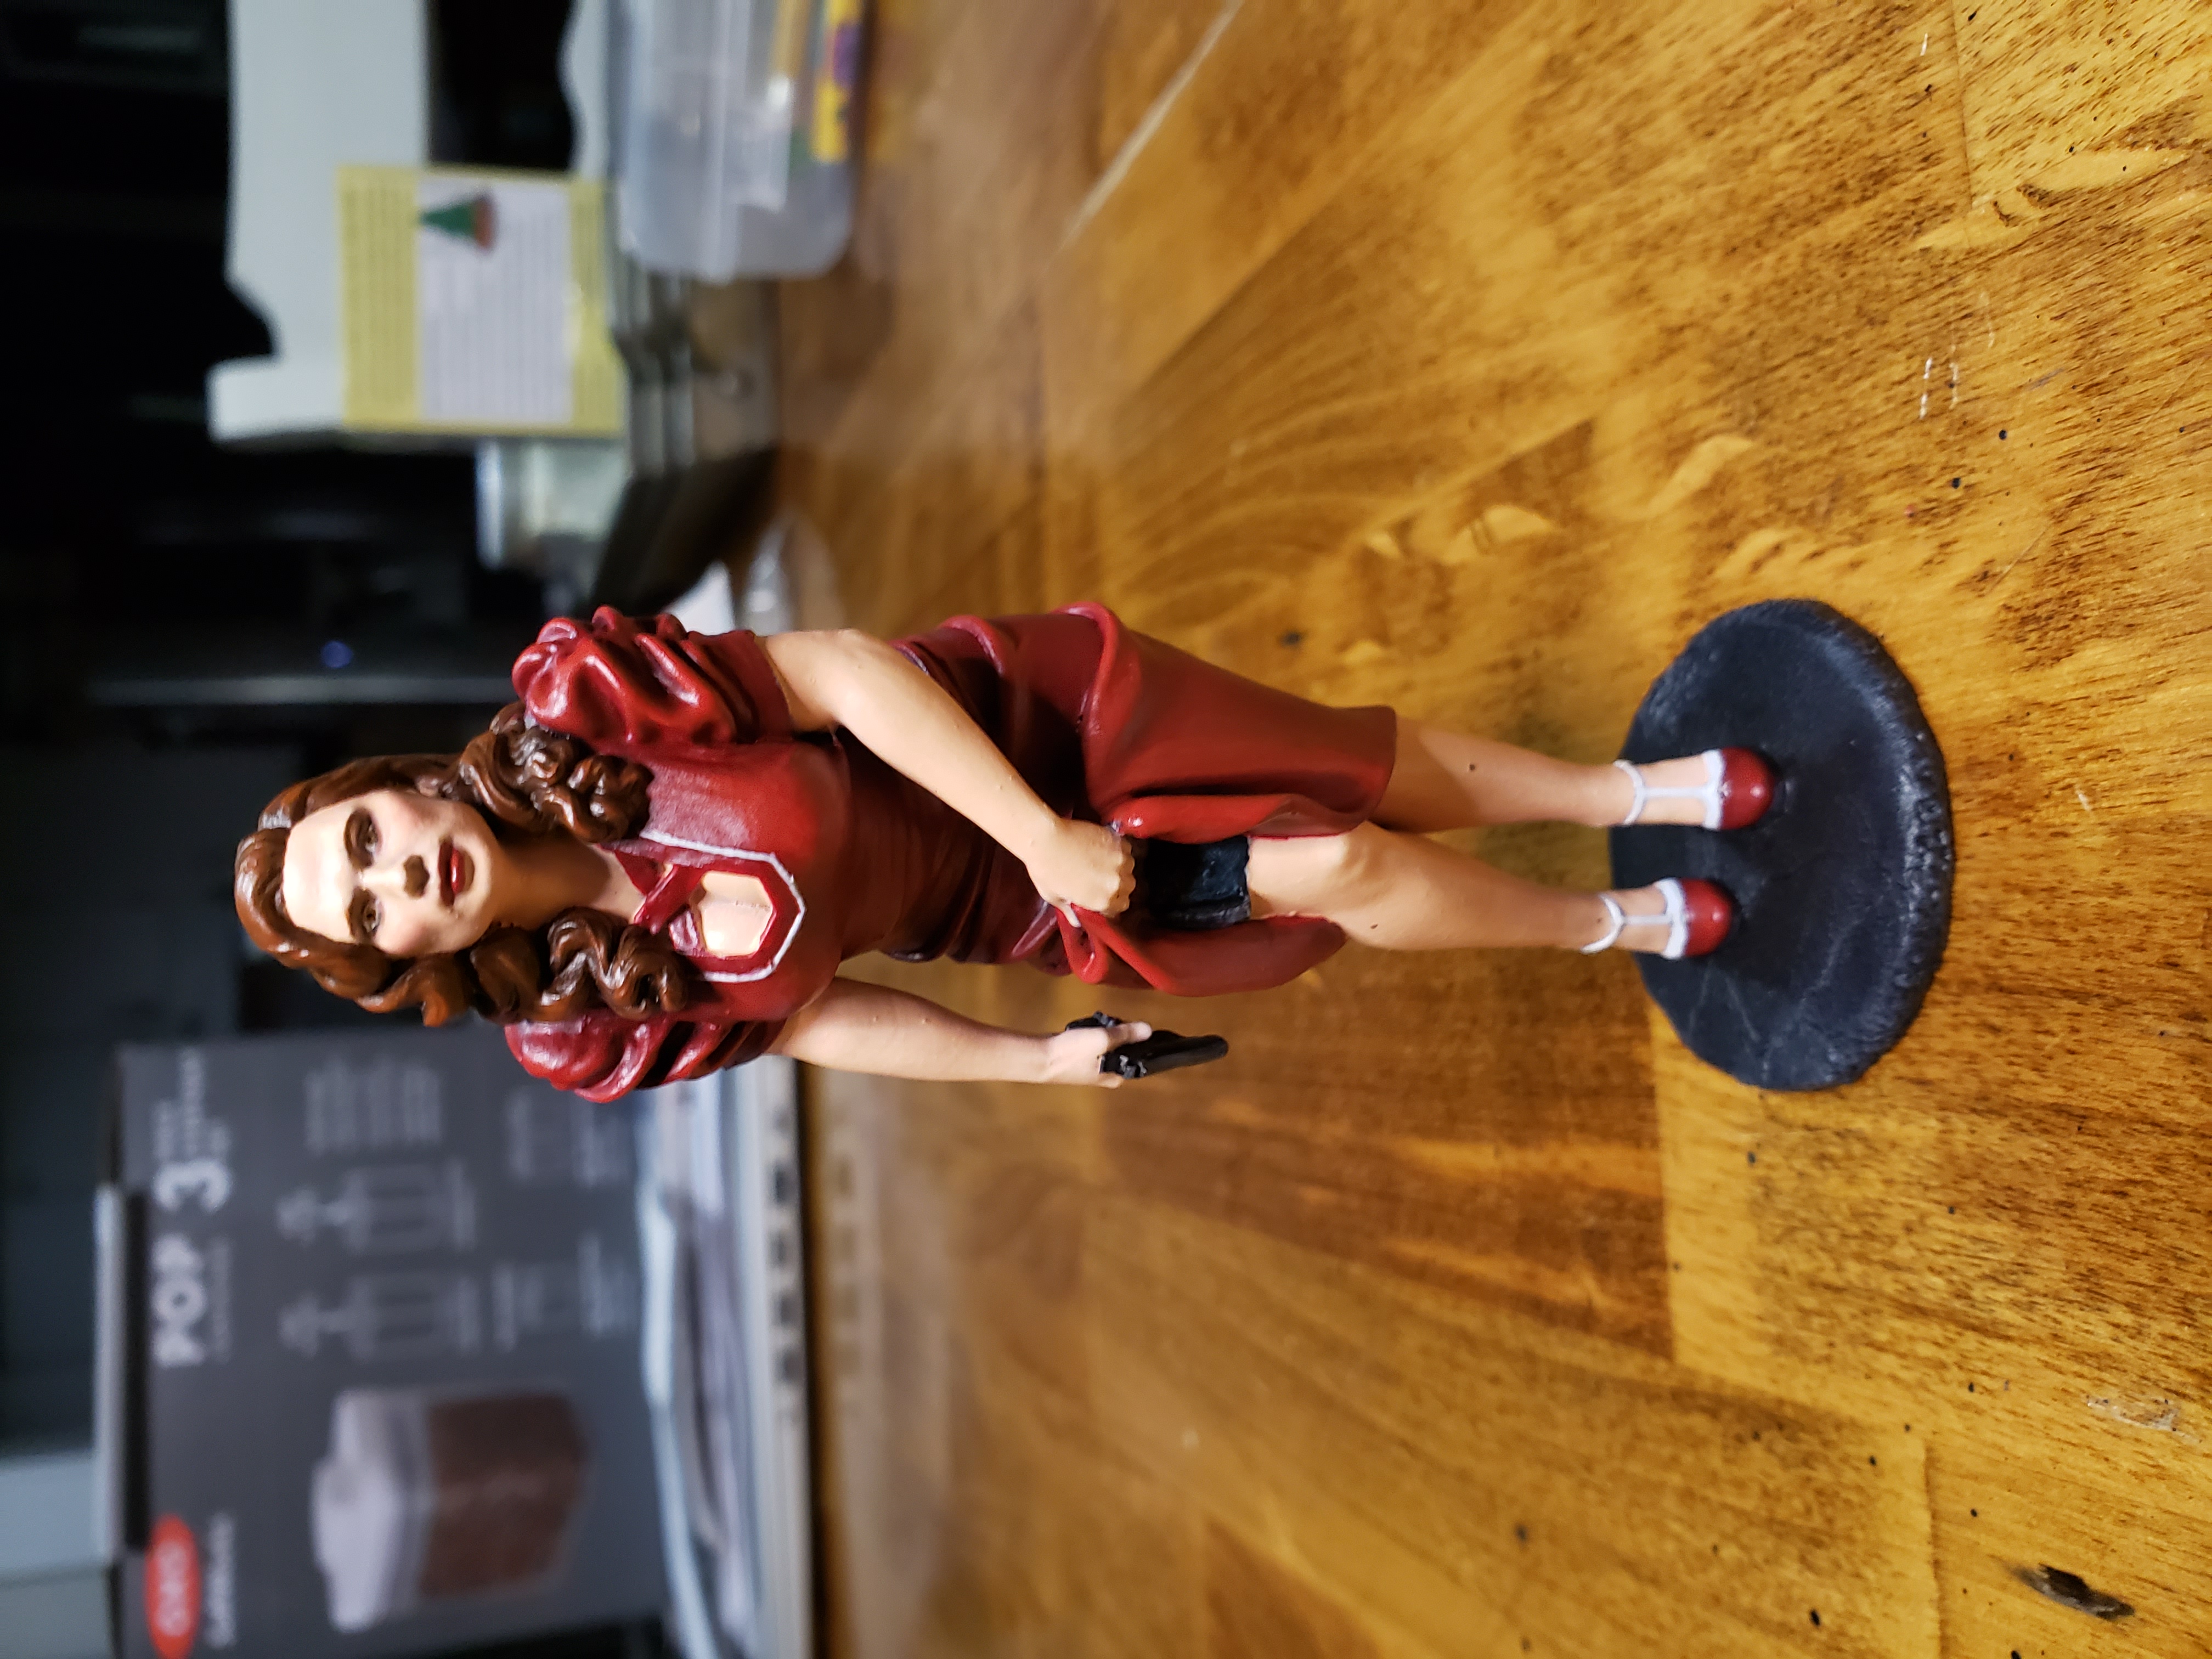
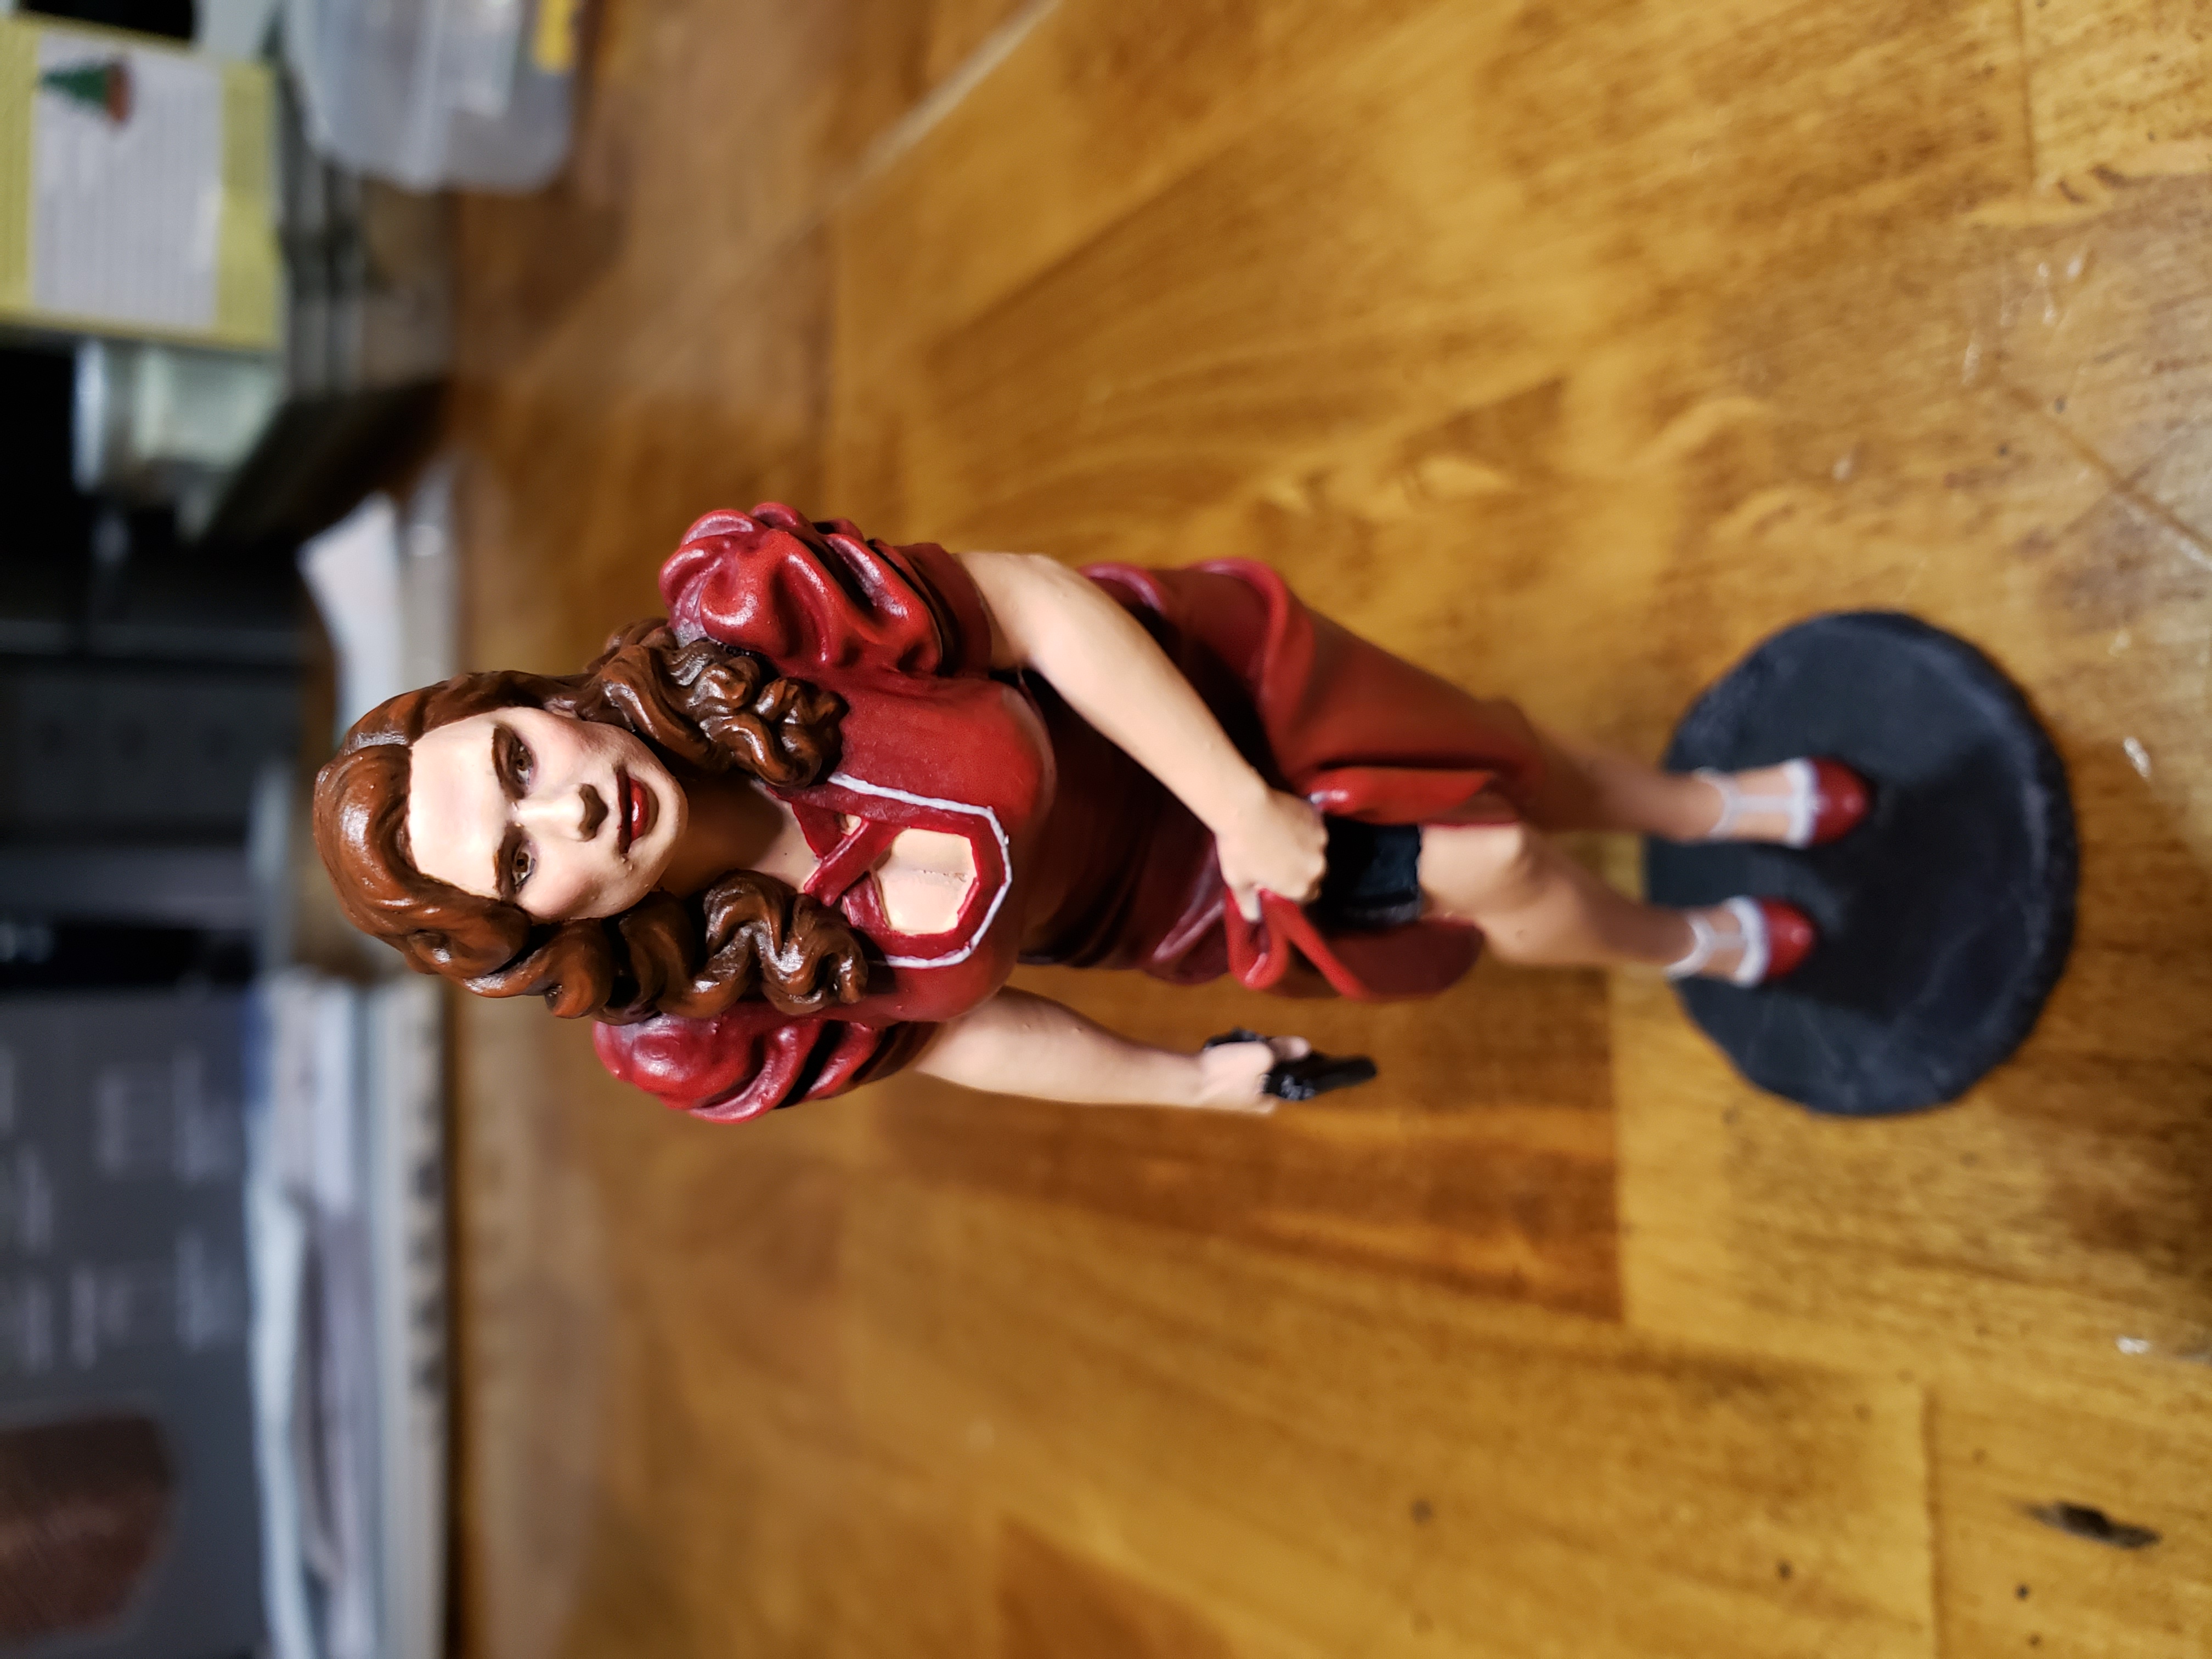
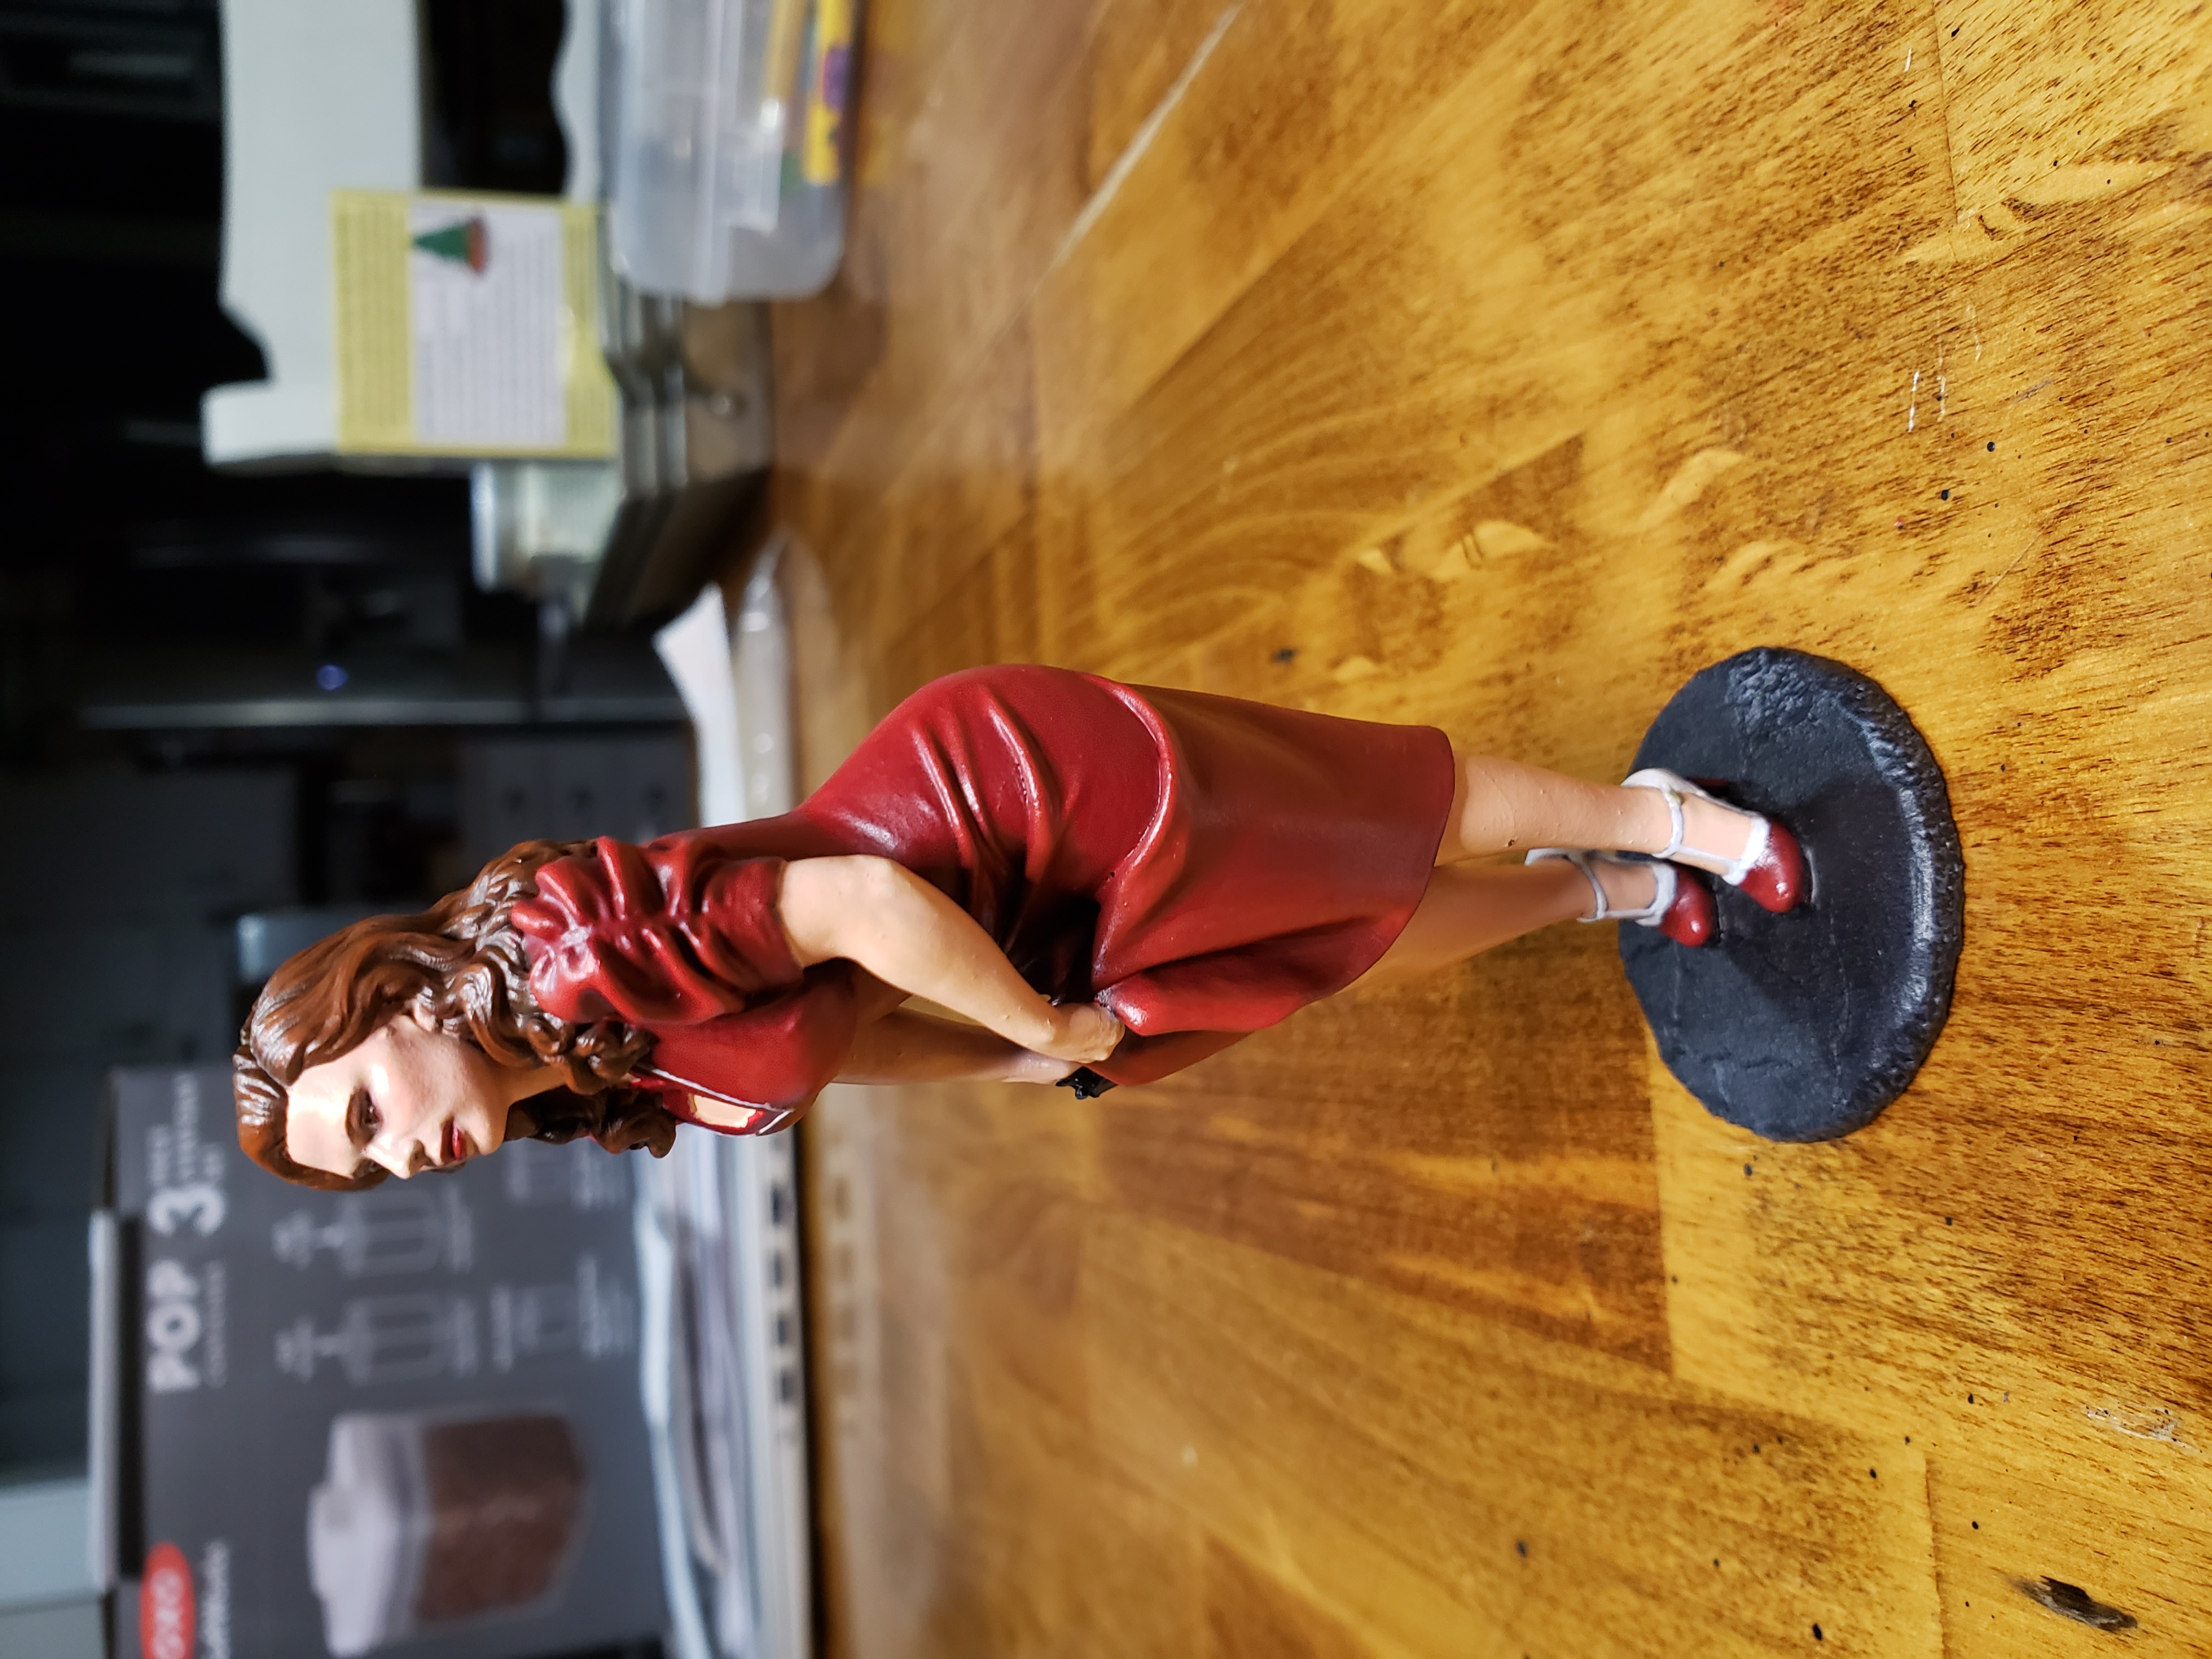
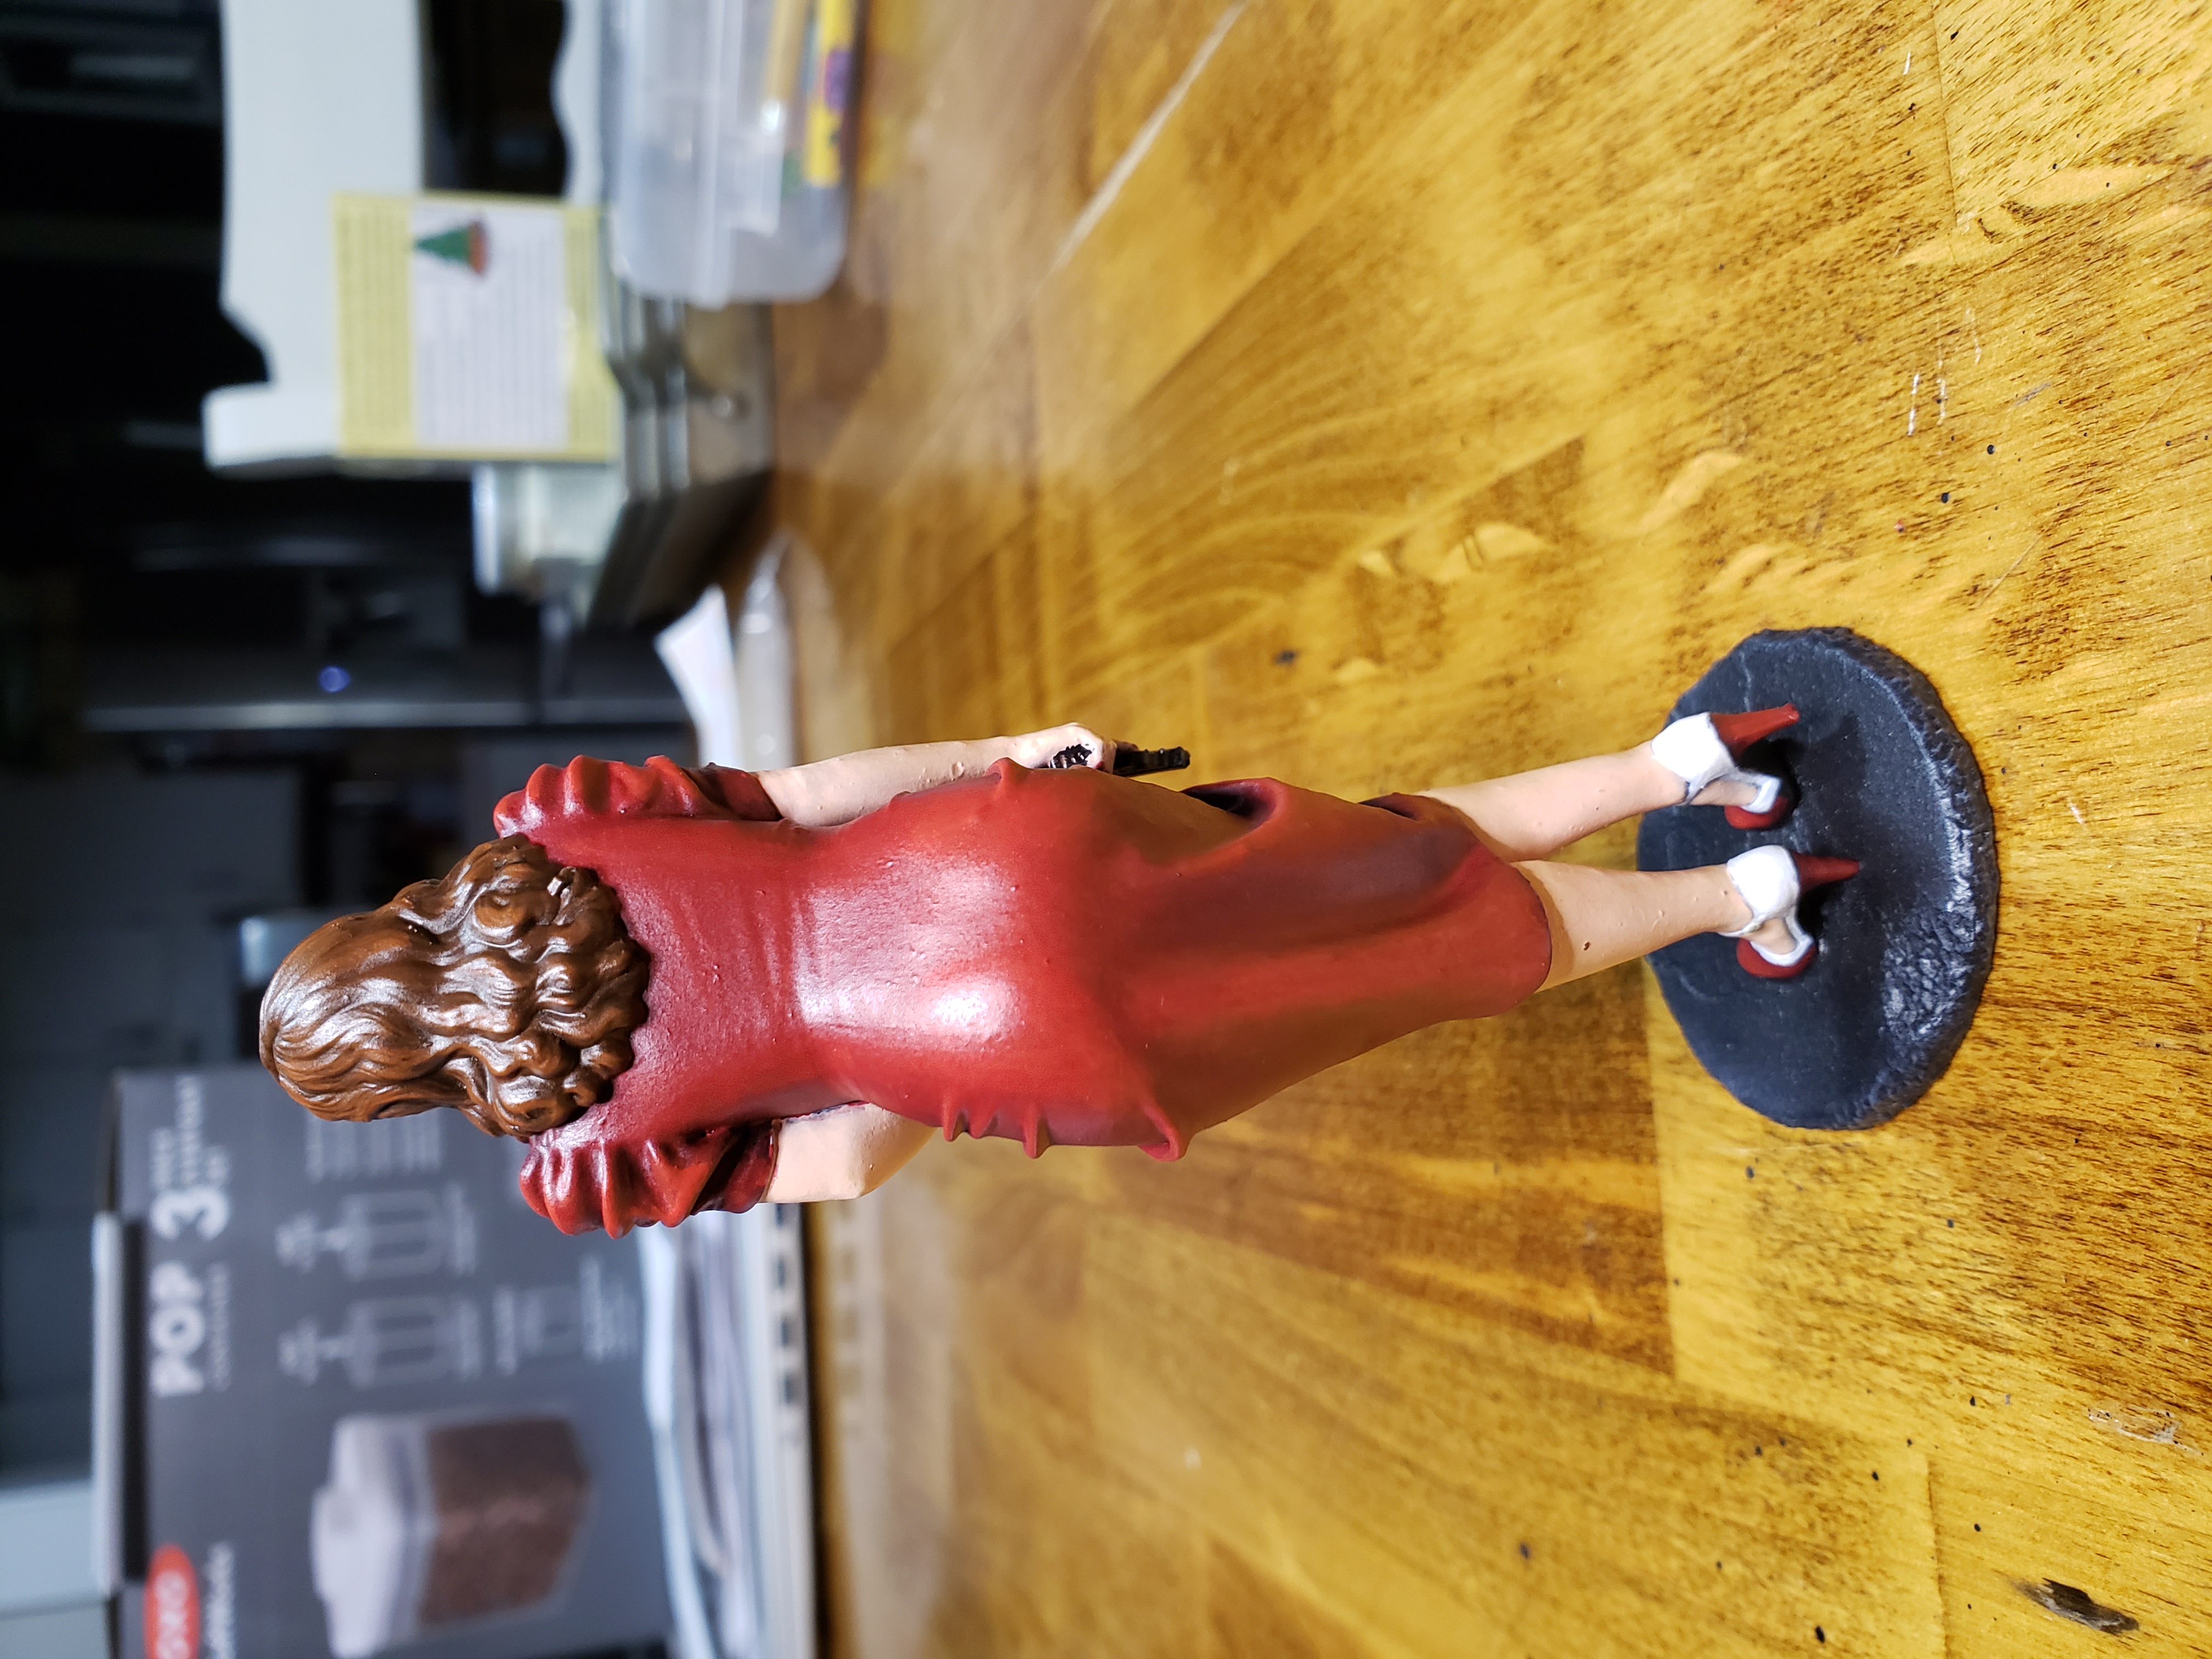
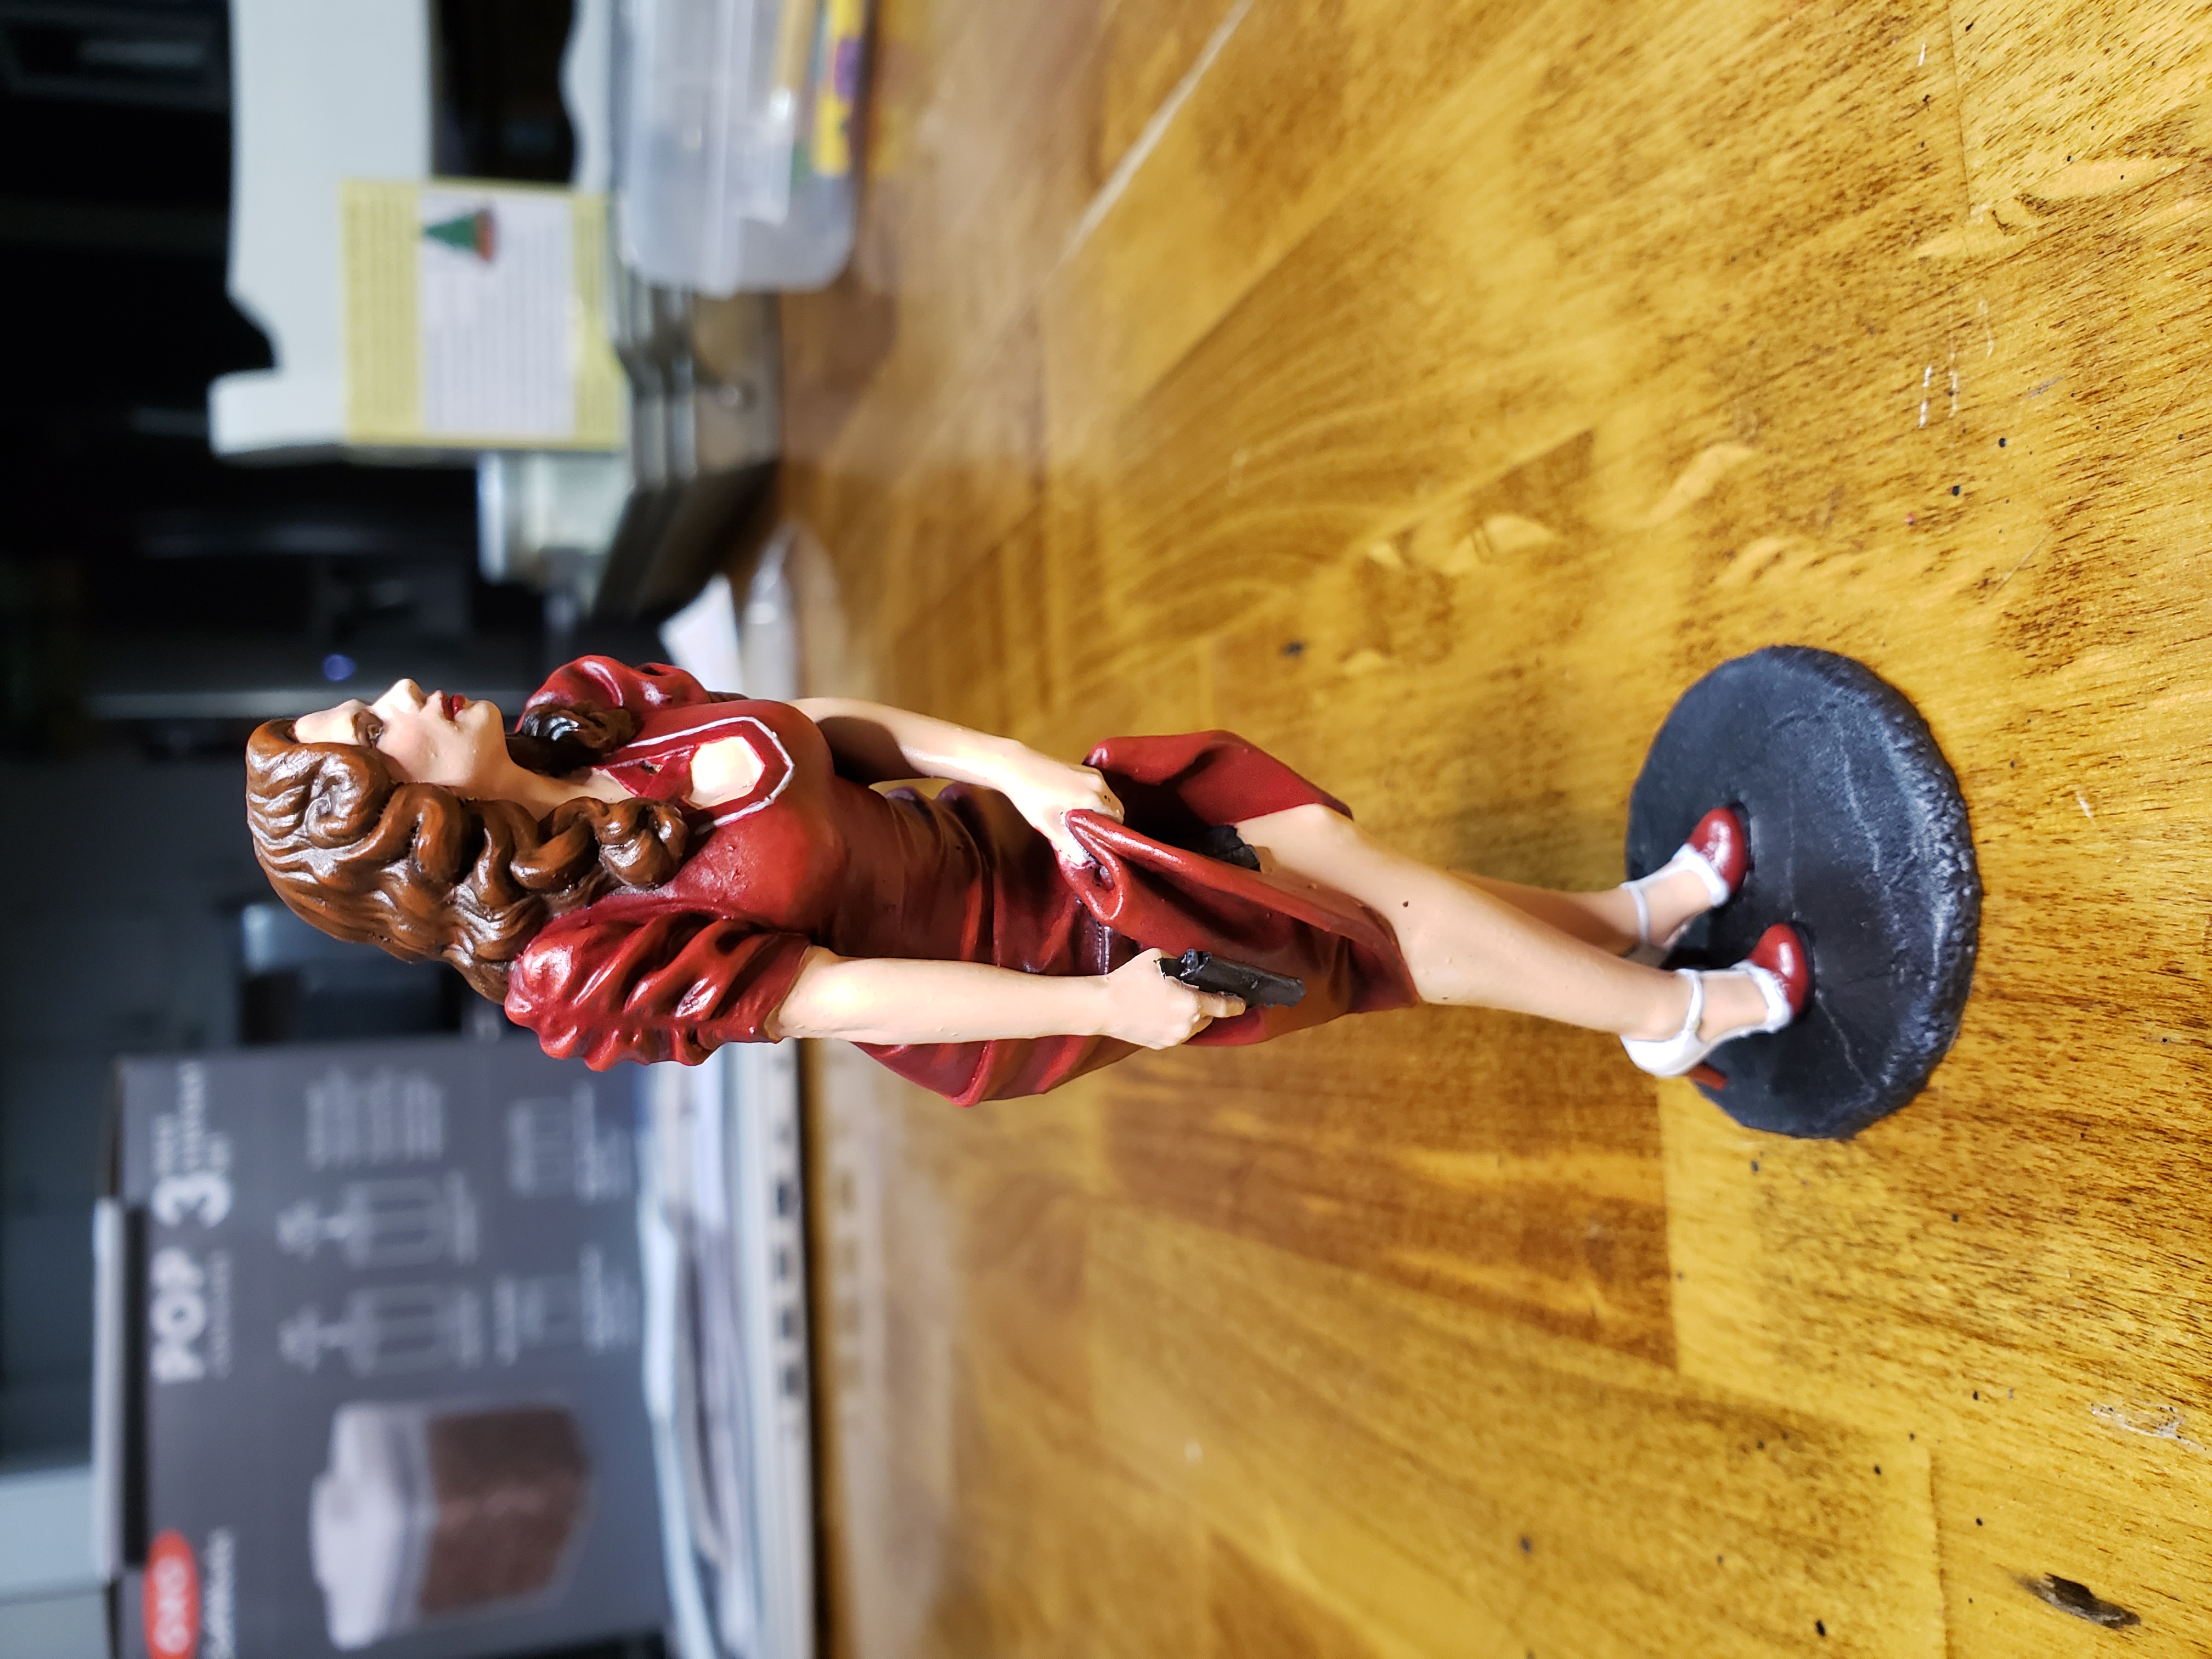
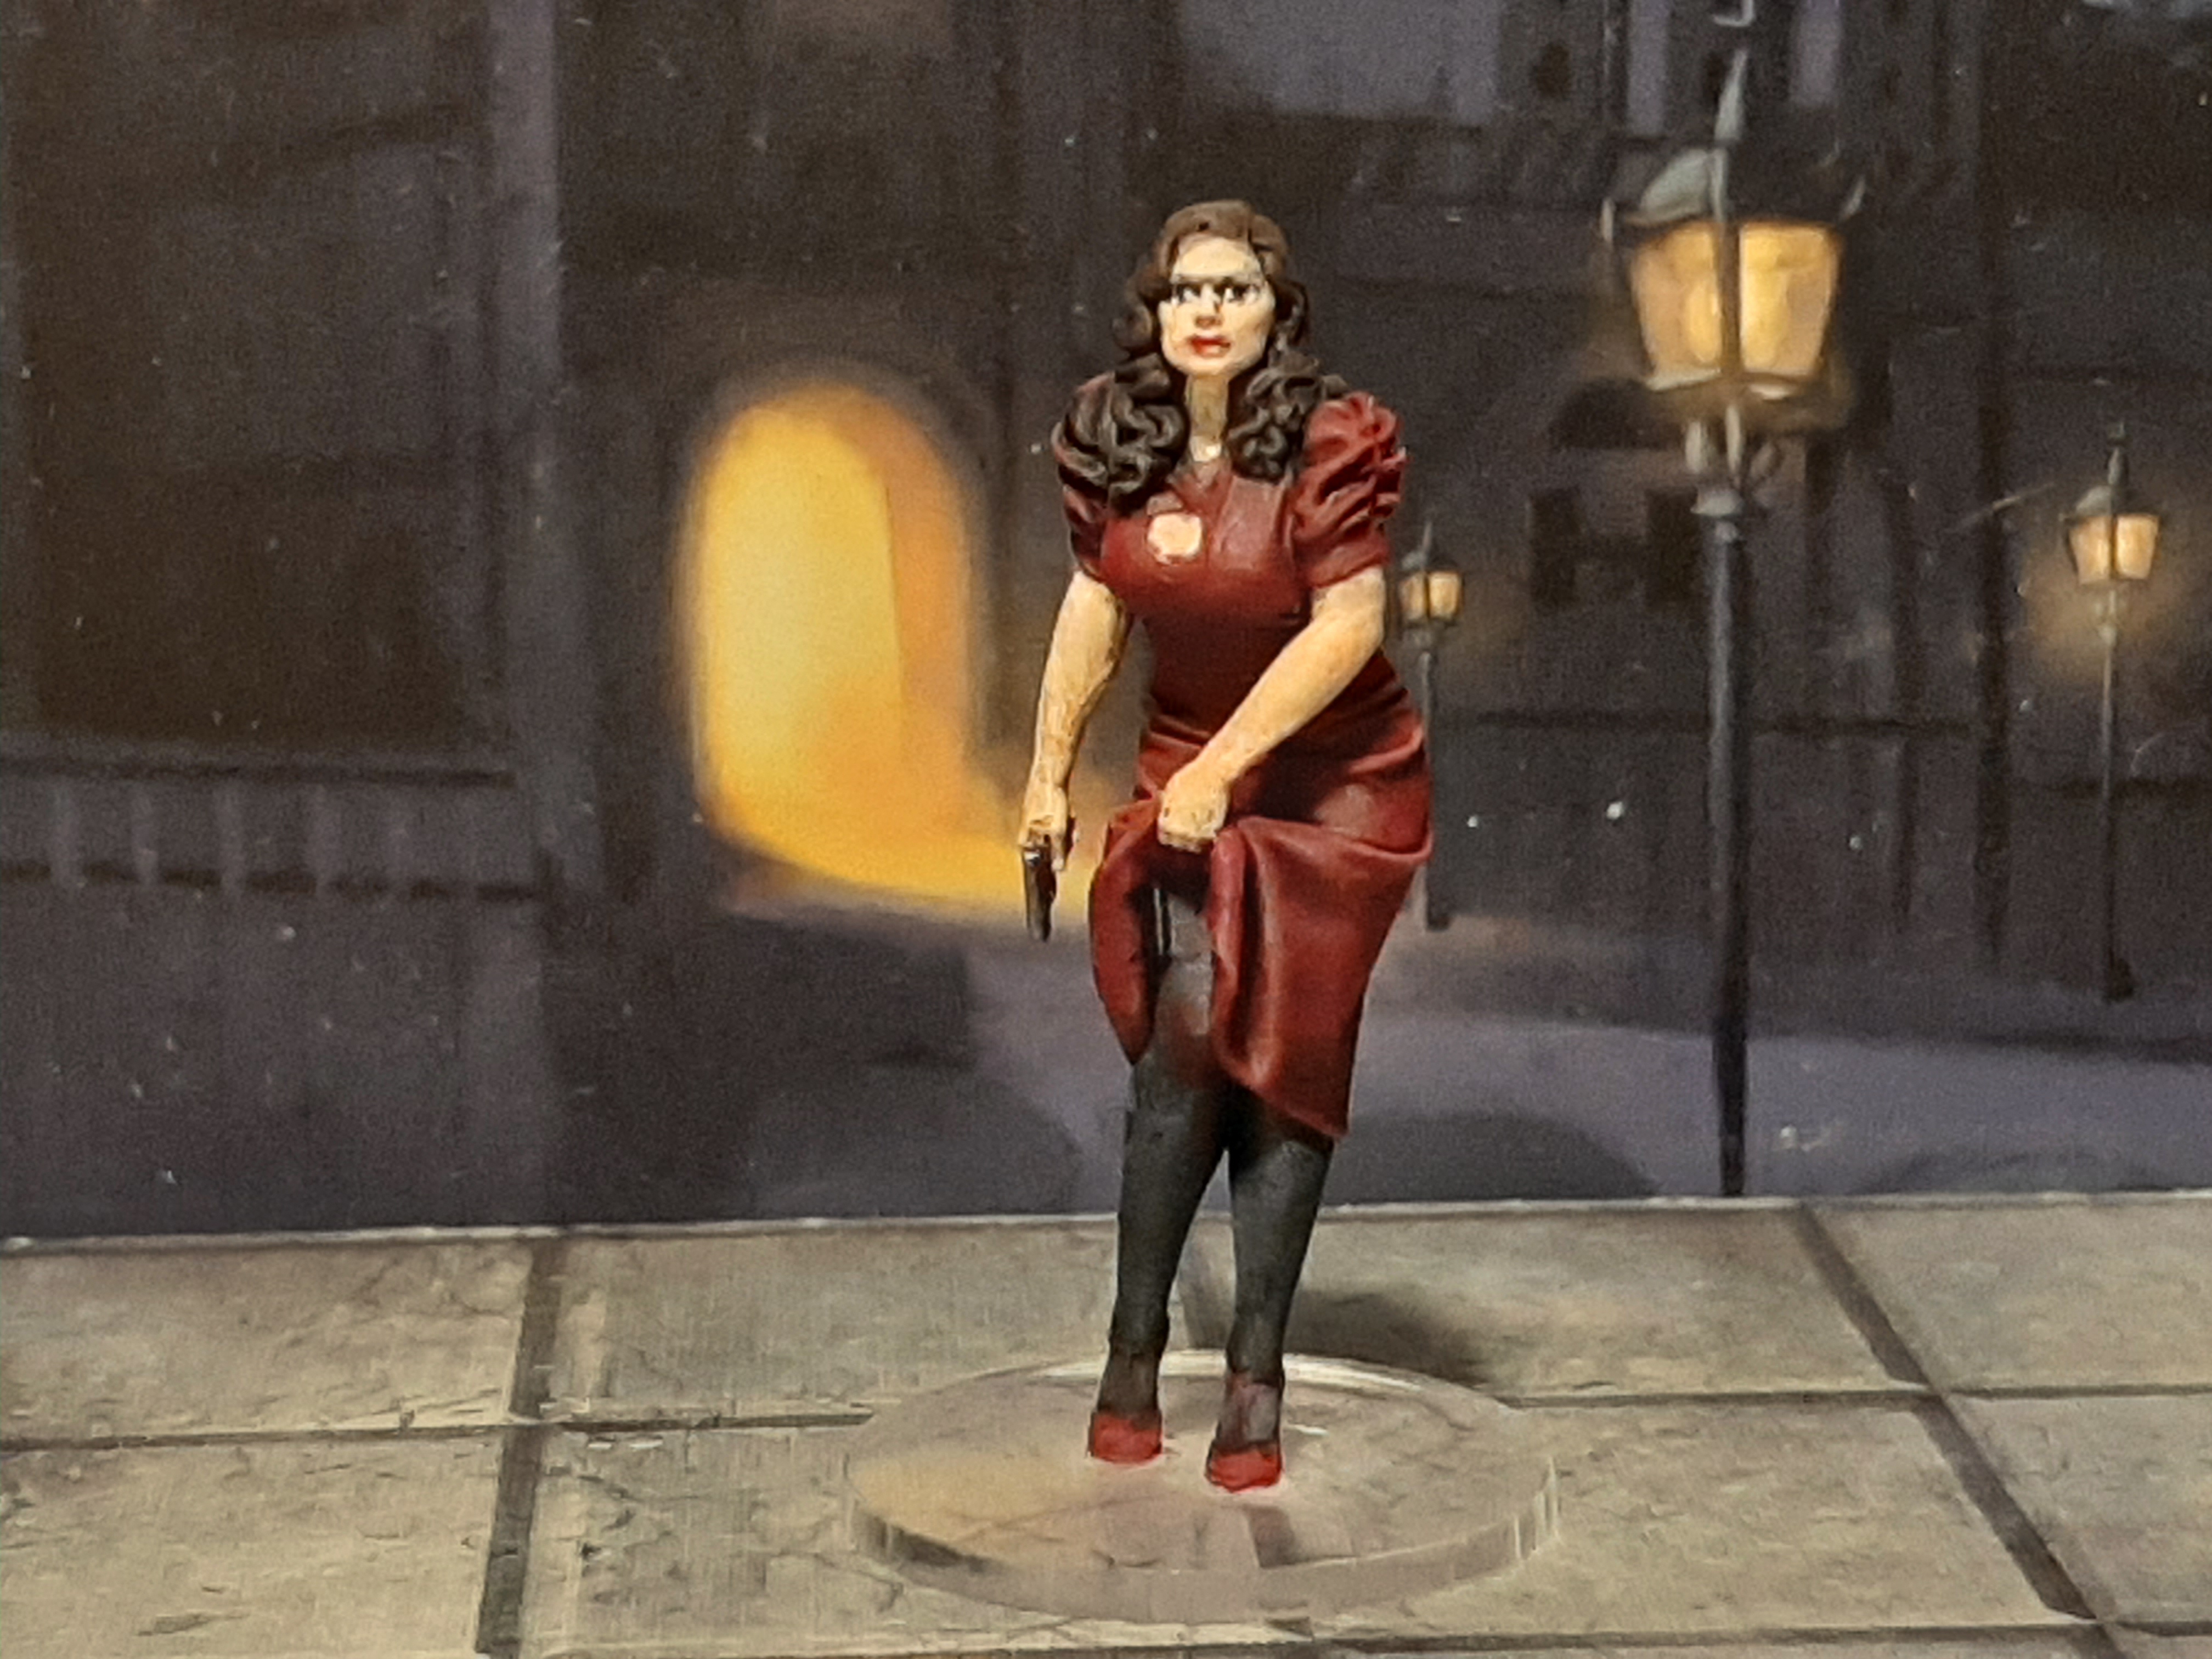
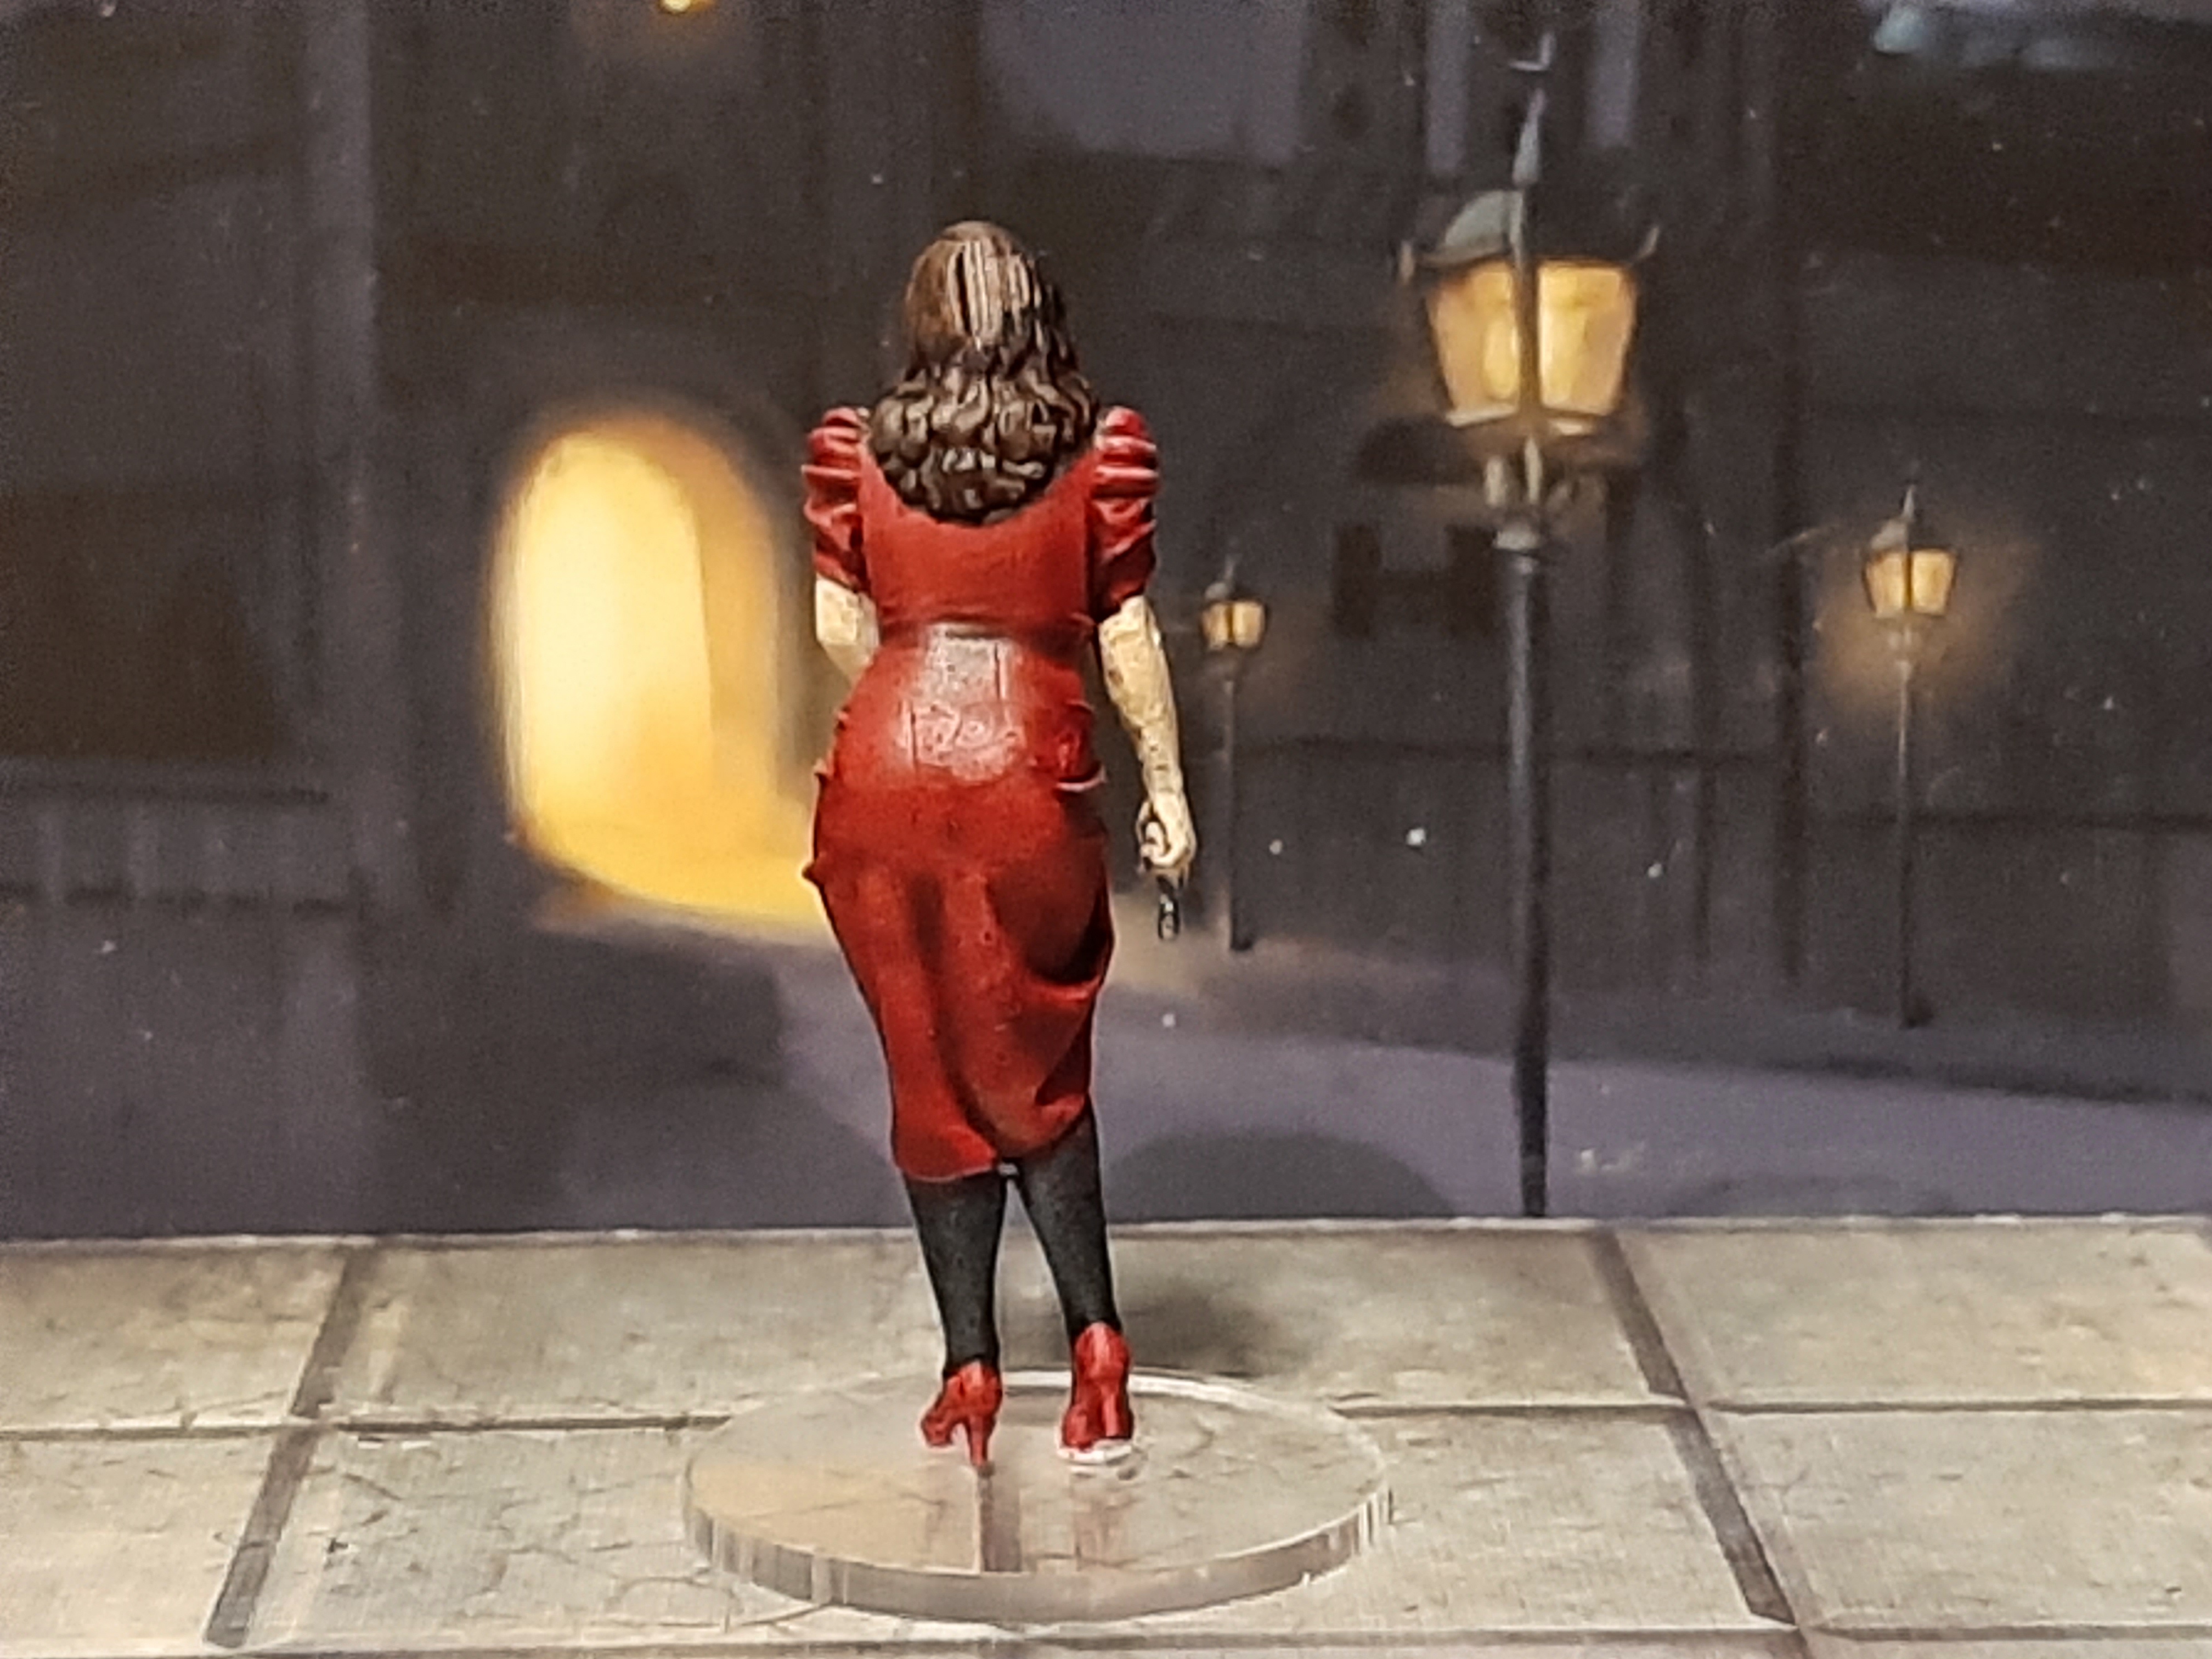
Fan-art full-body 1:10 scale figurine of Peggy Carter from Agent Carter, inspired by the garter holster in Season 2 Episode 1 "The Lady in the Lake".
If you like this model, please consider supporting me on Patreon to help me be able to make more free models!
I wanted to make a fairly modest pin-up, in keeping with the character. The actual garter holster given to Peggy by Ana Jarvis in the episode is a bit different from the one here, and it was used to holster a Sharps Pepperbox, but to make a more interesting sculpt, I changed the garter from what is seen in the episode quite dramatically, and gave Peggy her Walther PPK/S.
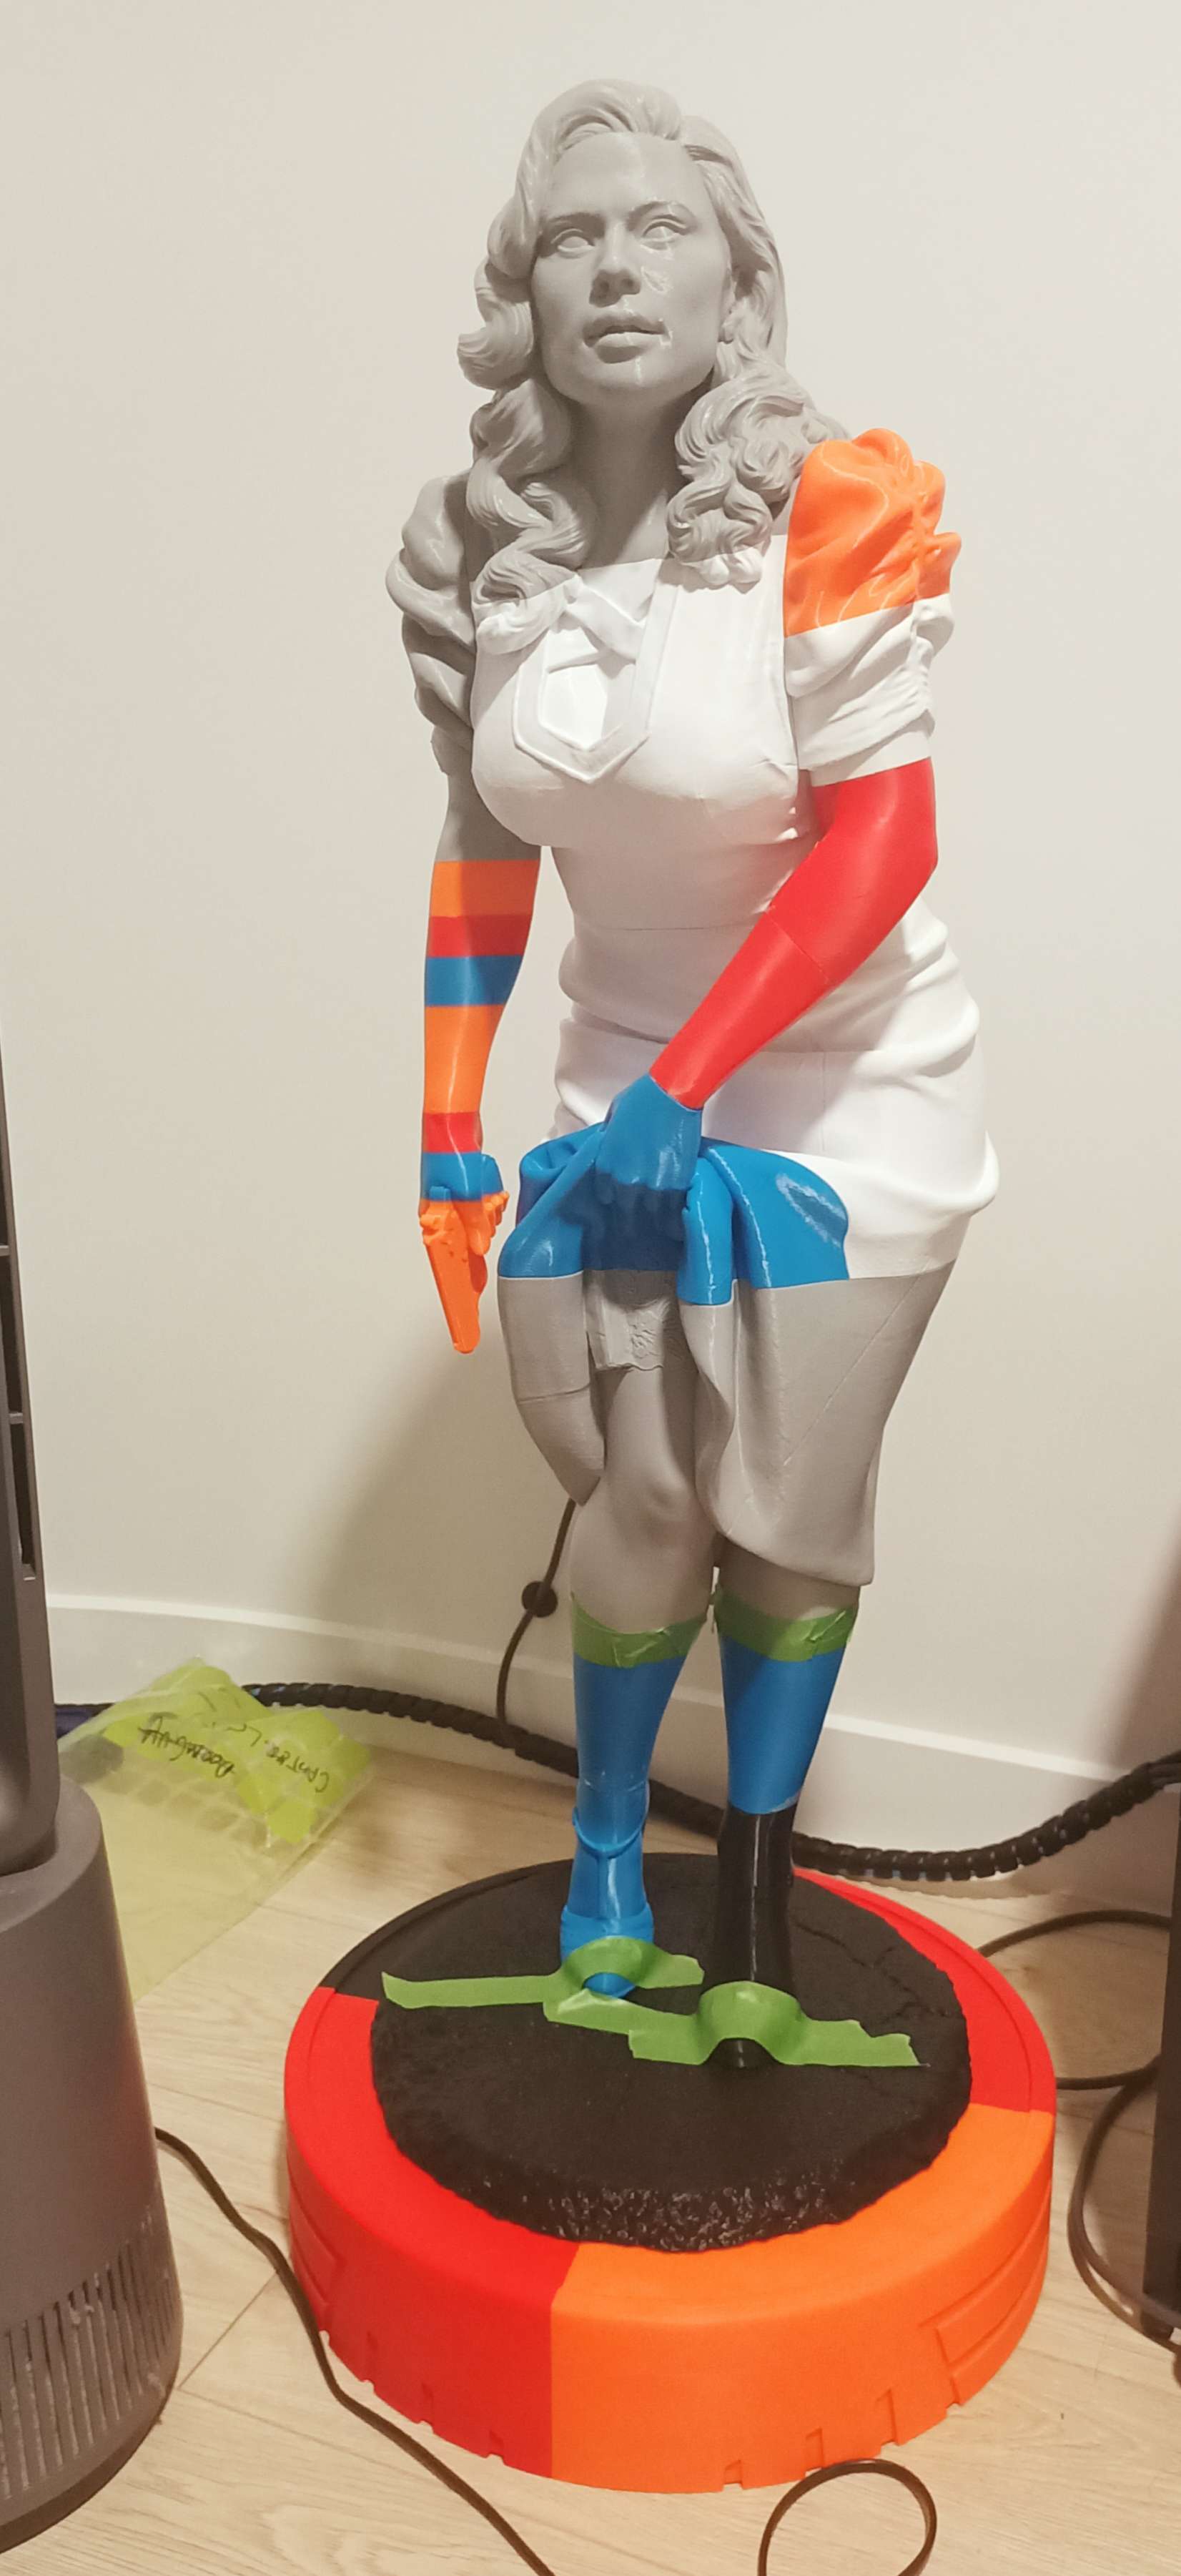
The model is provided cut and keyed ready for slicing and printing (see printing details). I've also included un-cut versions of the model for you to cut and key yourself if you like.
There are two bases provided, the smaller model base and the larger display base. They are keyed identically, so you can use either base alone, or both together.
This model is unofficial fan-art, provided for free.


Note, I'm personally pretty new to 3D printing, so the information below is what I think, but I'm no expert. Let me know if you find better ways or have advice!
All STLs are scaled to 1:10, and the cut files are provided in the orientations I used for my prints. I printed it on my Flsun Q5, at 0.1mm layer height, sliced in Cura. Supports will be needed, see below for details.
Printing the body:
Approximately align the cut at the waist with the build plate and lift it off the plate a little. I used line supports with support interface, which worked fine. It didn't need much support.
Printing the legs:
Print with feet standing on the build plate. I recommend using the file with the provided heel support*. Enable brim (I used 8mm) to give the heel that's on the plate sufficient adhesion.
I used tree supports when printing this, with the extra manual support. It came out mostly fine, just the fingers were a little imperfect.
Printing the arms:
I found most success printing with the wrists down towards the build plate, using line supports, with a brim for stability.
For the left arm, I aligned the cut at the wrist to the build plate, and lifted it off the plate a little. I had a bit of difficulty removing the support interface from the wrist-cut surface.
For the right arm, I angled it so the gun was perpendicular to the build plate (muzzle aligned to build plate), and lifted it off the plate a little.
*Slicing with provided support:
In Cura, go to Marketplace and install Mesh Tools plugin. Restart Cura.
Open the STL with the support, right click, go to Mesh Tools > Split model into parts.
Select the support, then on the left panel, go to Per Model Settings, and select Print As Support.
| Date published | 09/11/2021 |
| Dimensionen | 62mm x 62mm x 177mm |
32mm