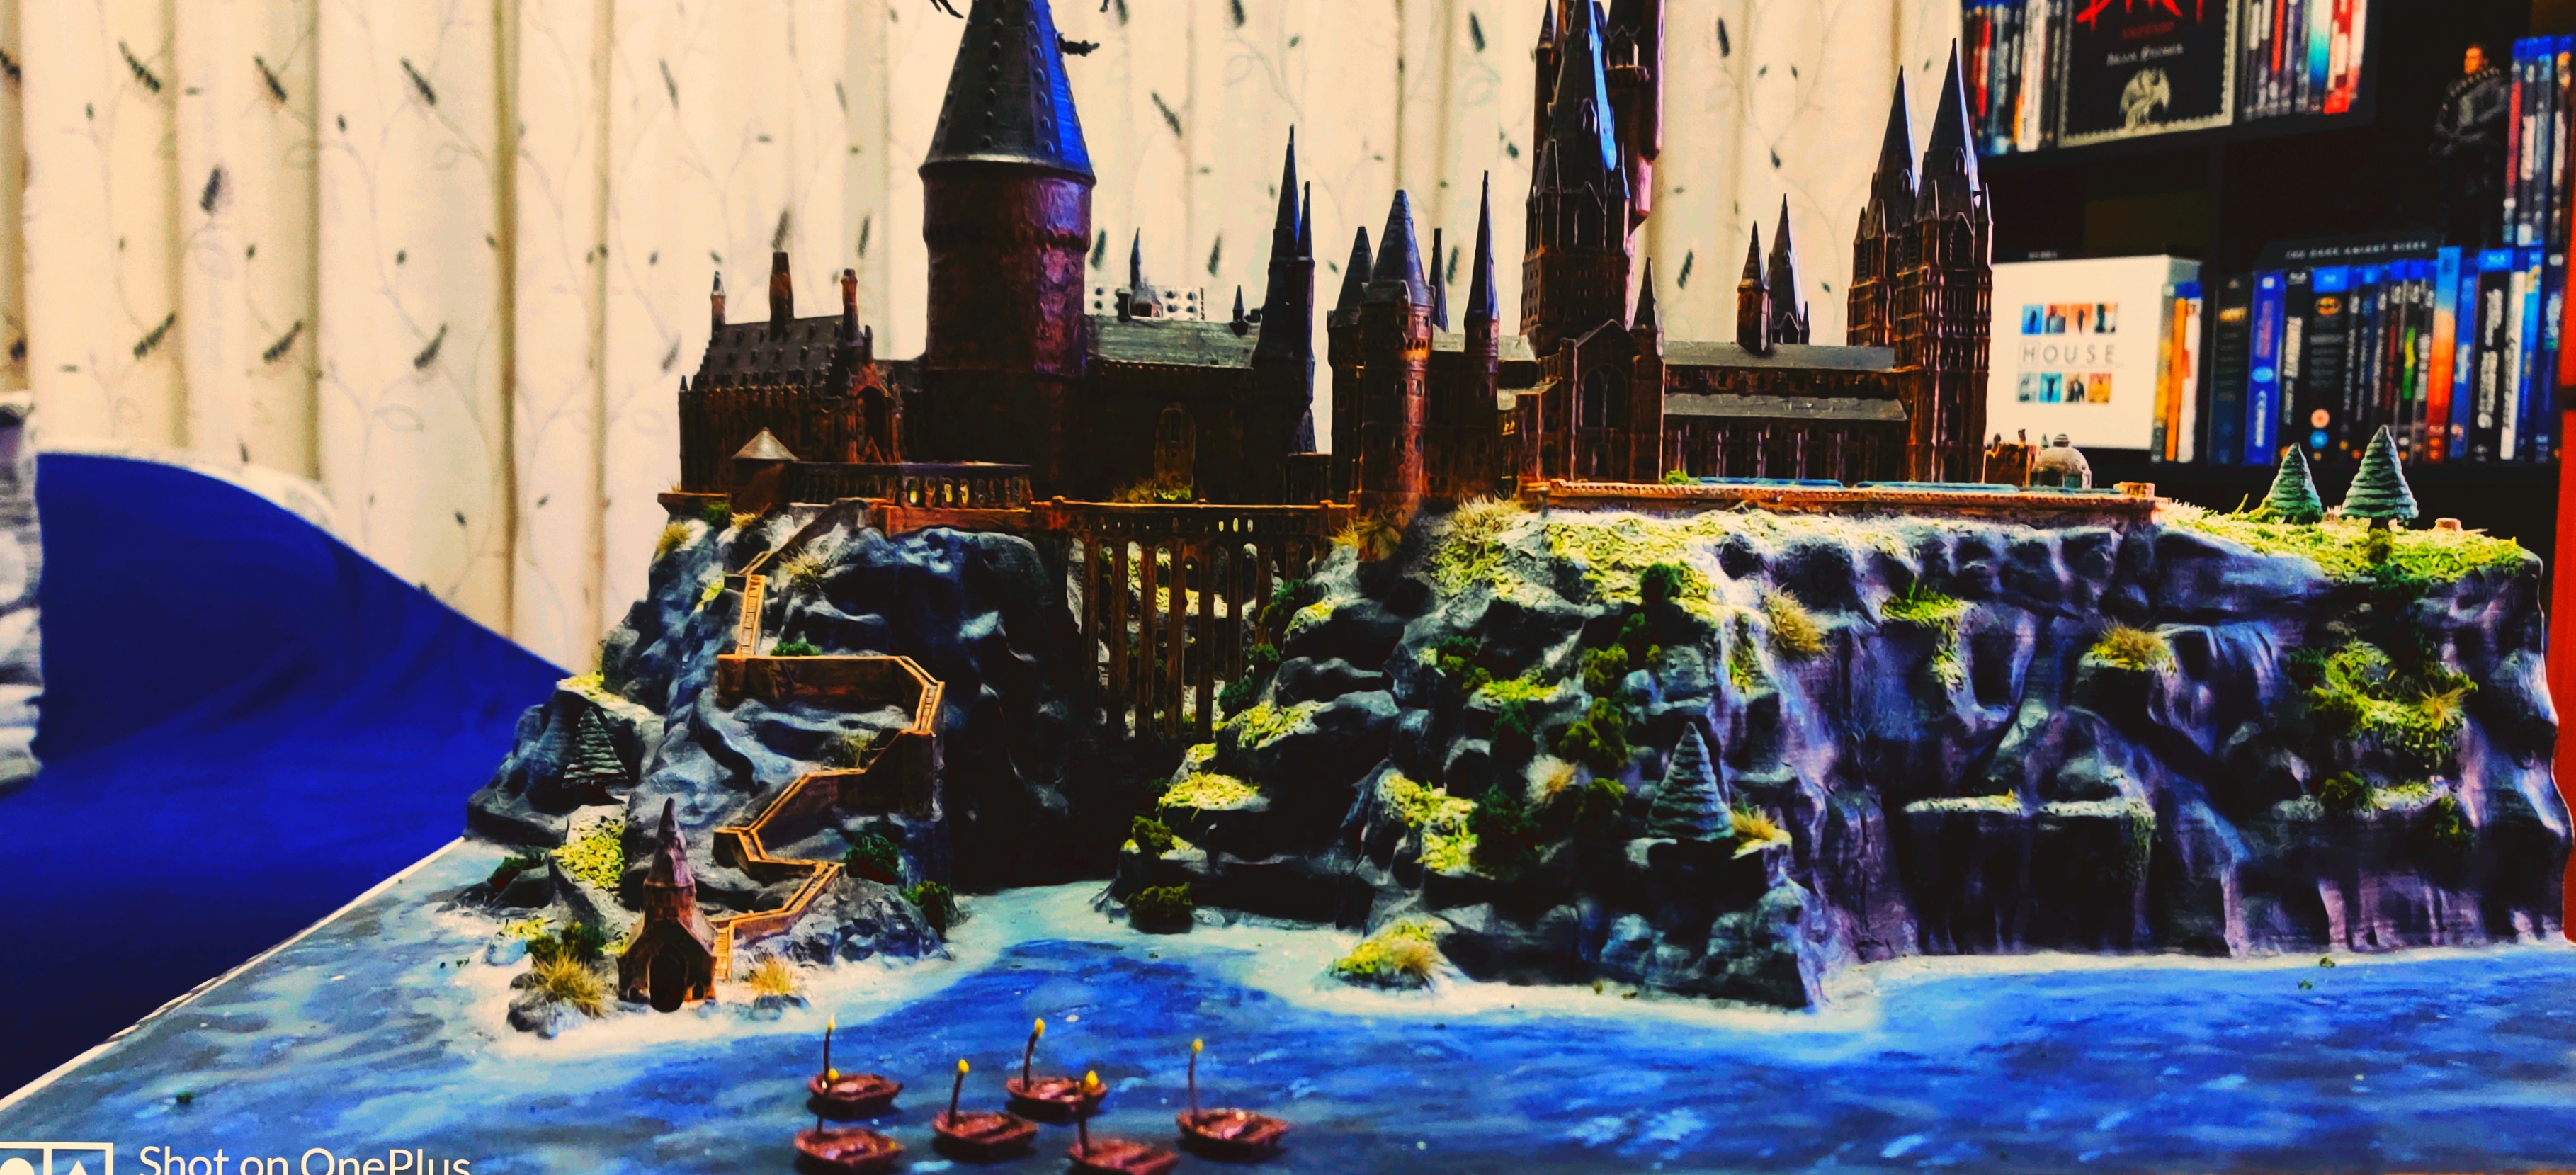
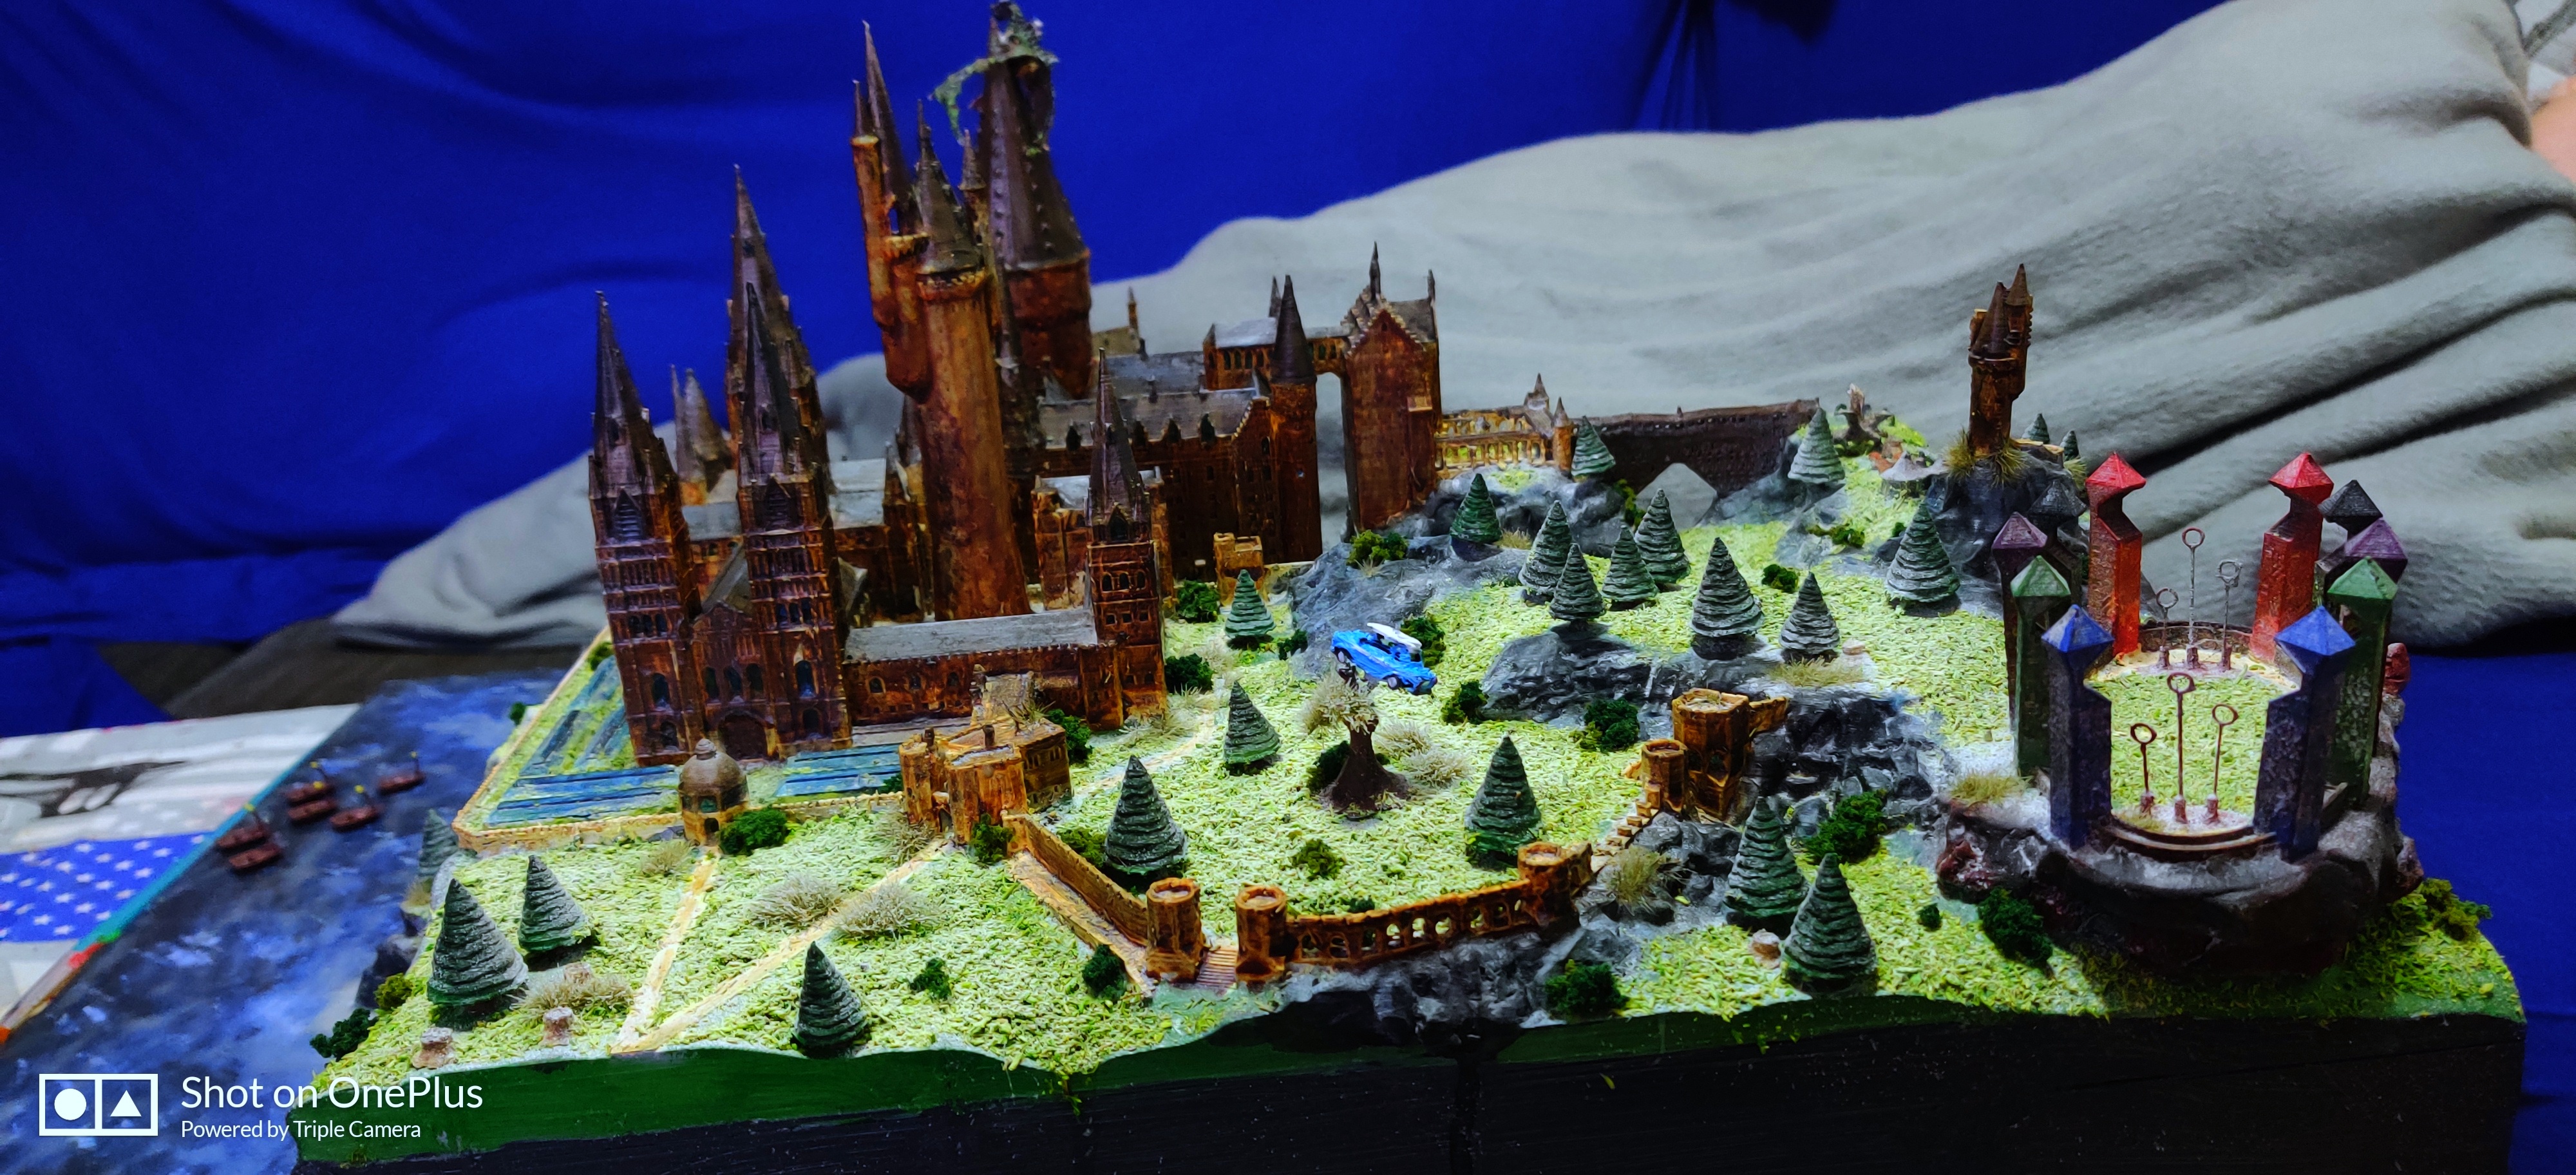
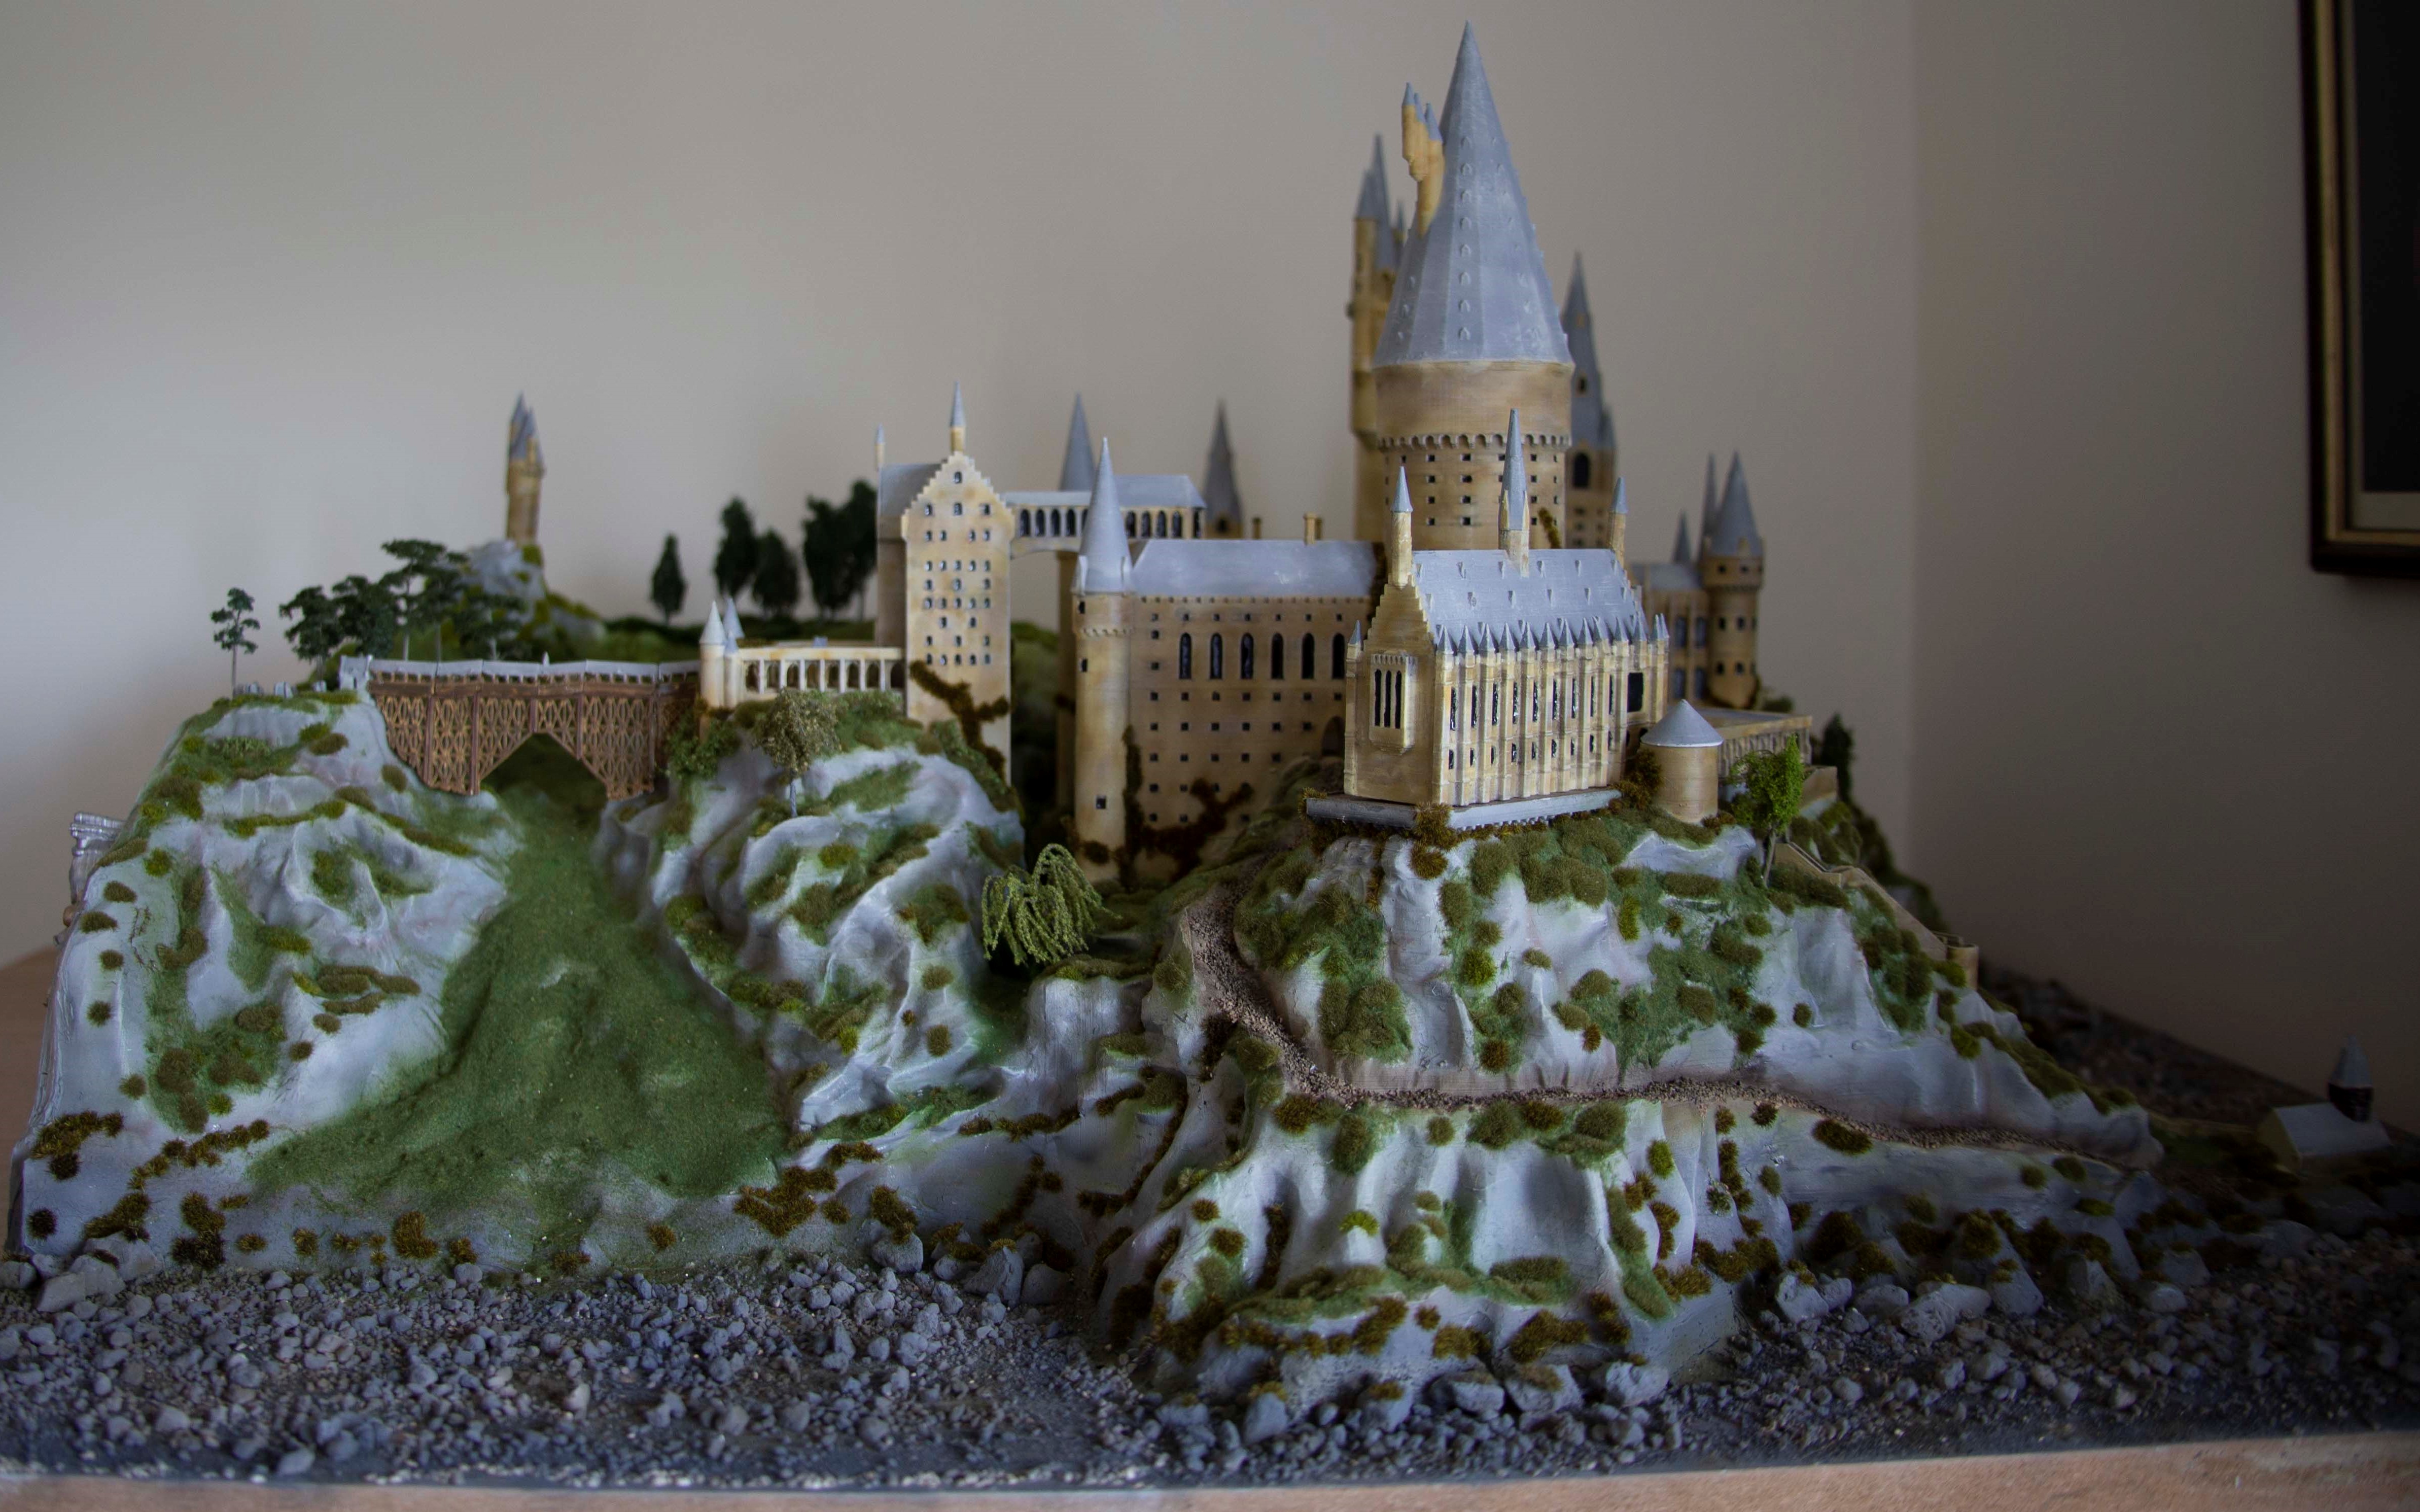
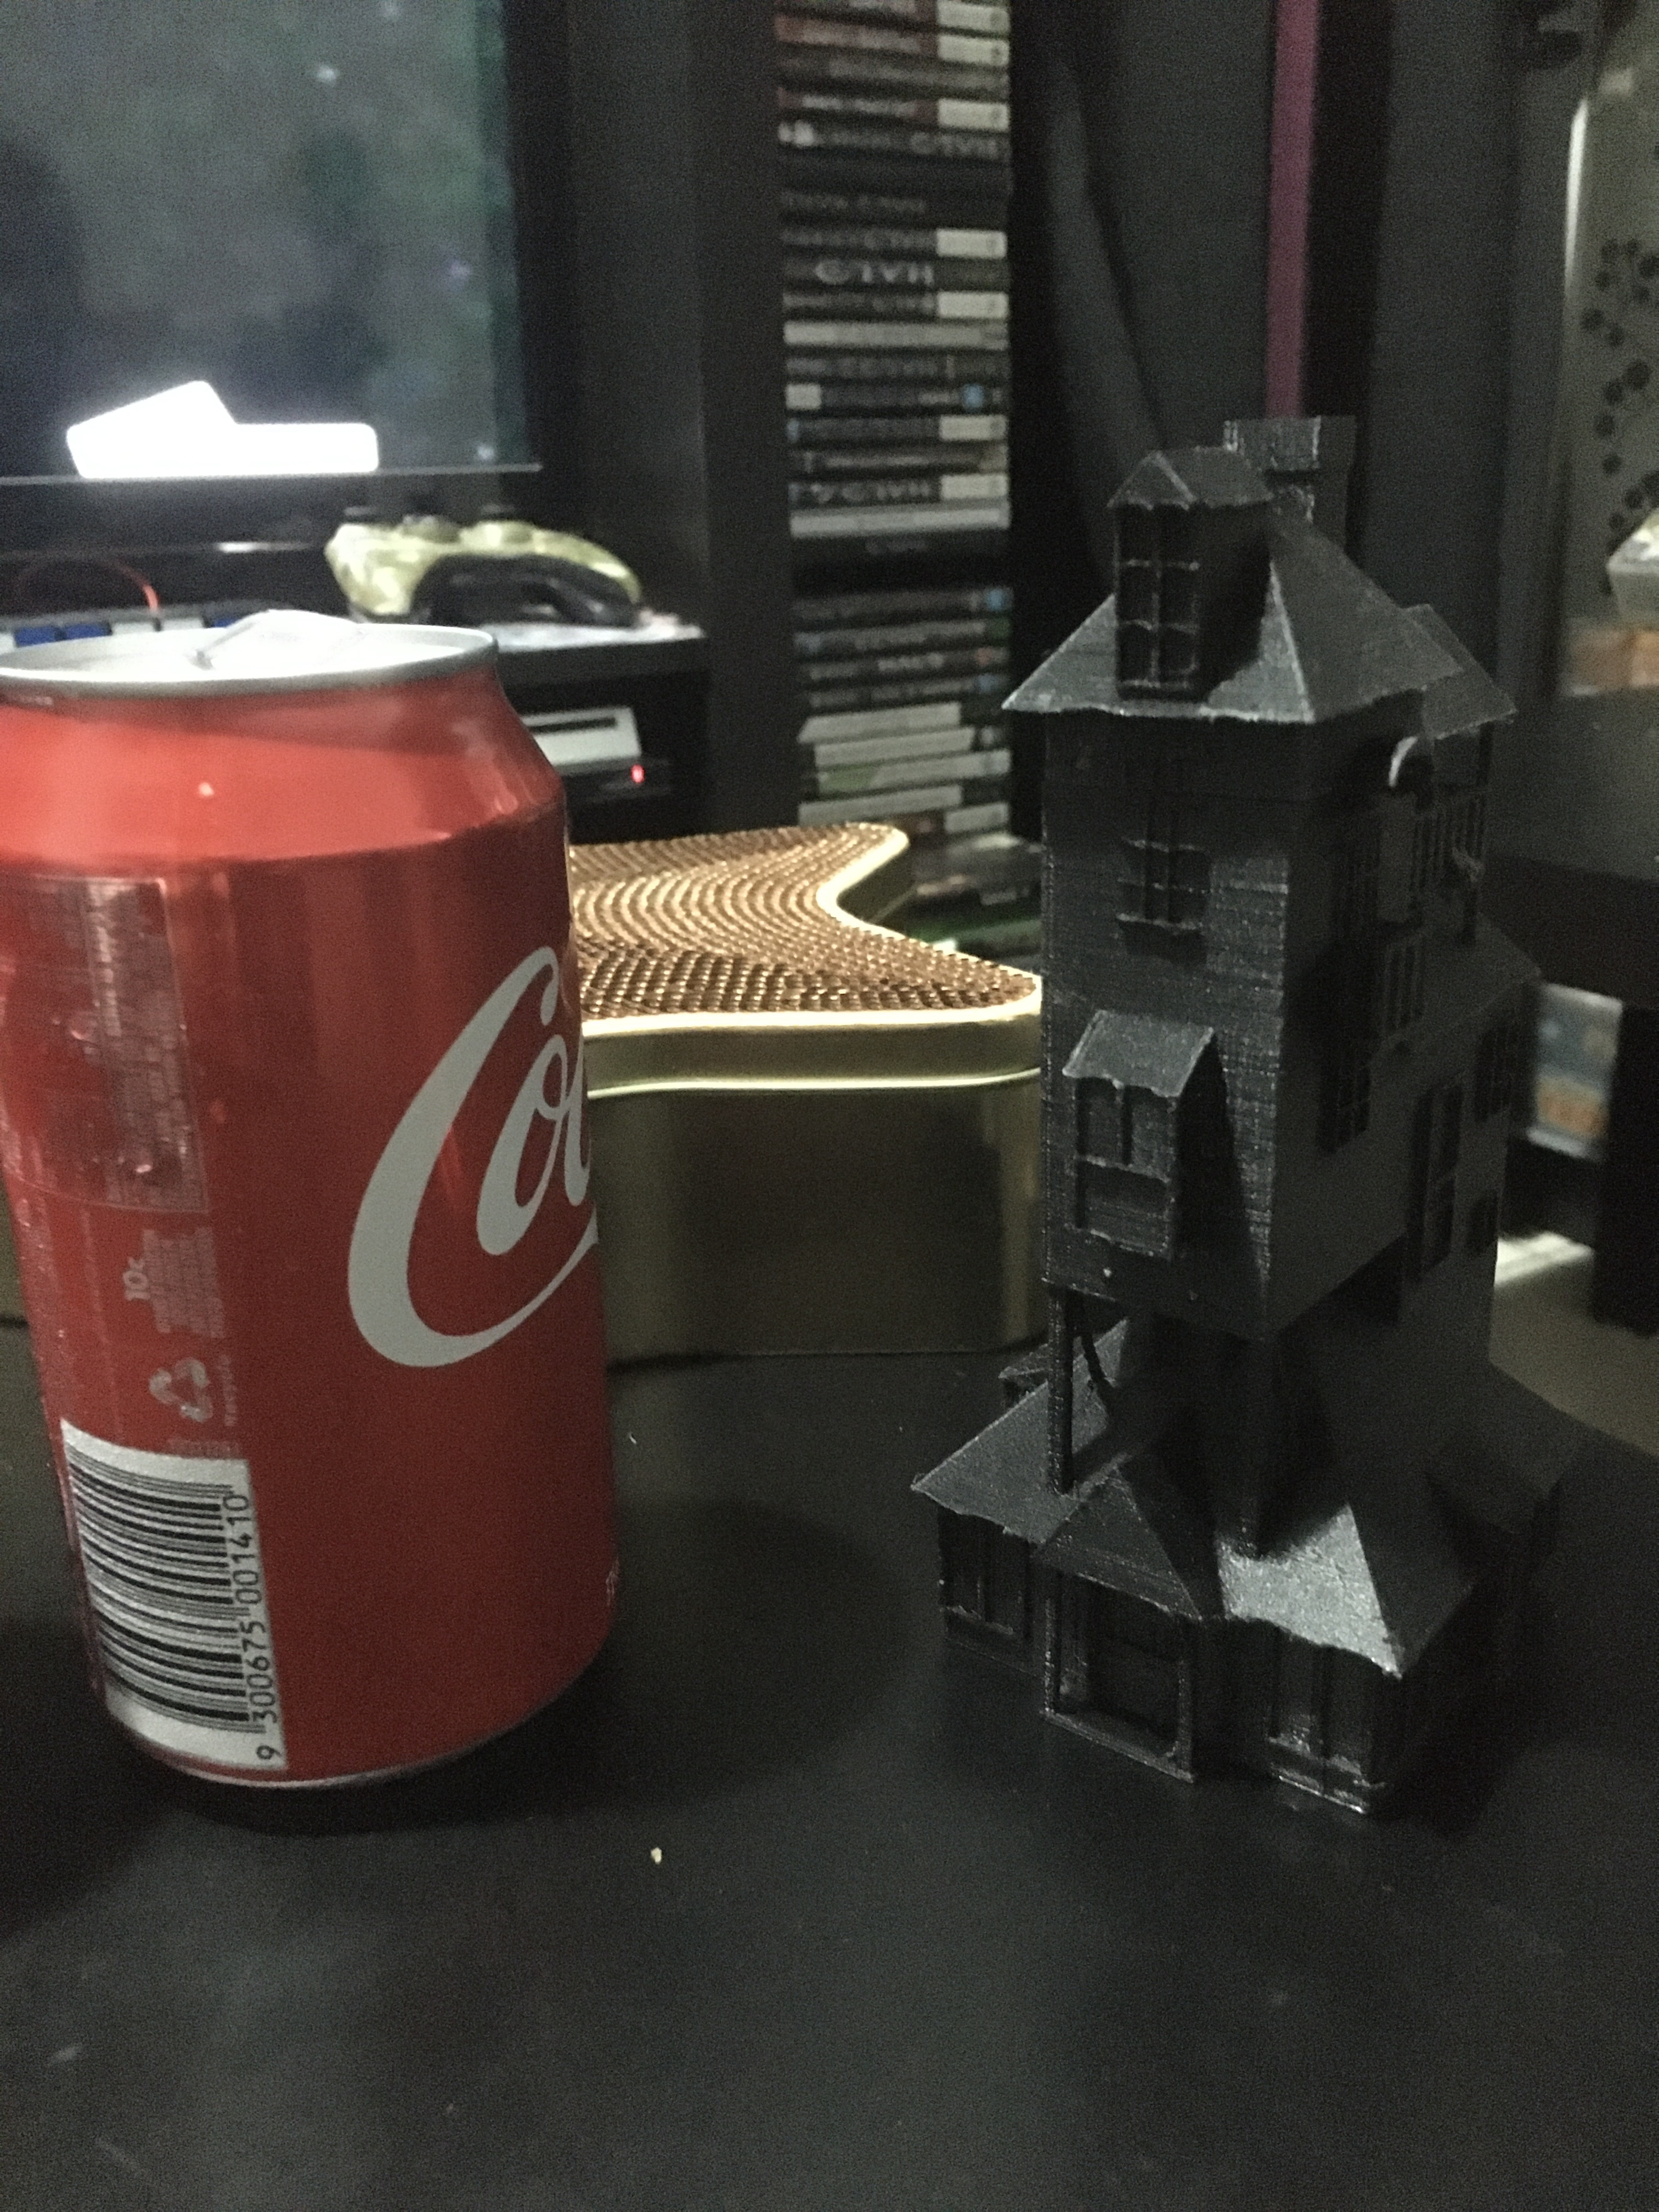
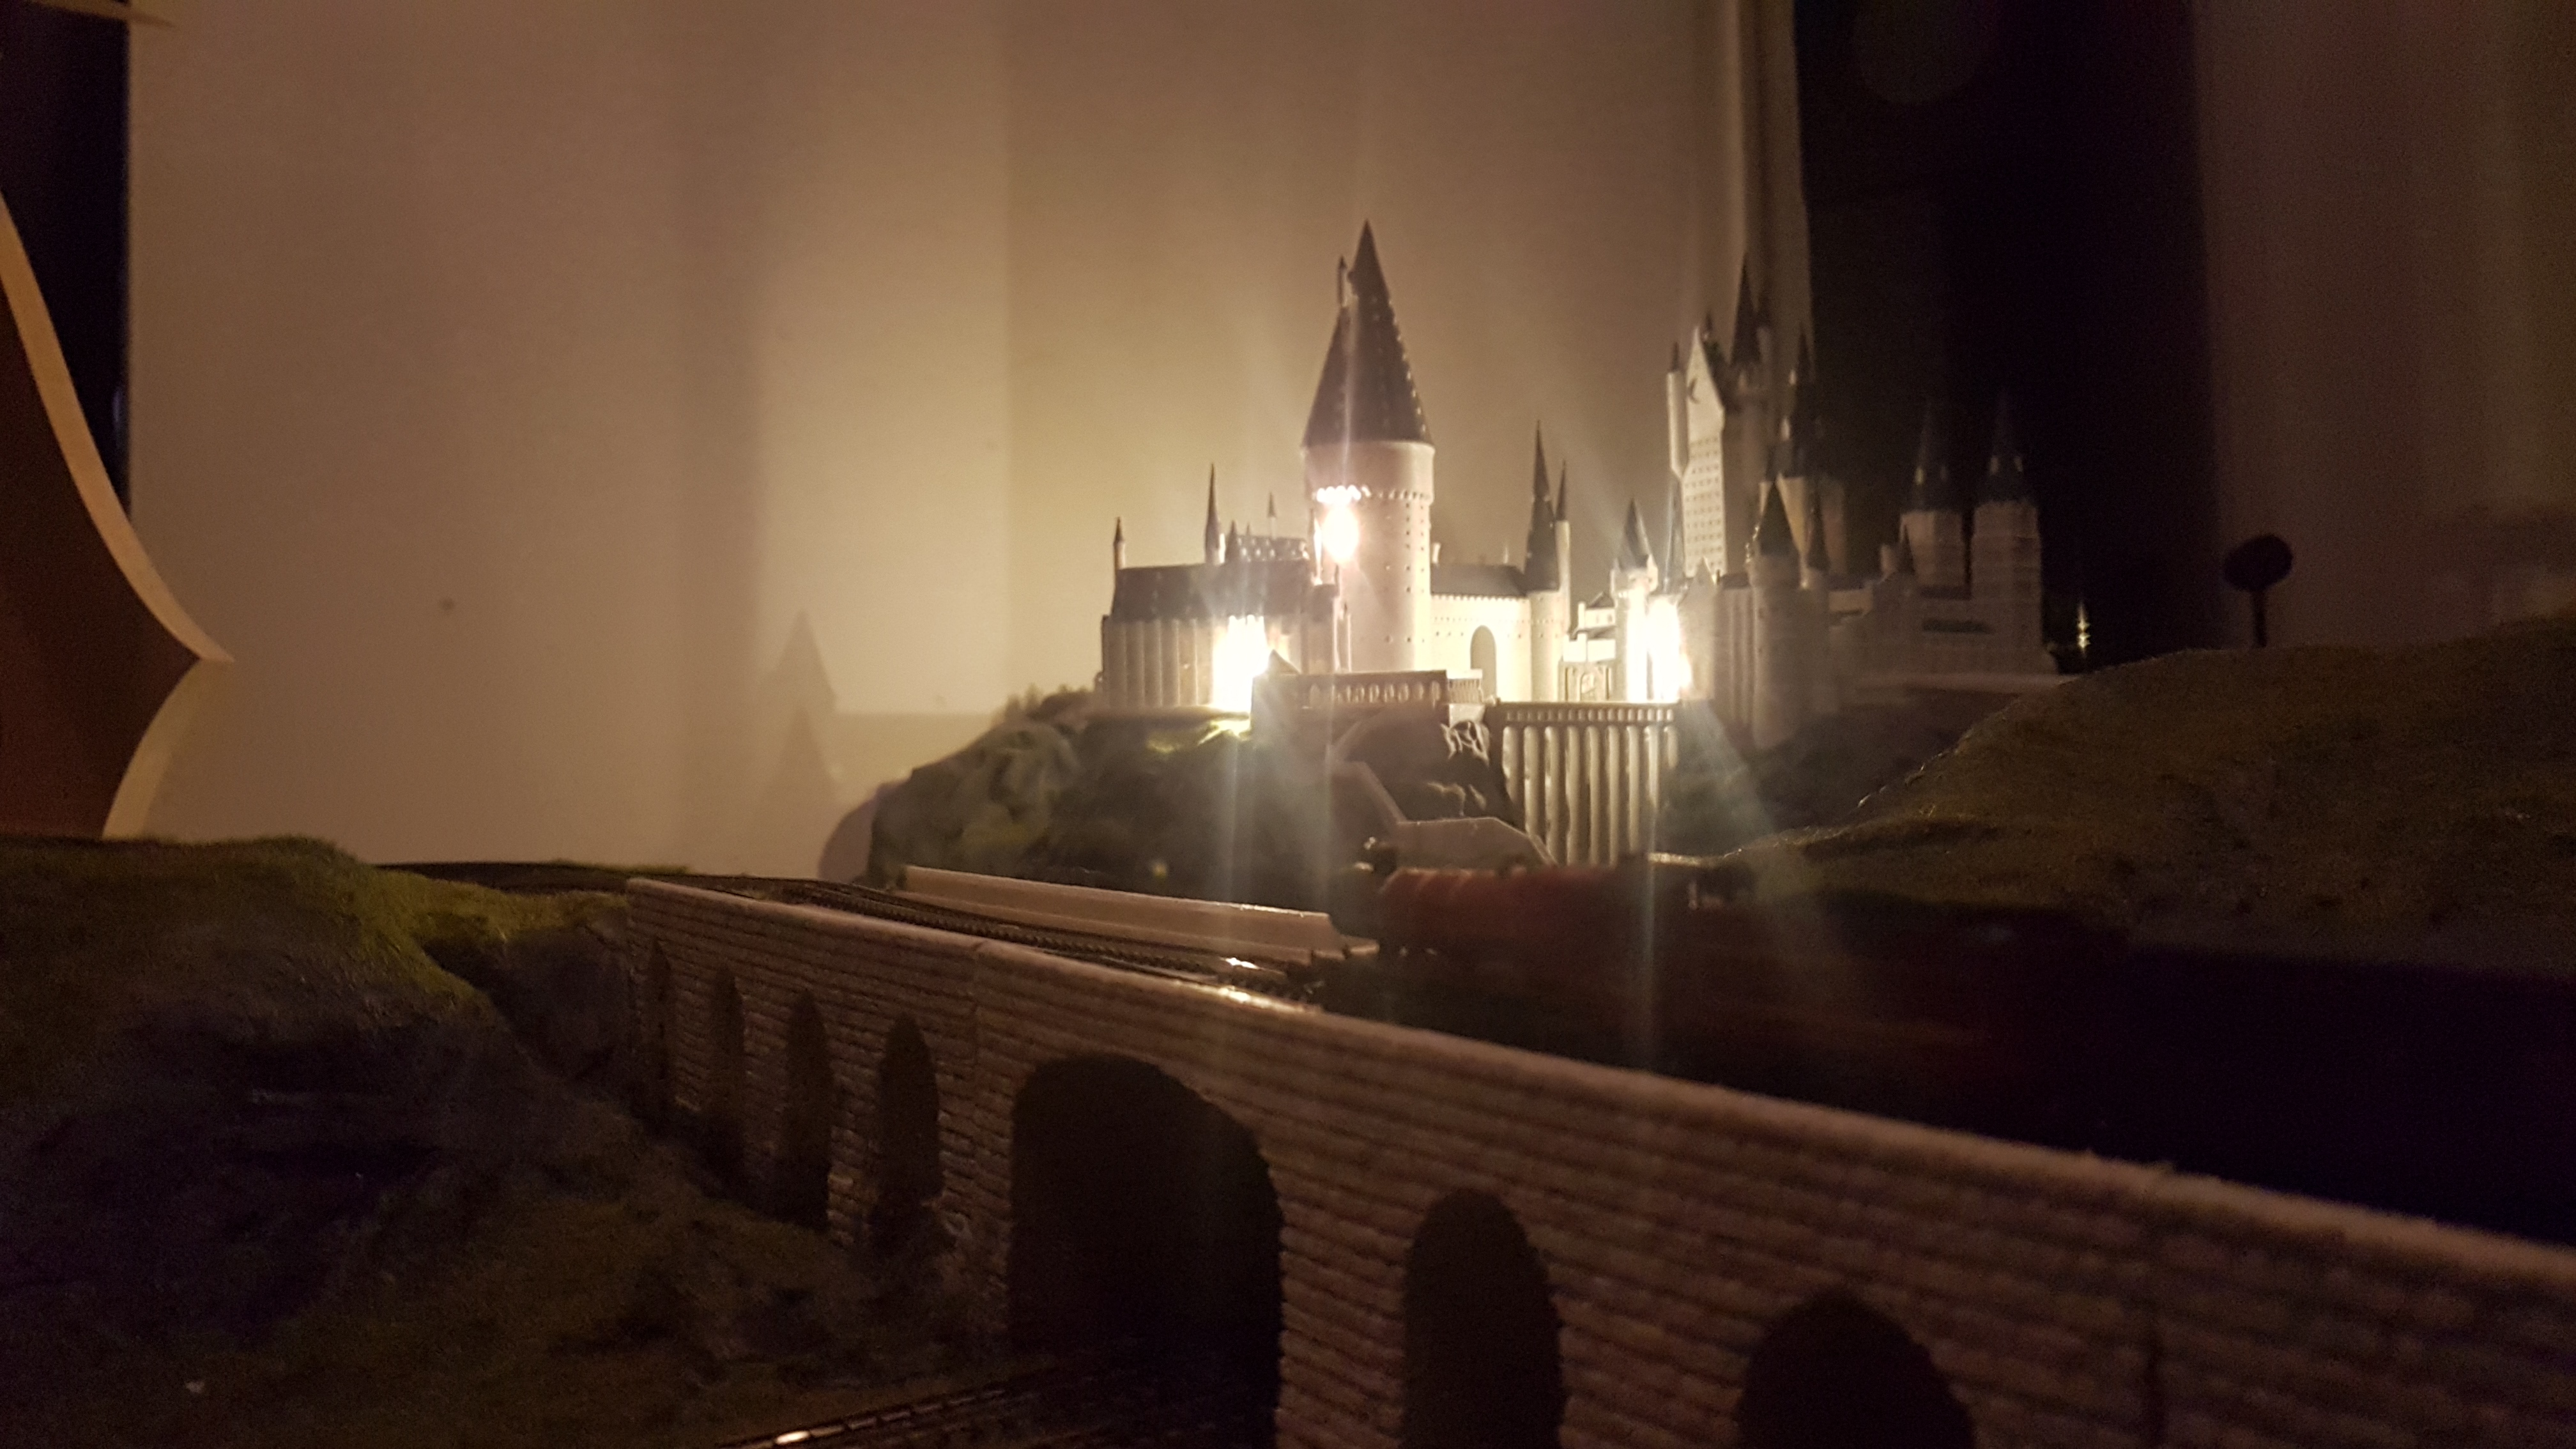
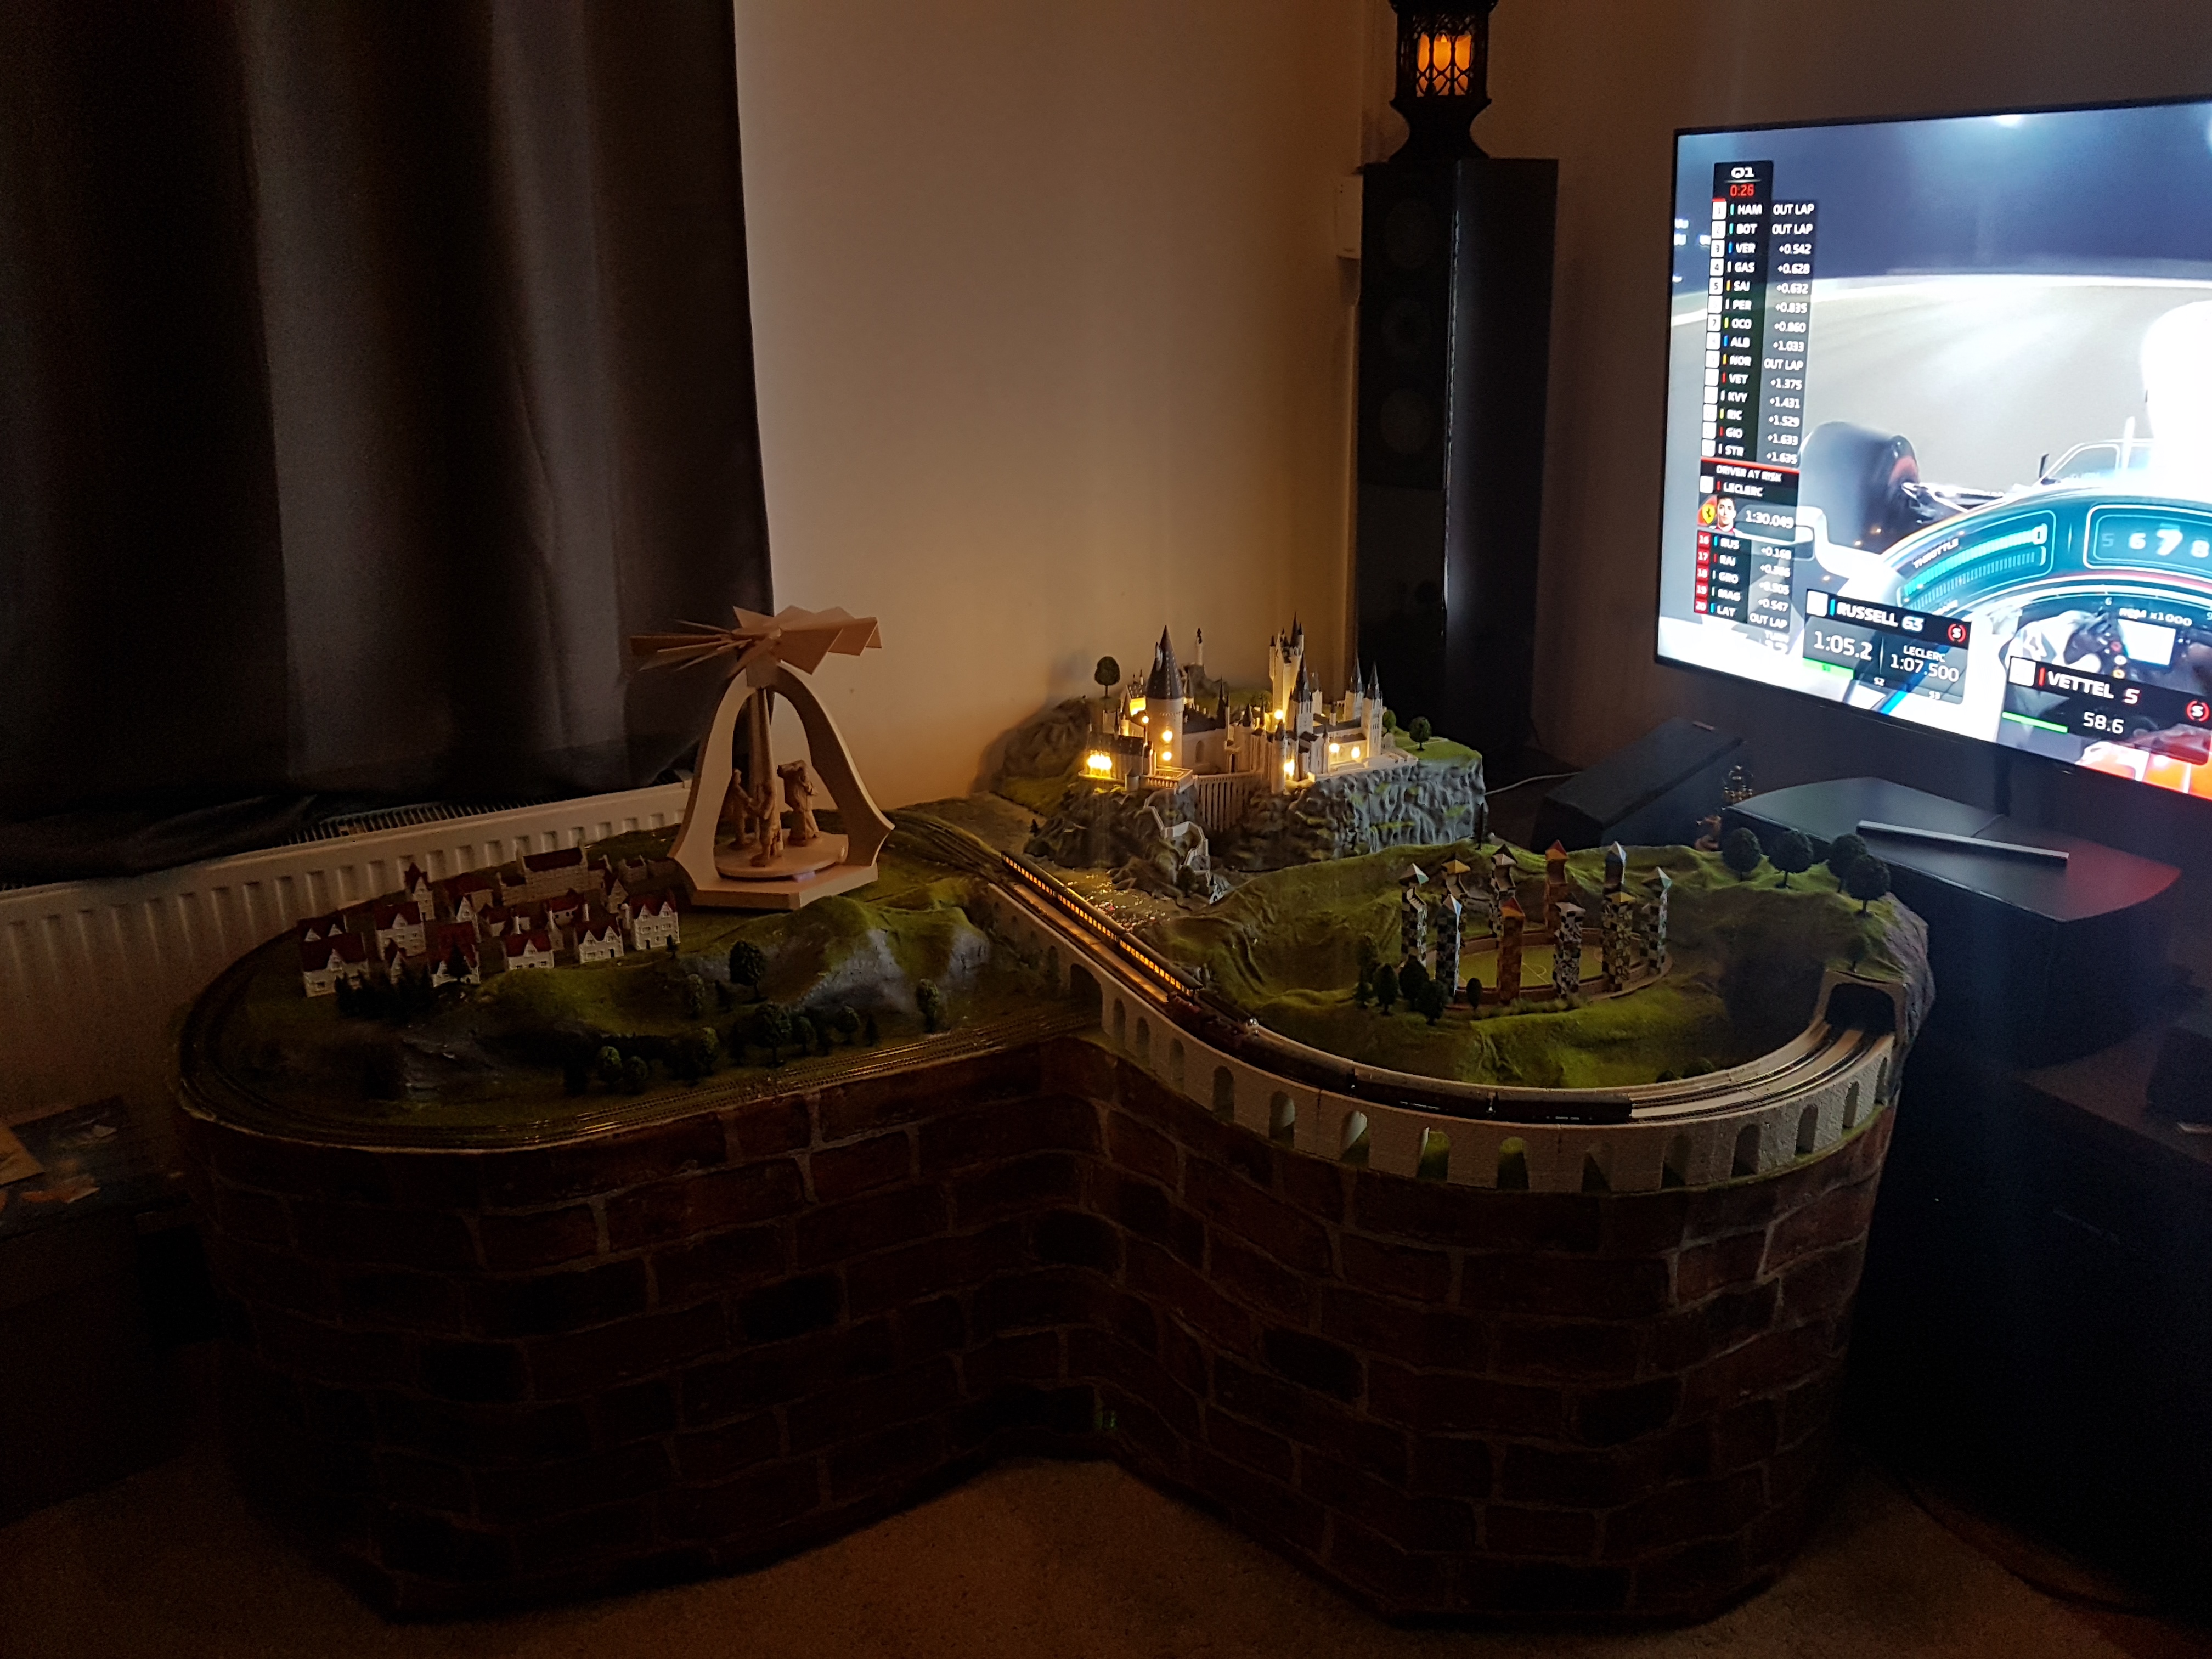
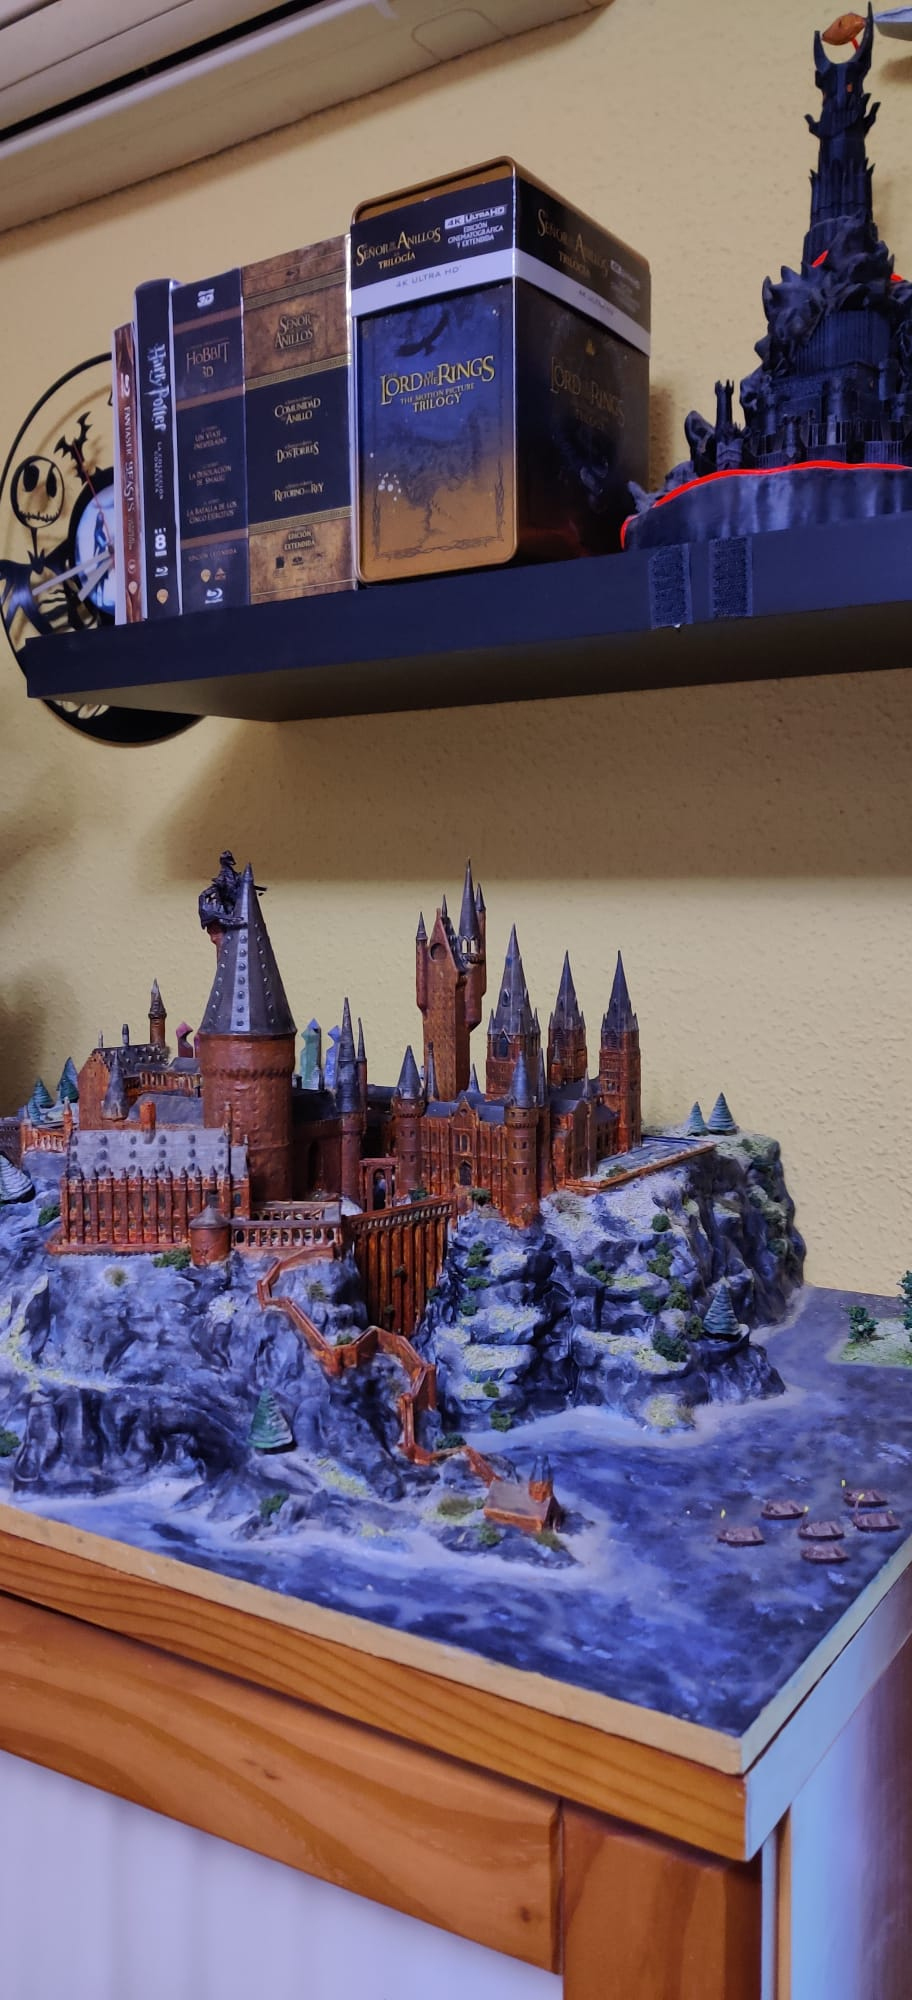
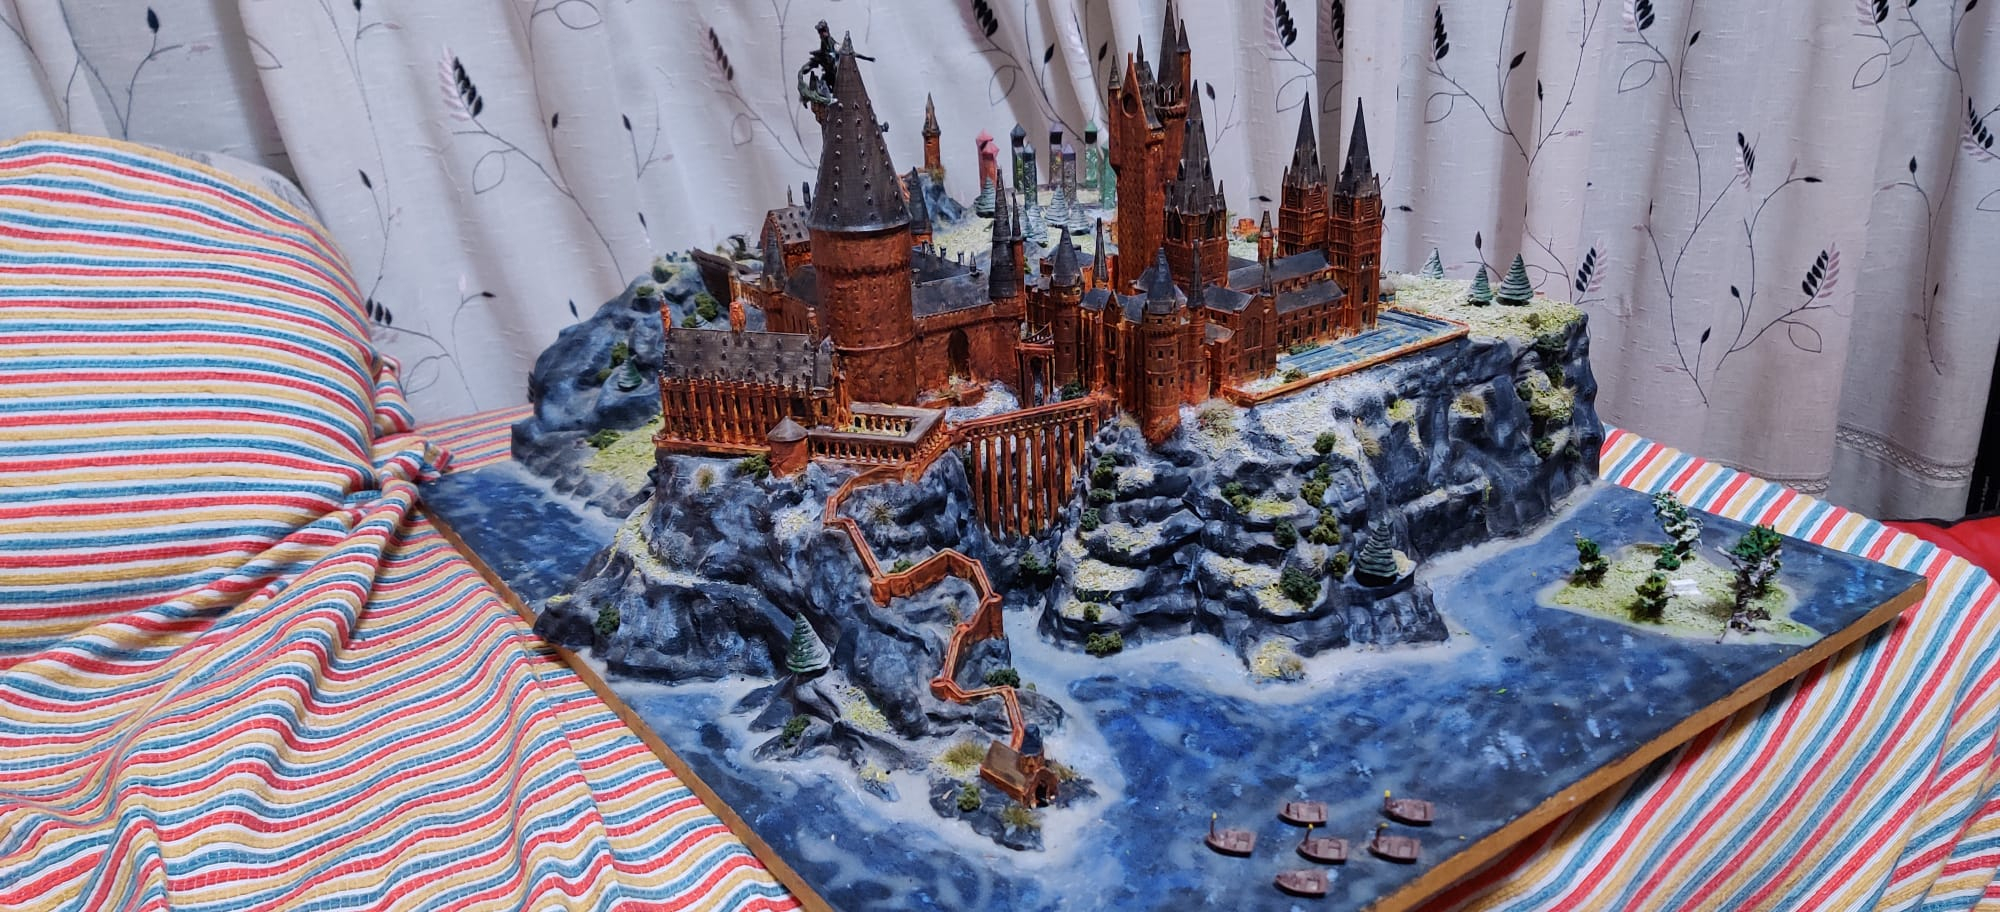
Hogwarts Castle


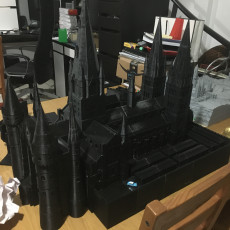


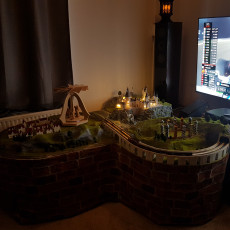
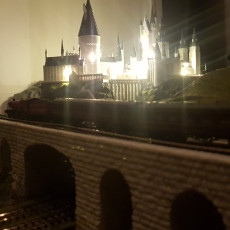


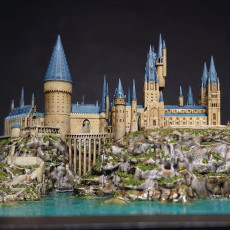


Hogwarts Castle
Published 2019-07-01T11:26:48+00:00
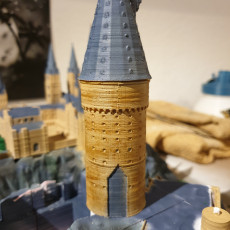
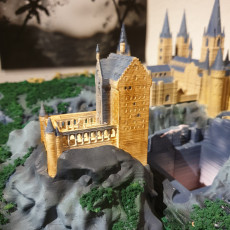
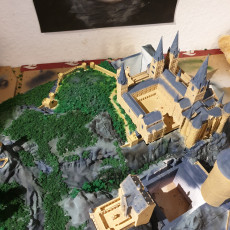
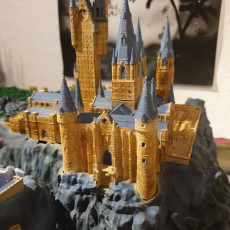
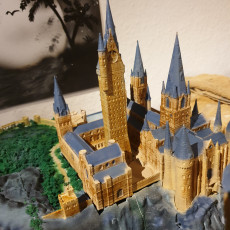
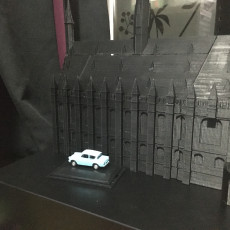
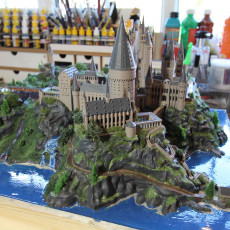
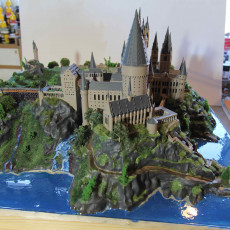
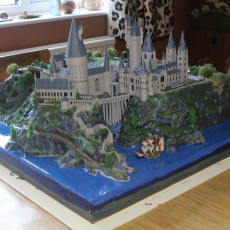
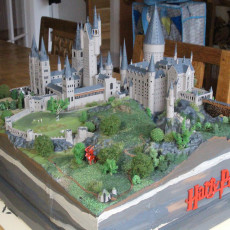
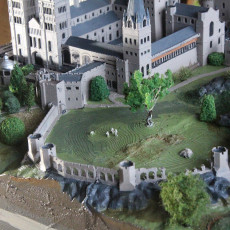
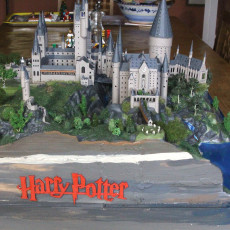
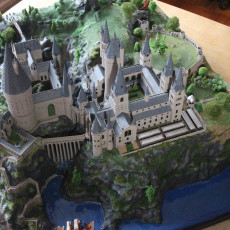
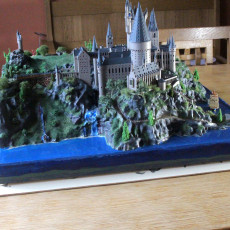
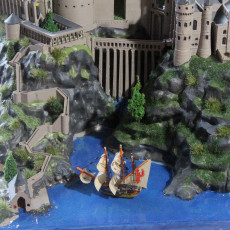
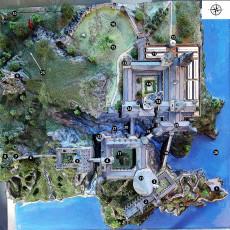
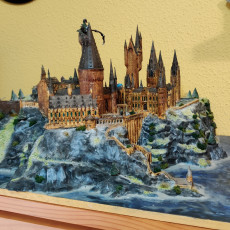
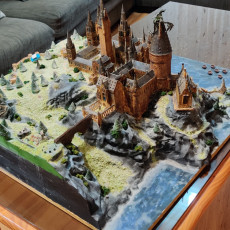
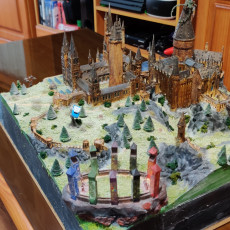
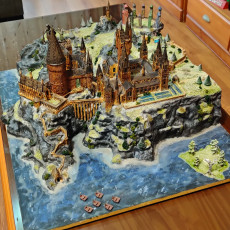
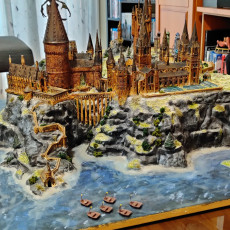
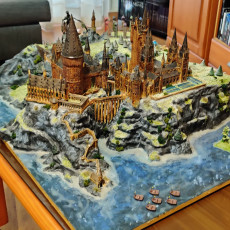
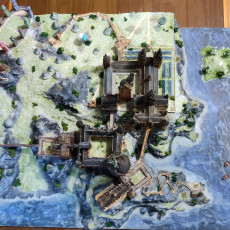
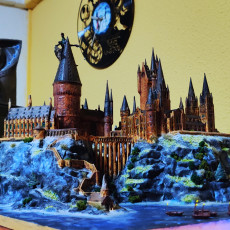
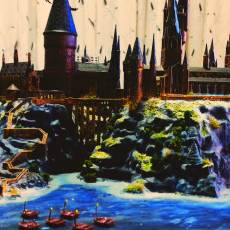
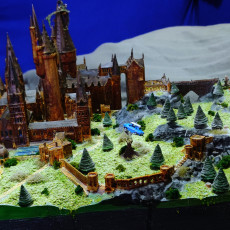
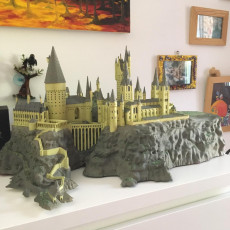
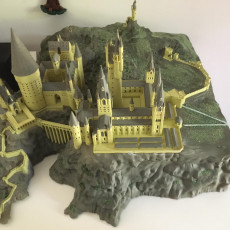
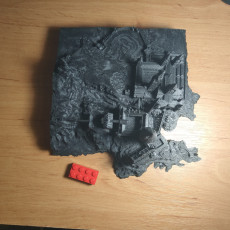
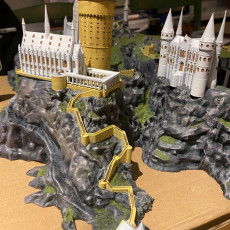
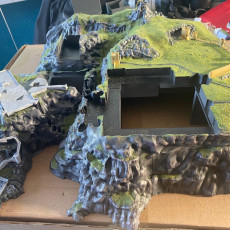
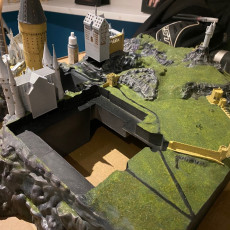
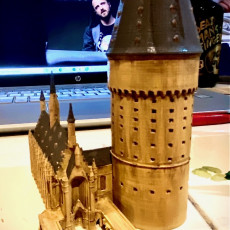
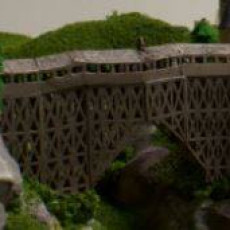
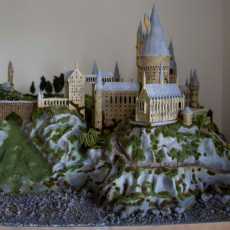
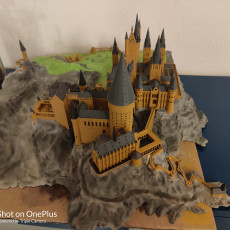
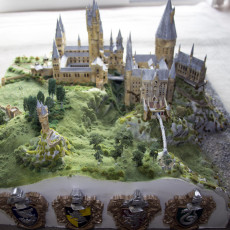
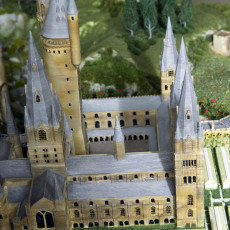
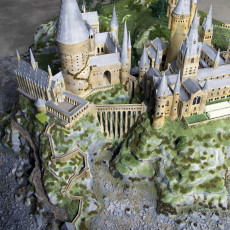
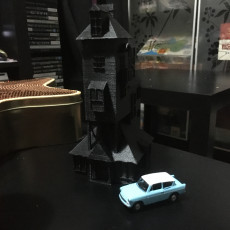
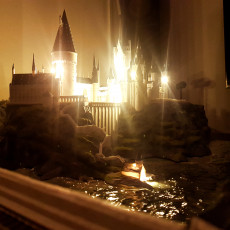
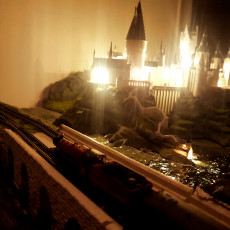
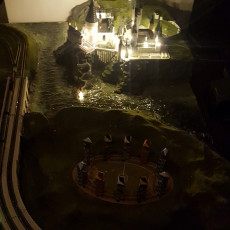
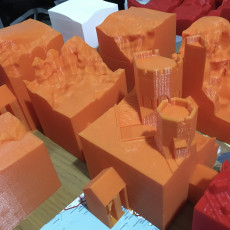
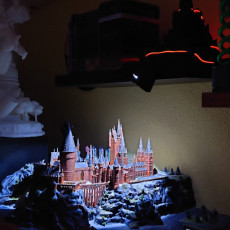
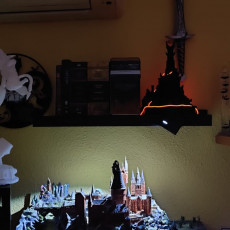
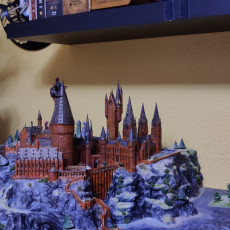
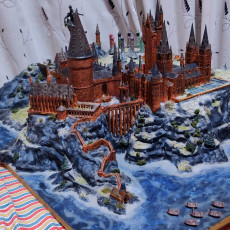
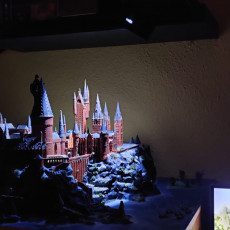
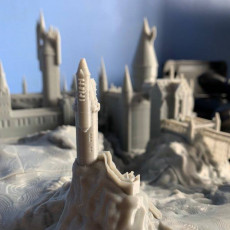
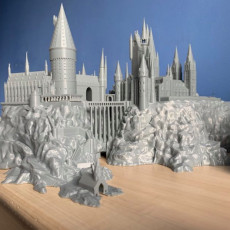
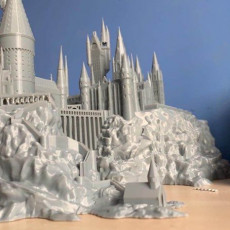
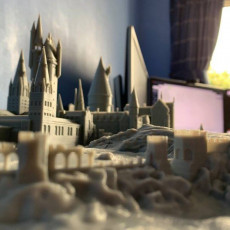
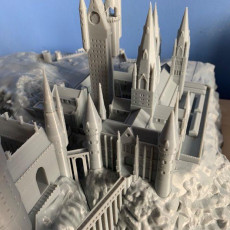
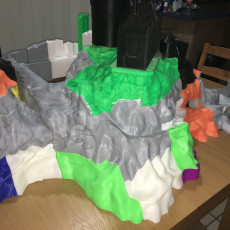
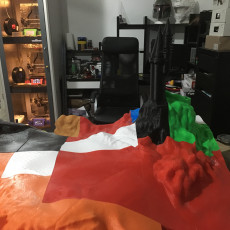
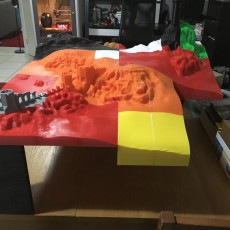
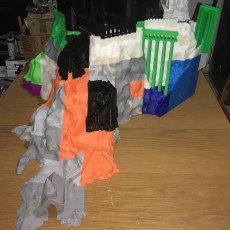
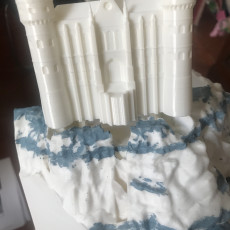
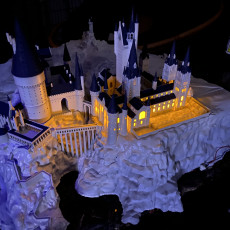
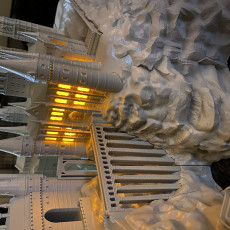
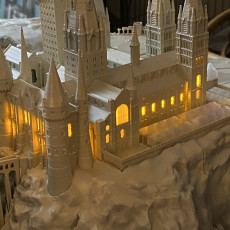
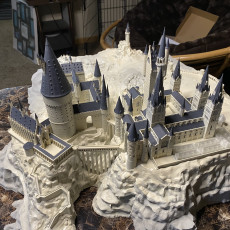
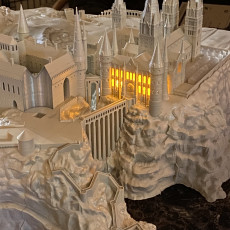
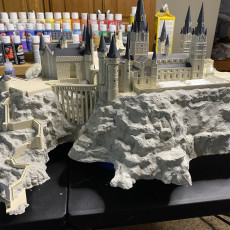
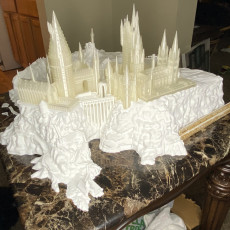
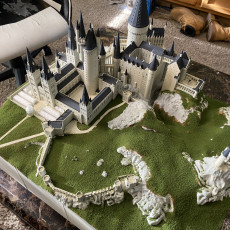
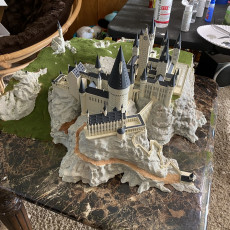
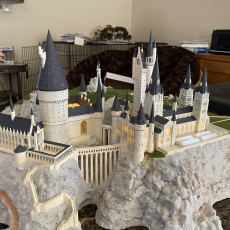
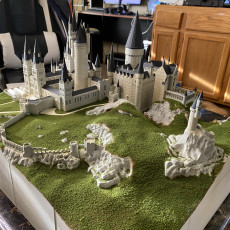
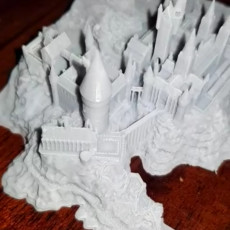
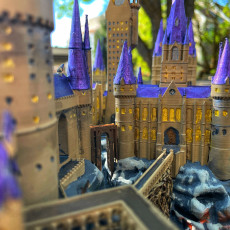
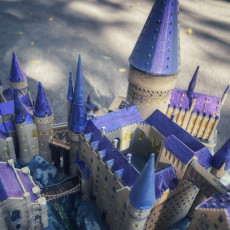
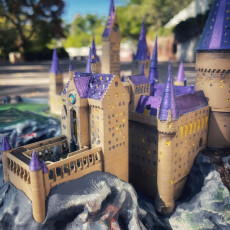
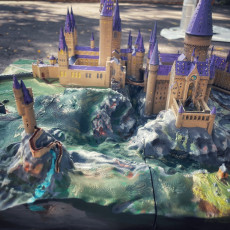
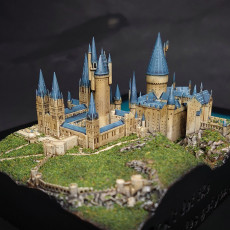
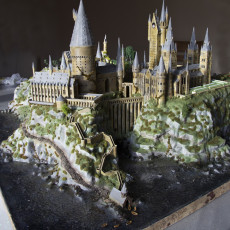
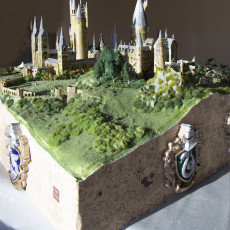
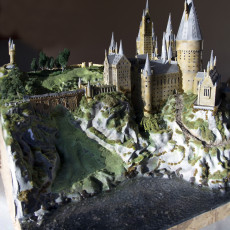
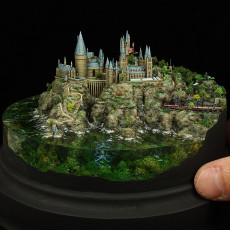
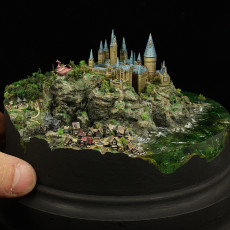
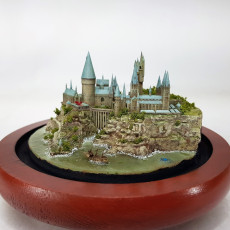
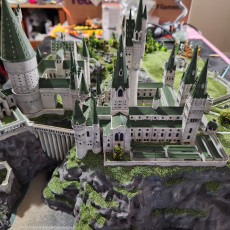
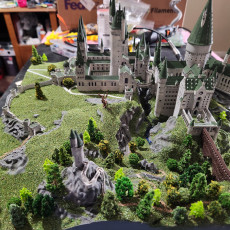
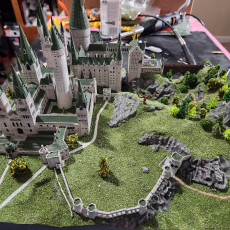
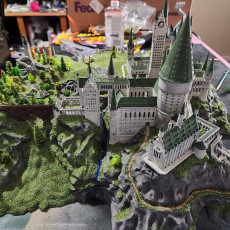
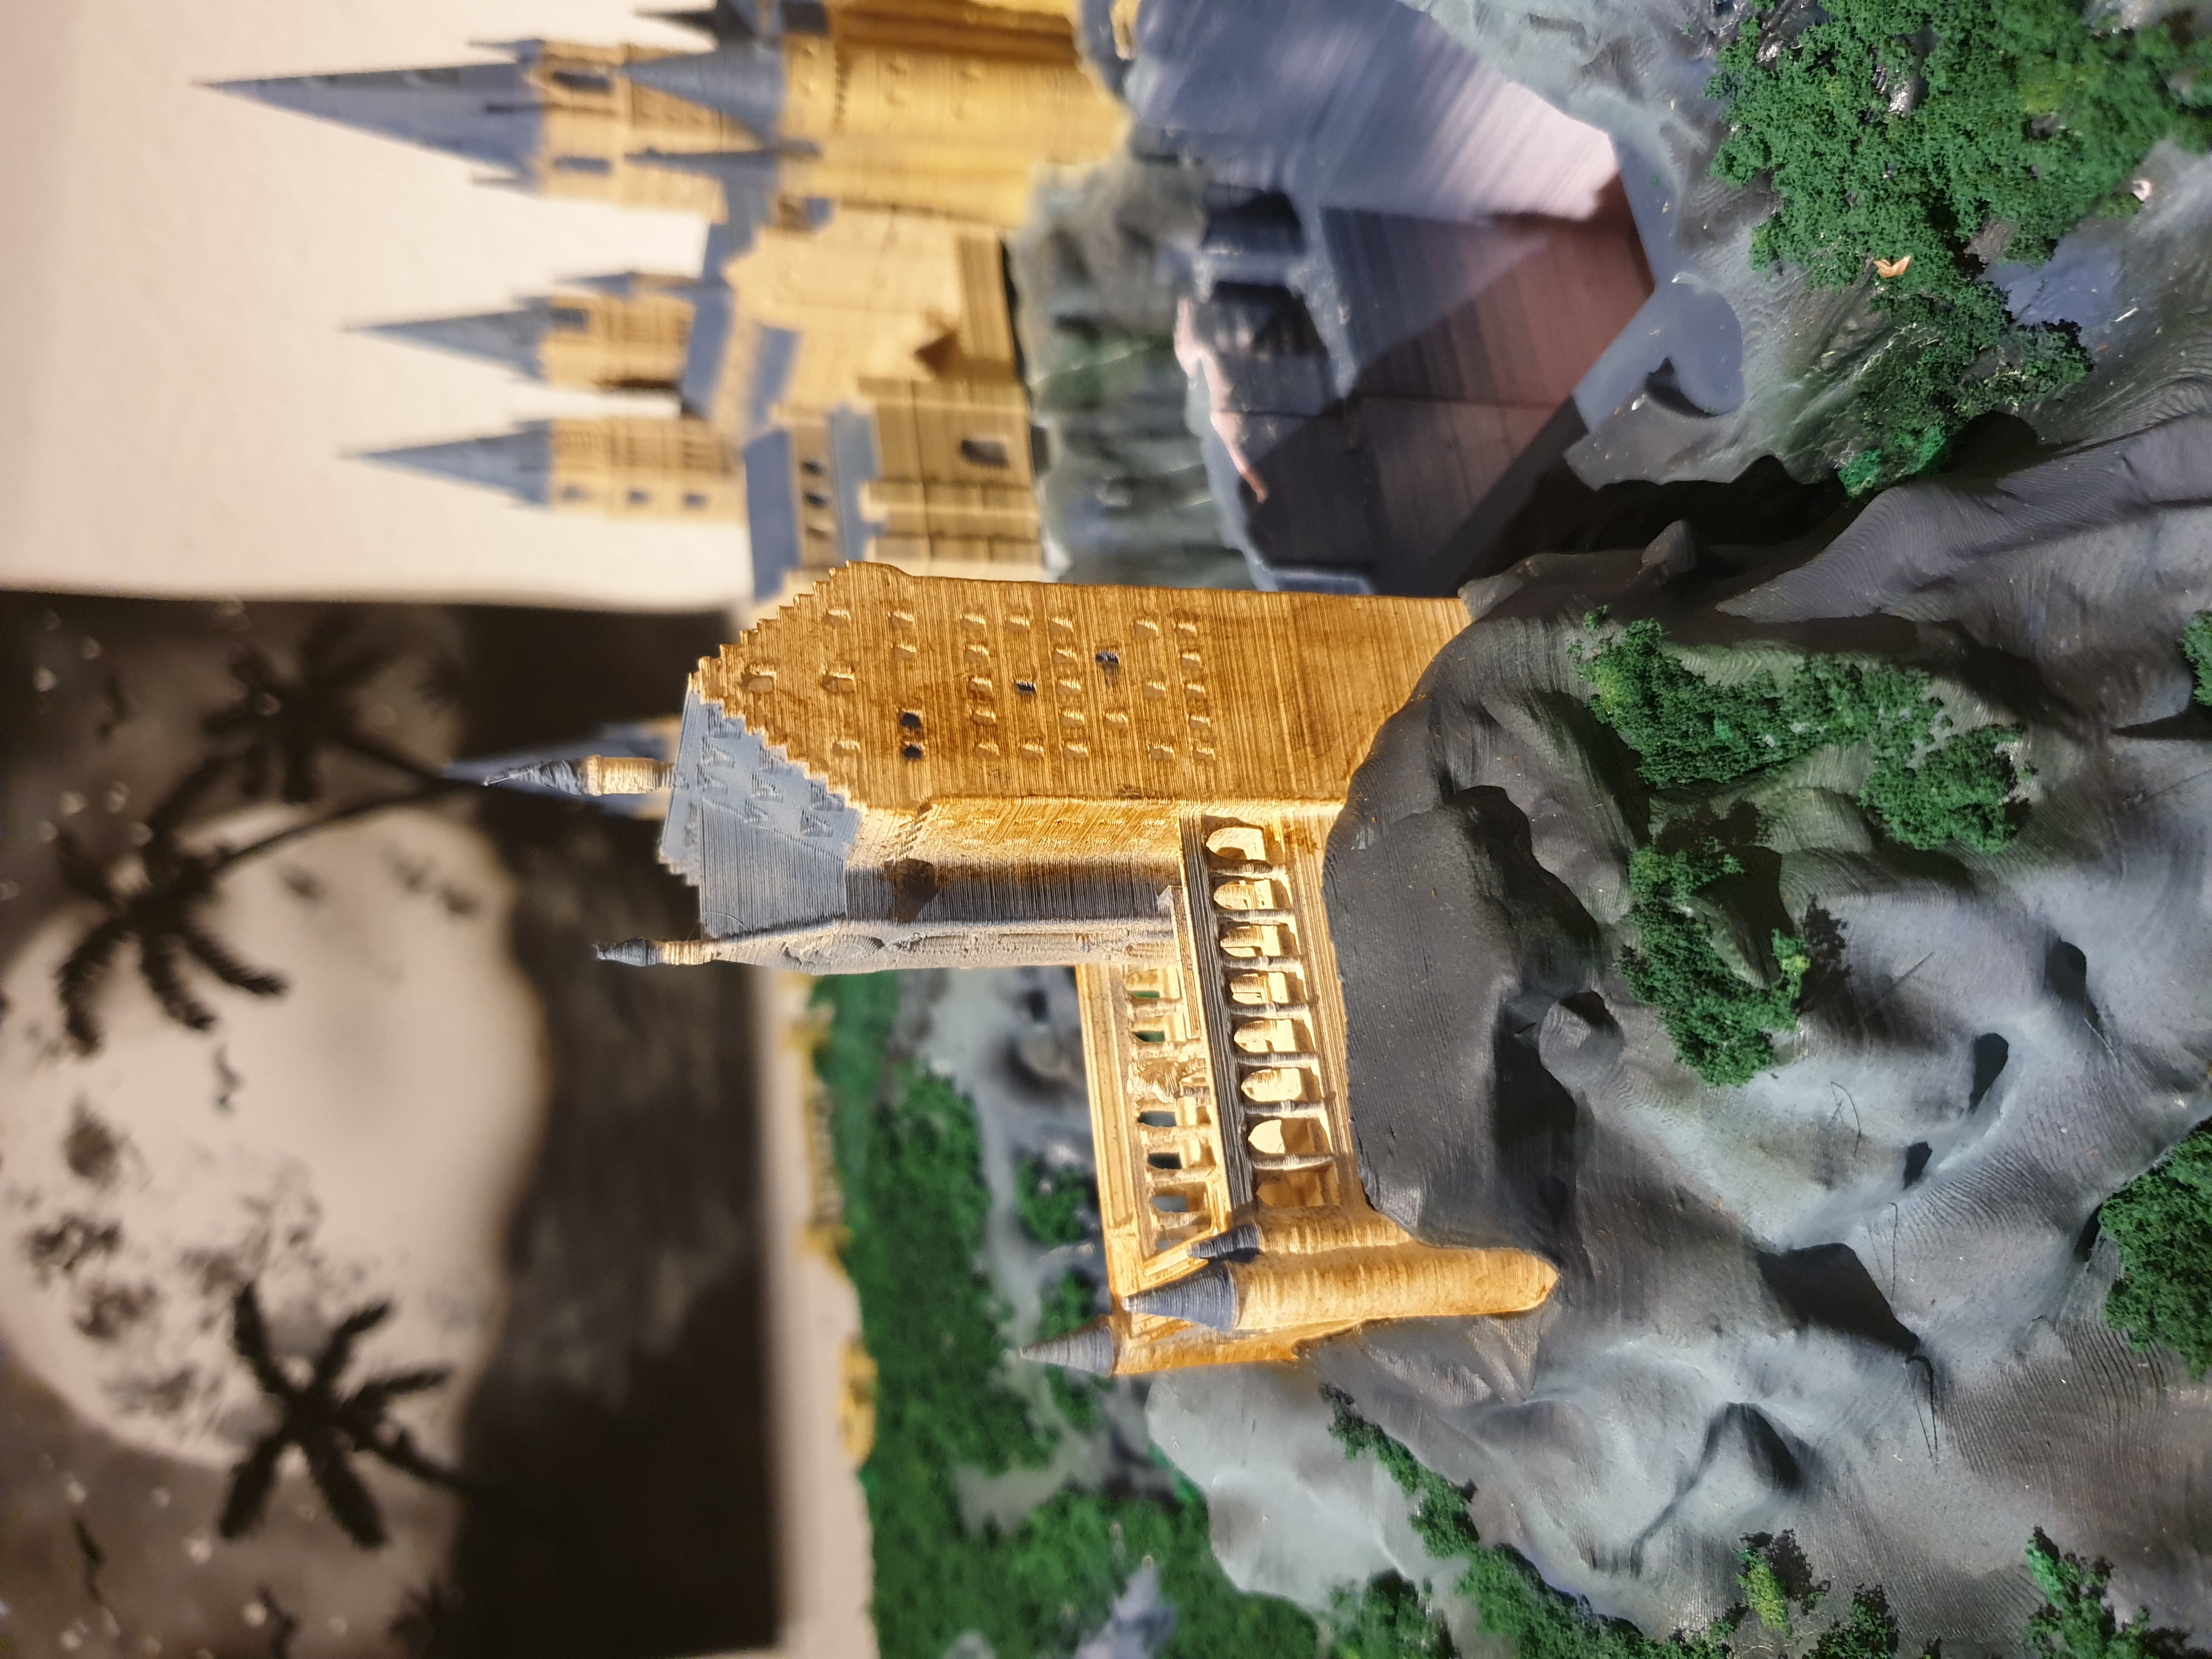
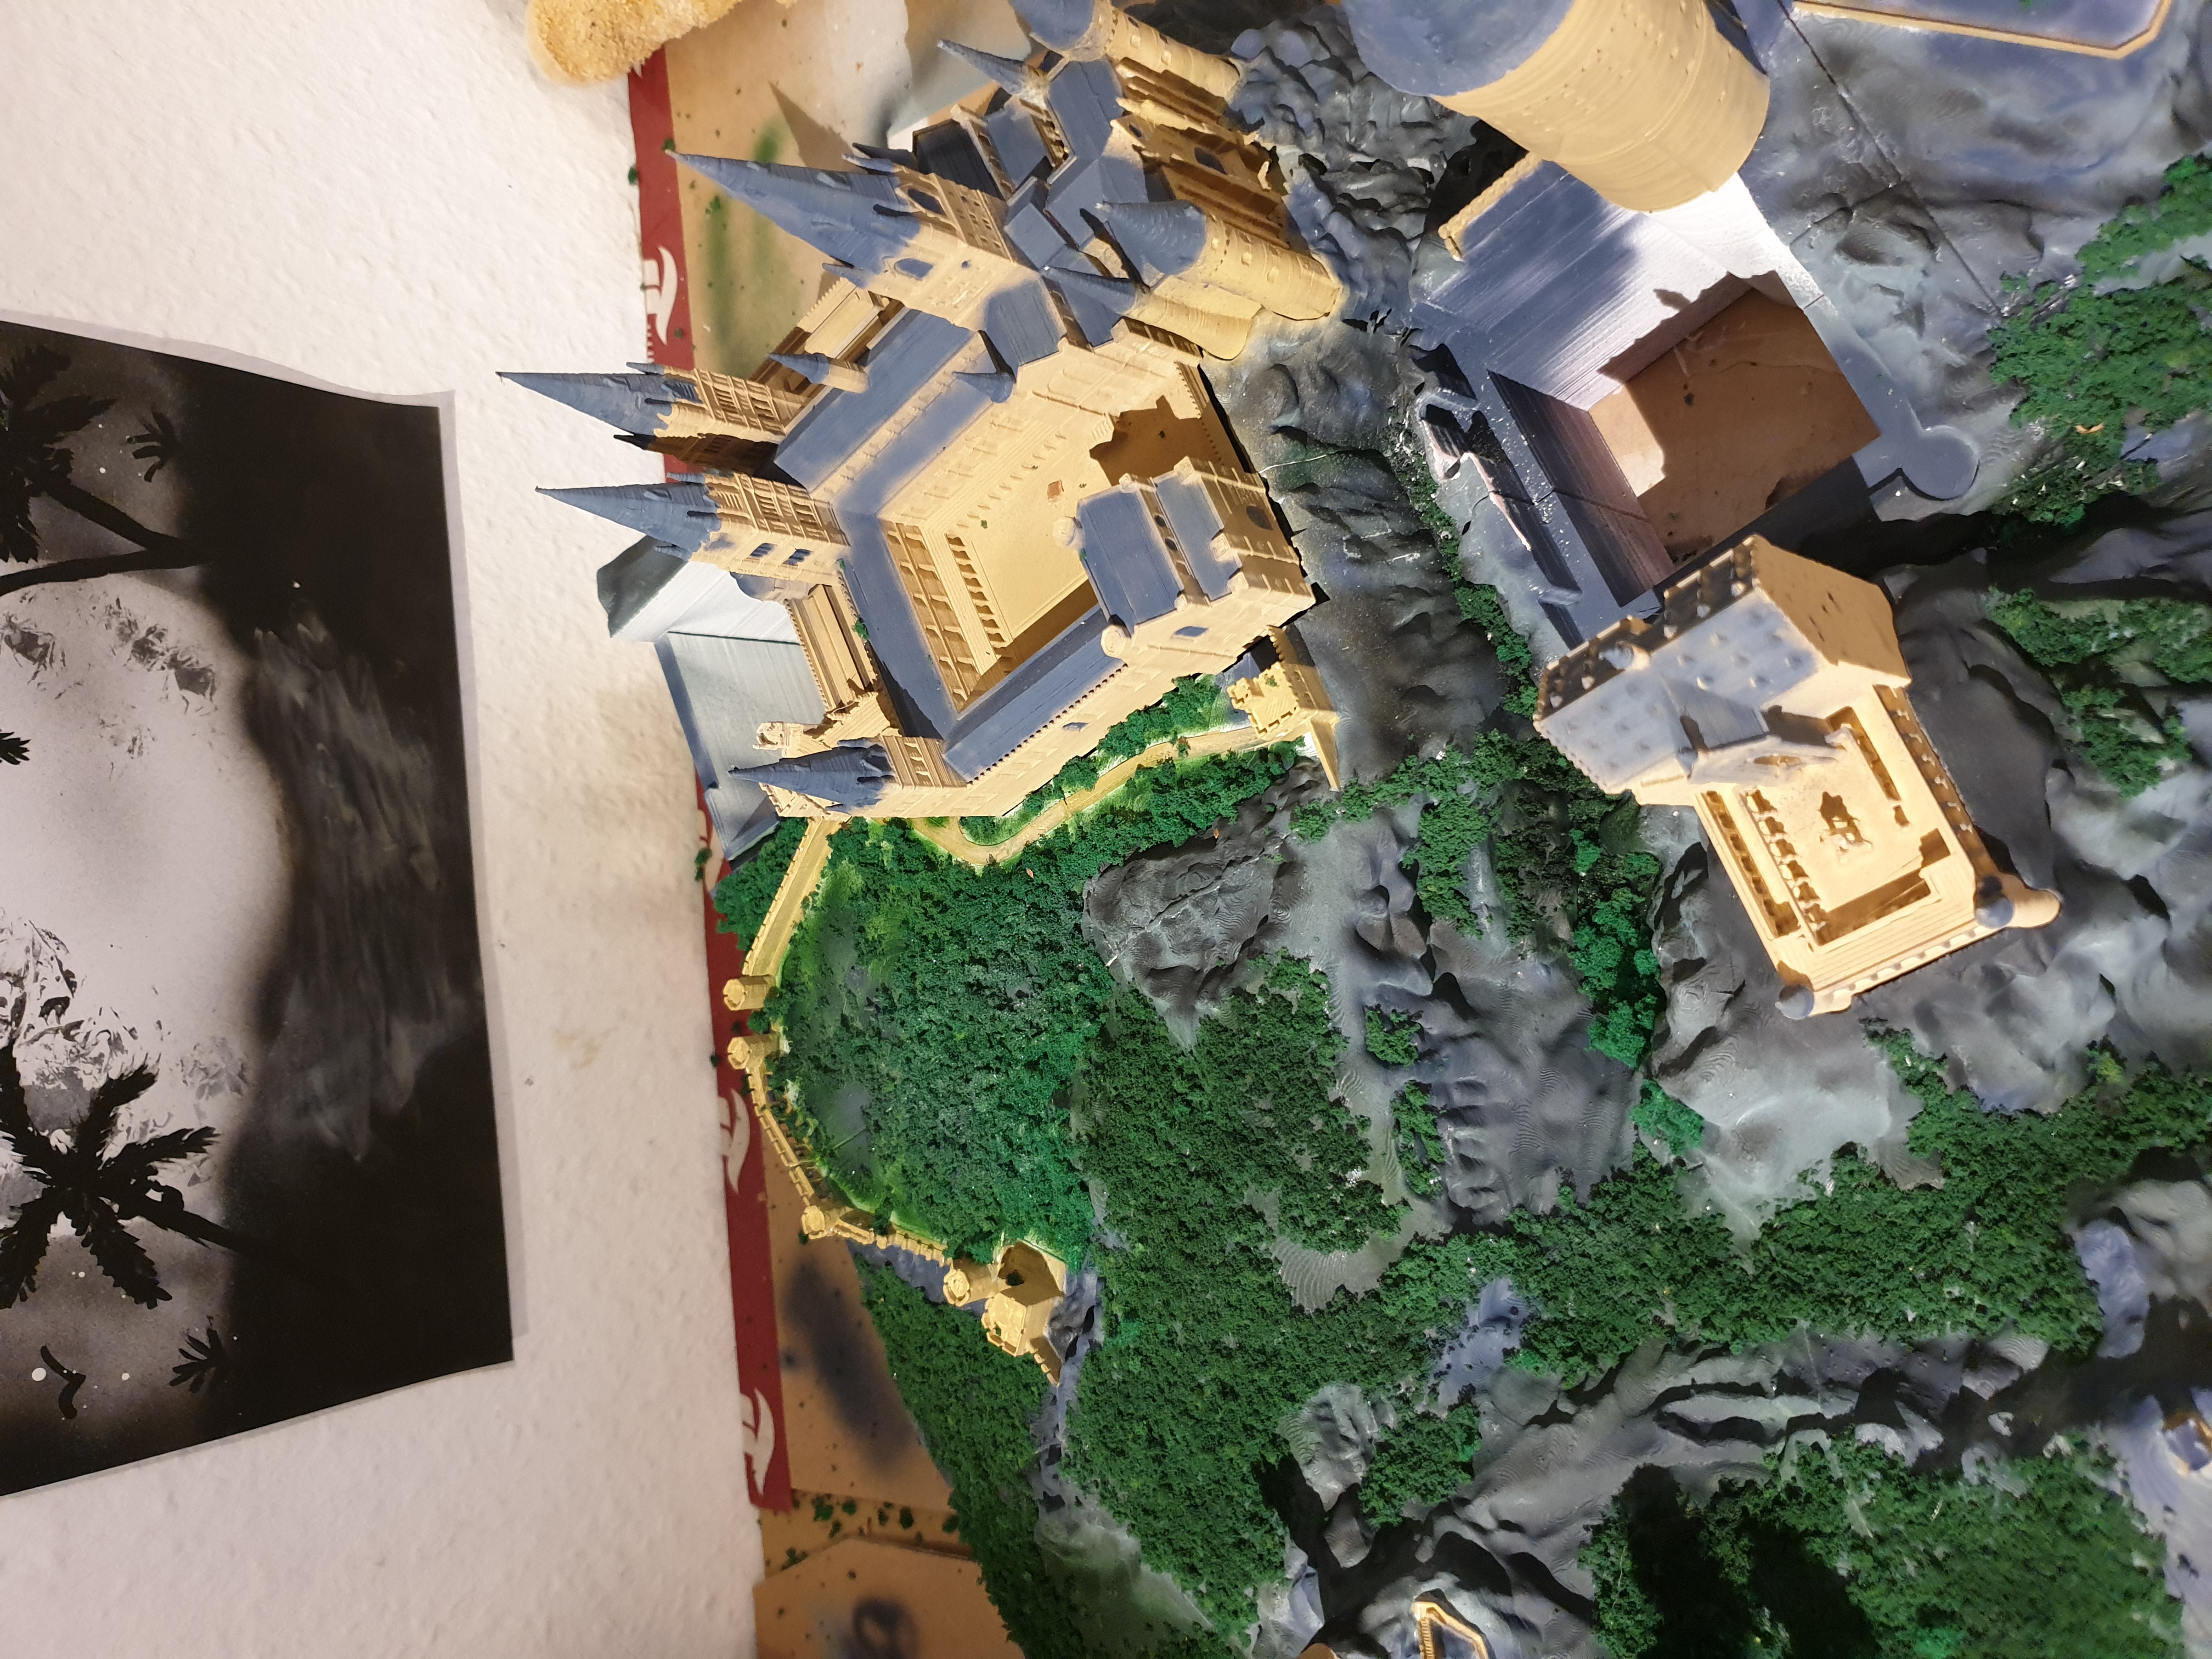
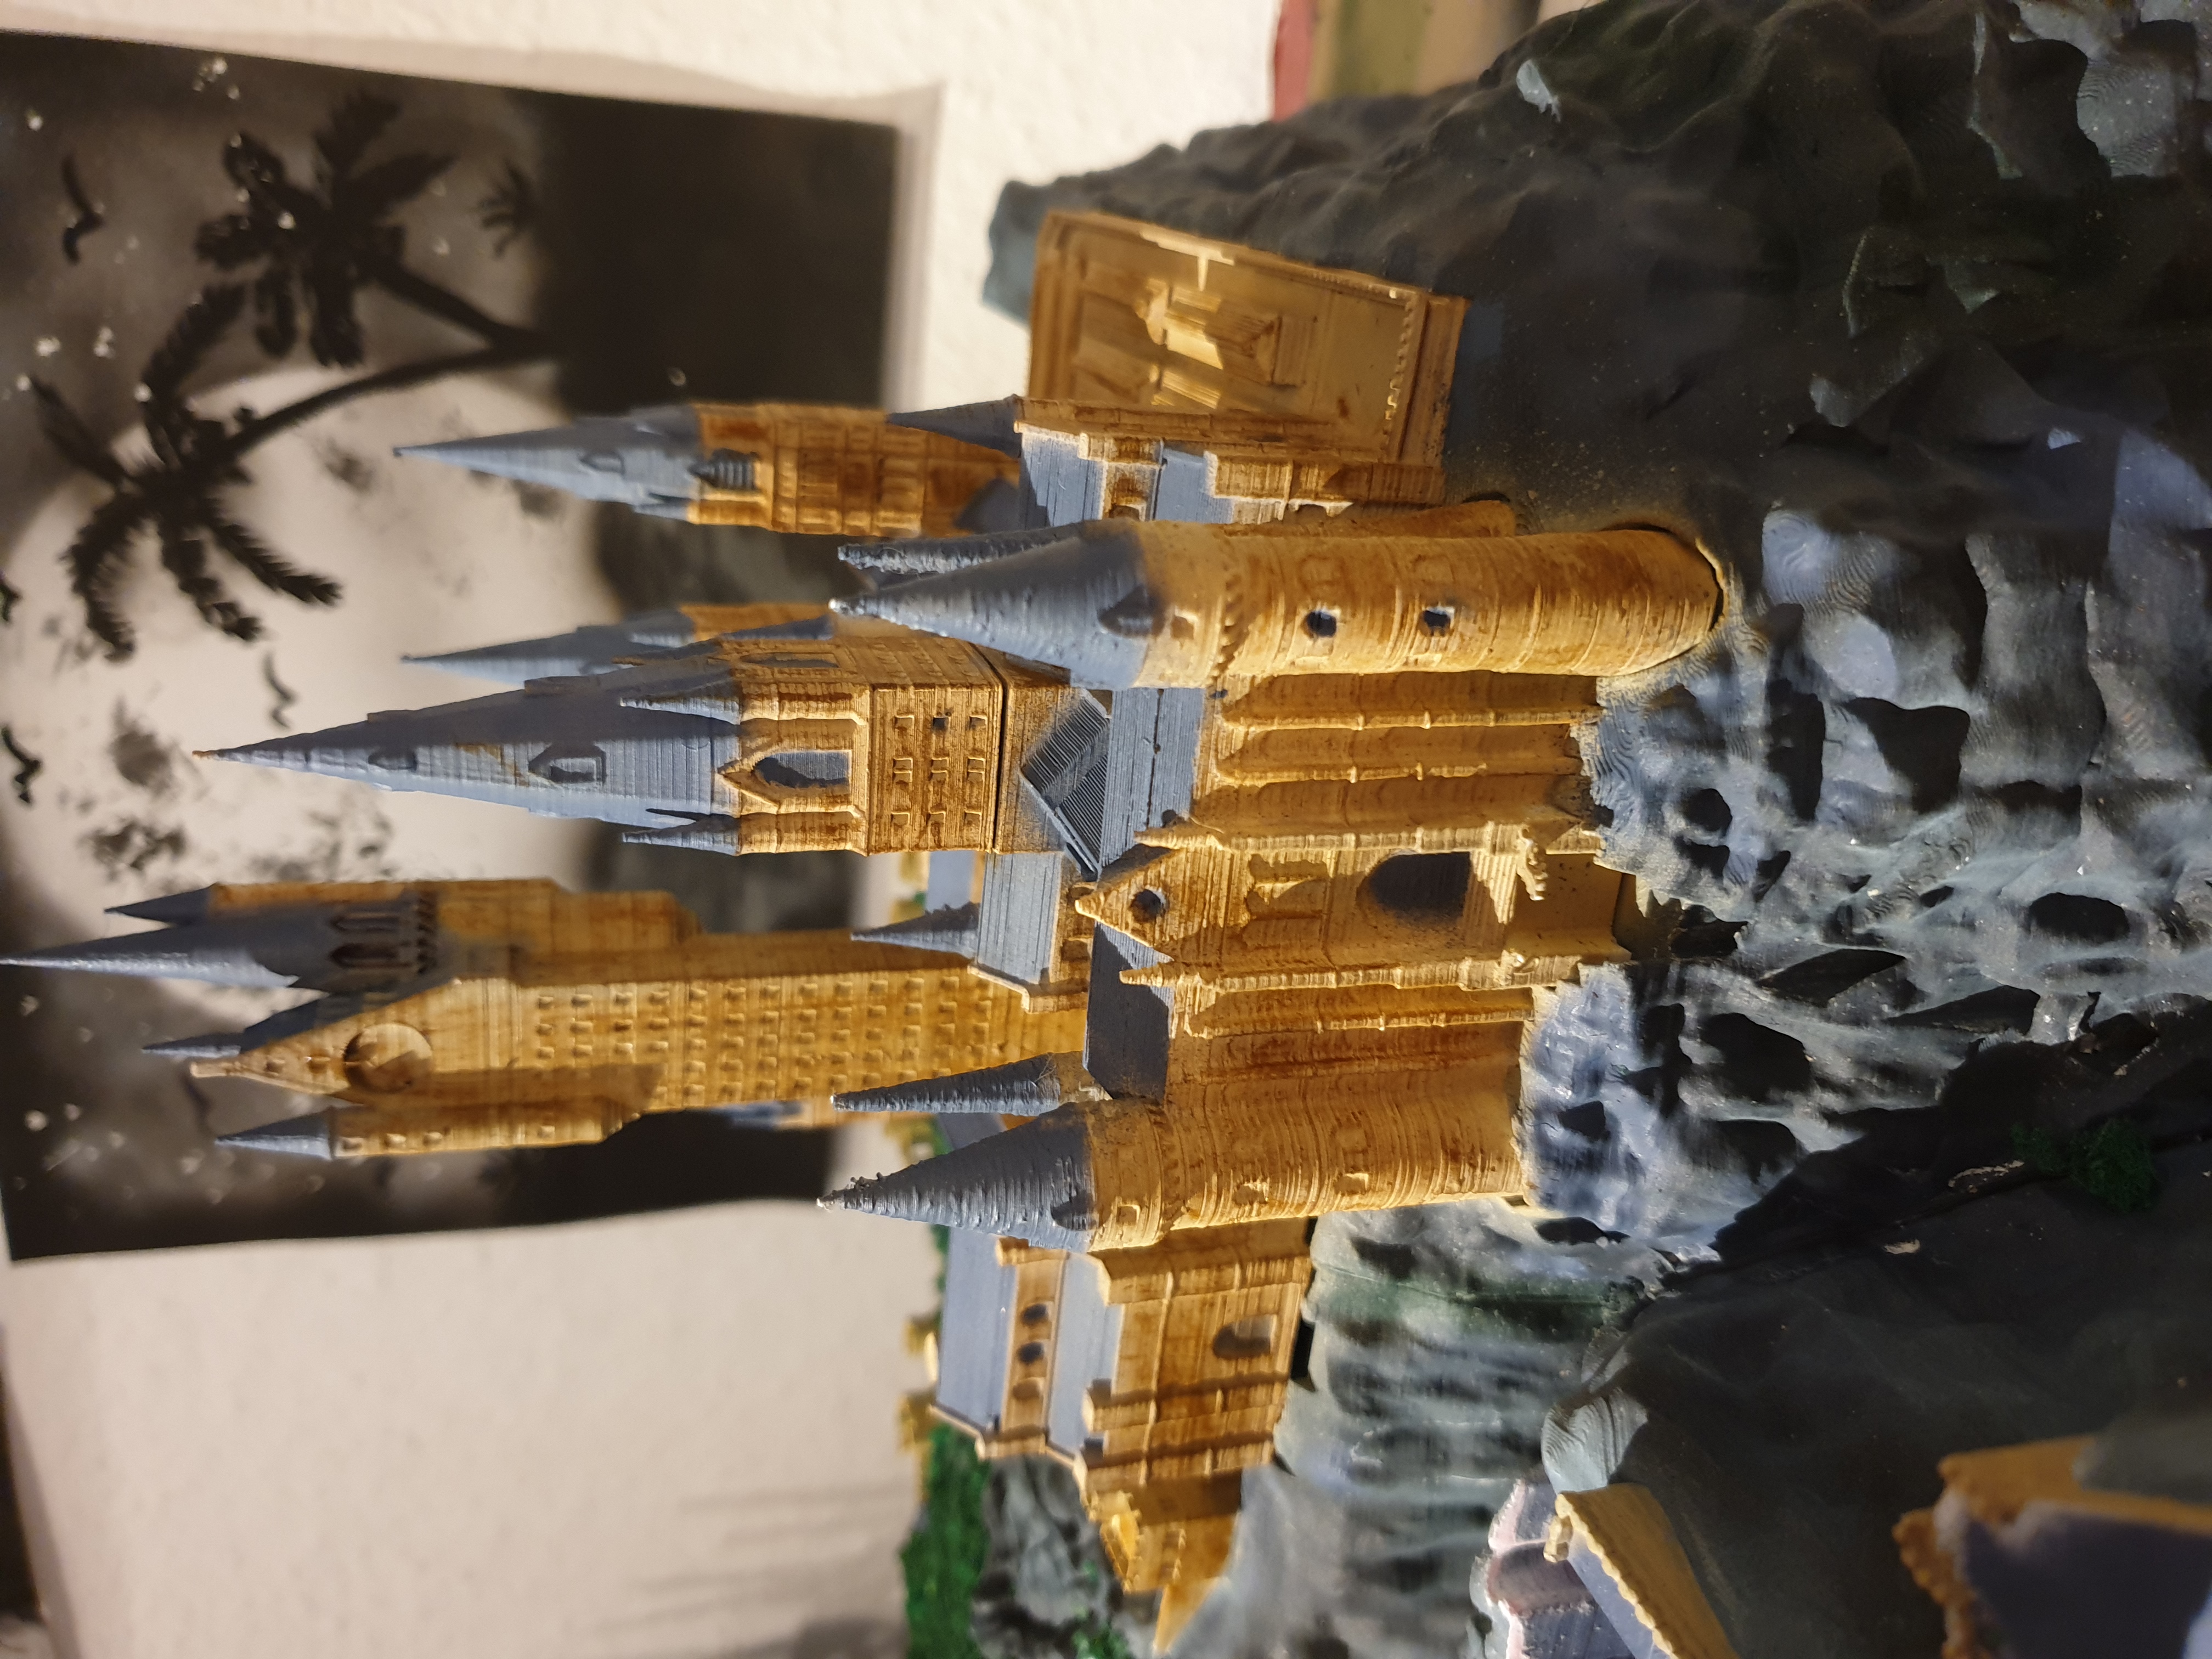
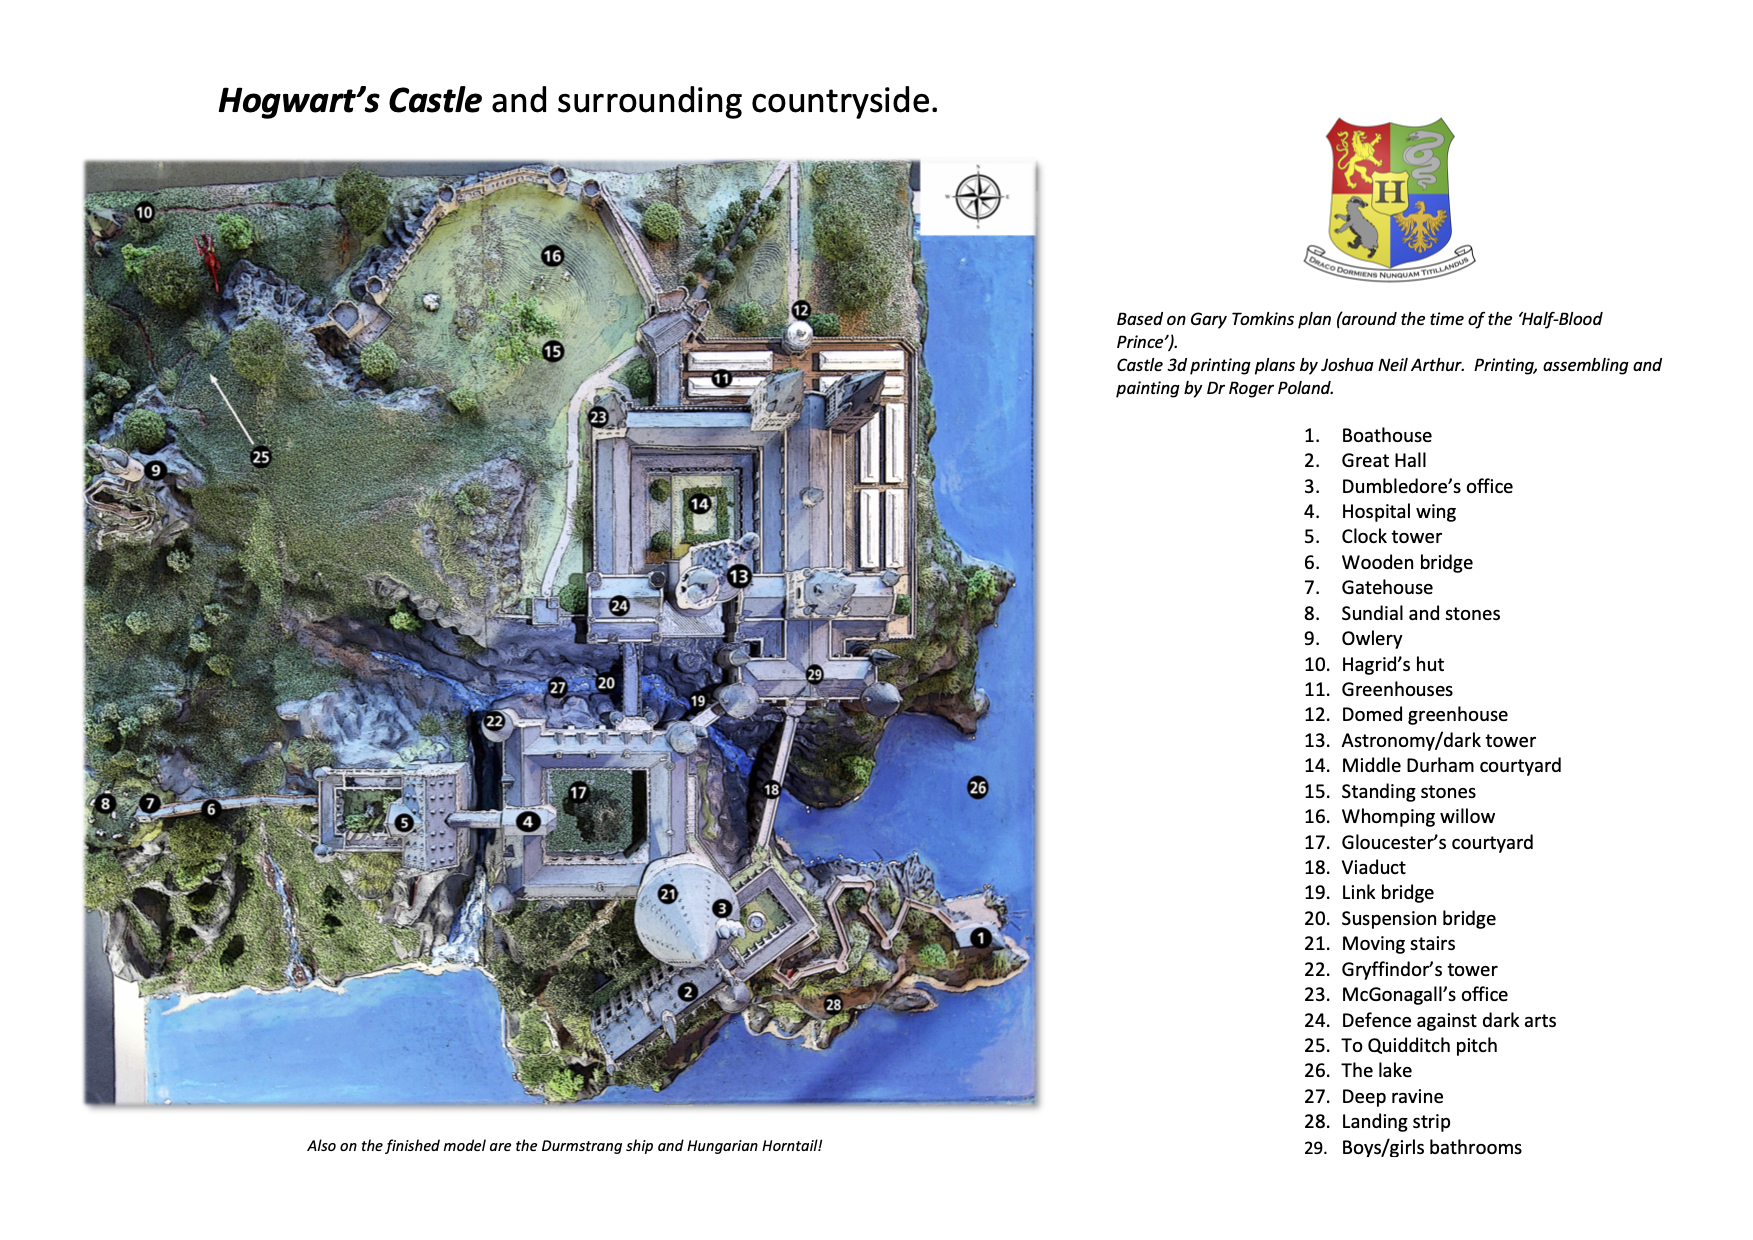
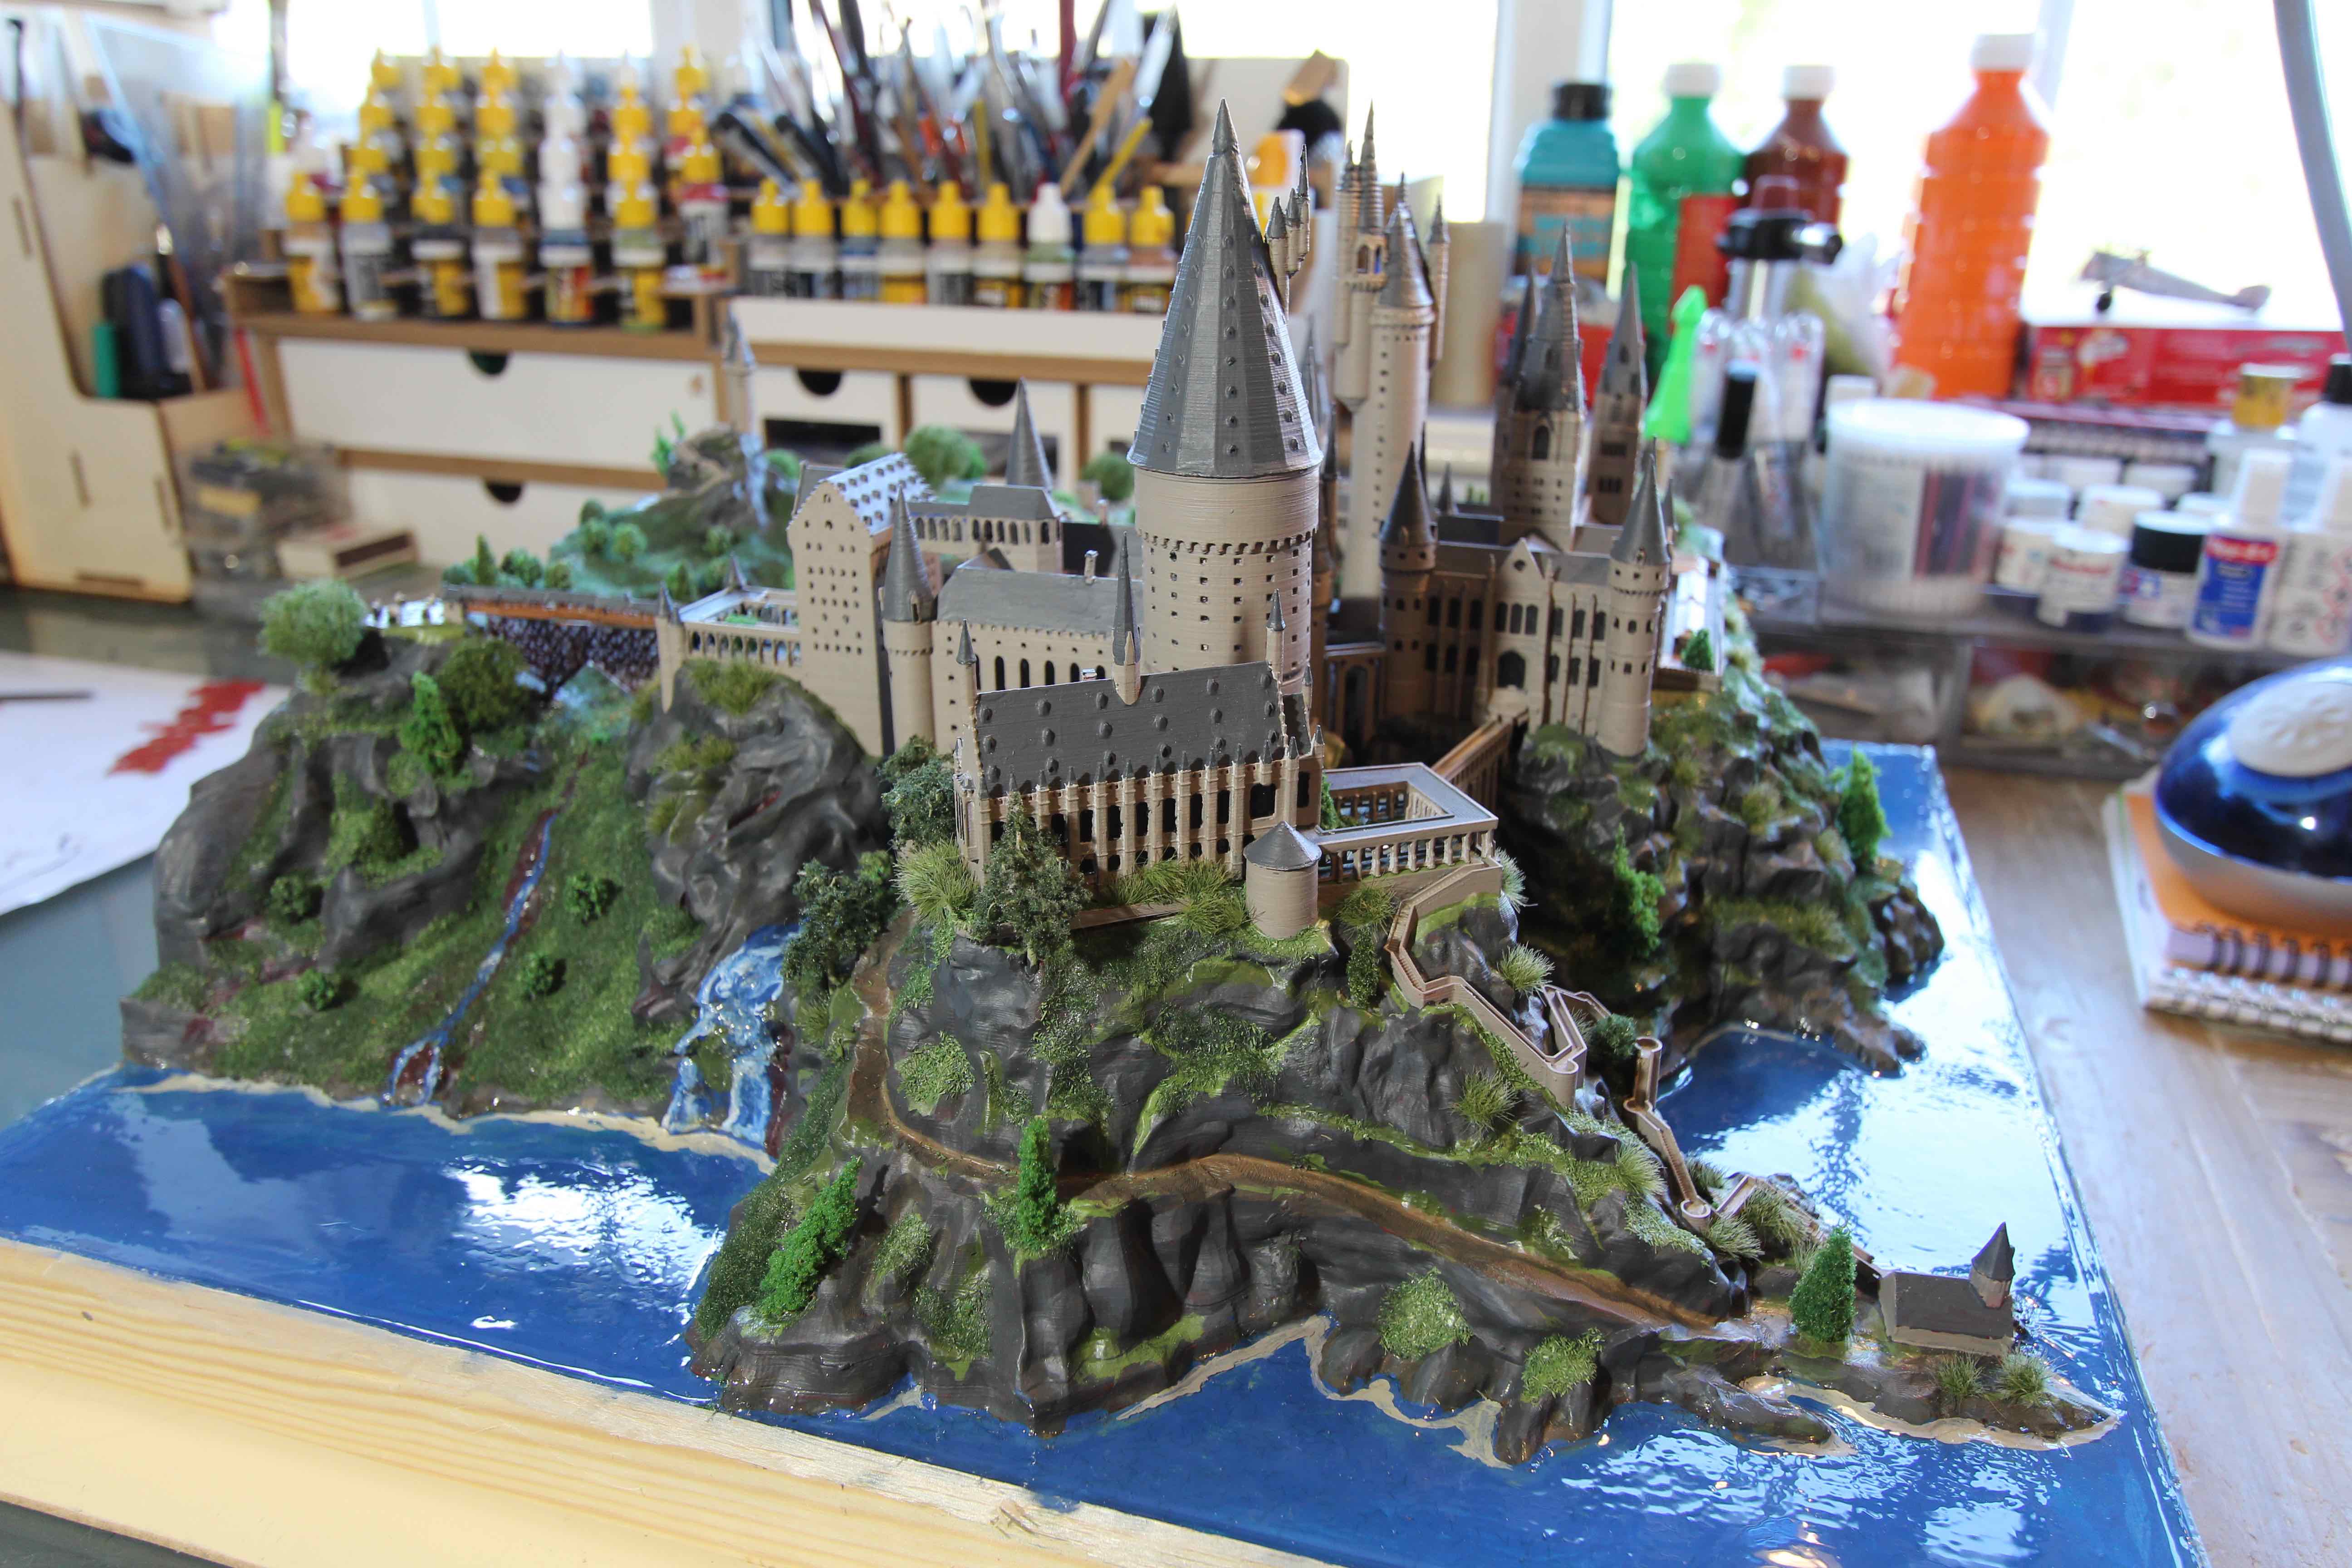
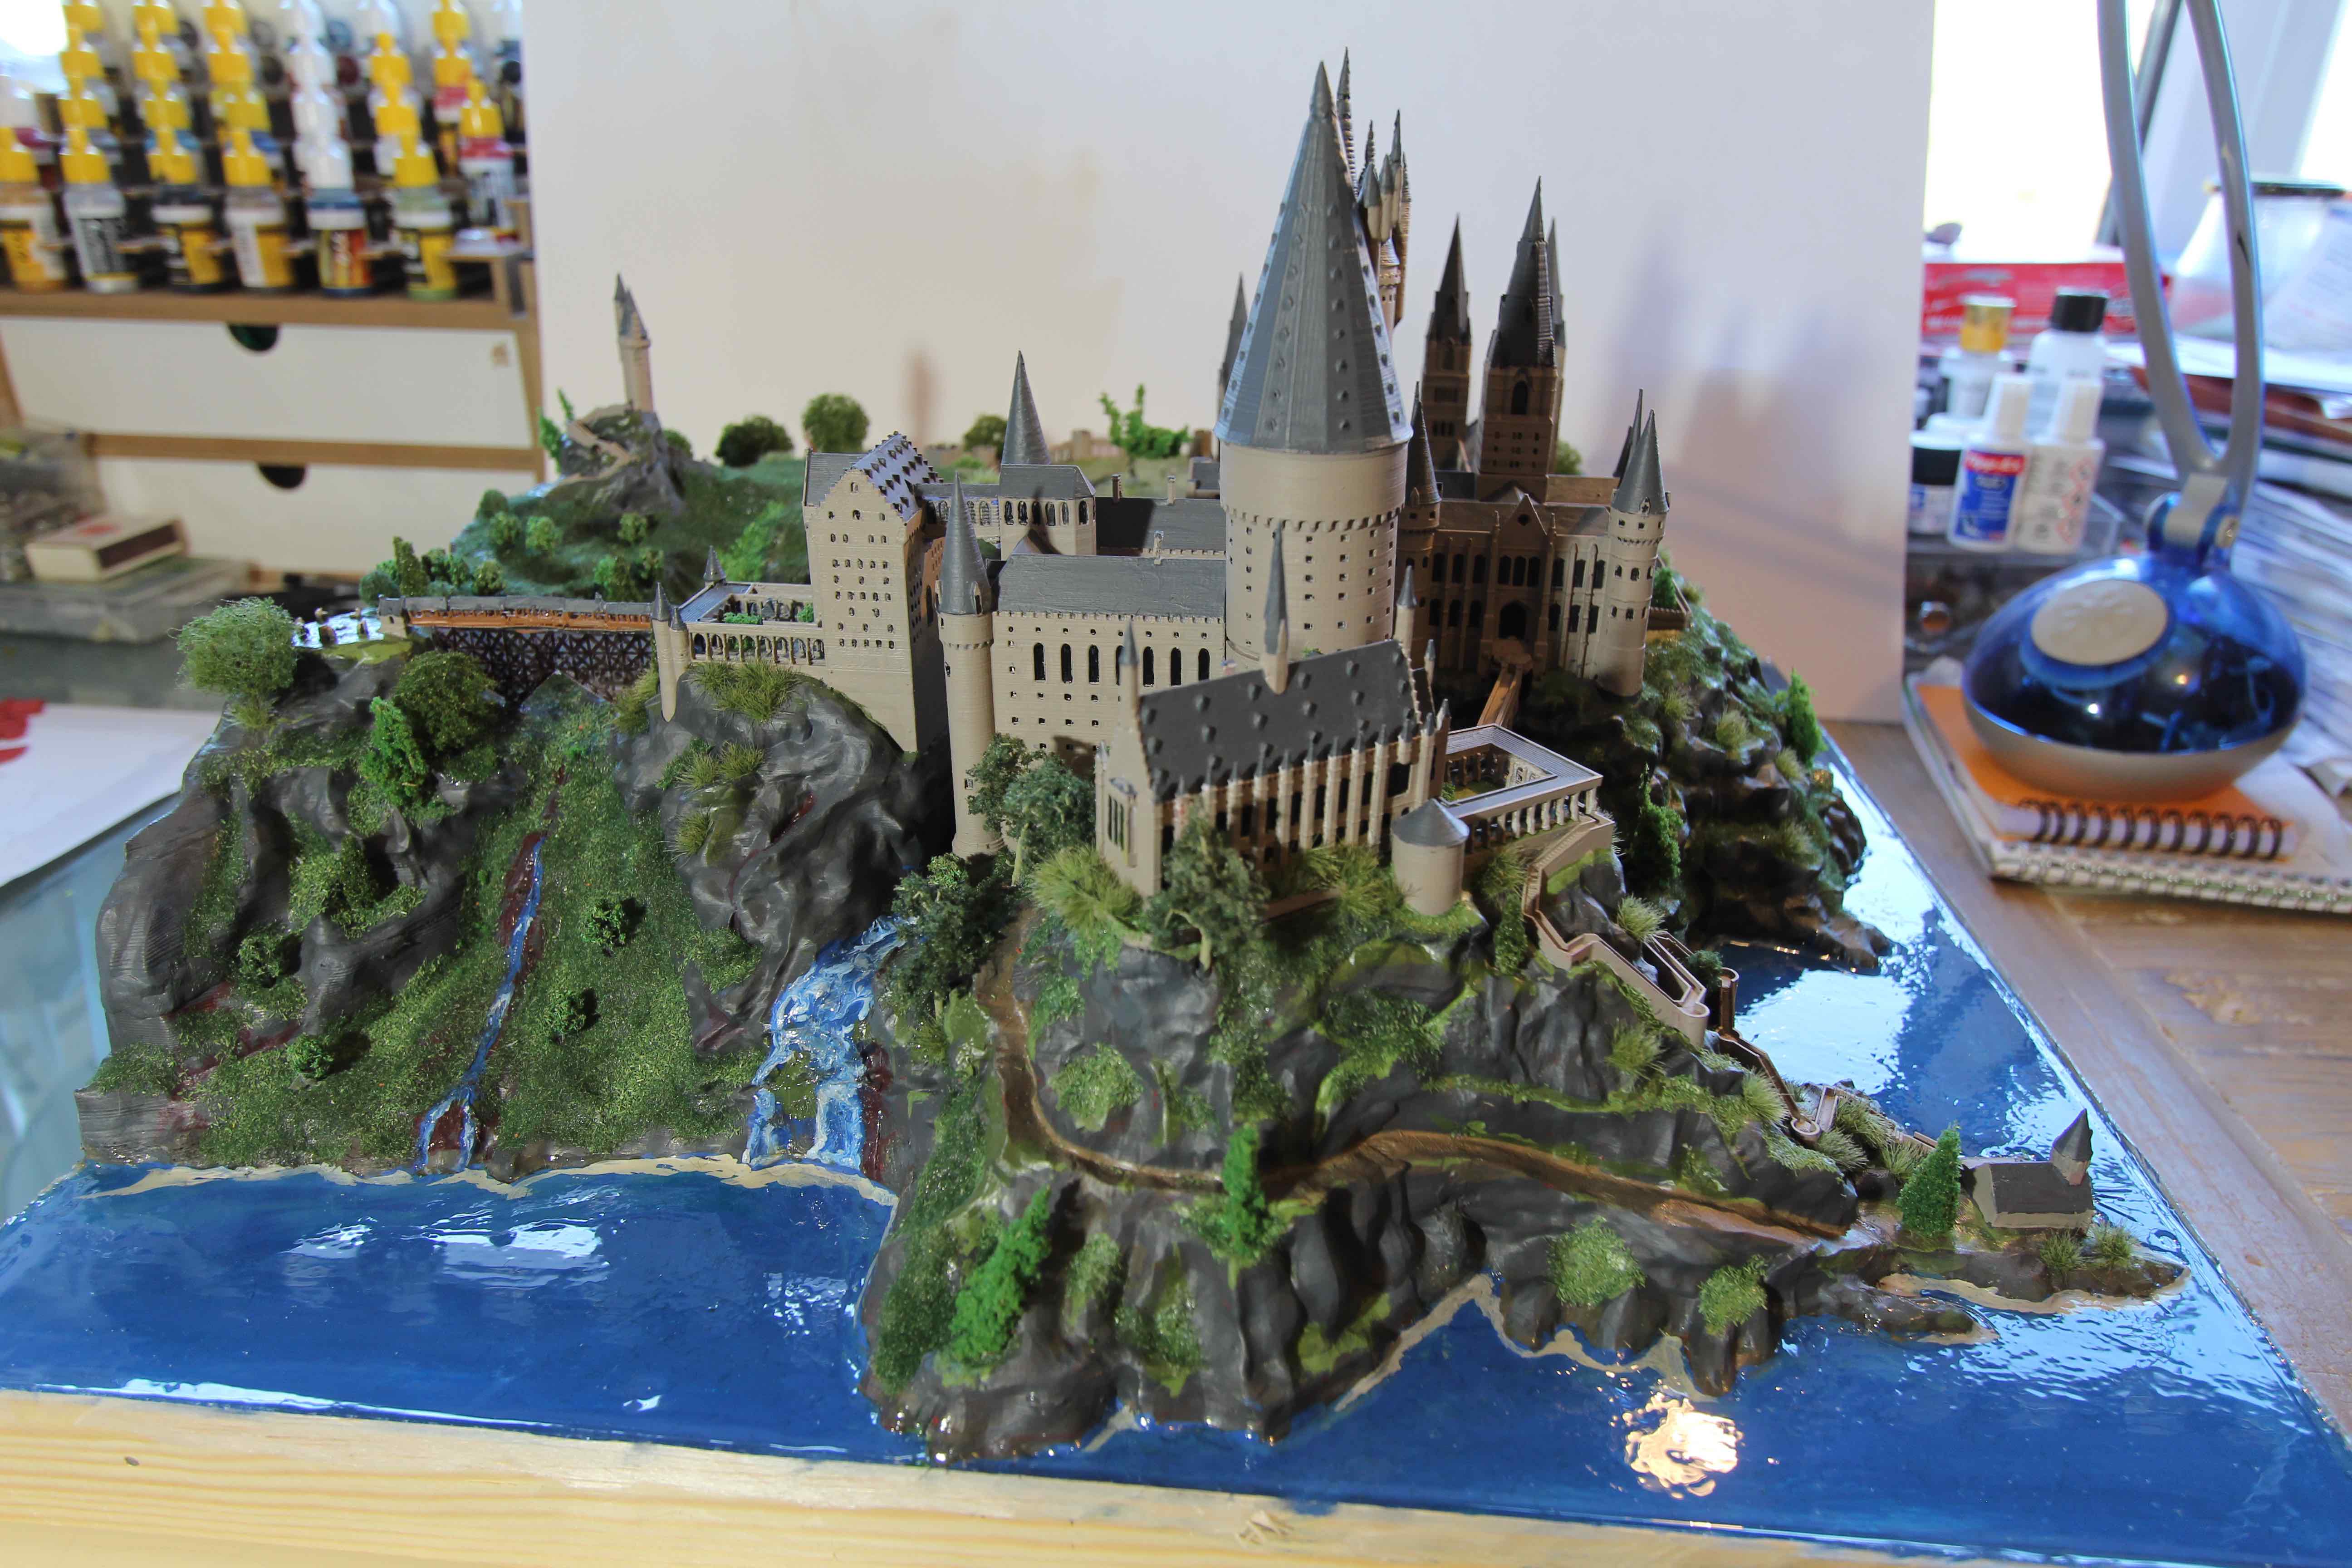
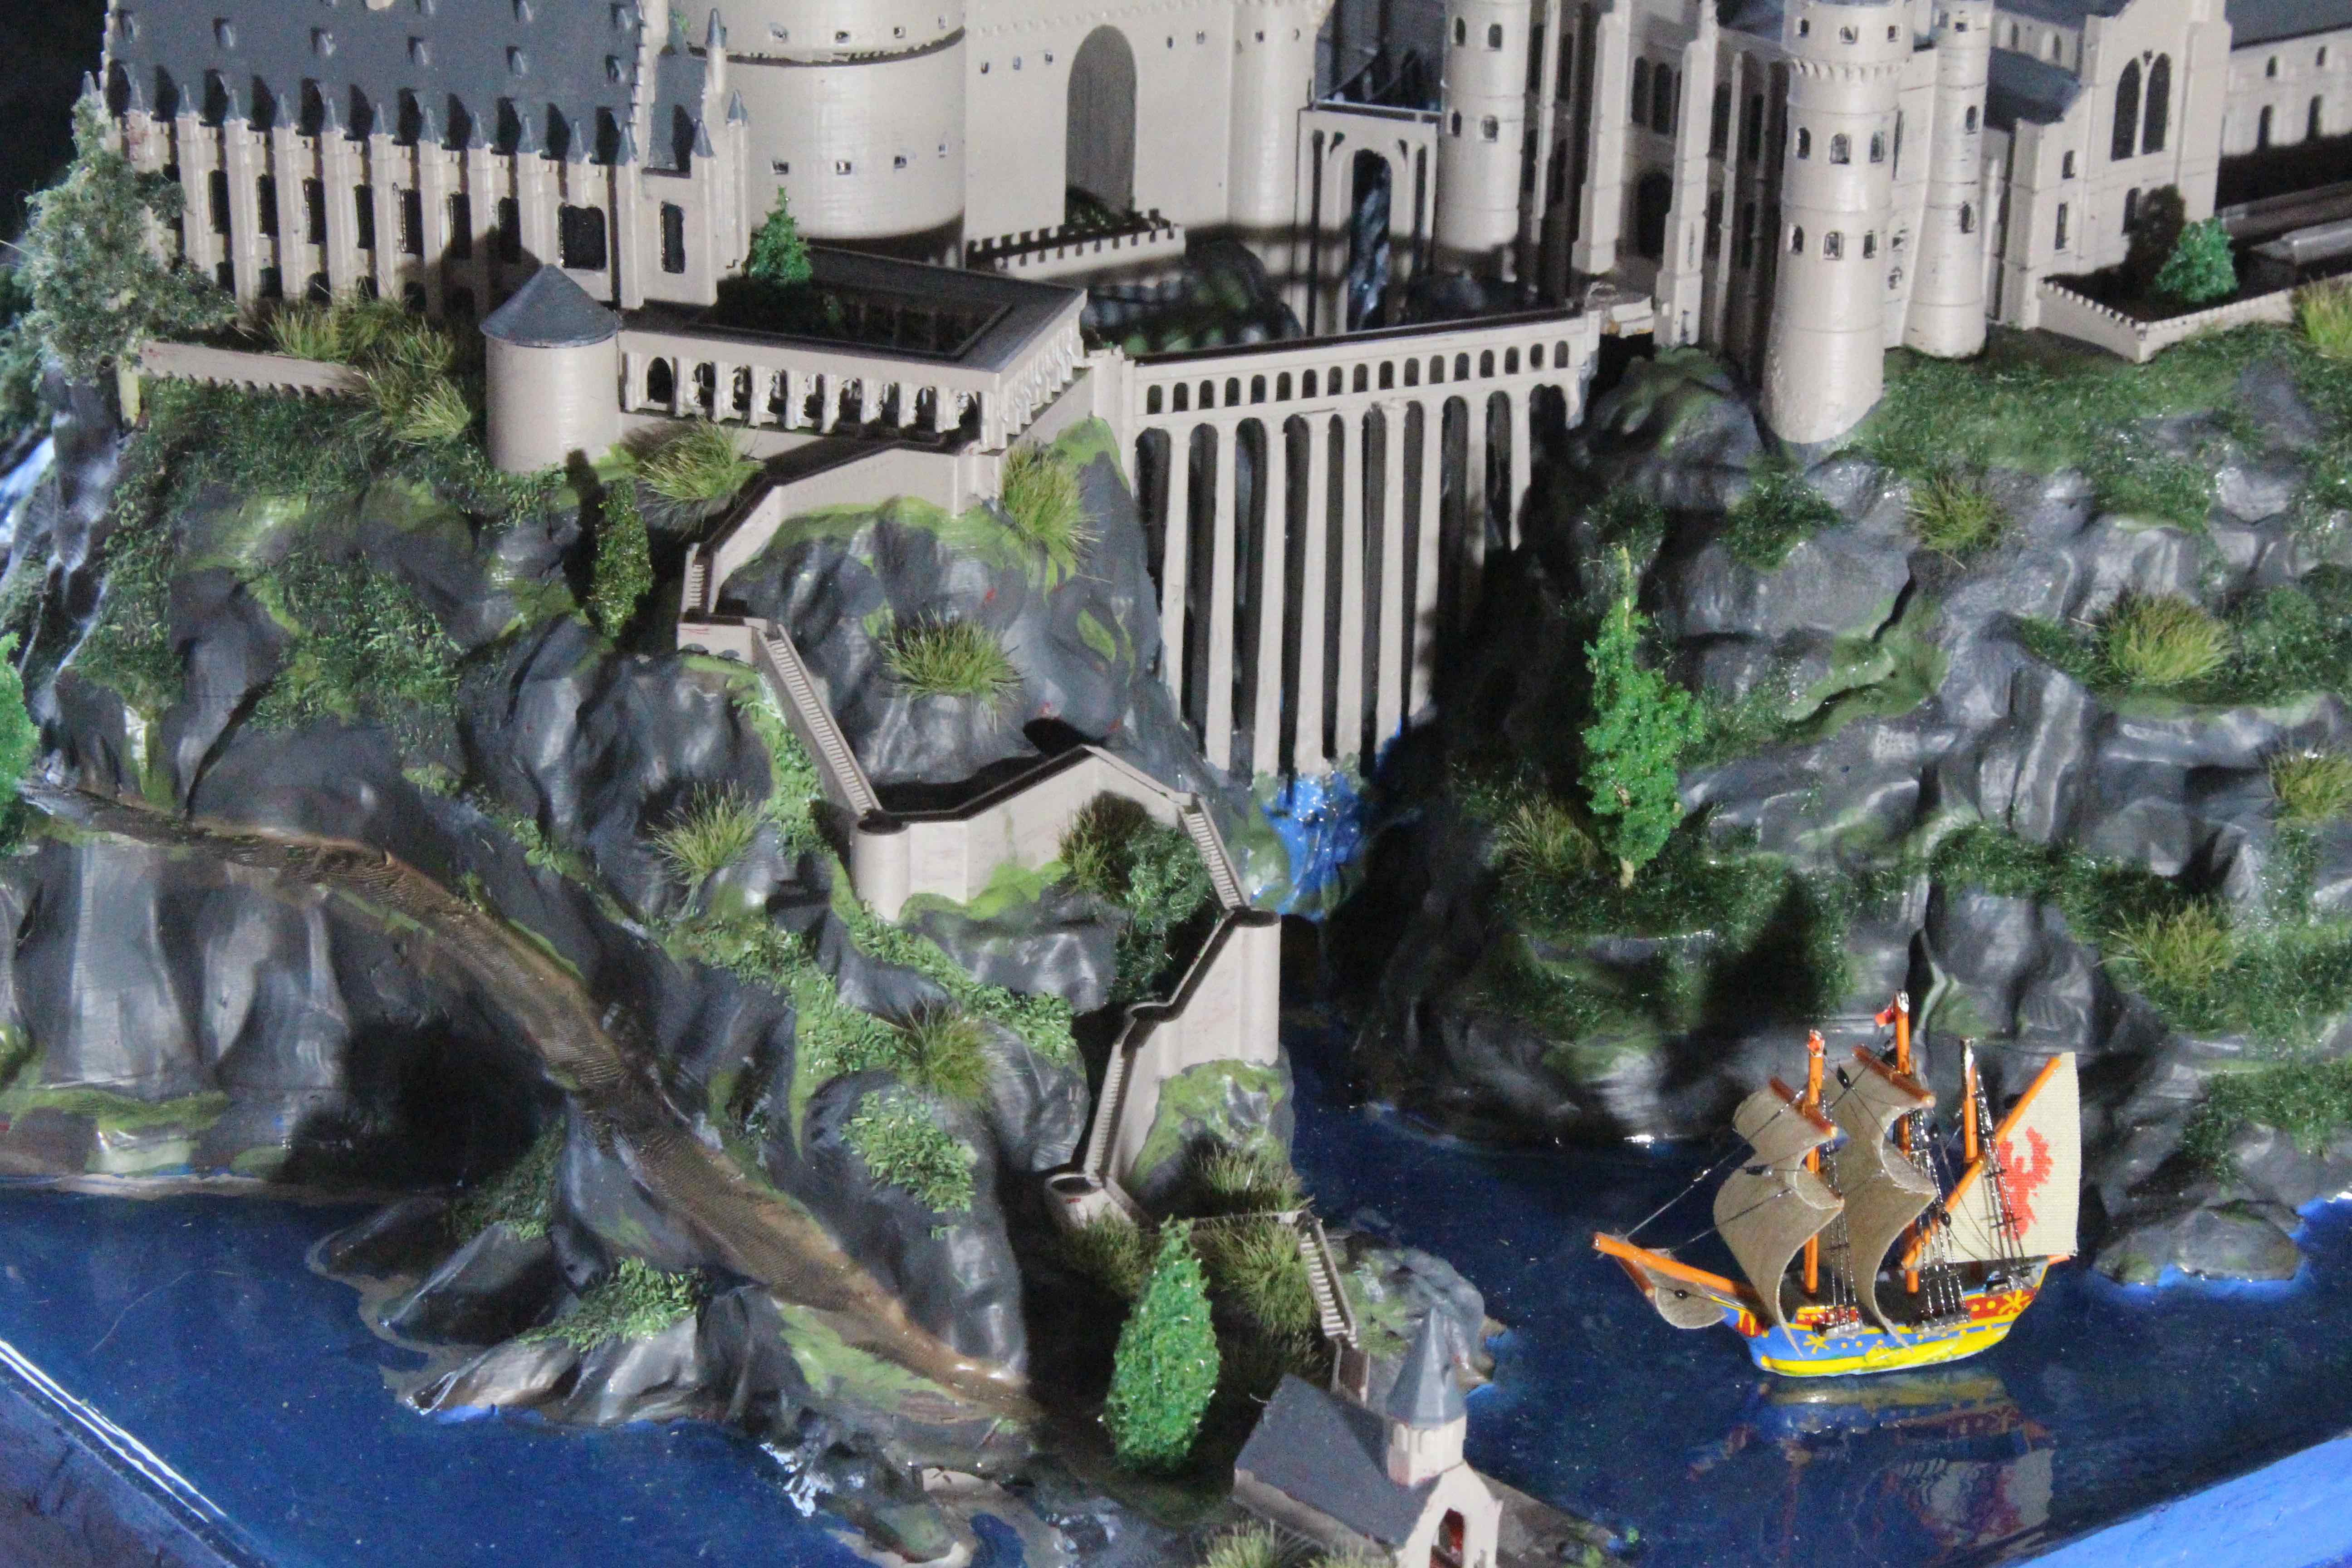
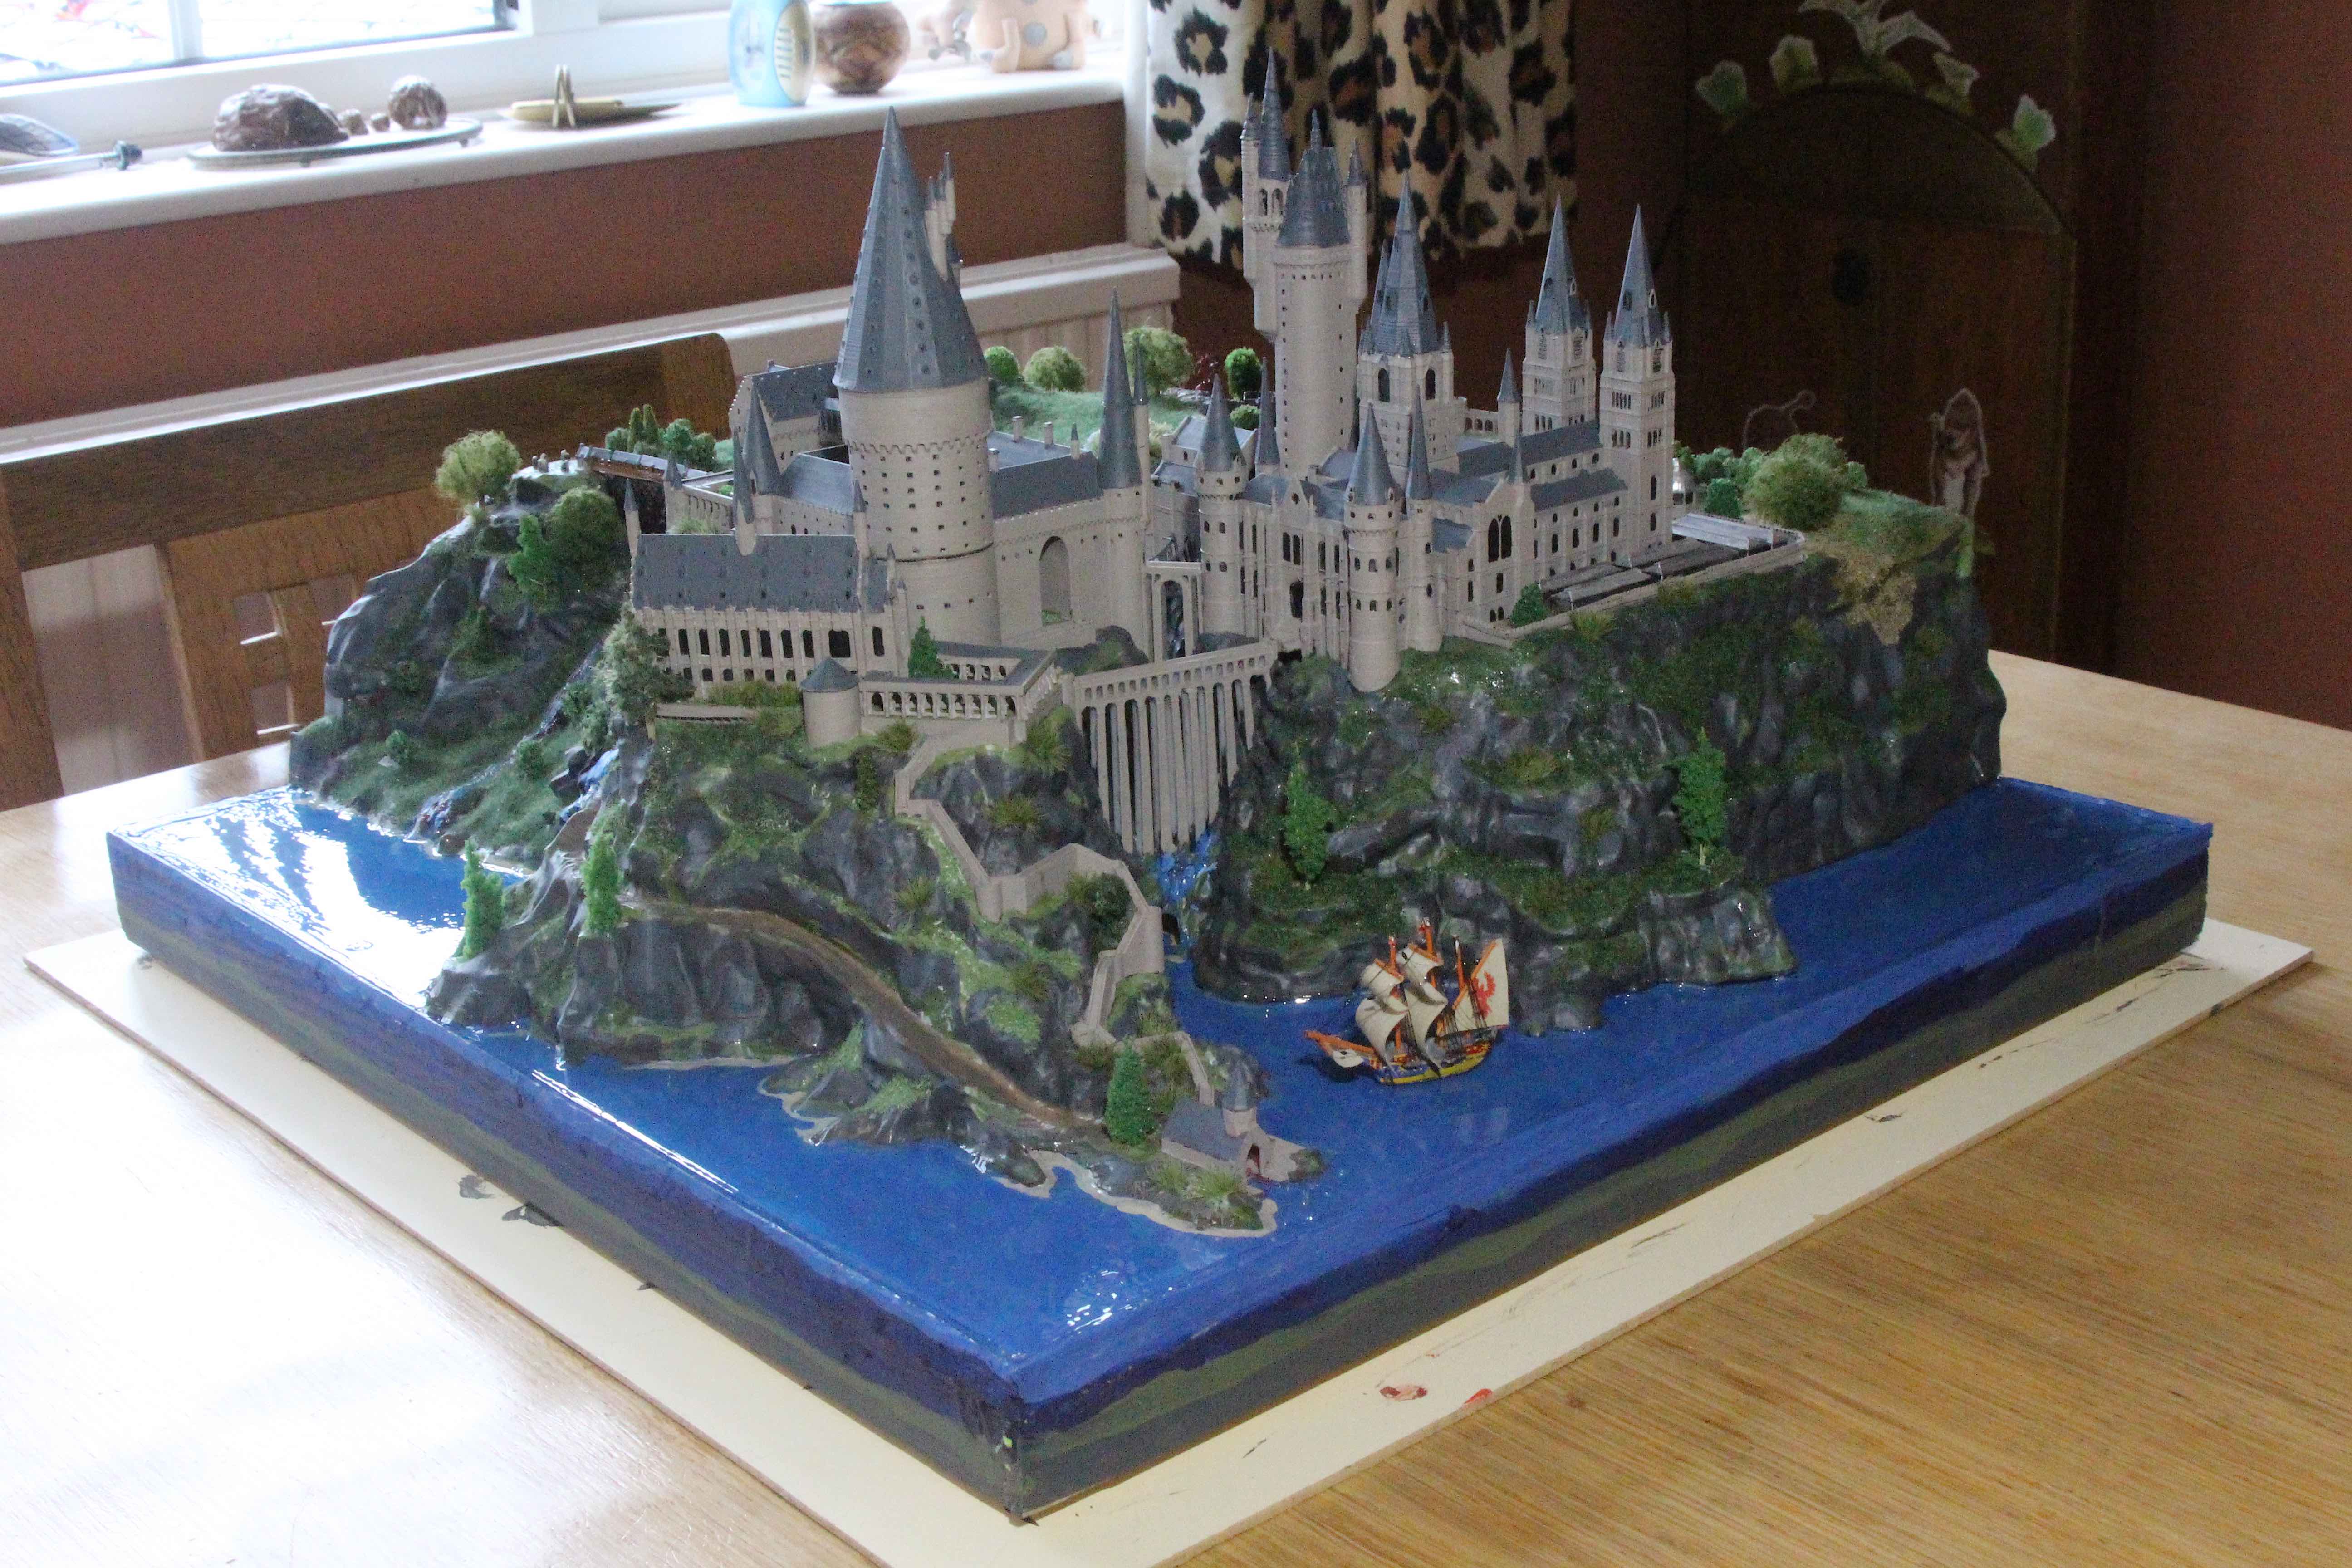
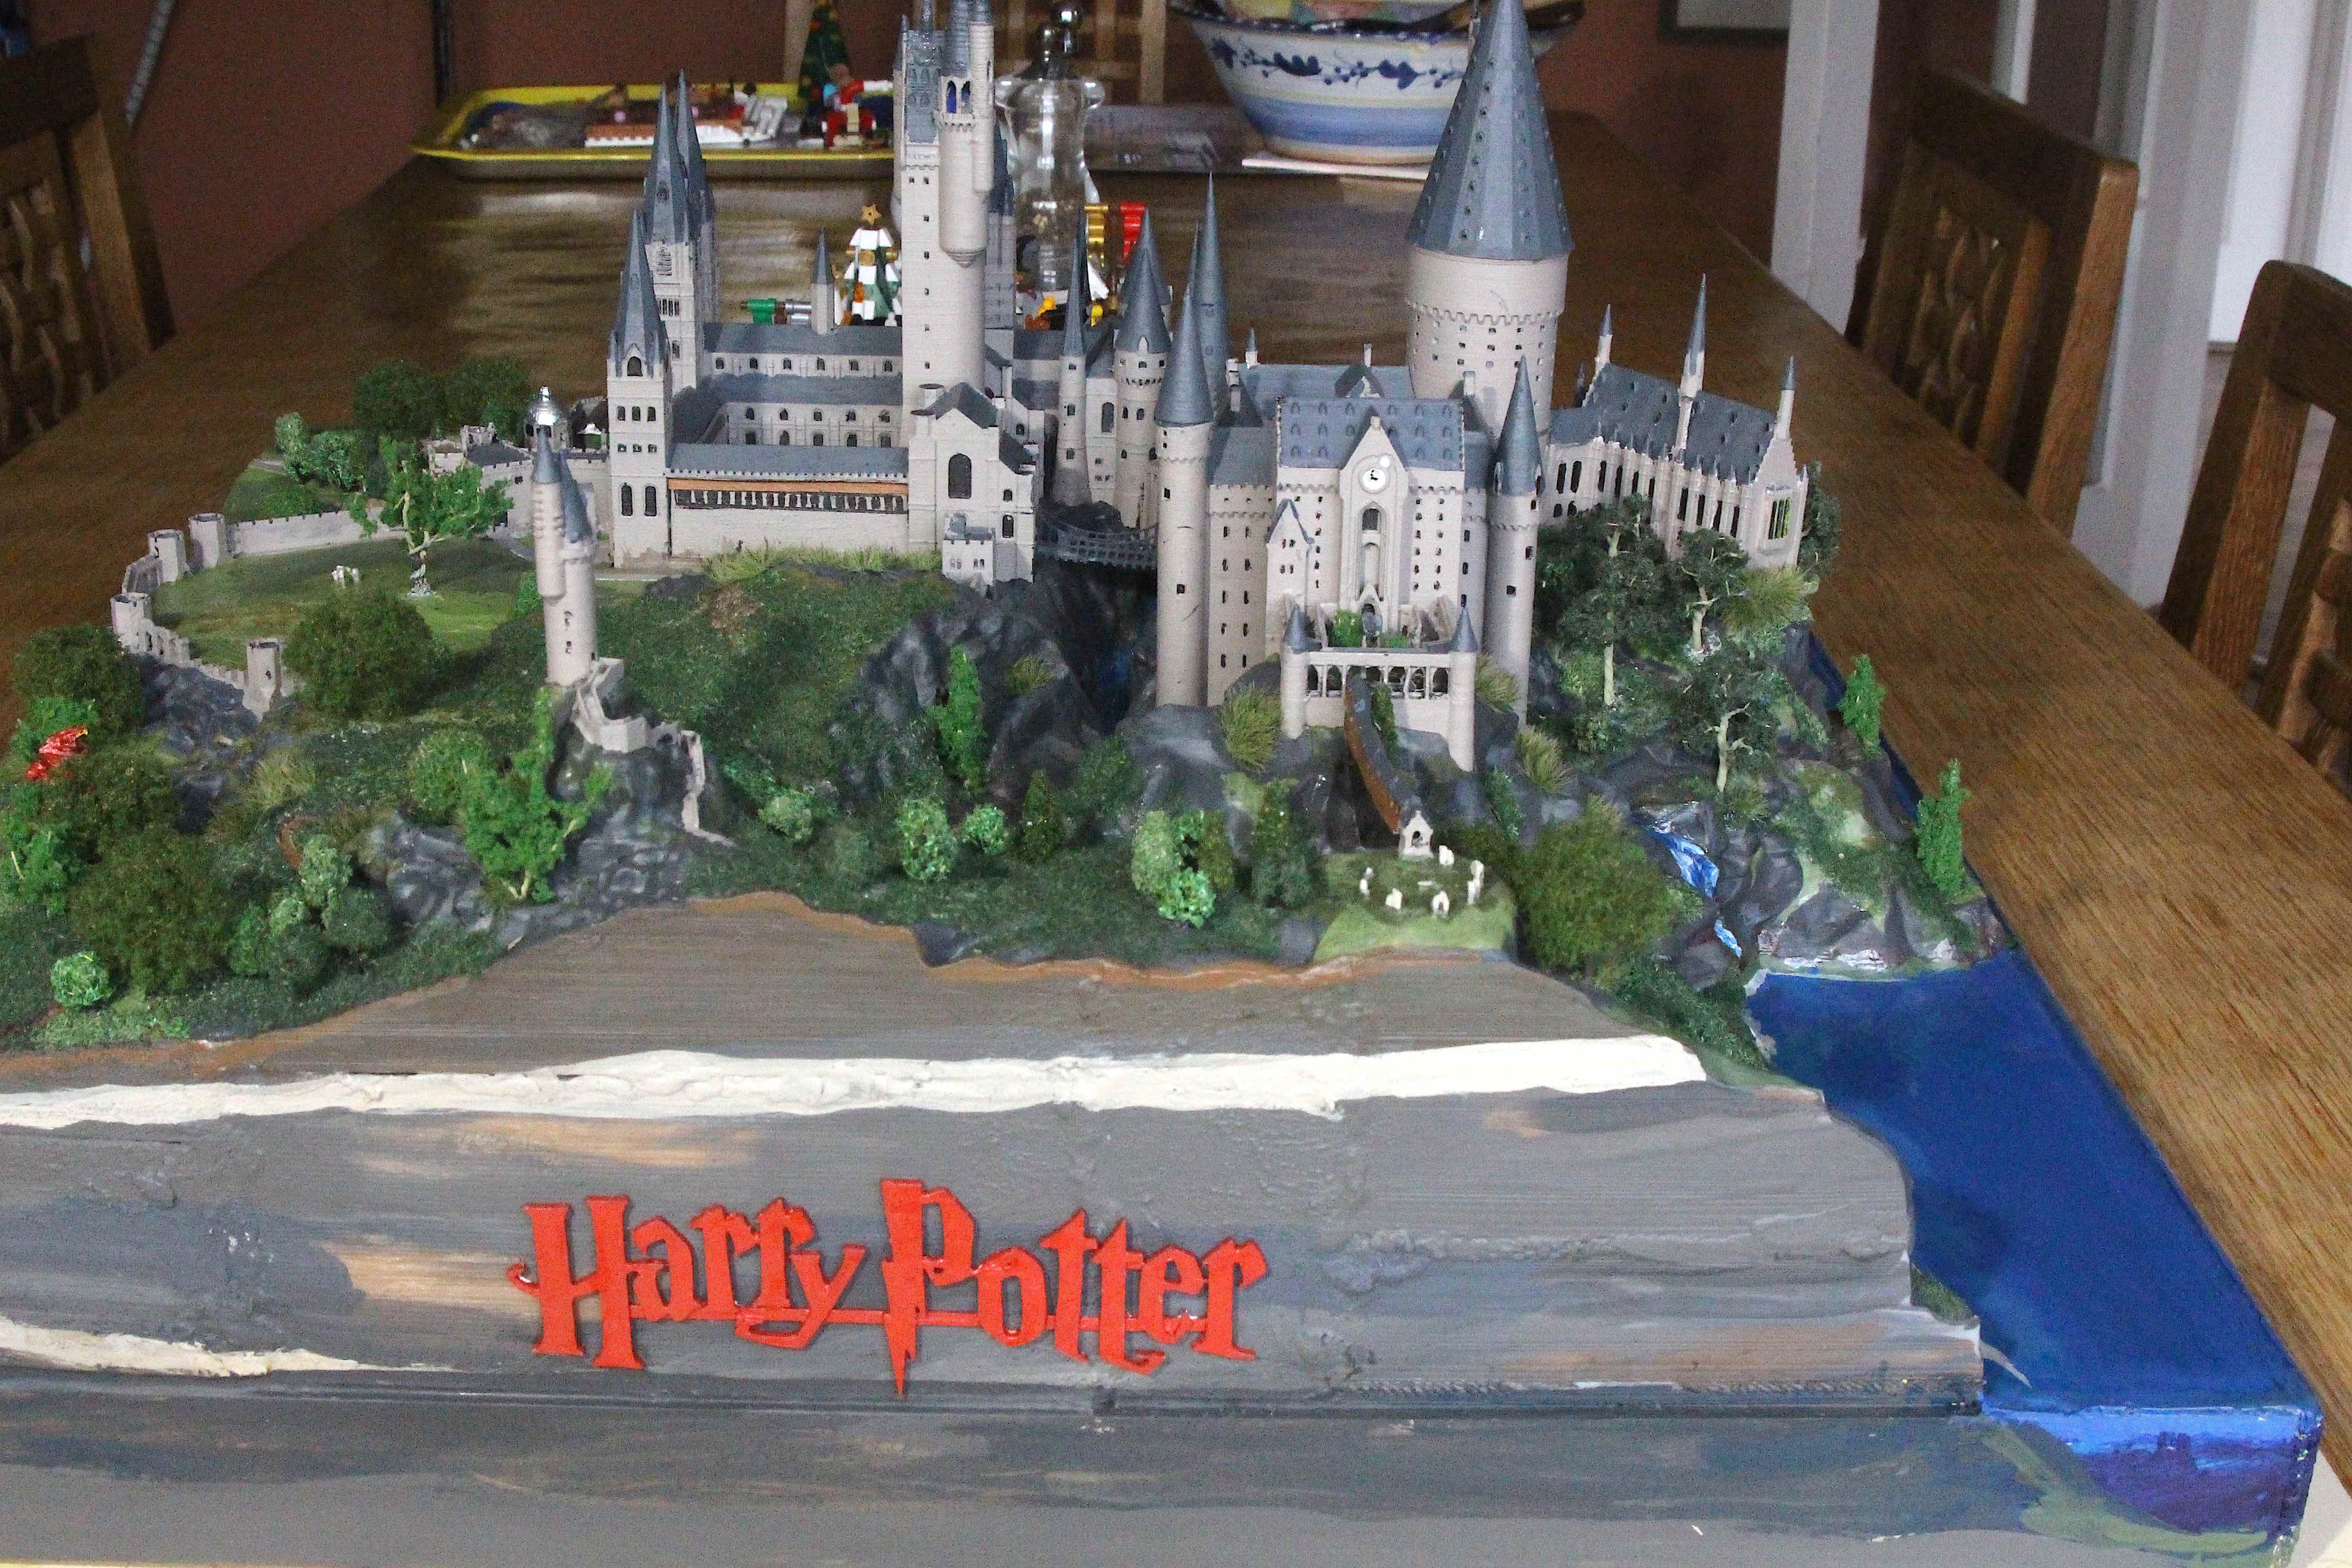
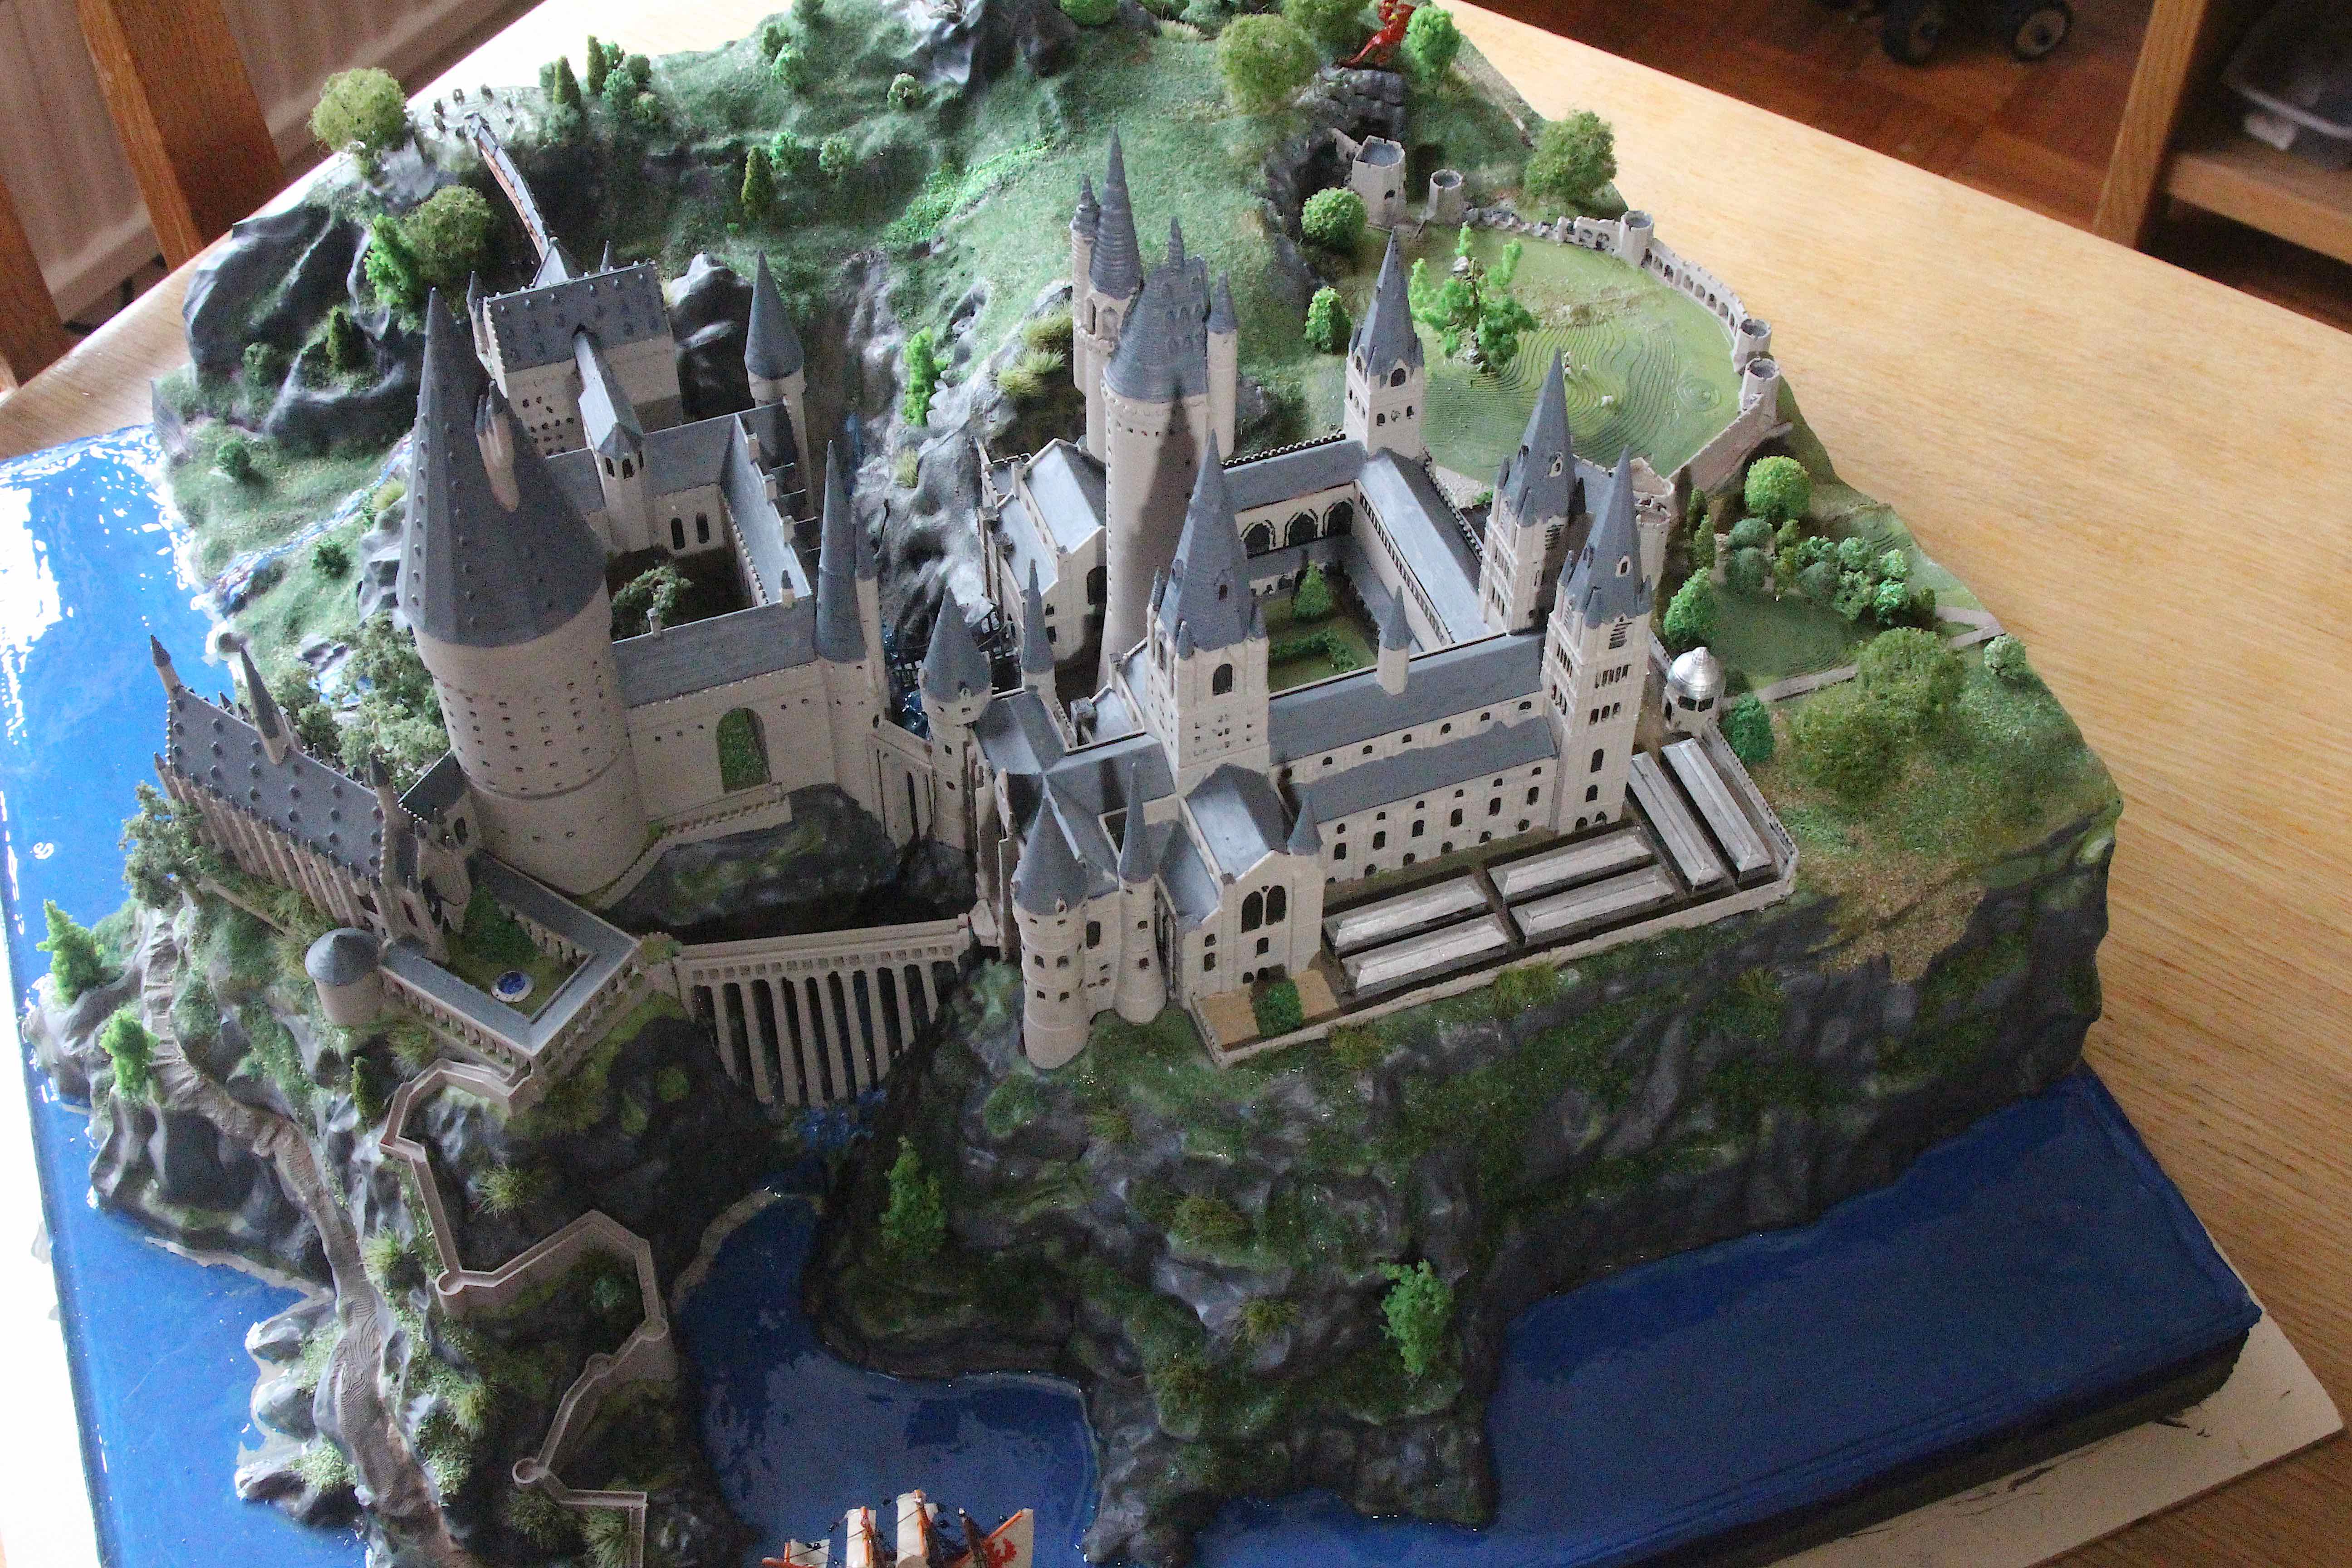
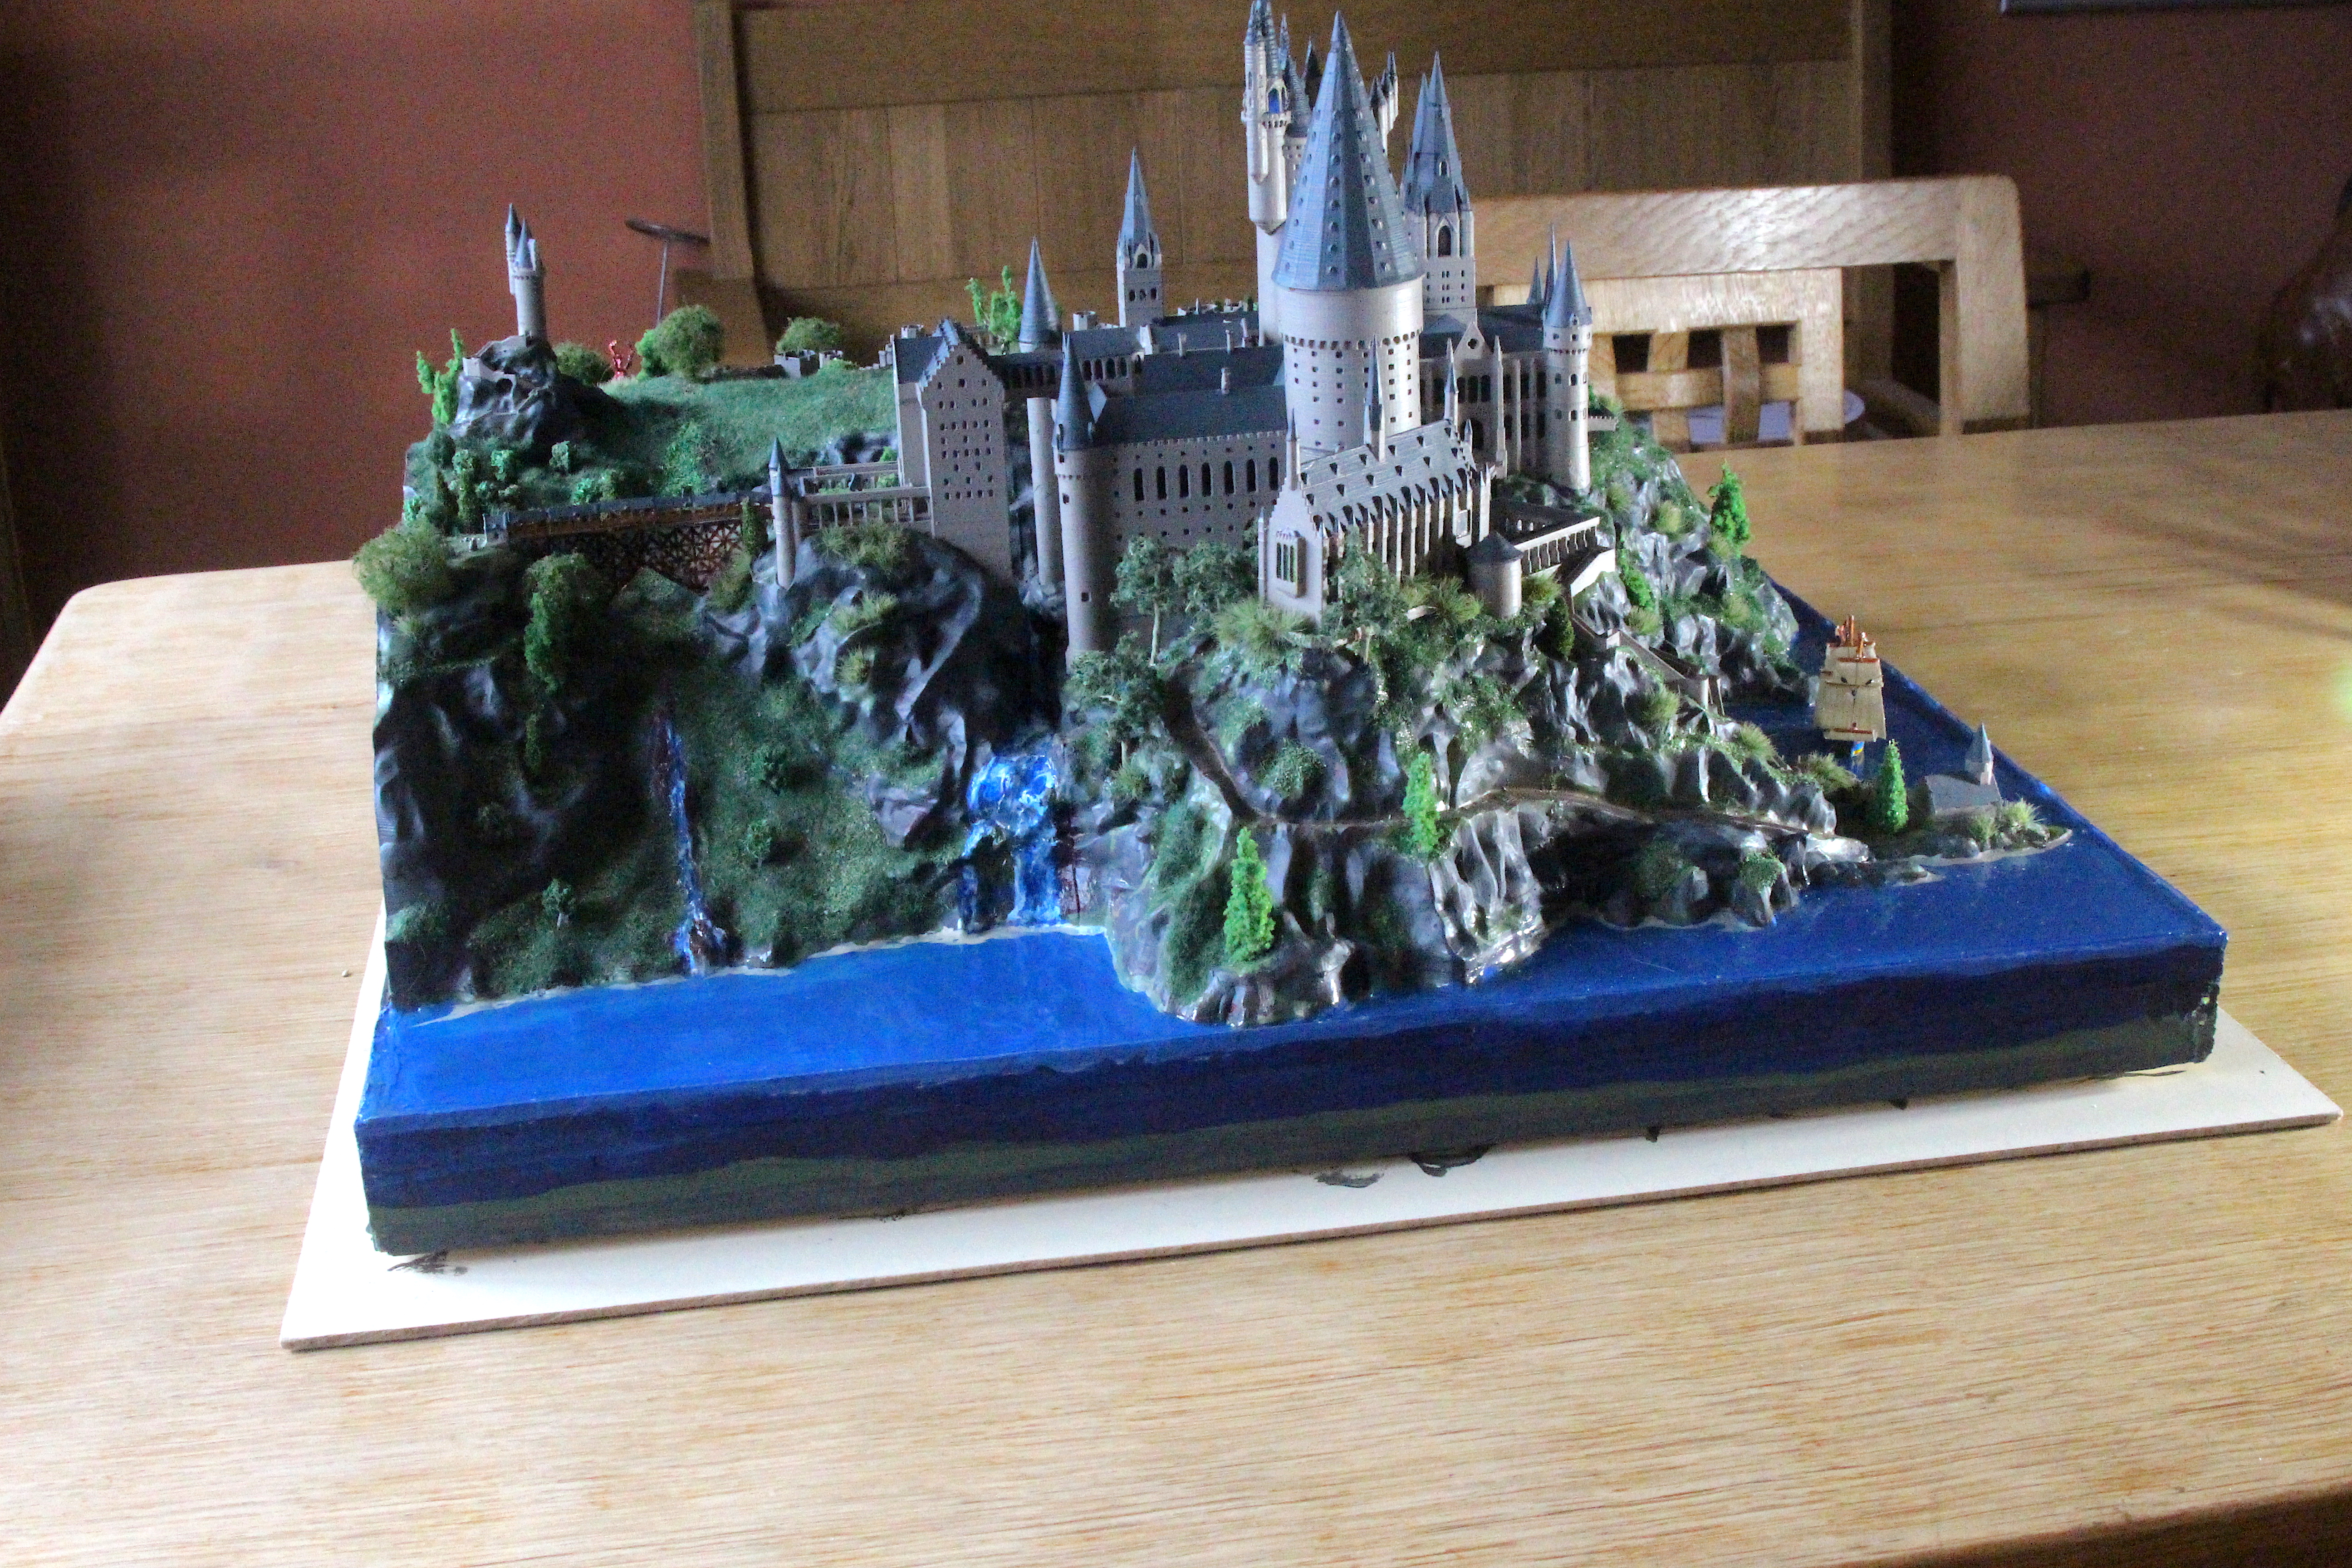
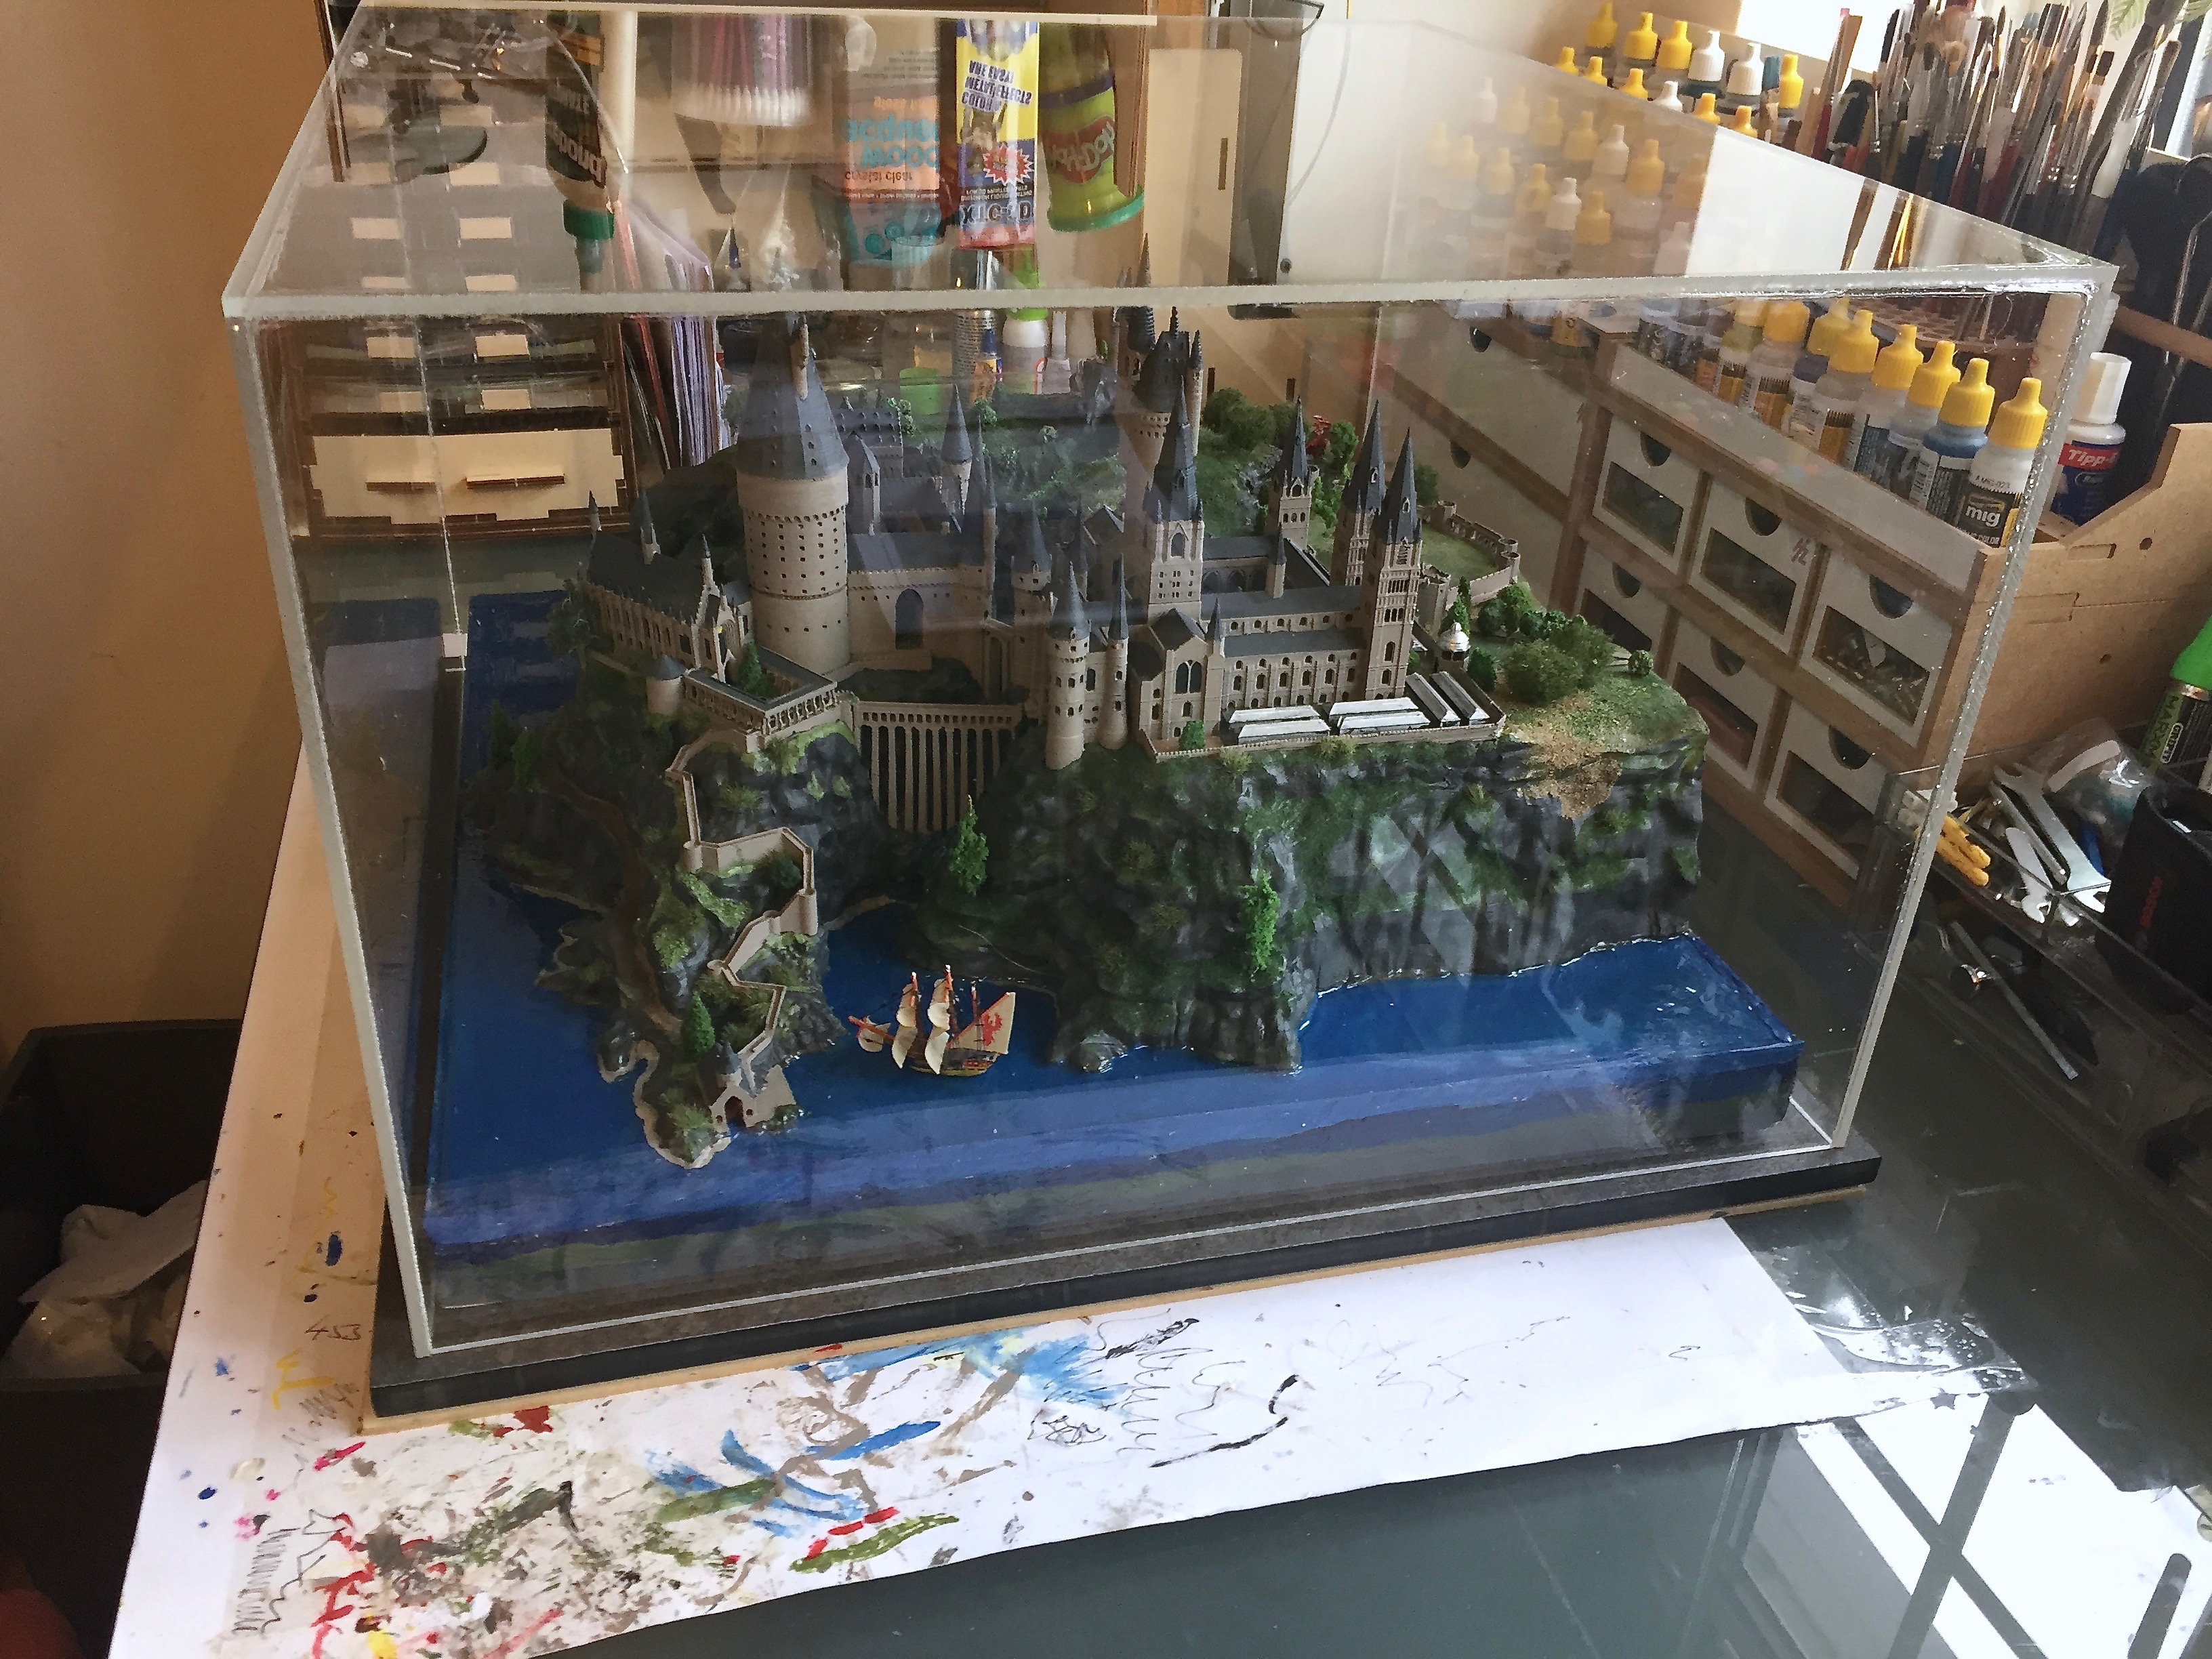
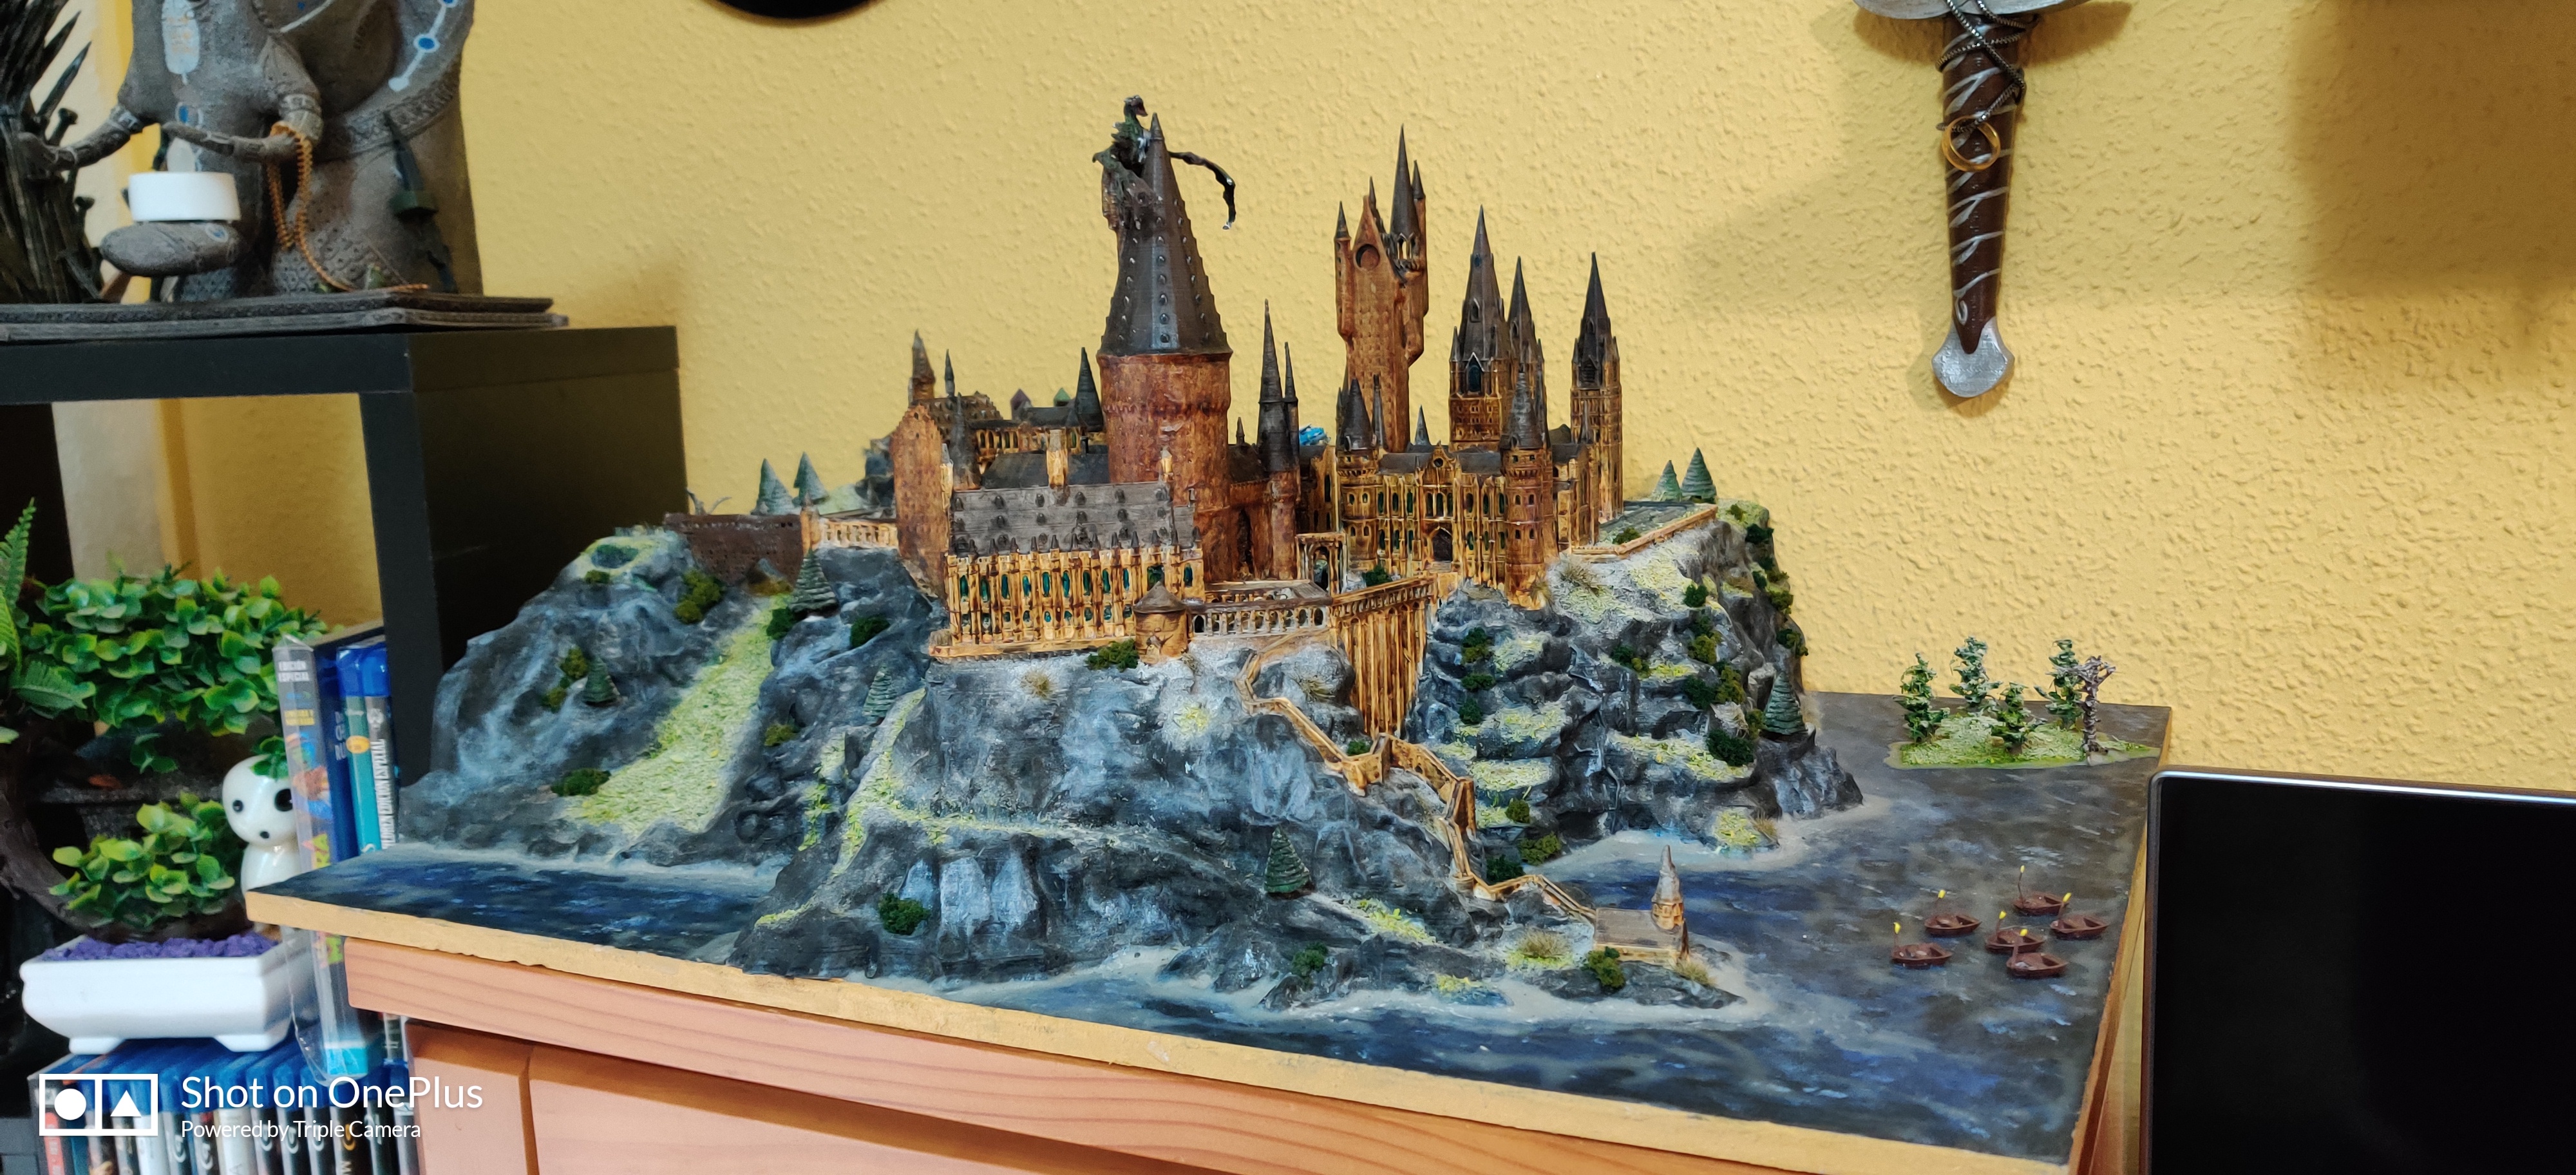
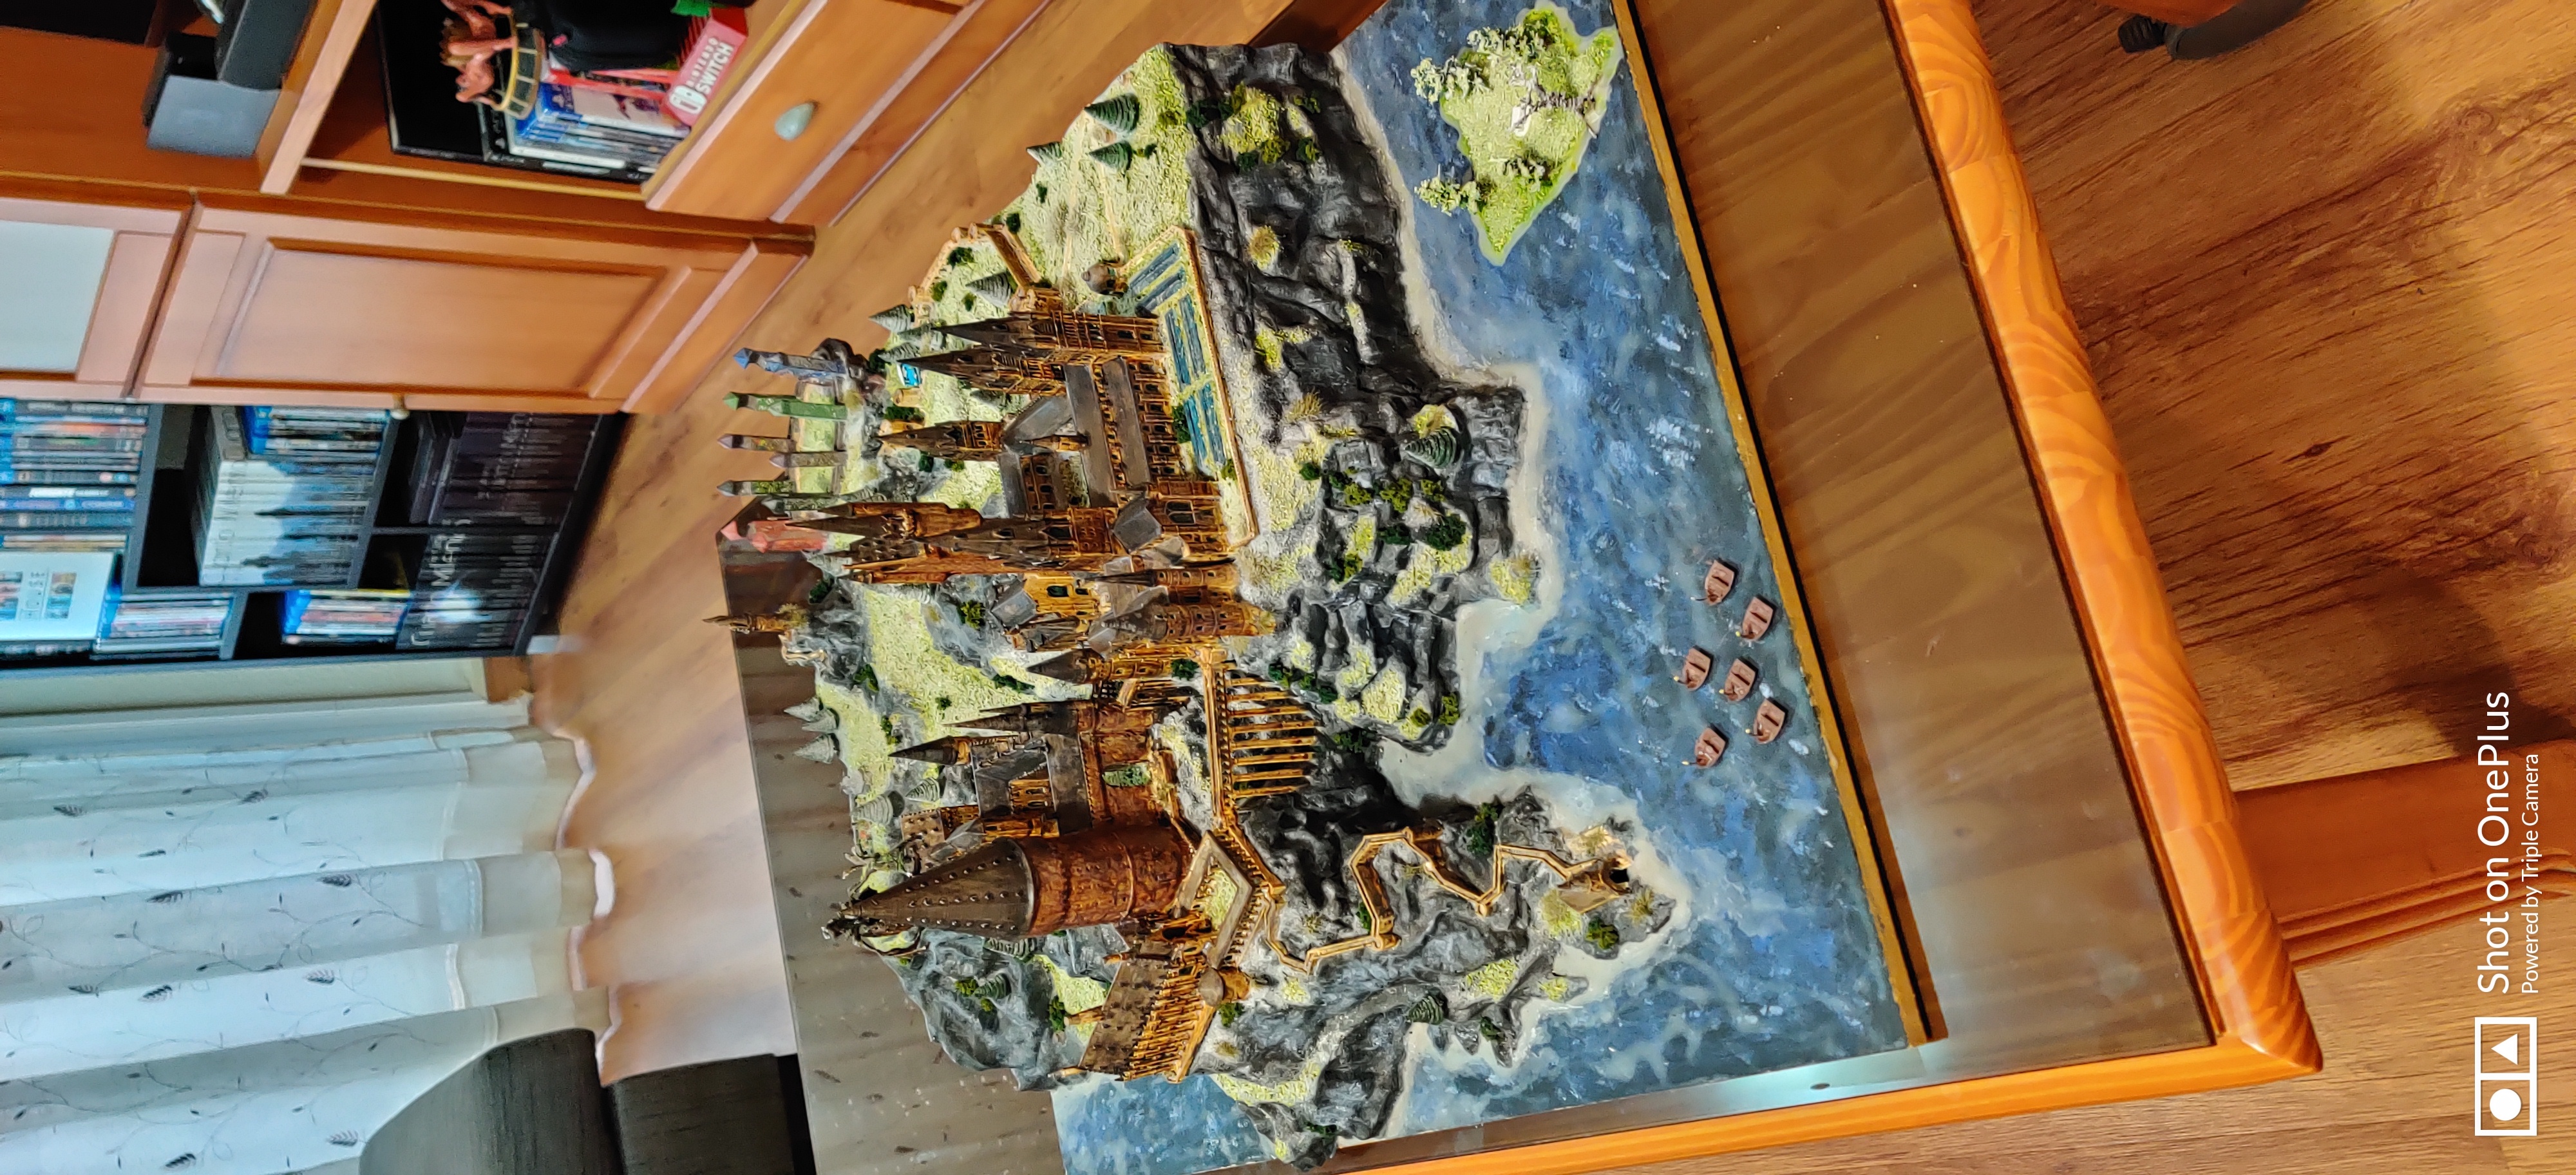
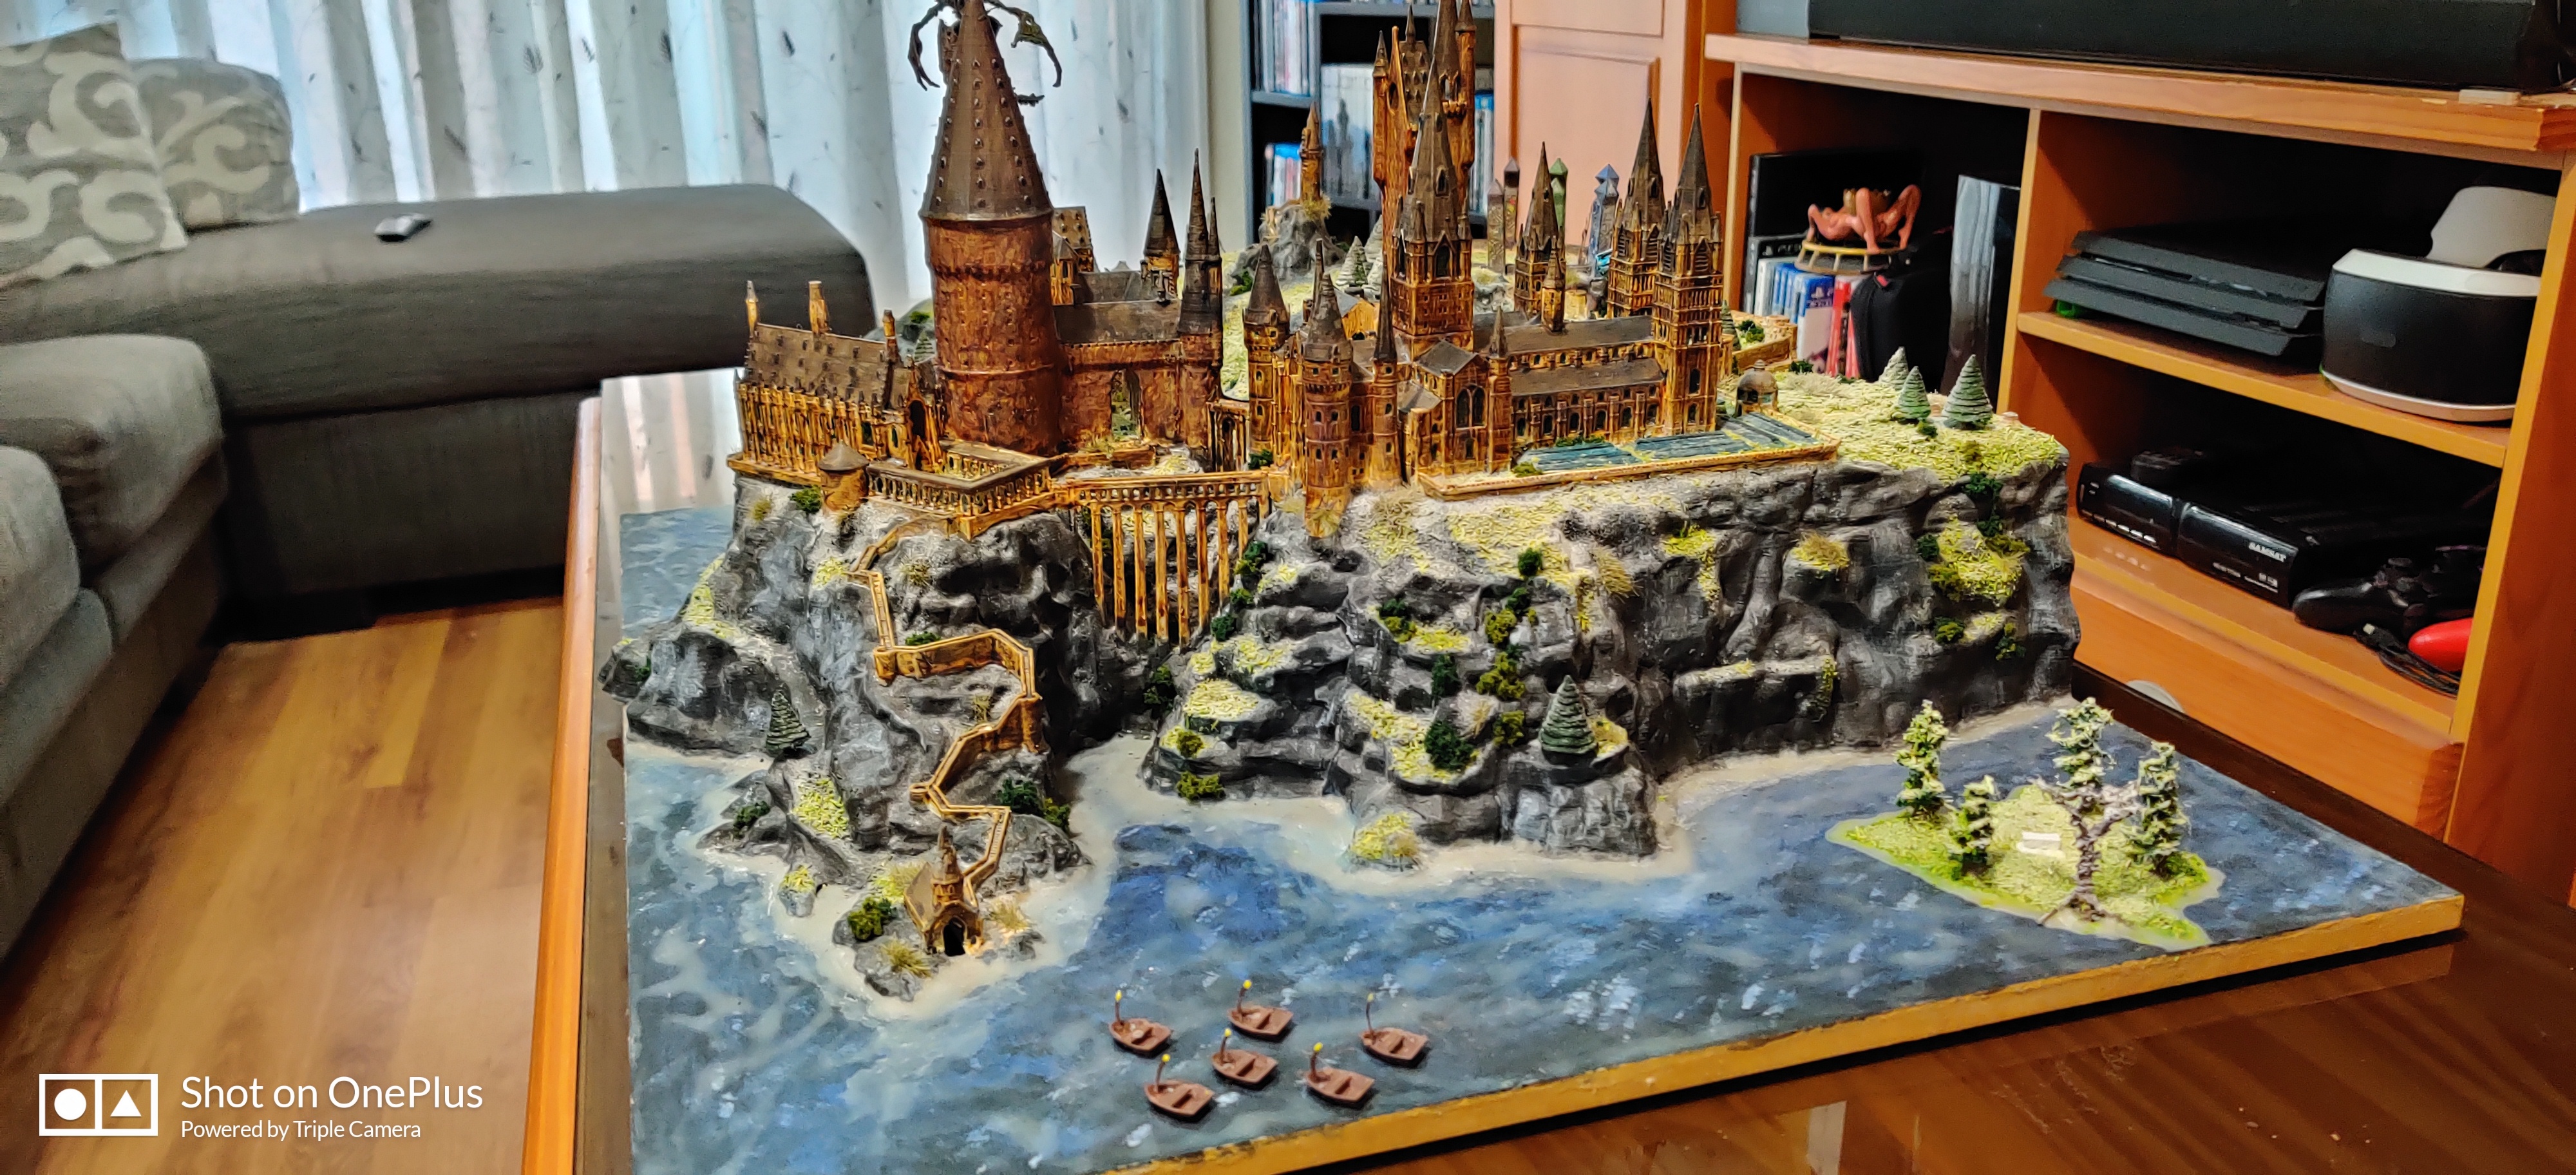
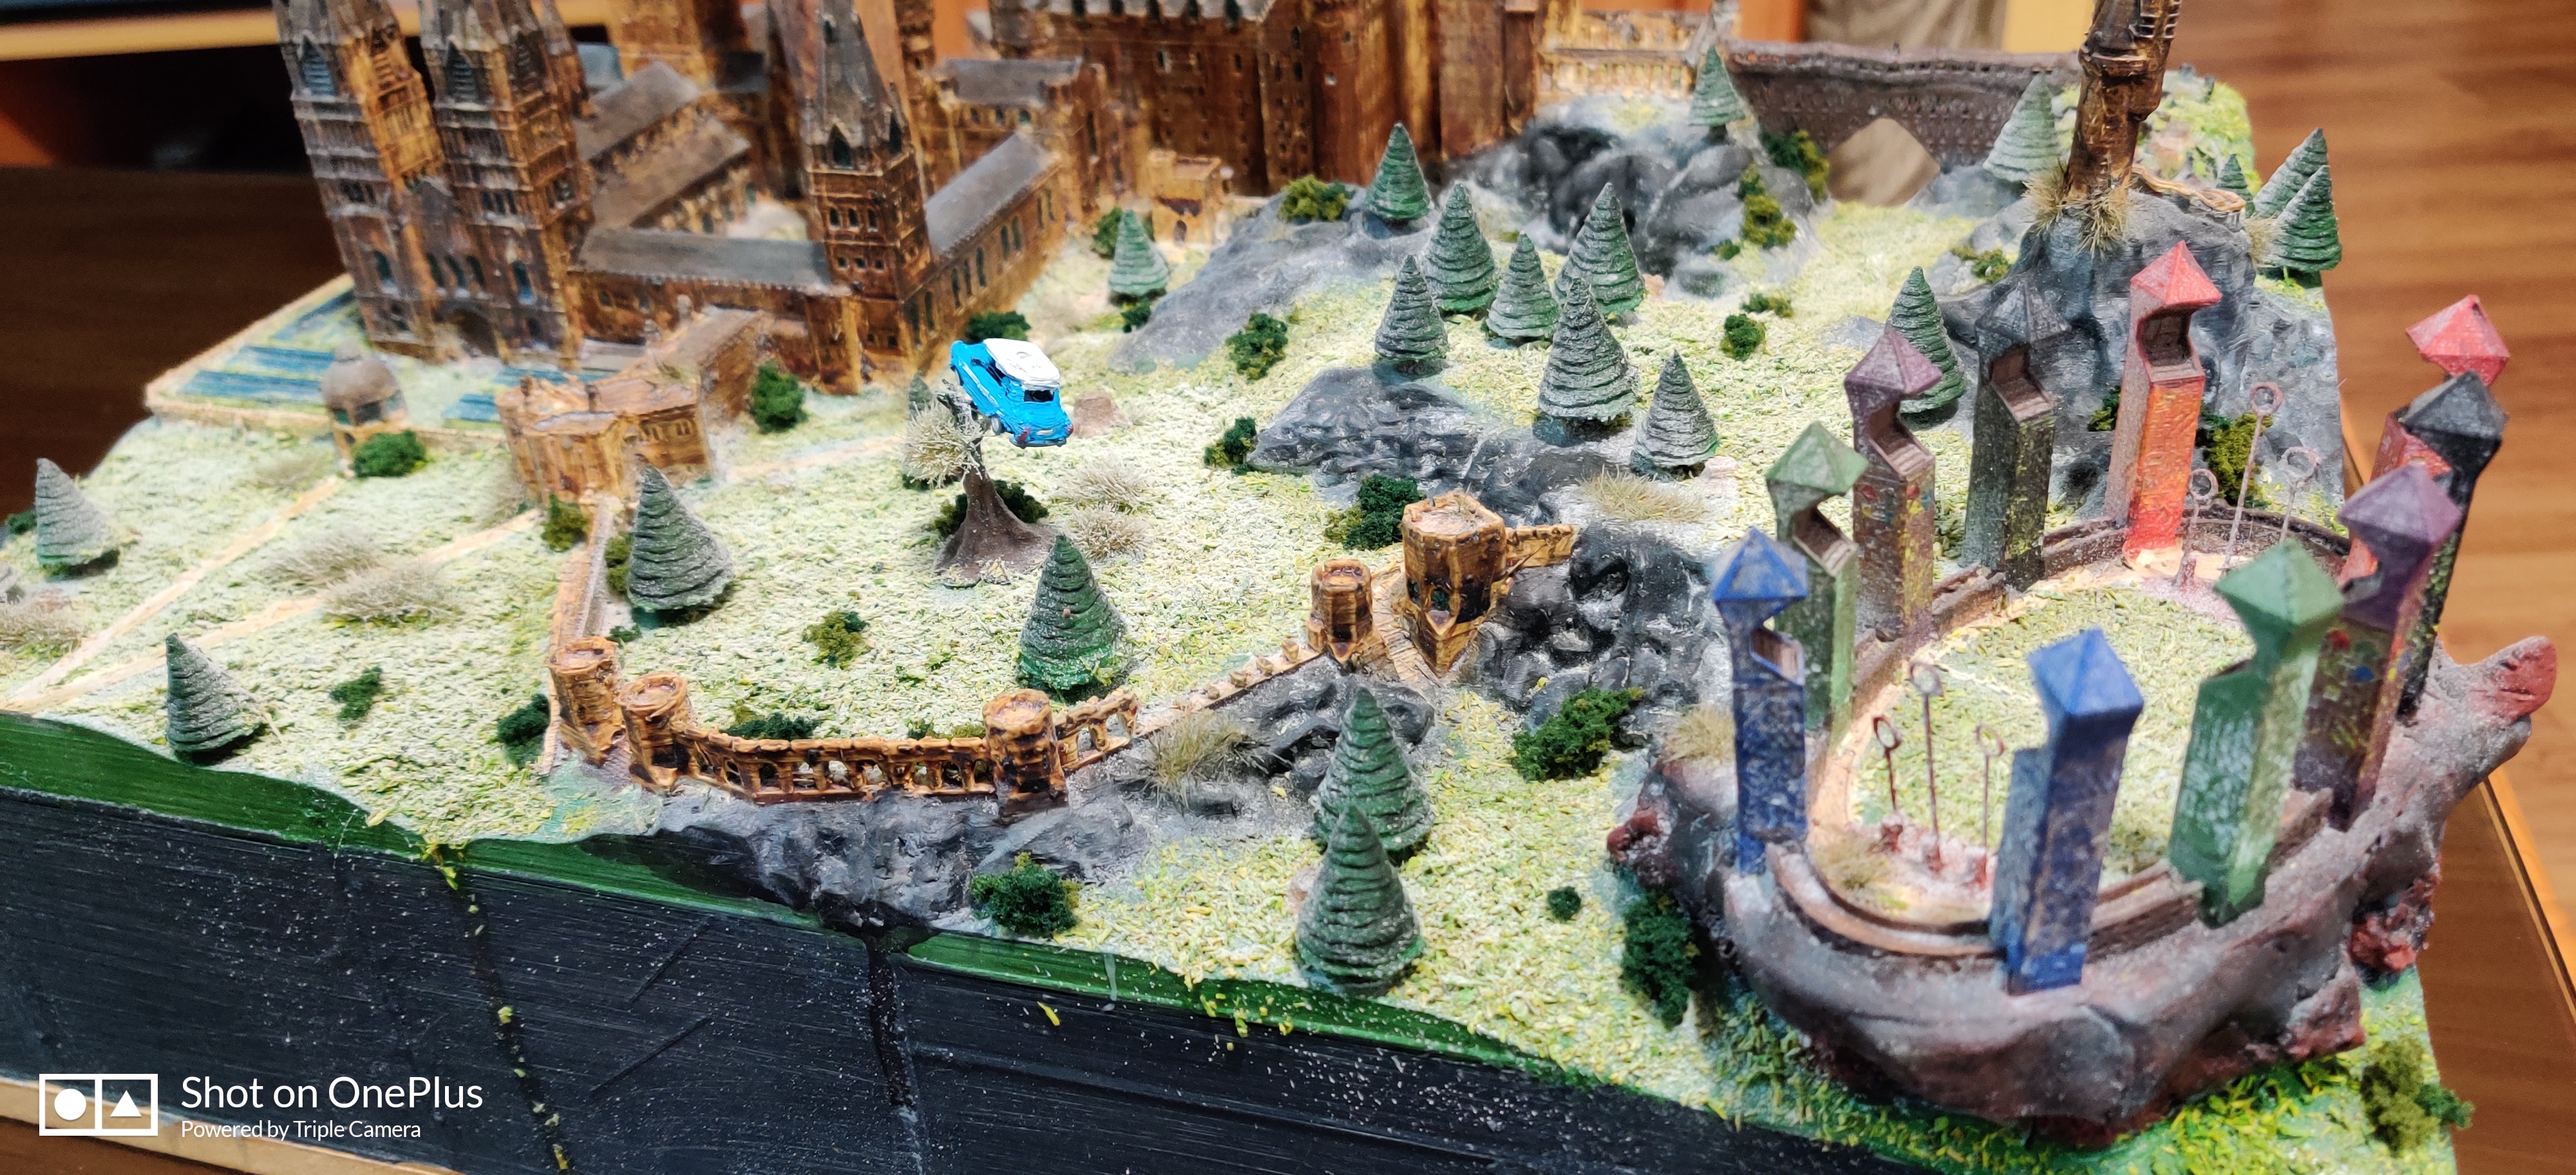
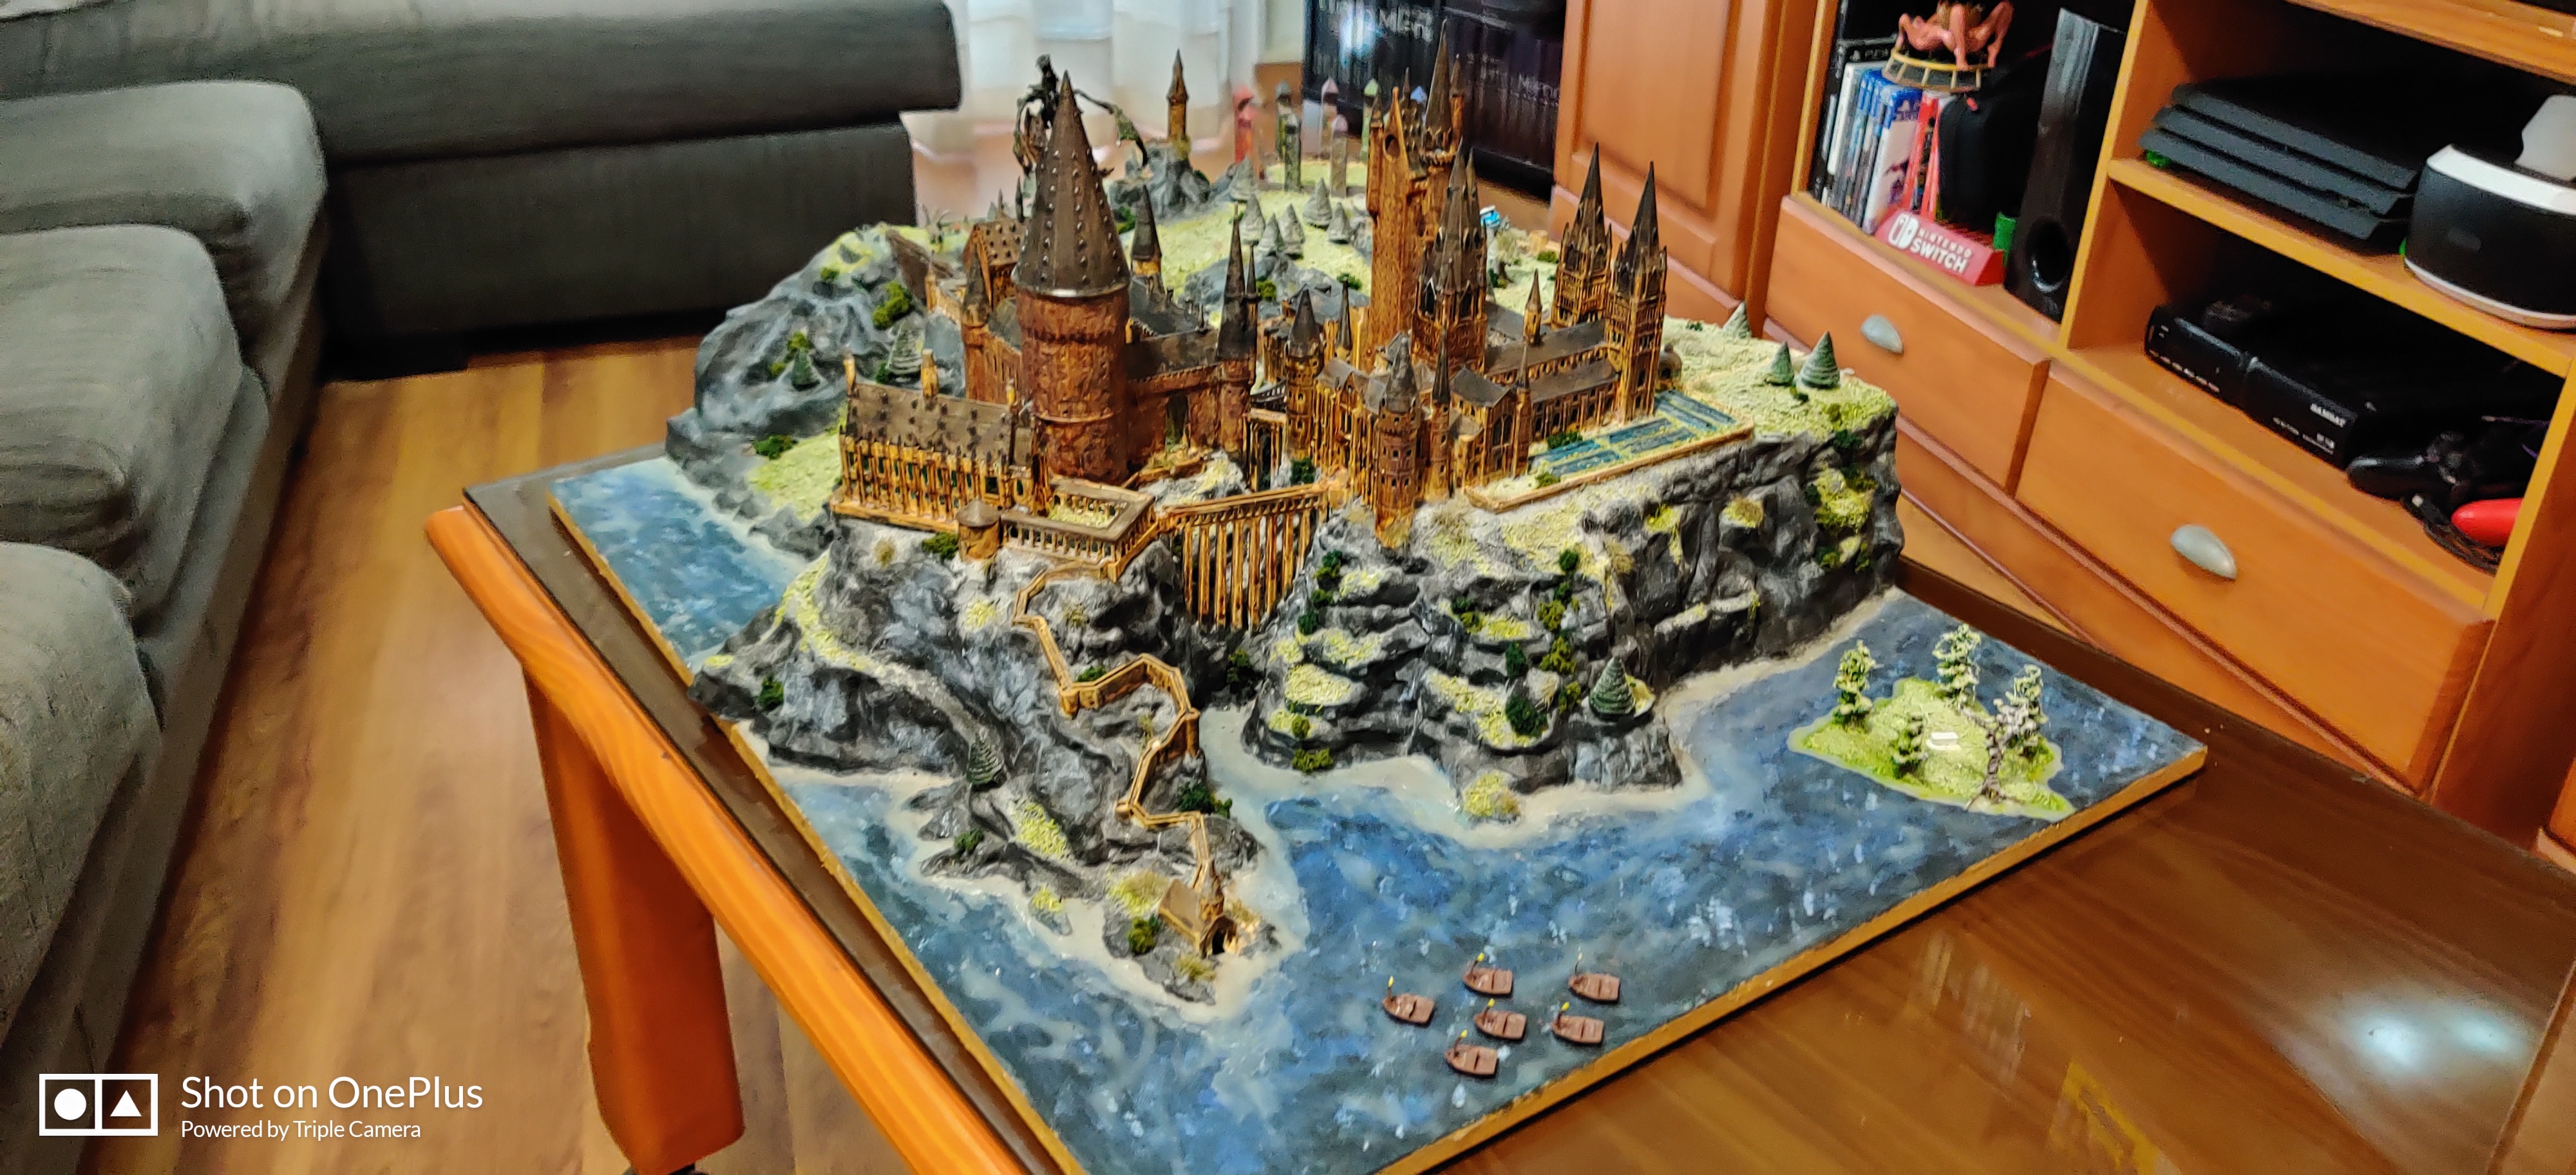
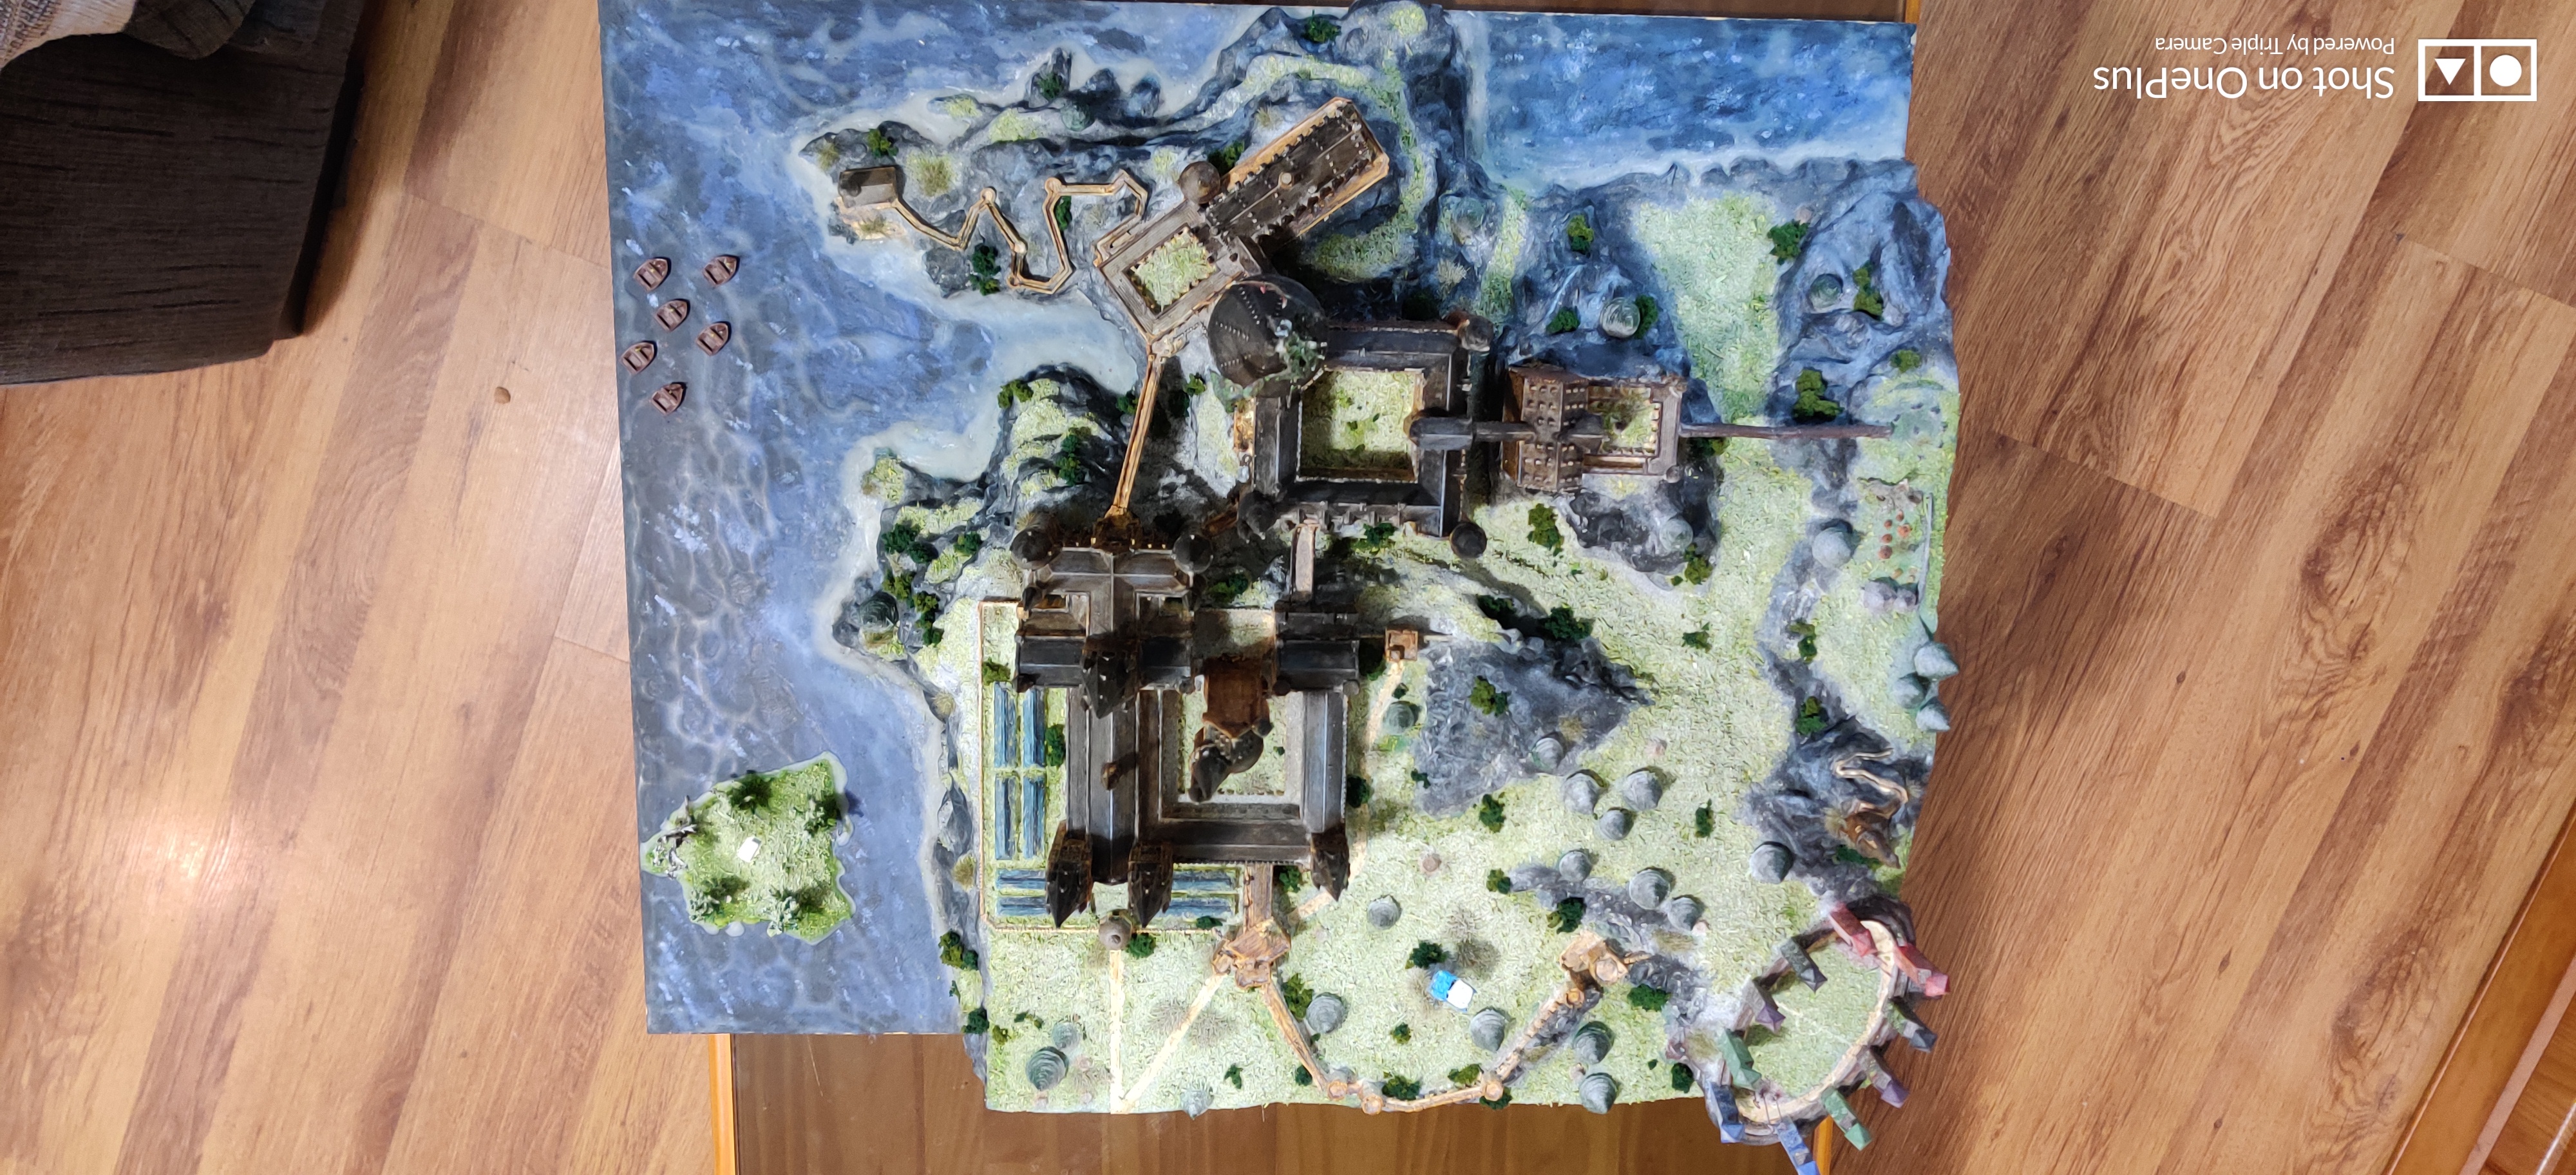
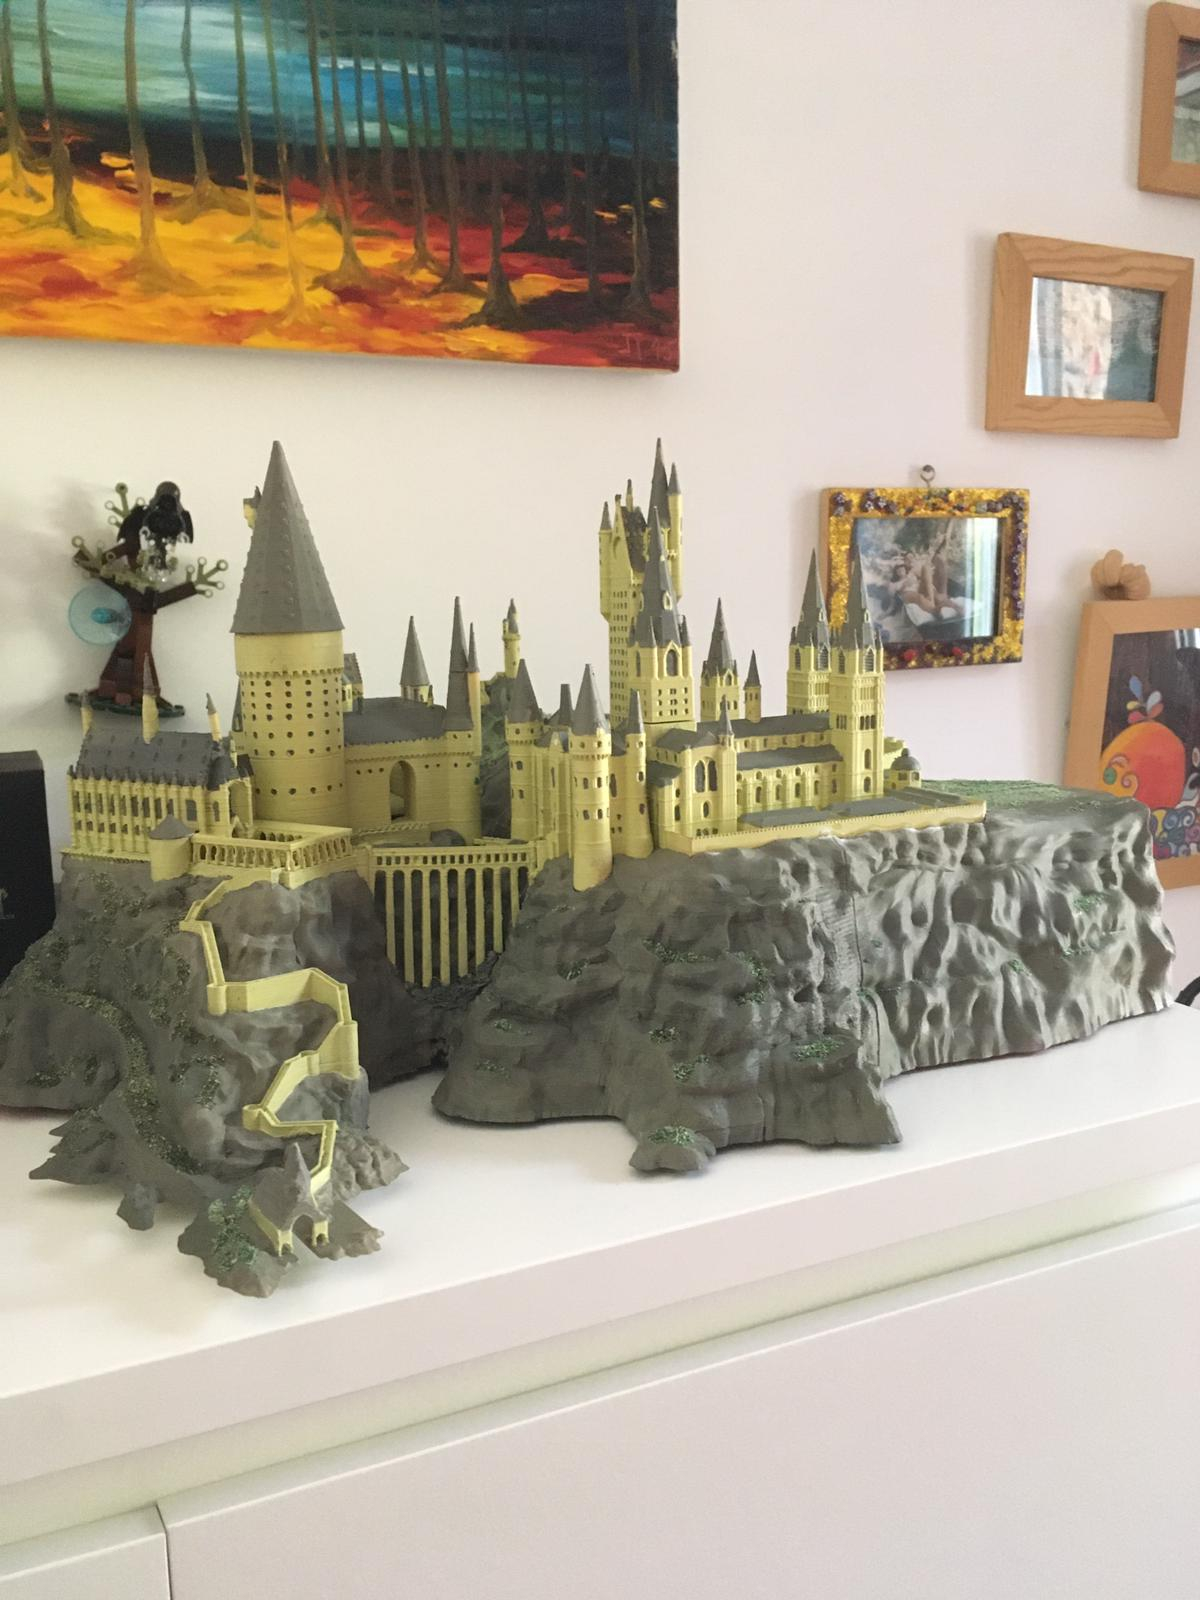
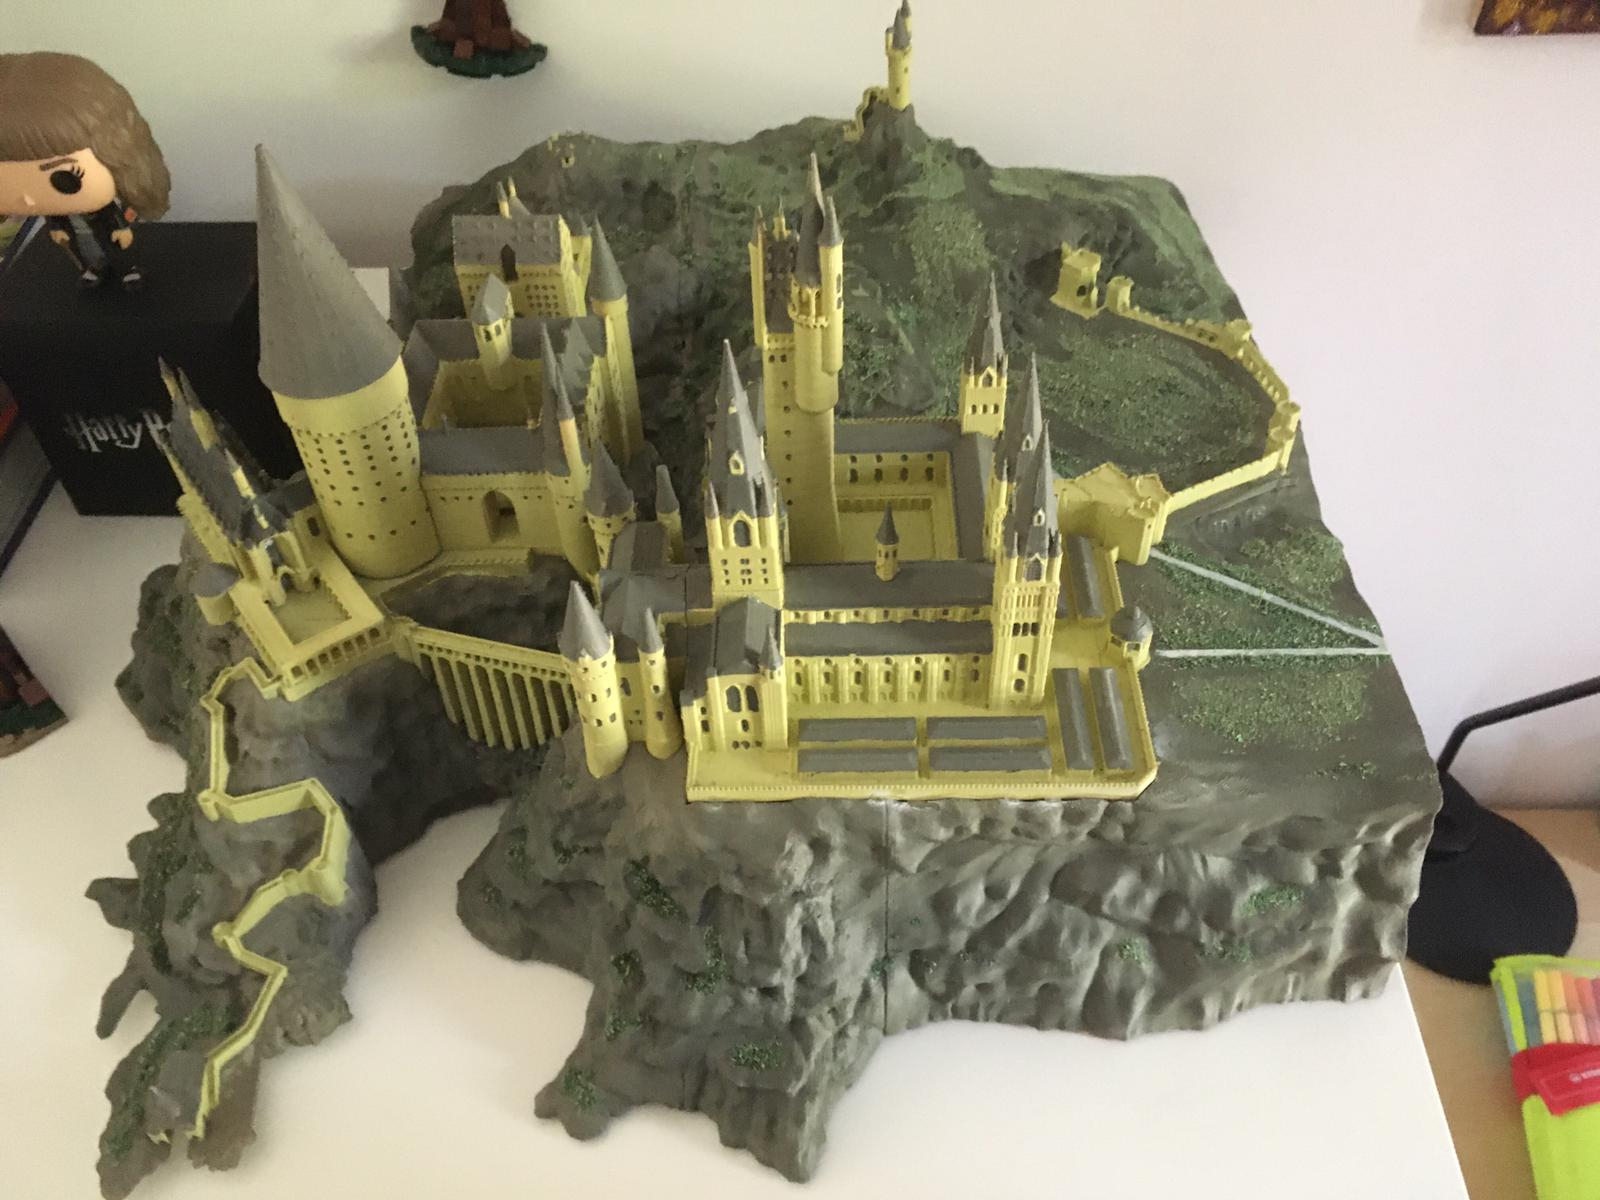
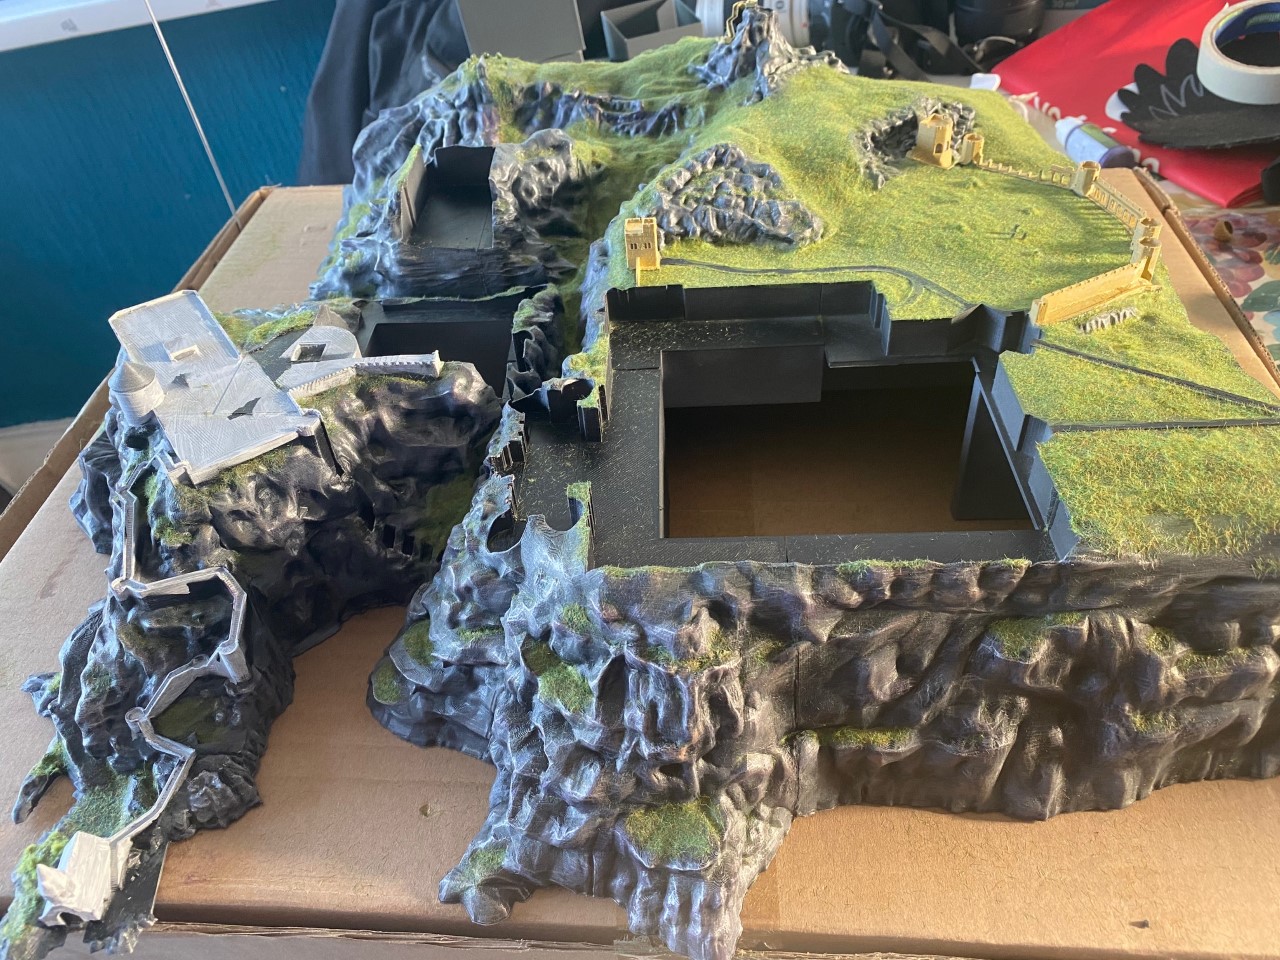
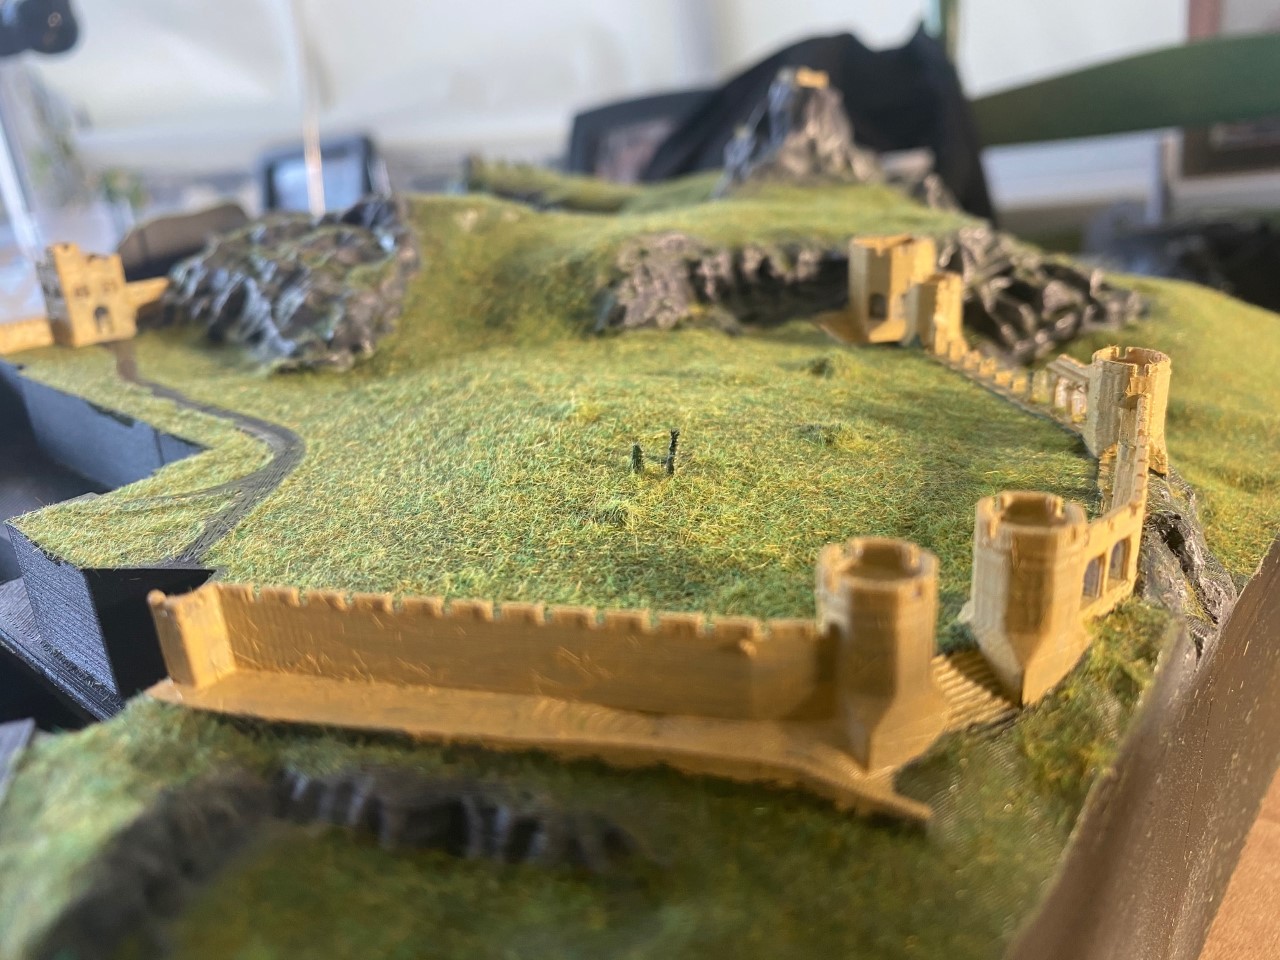
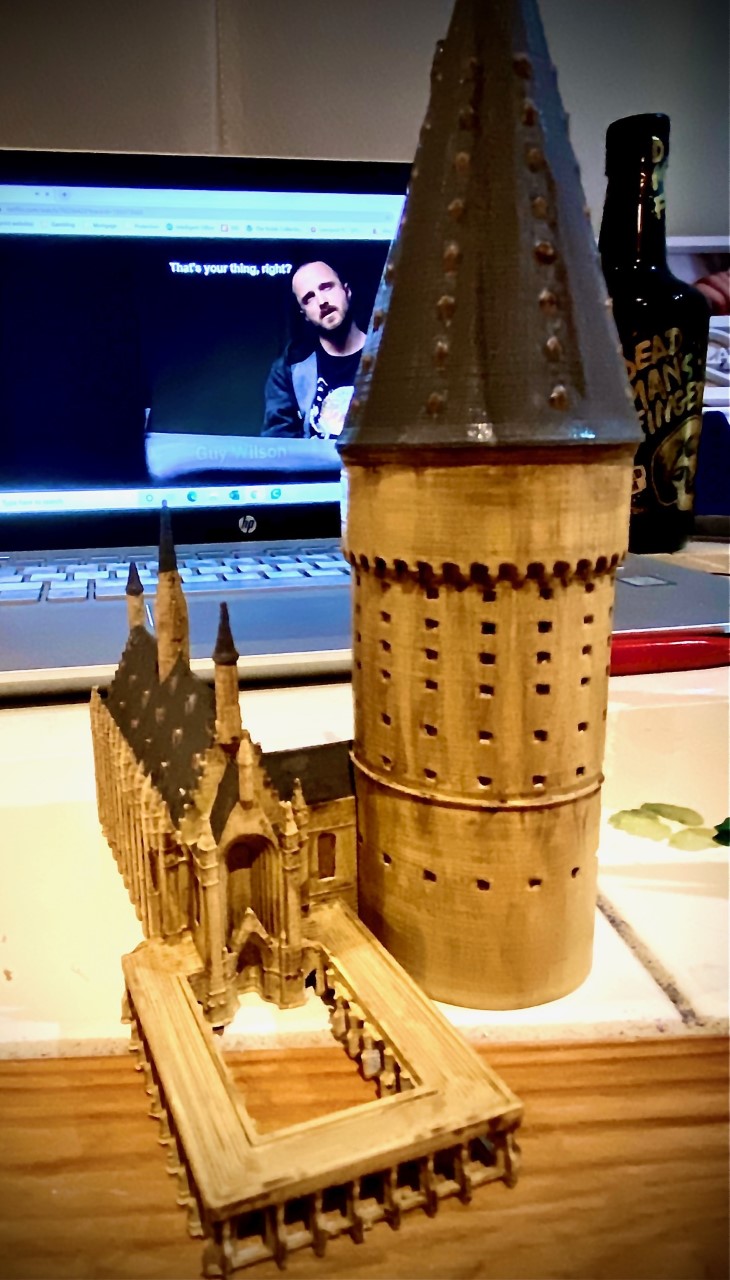
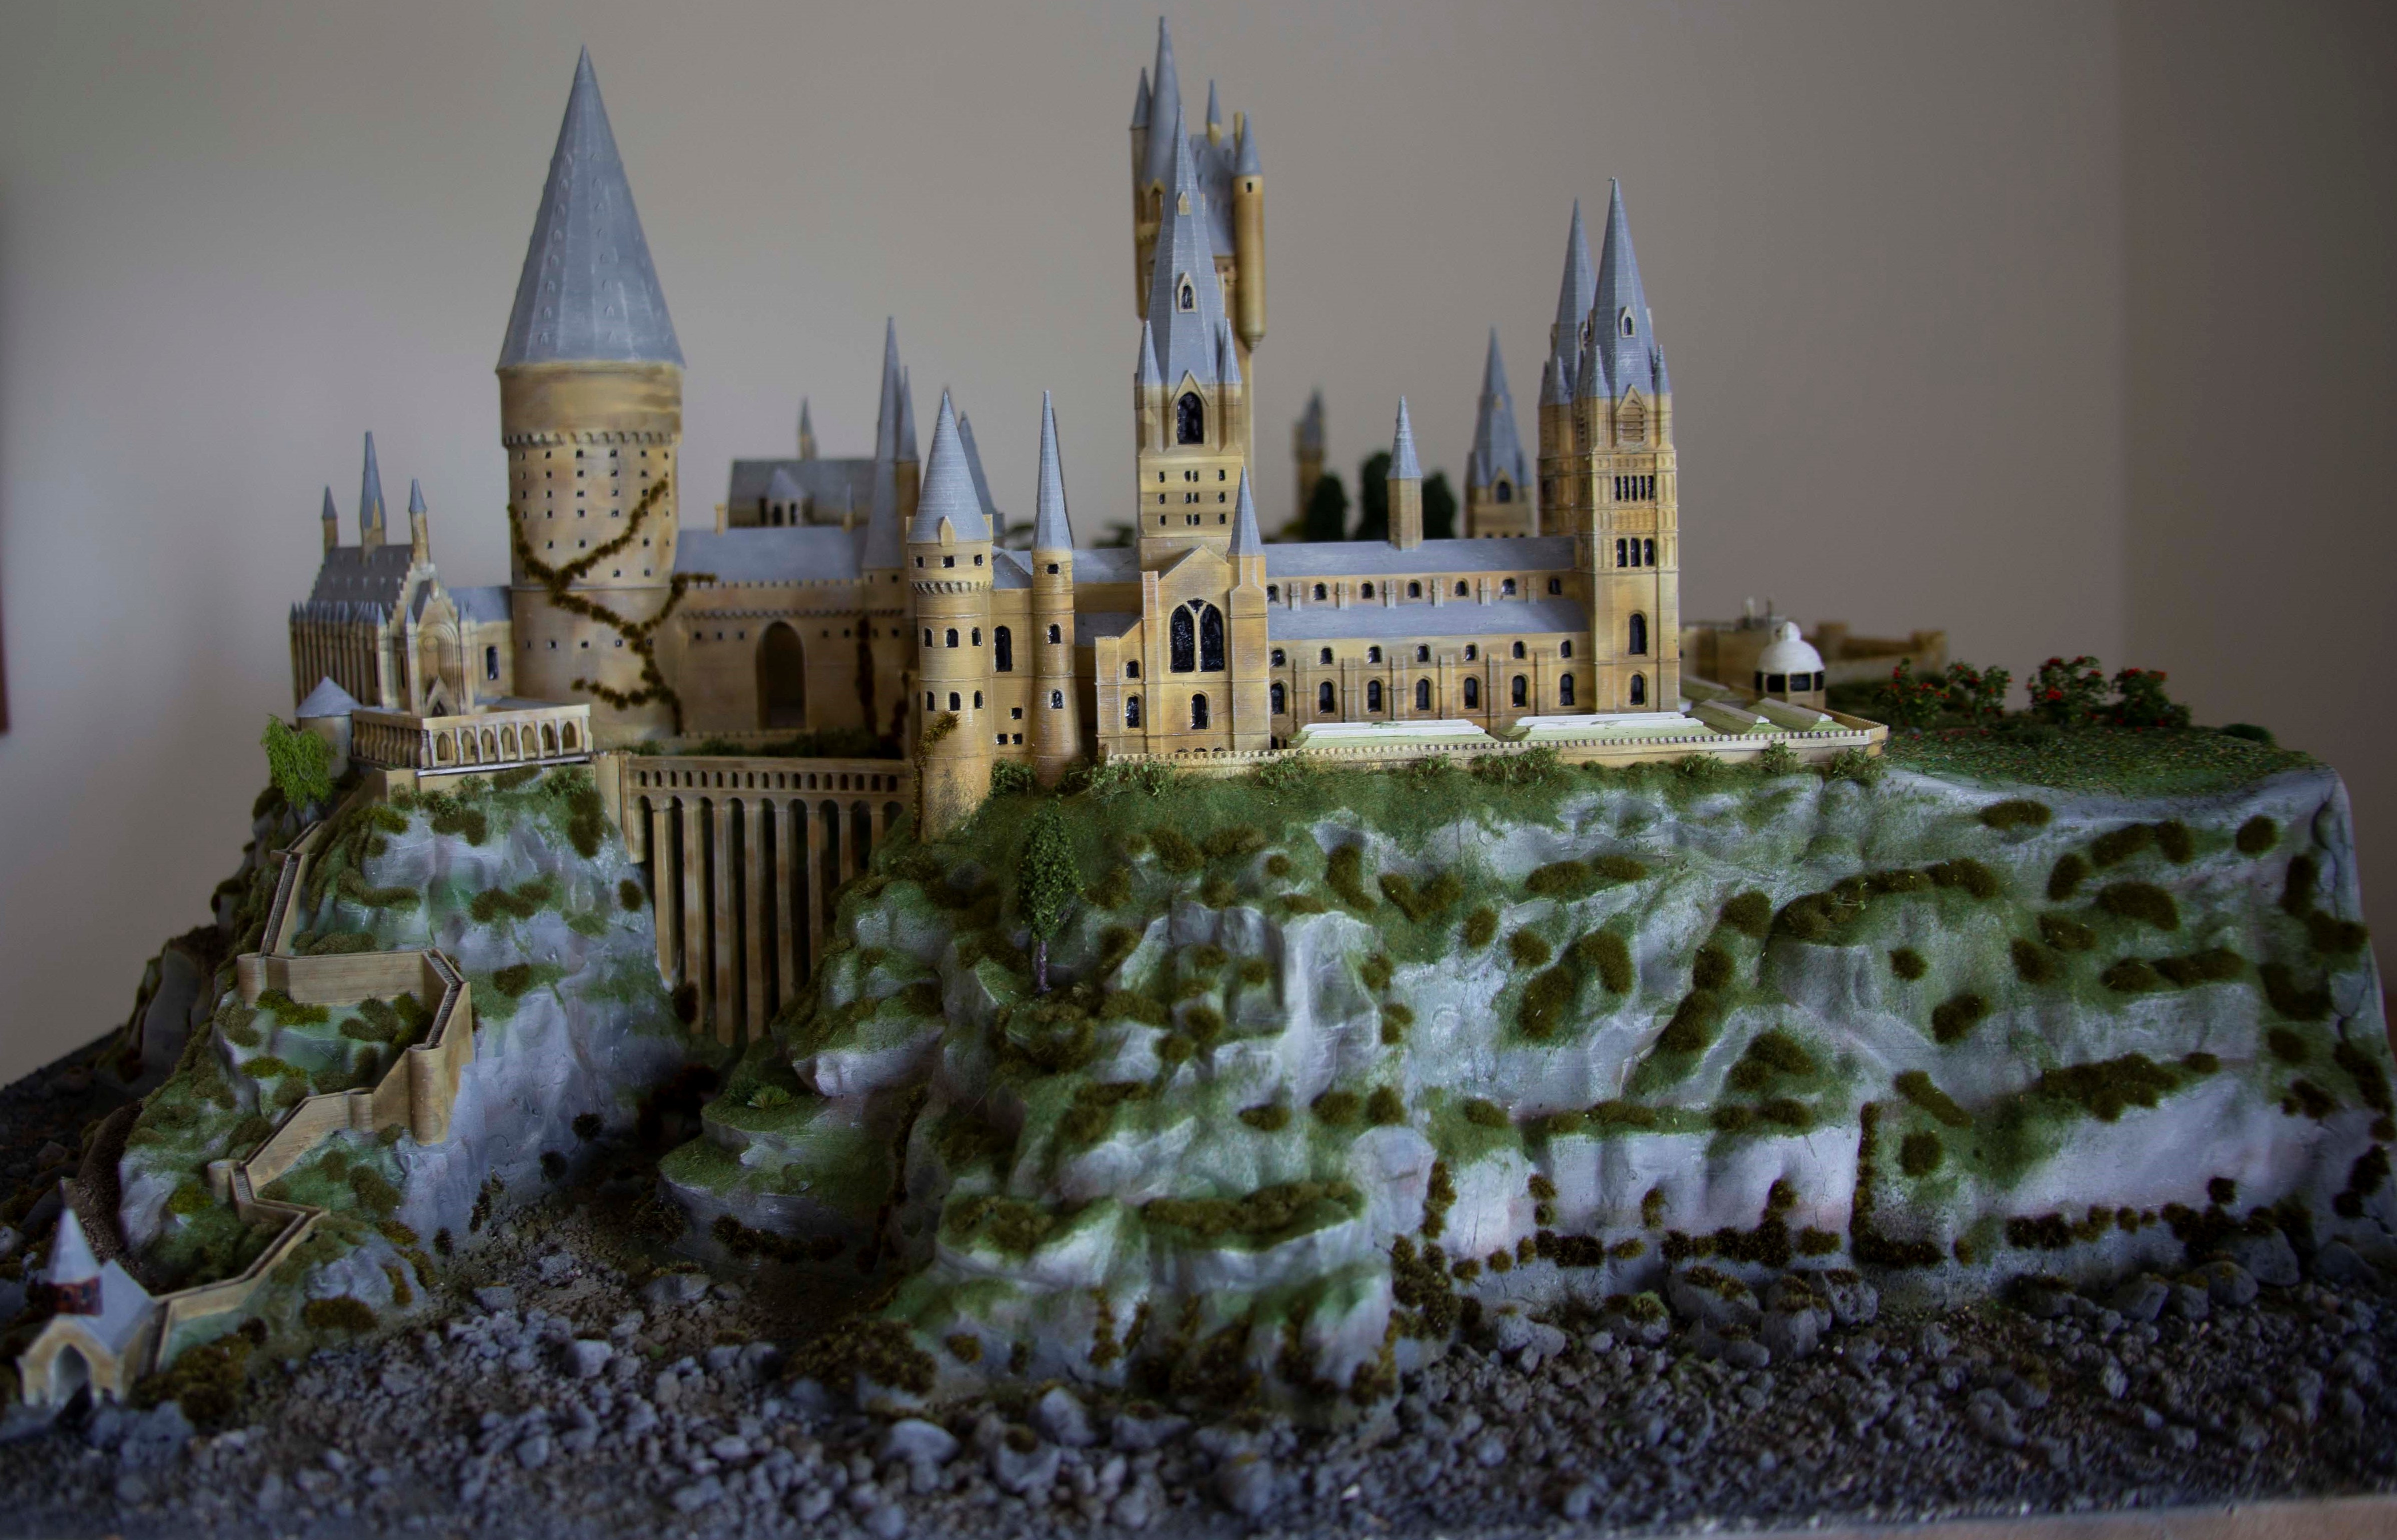
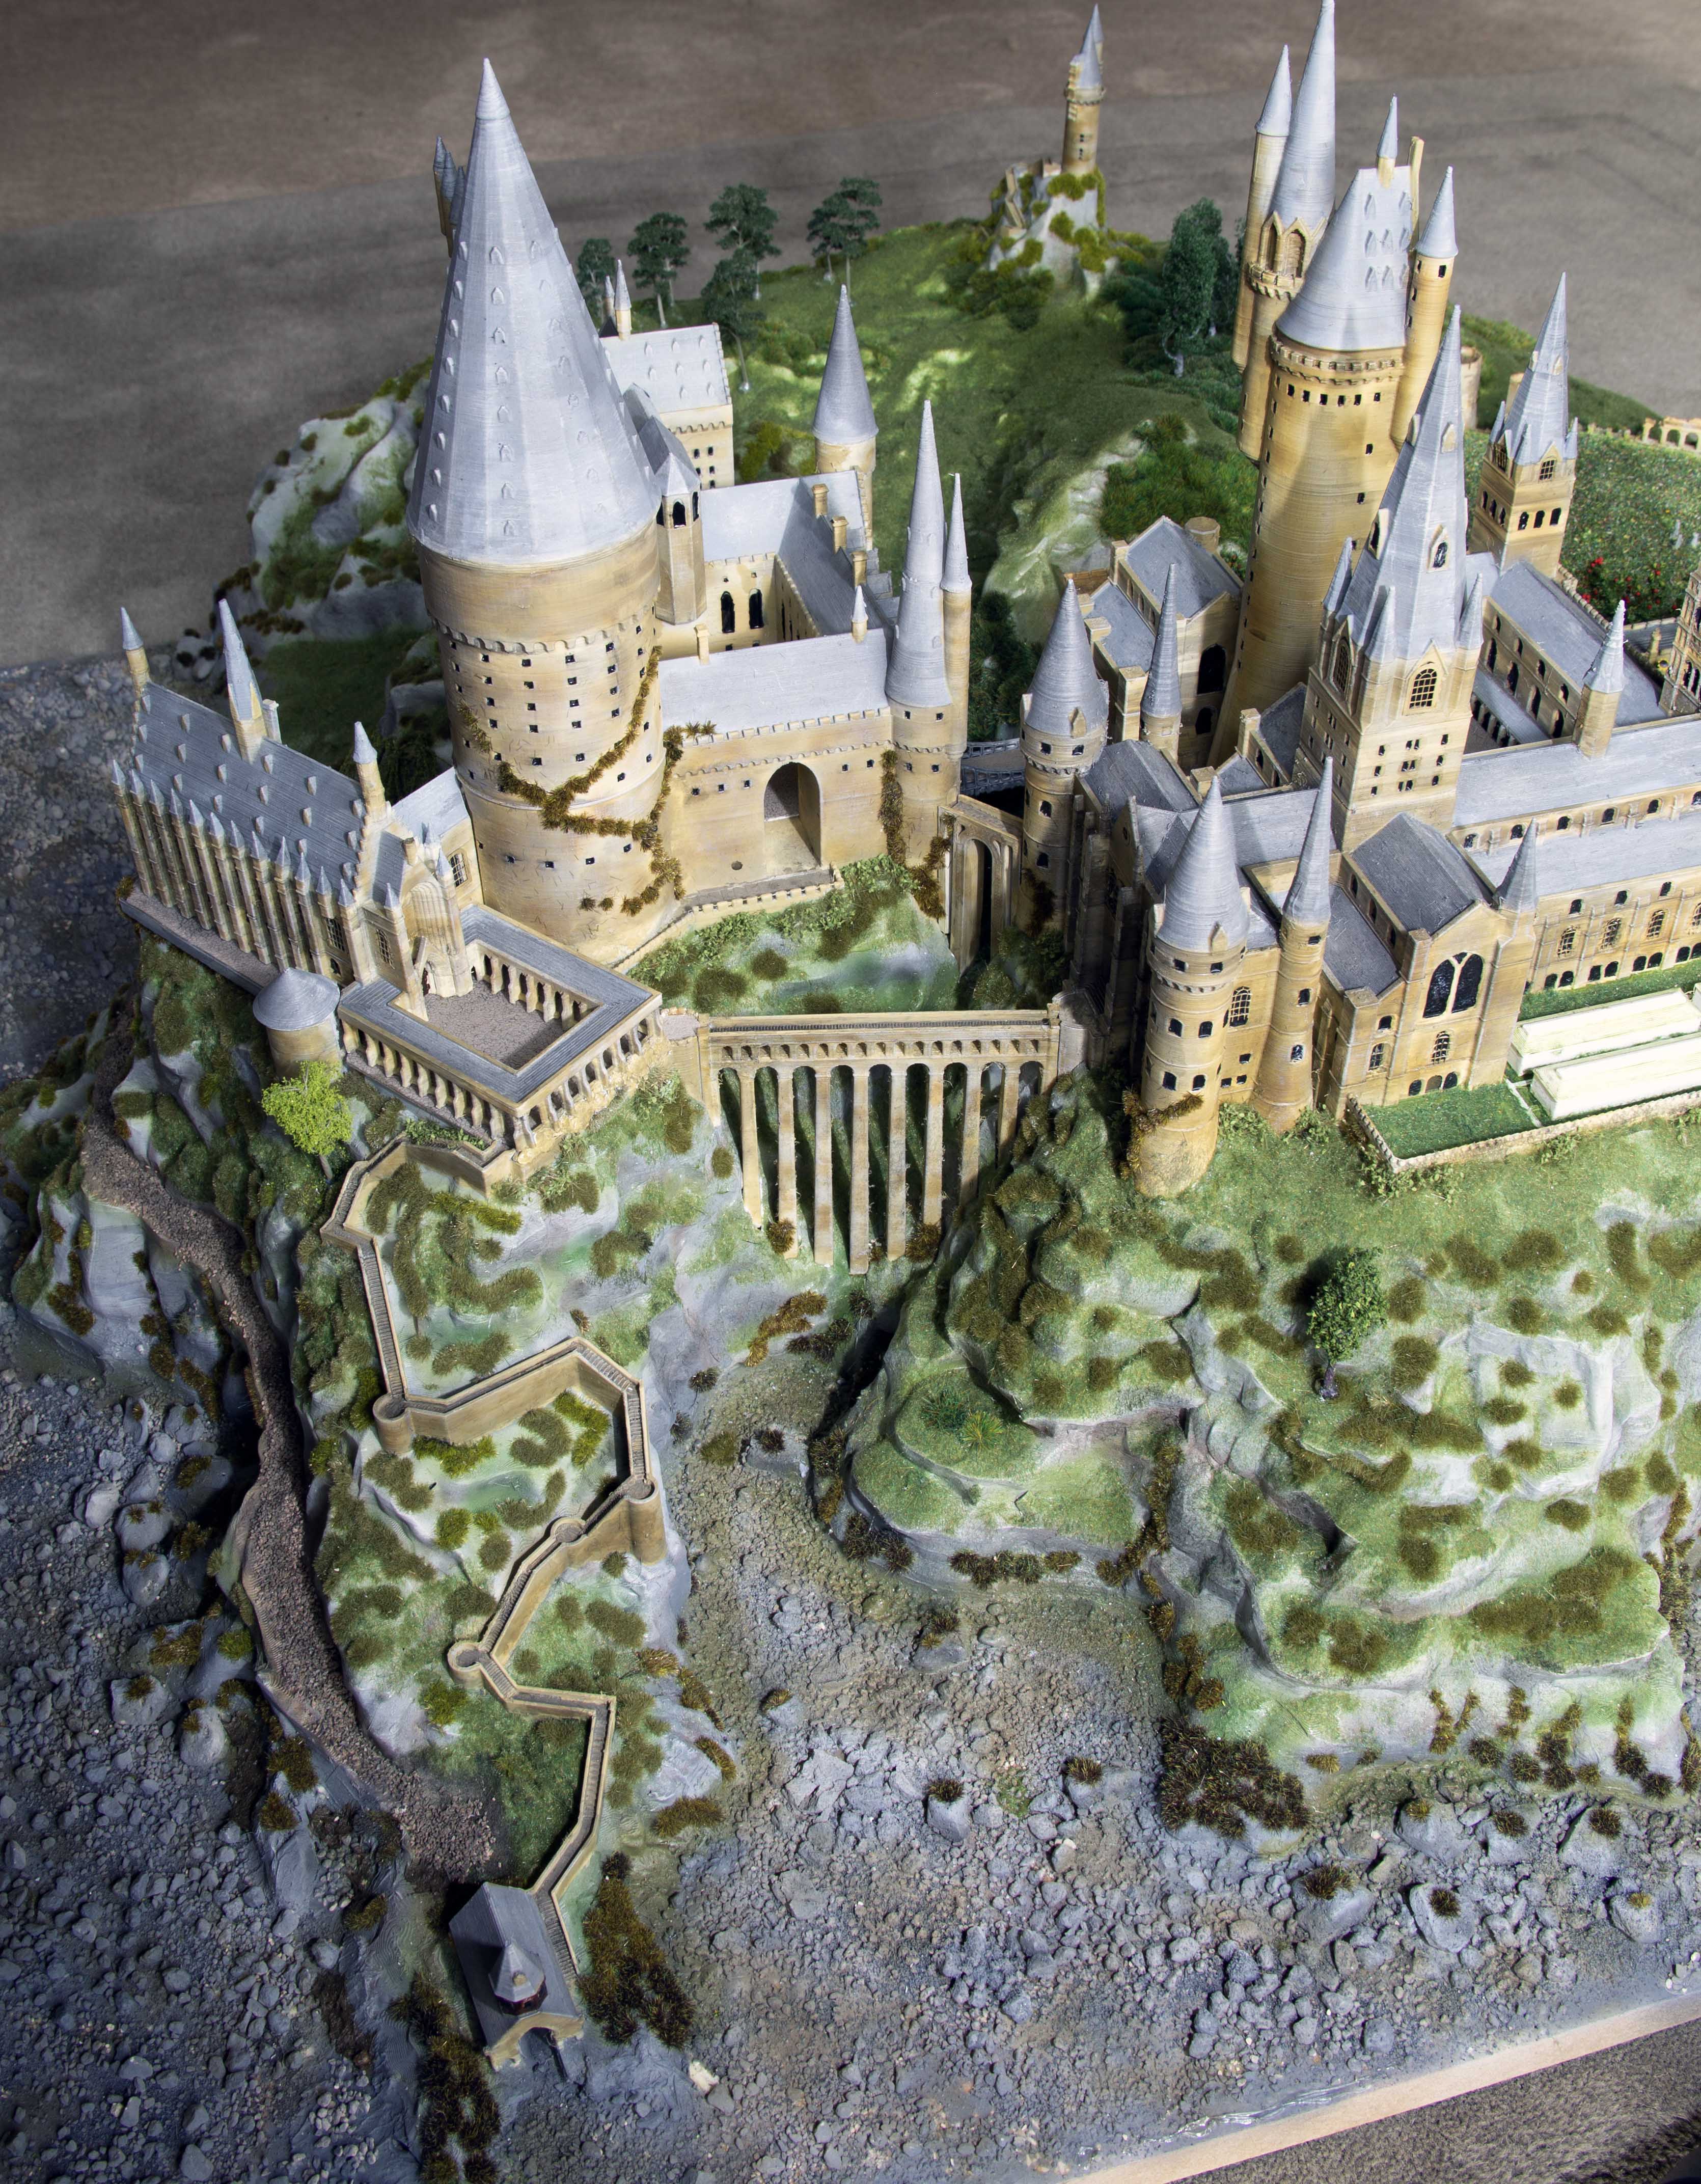
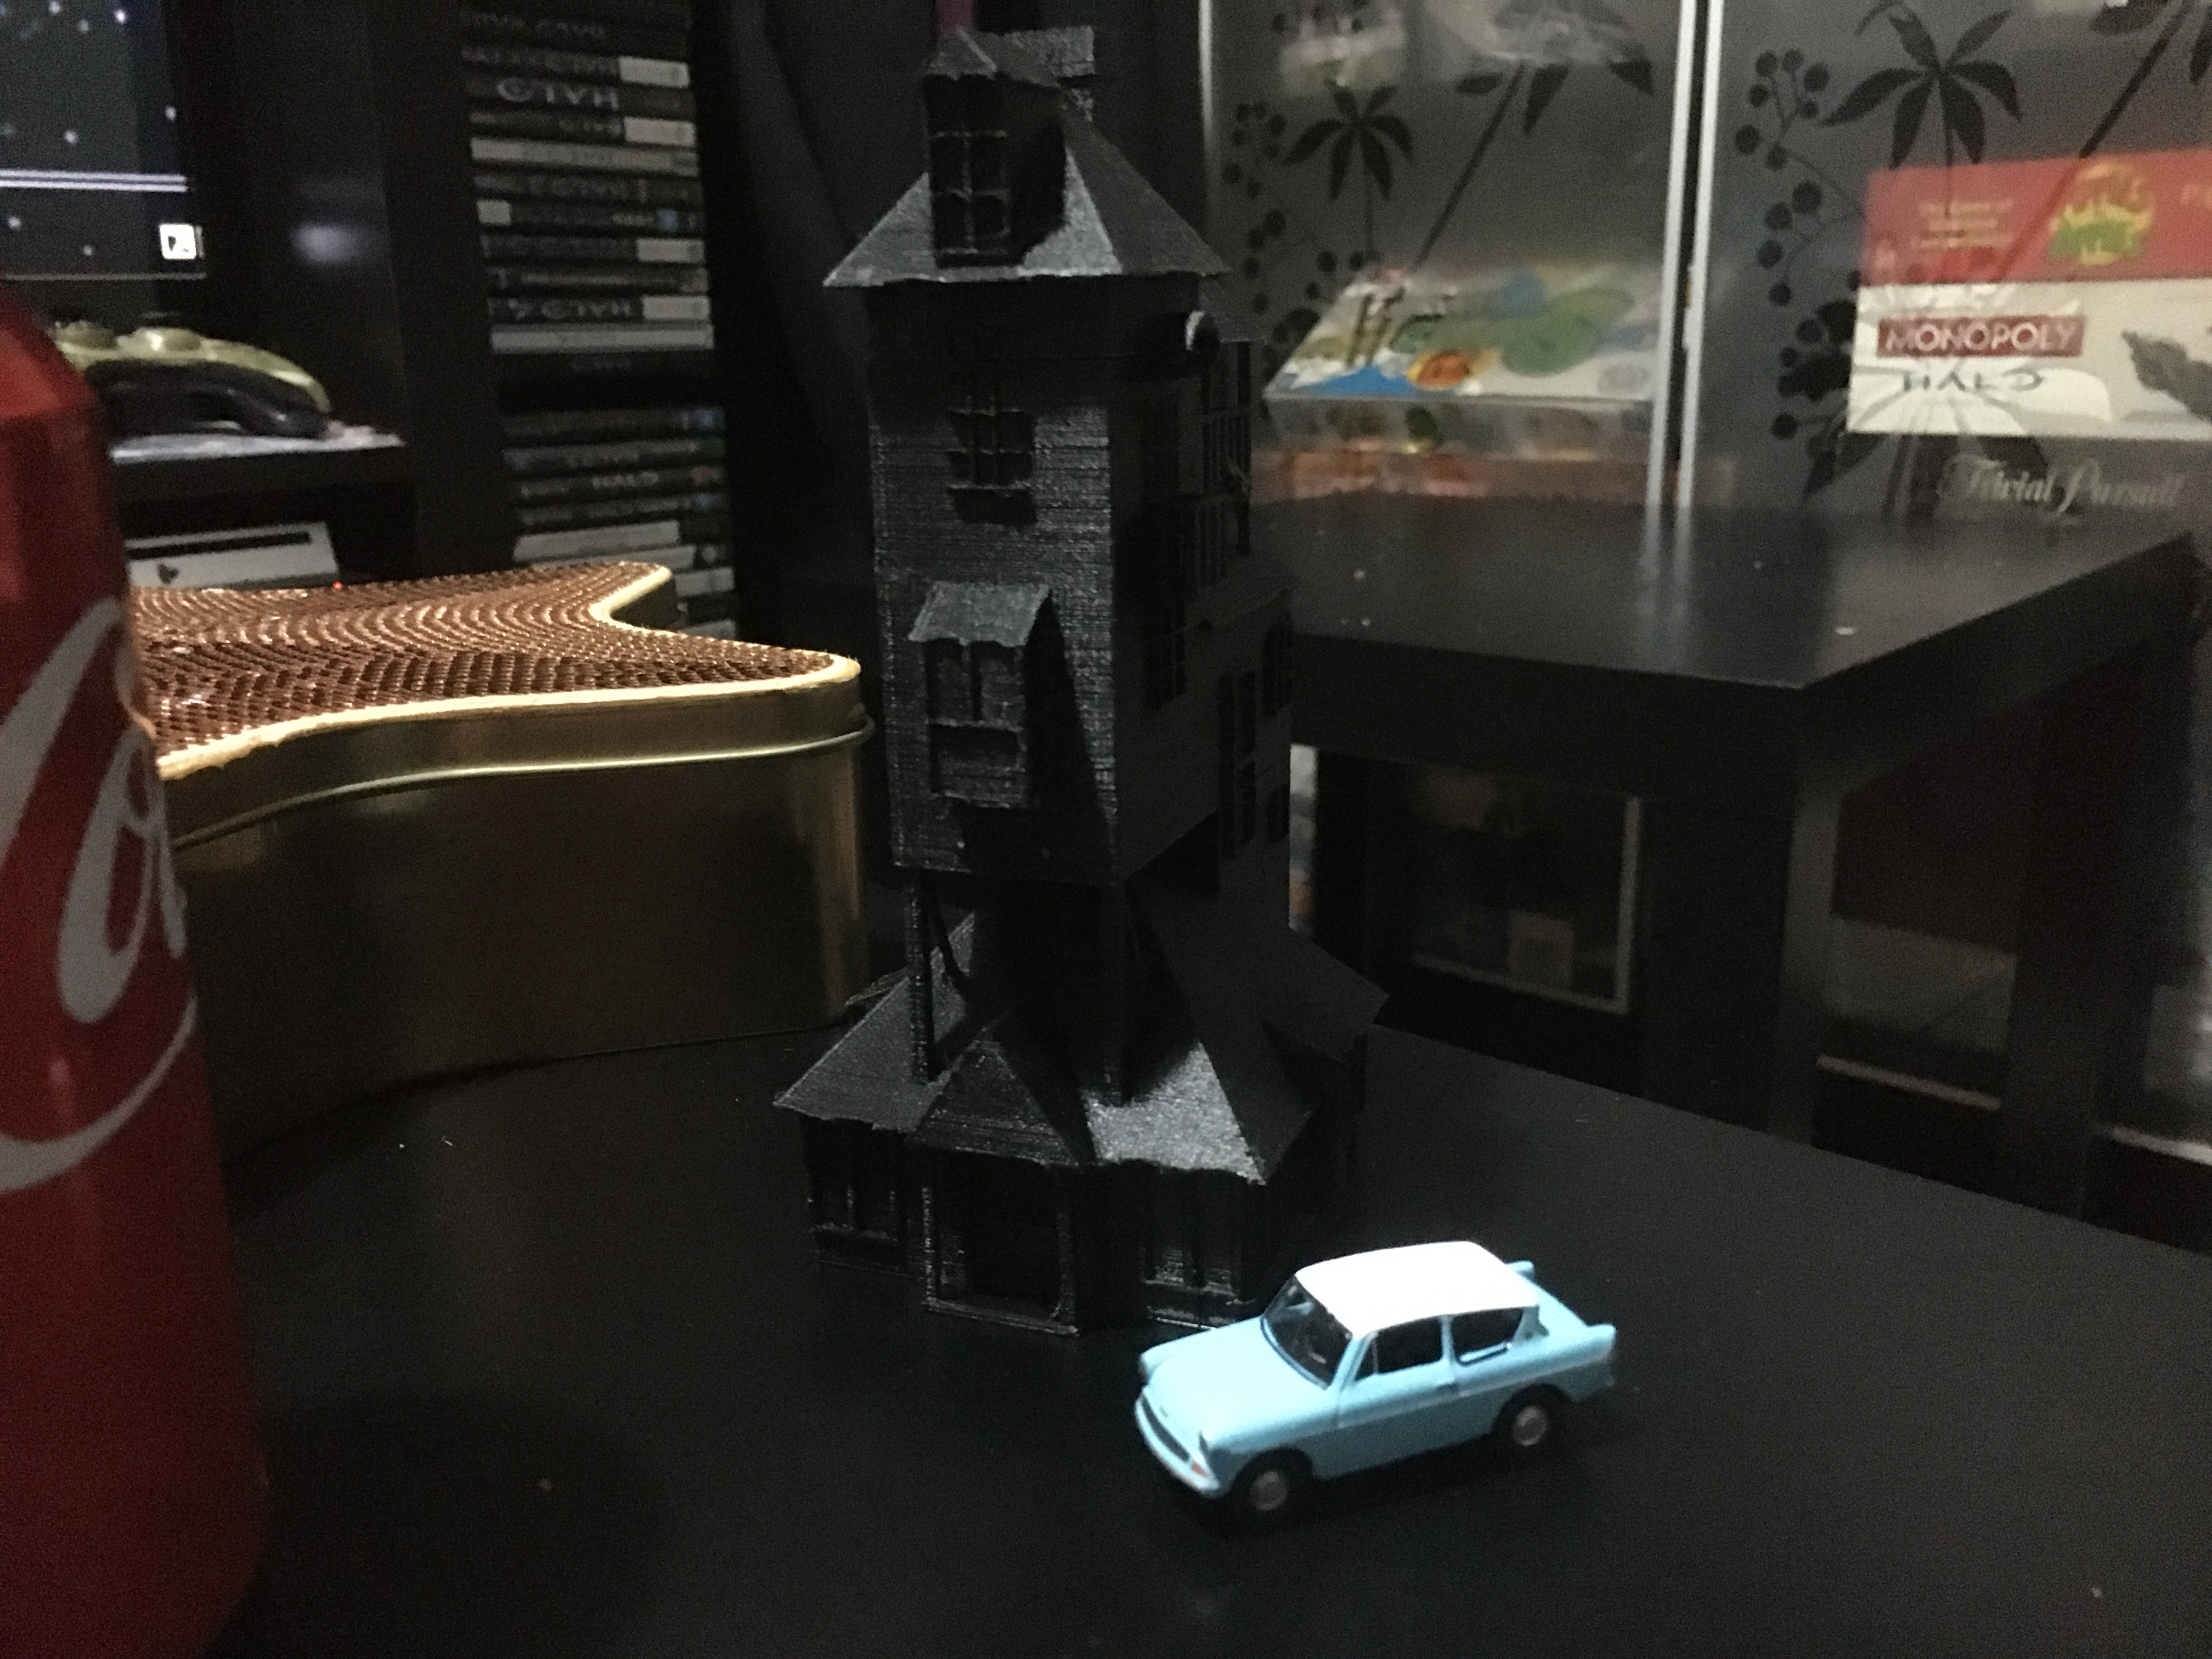
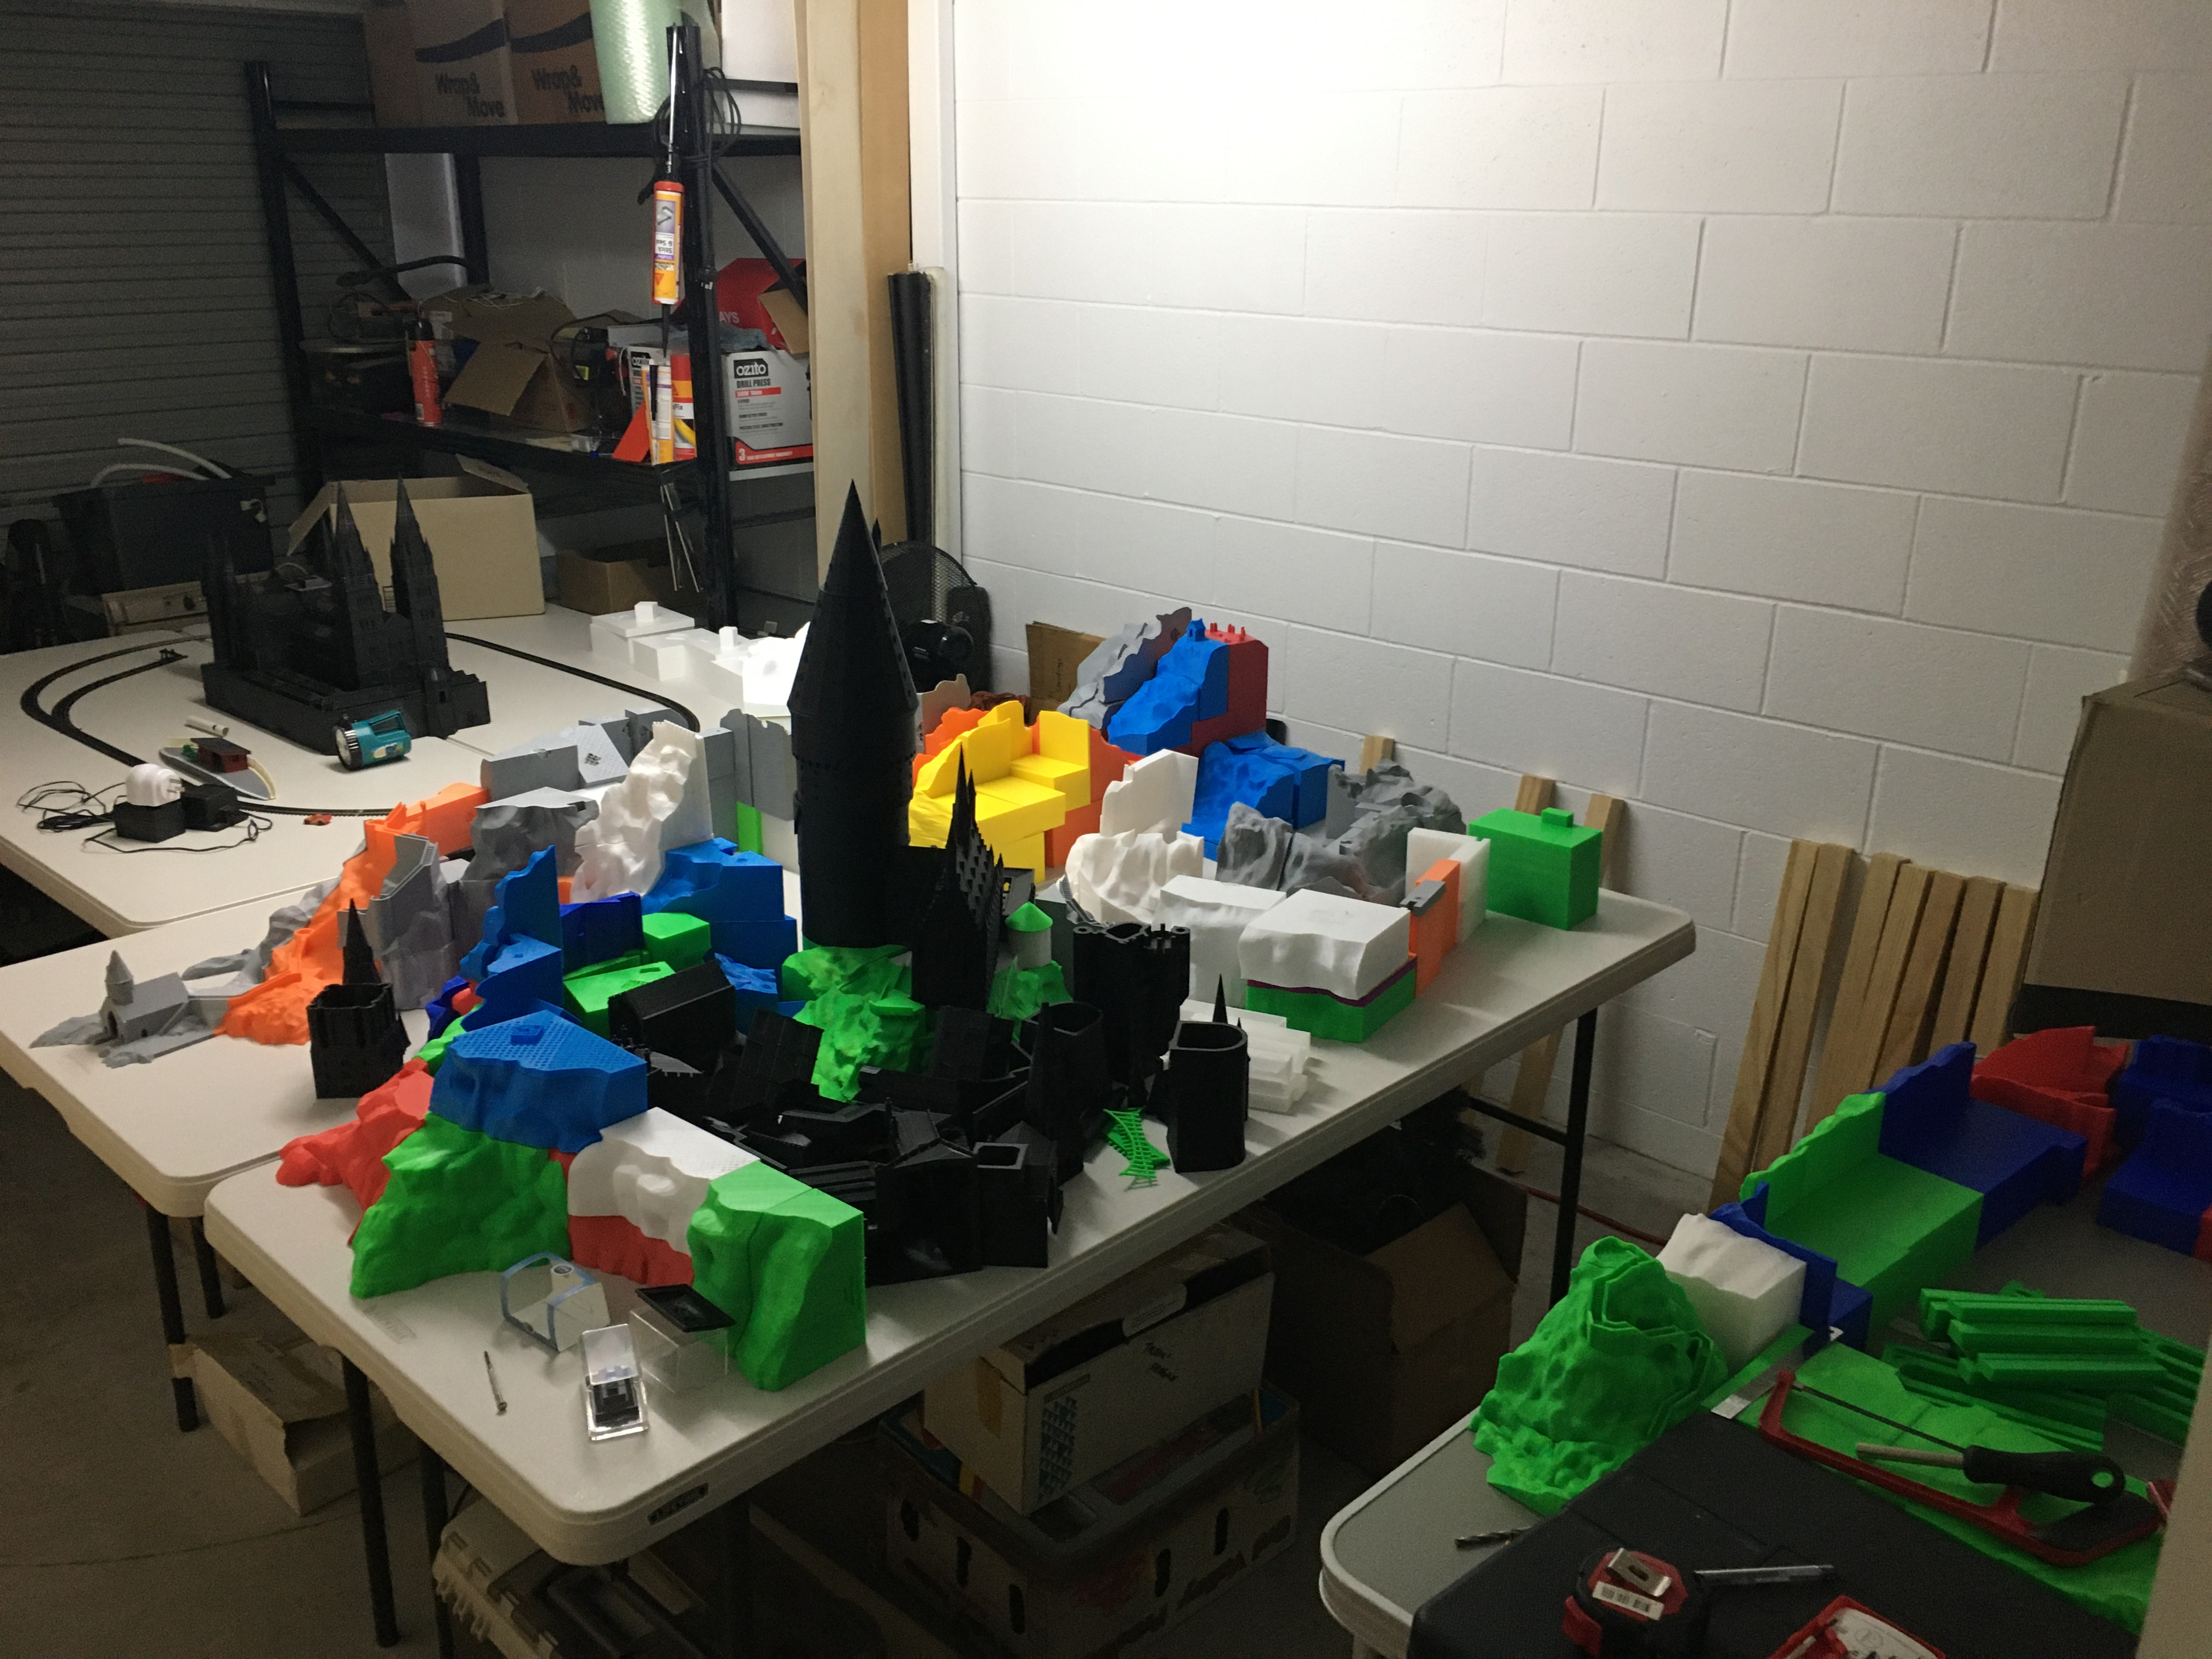
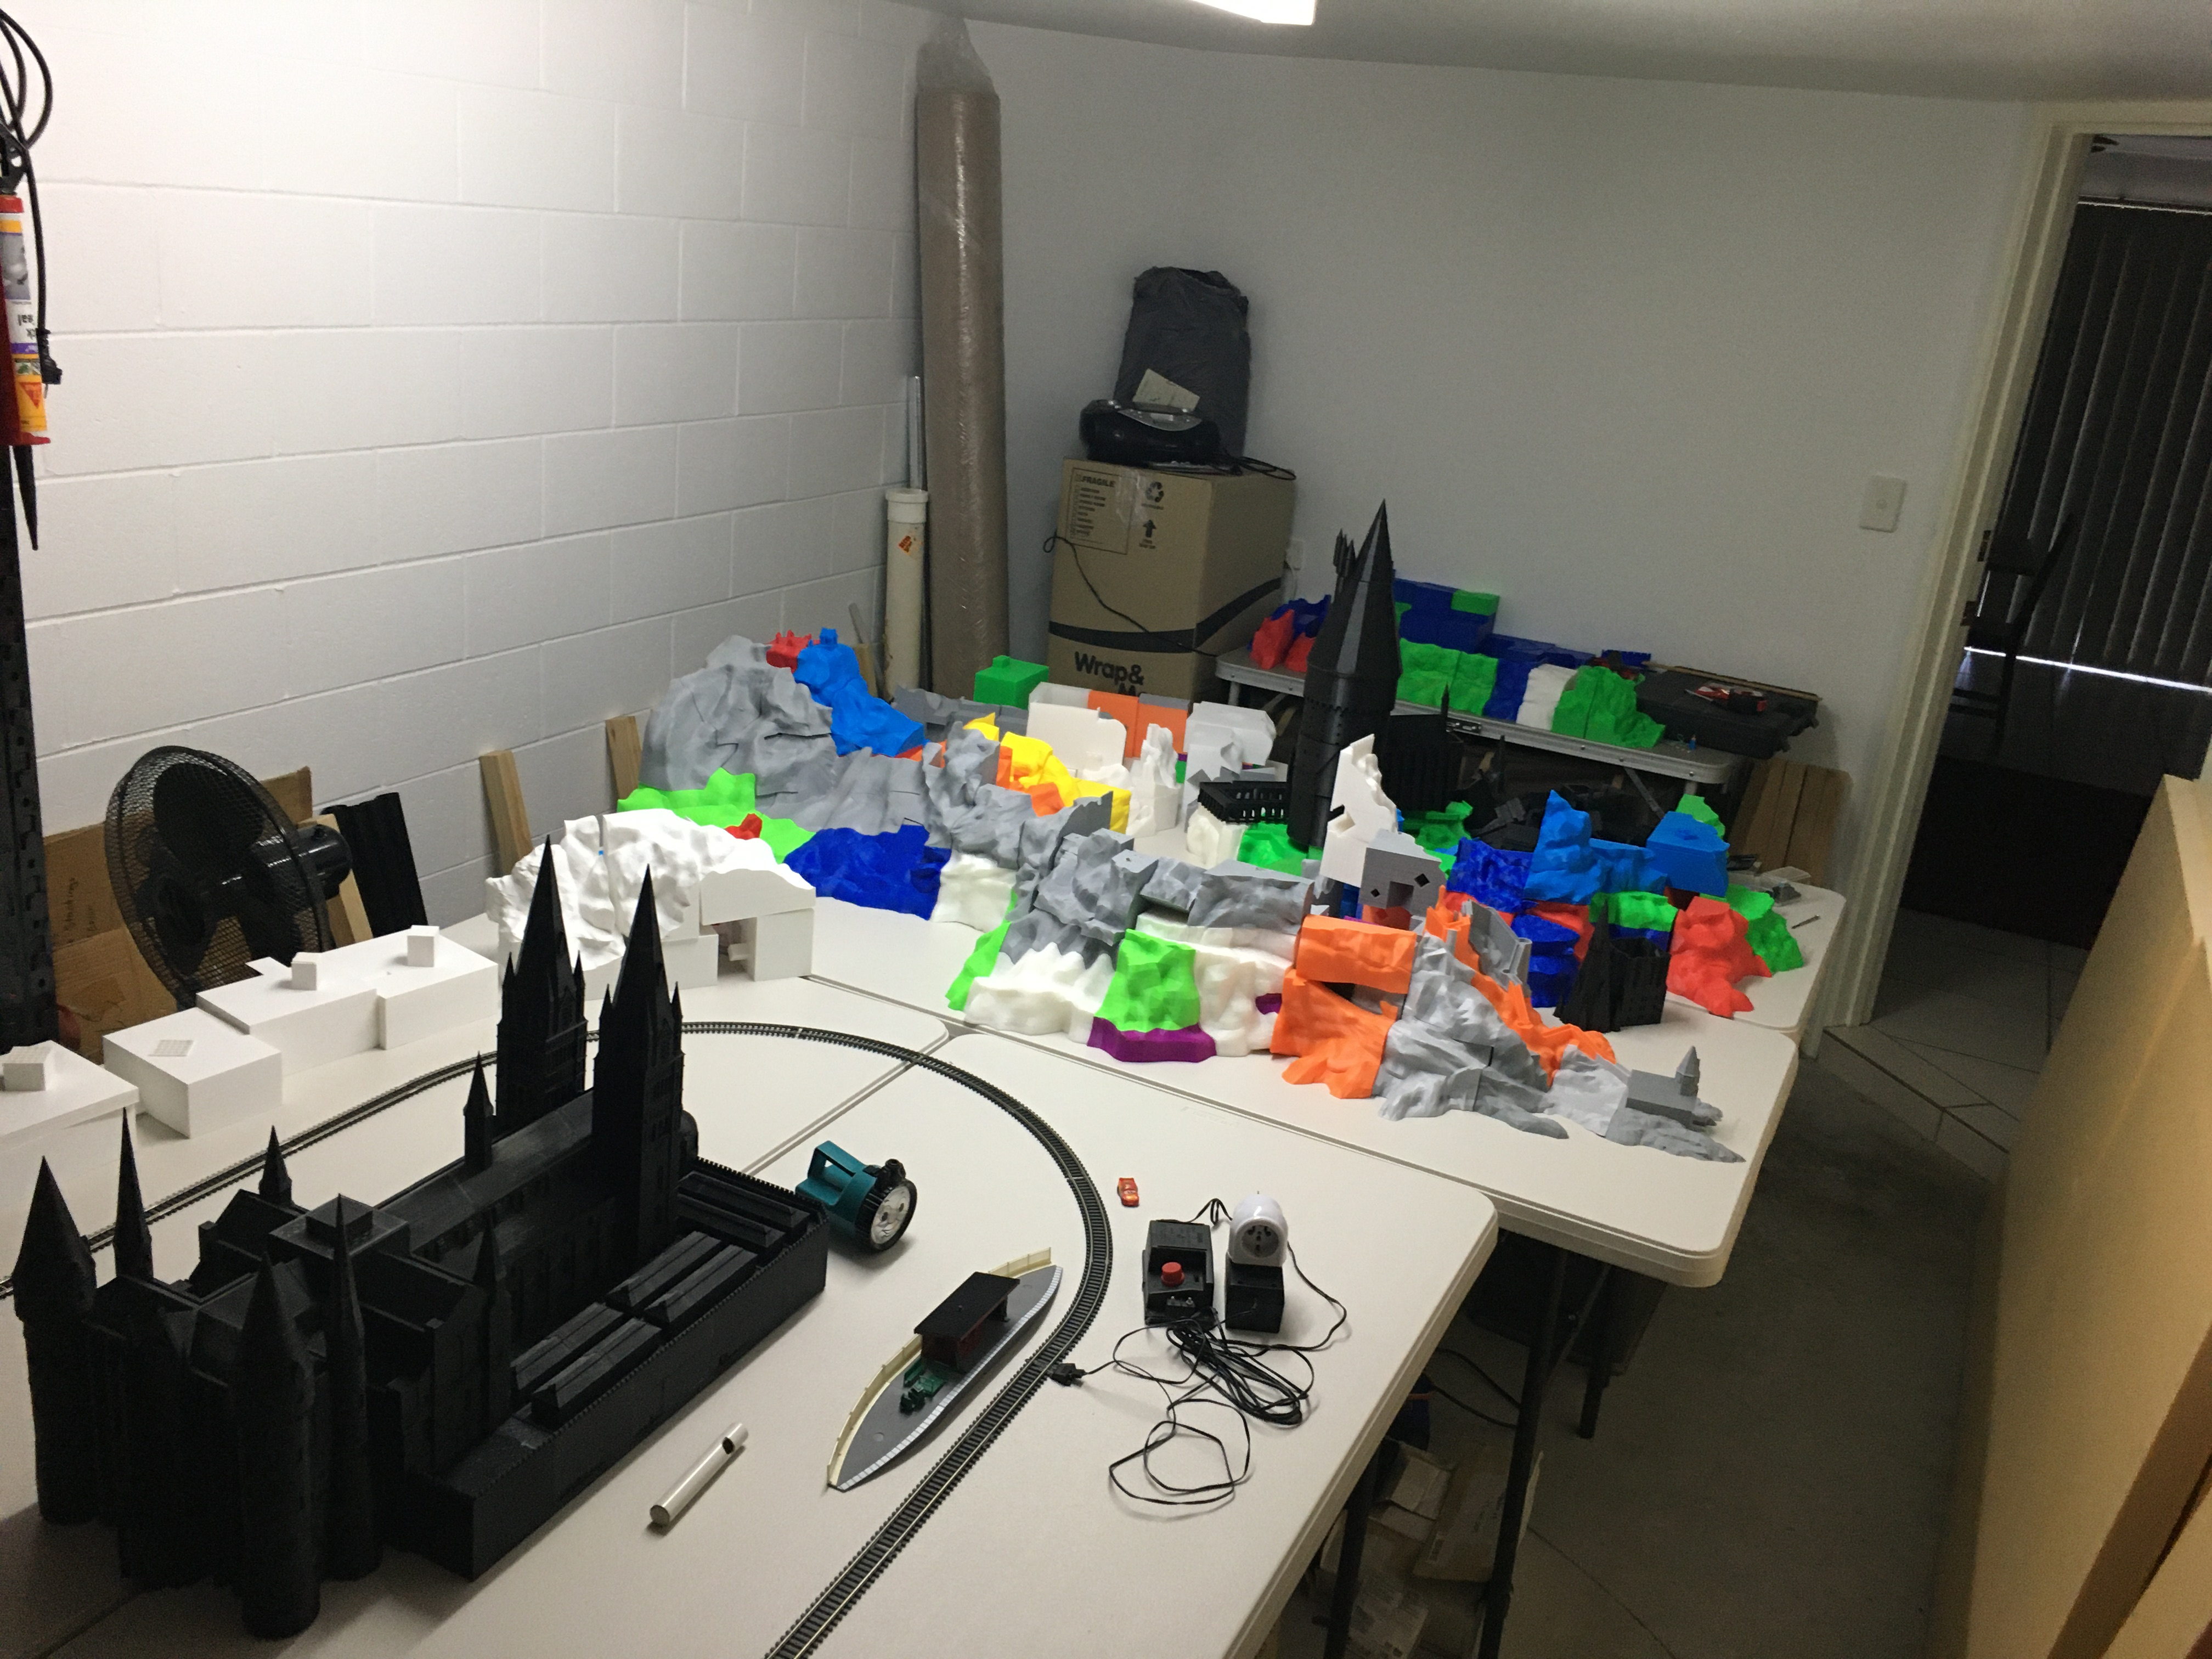
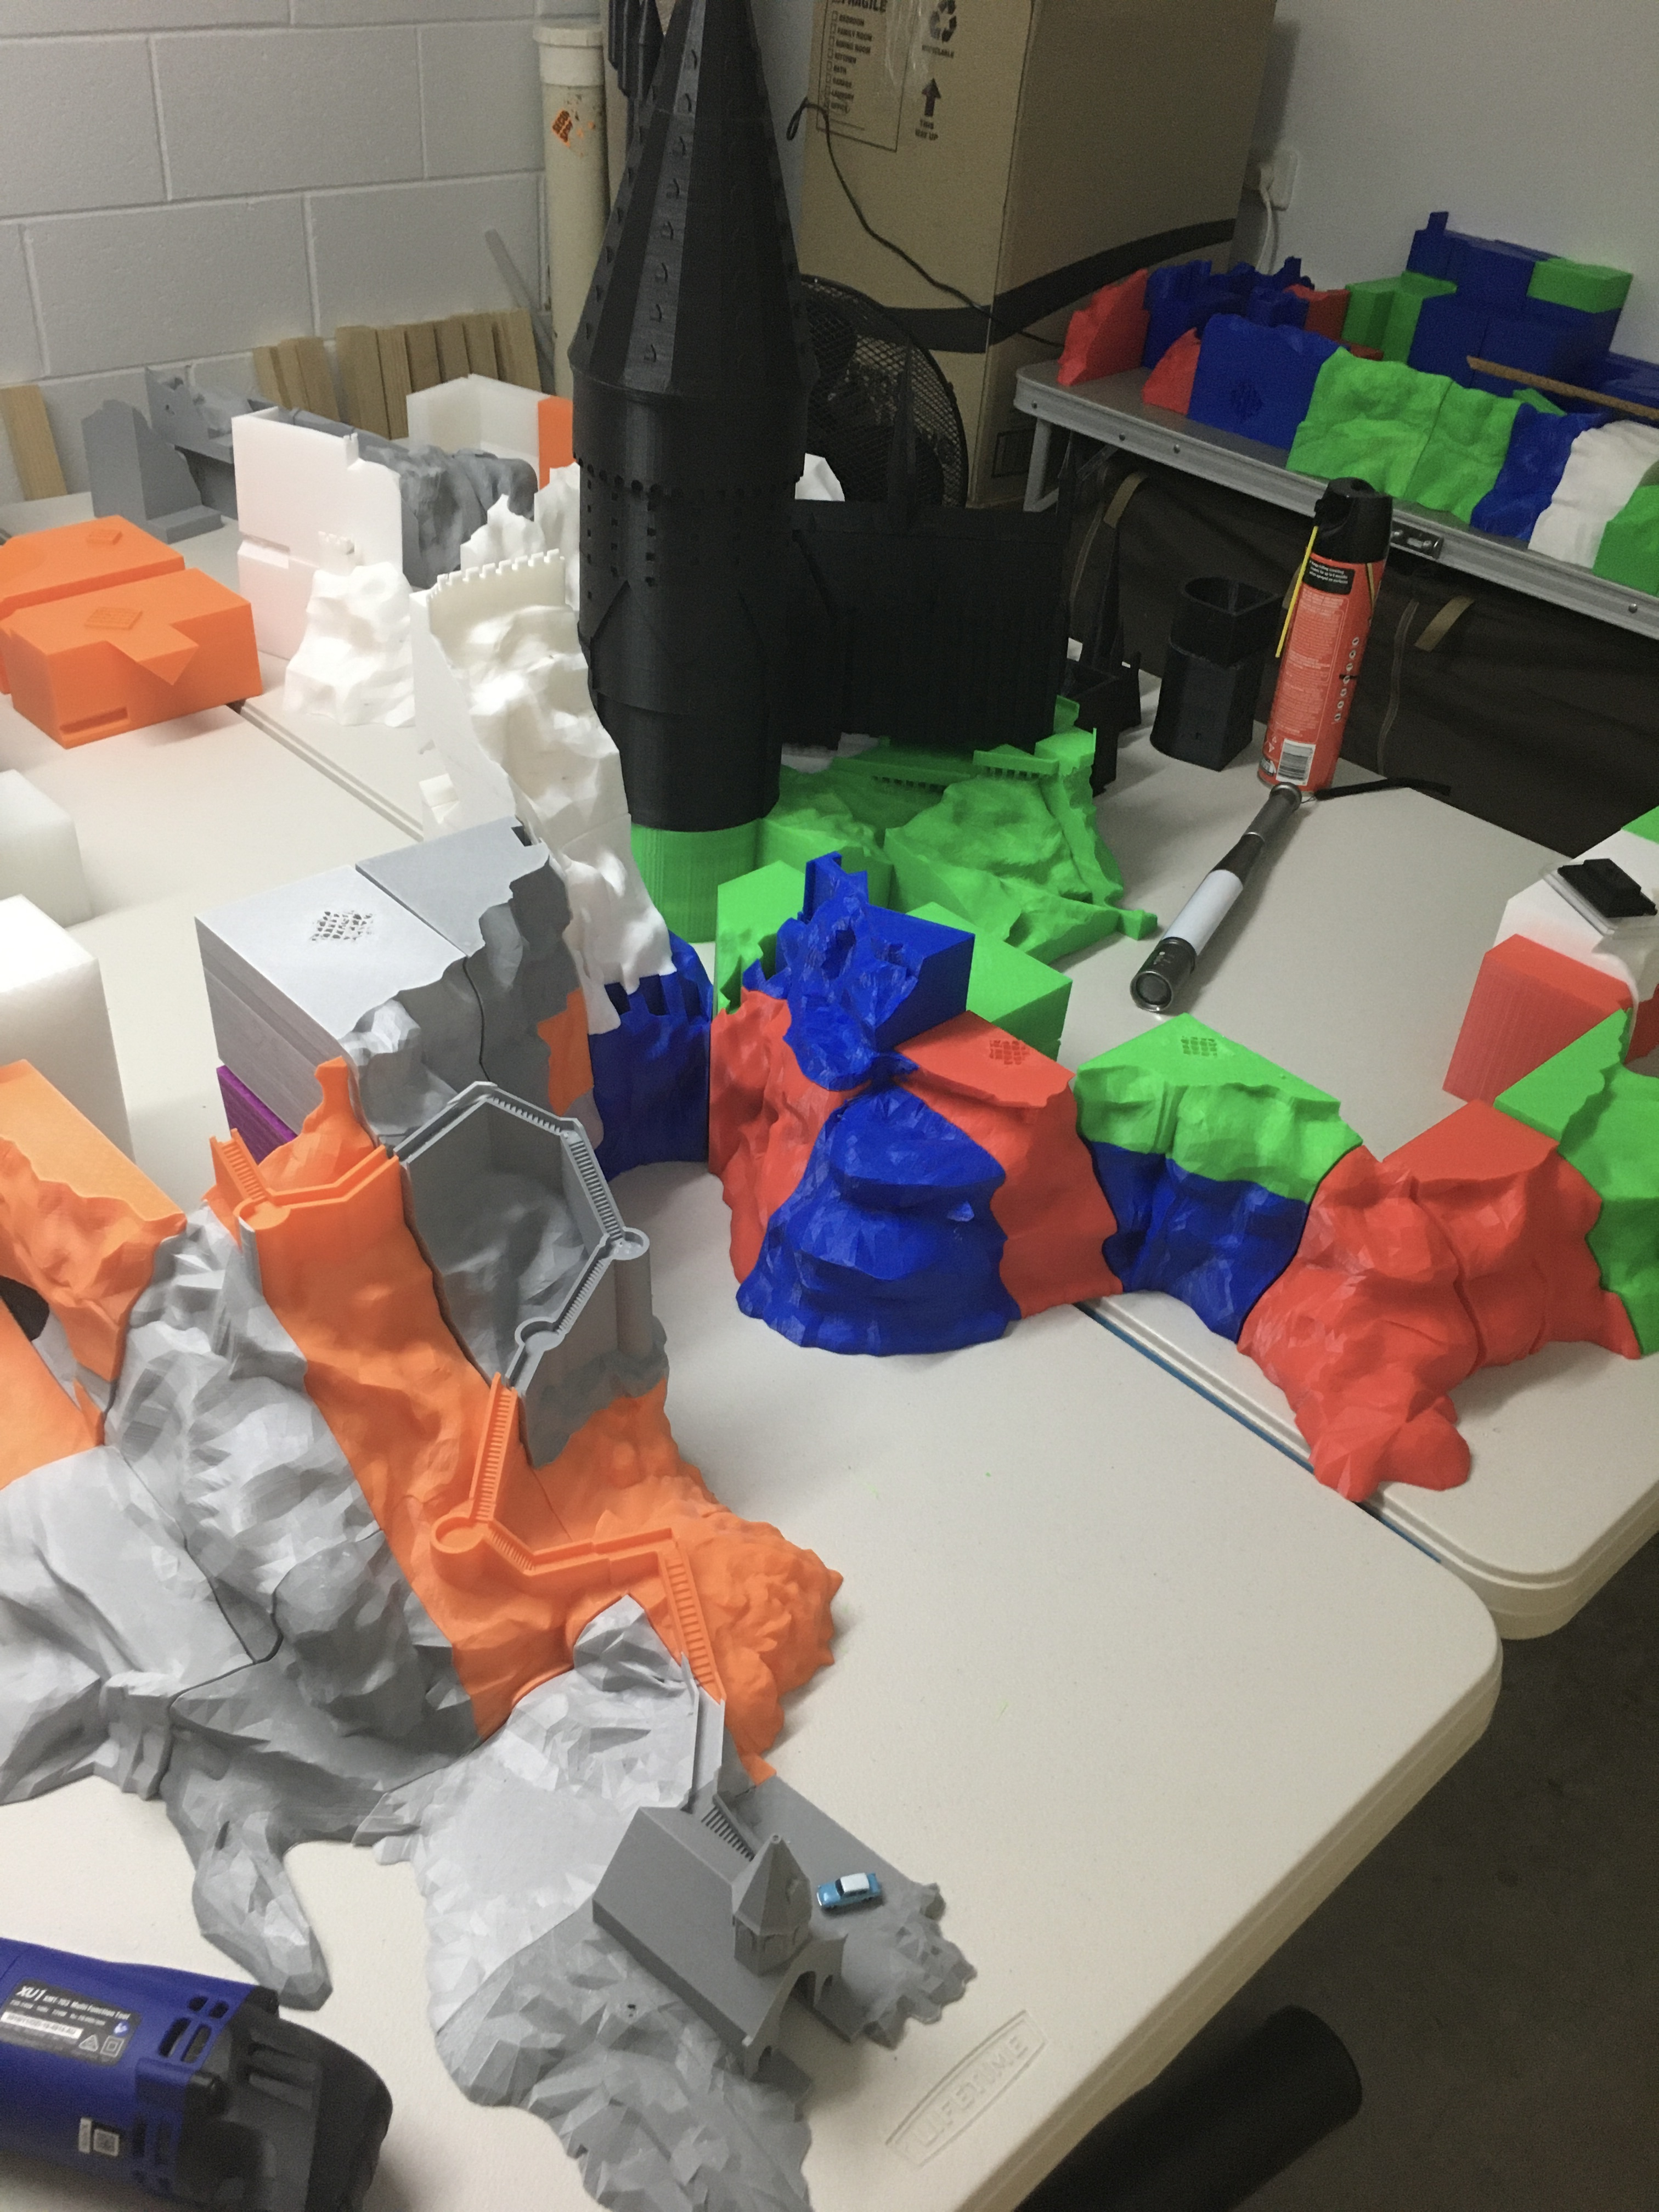
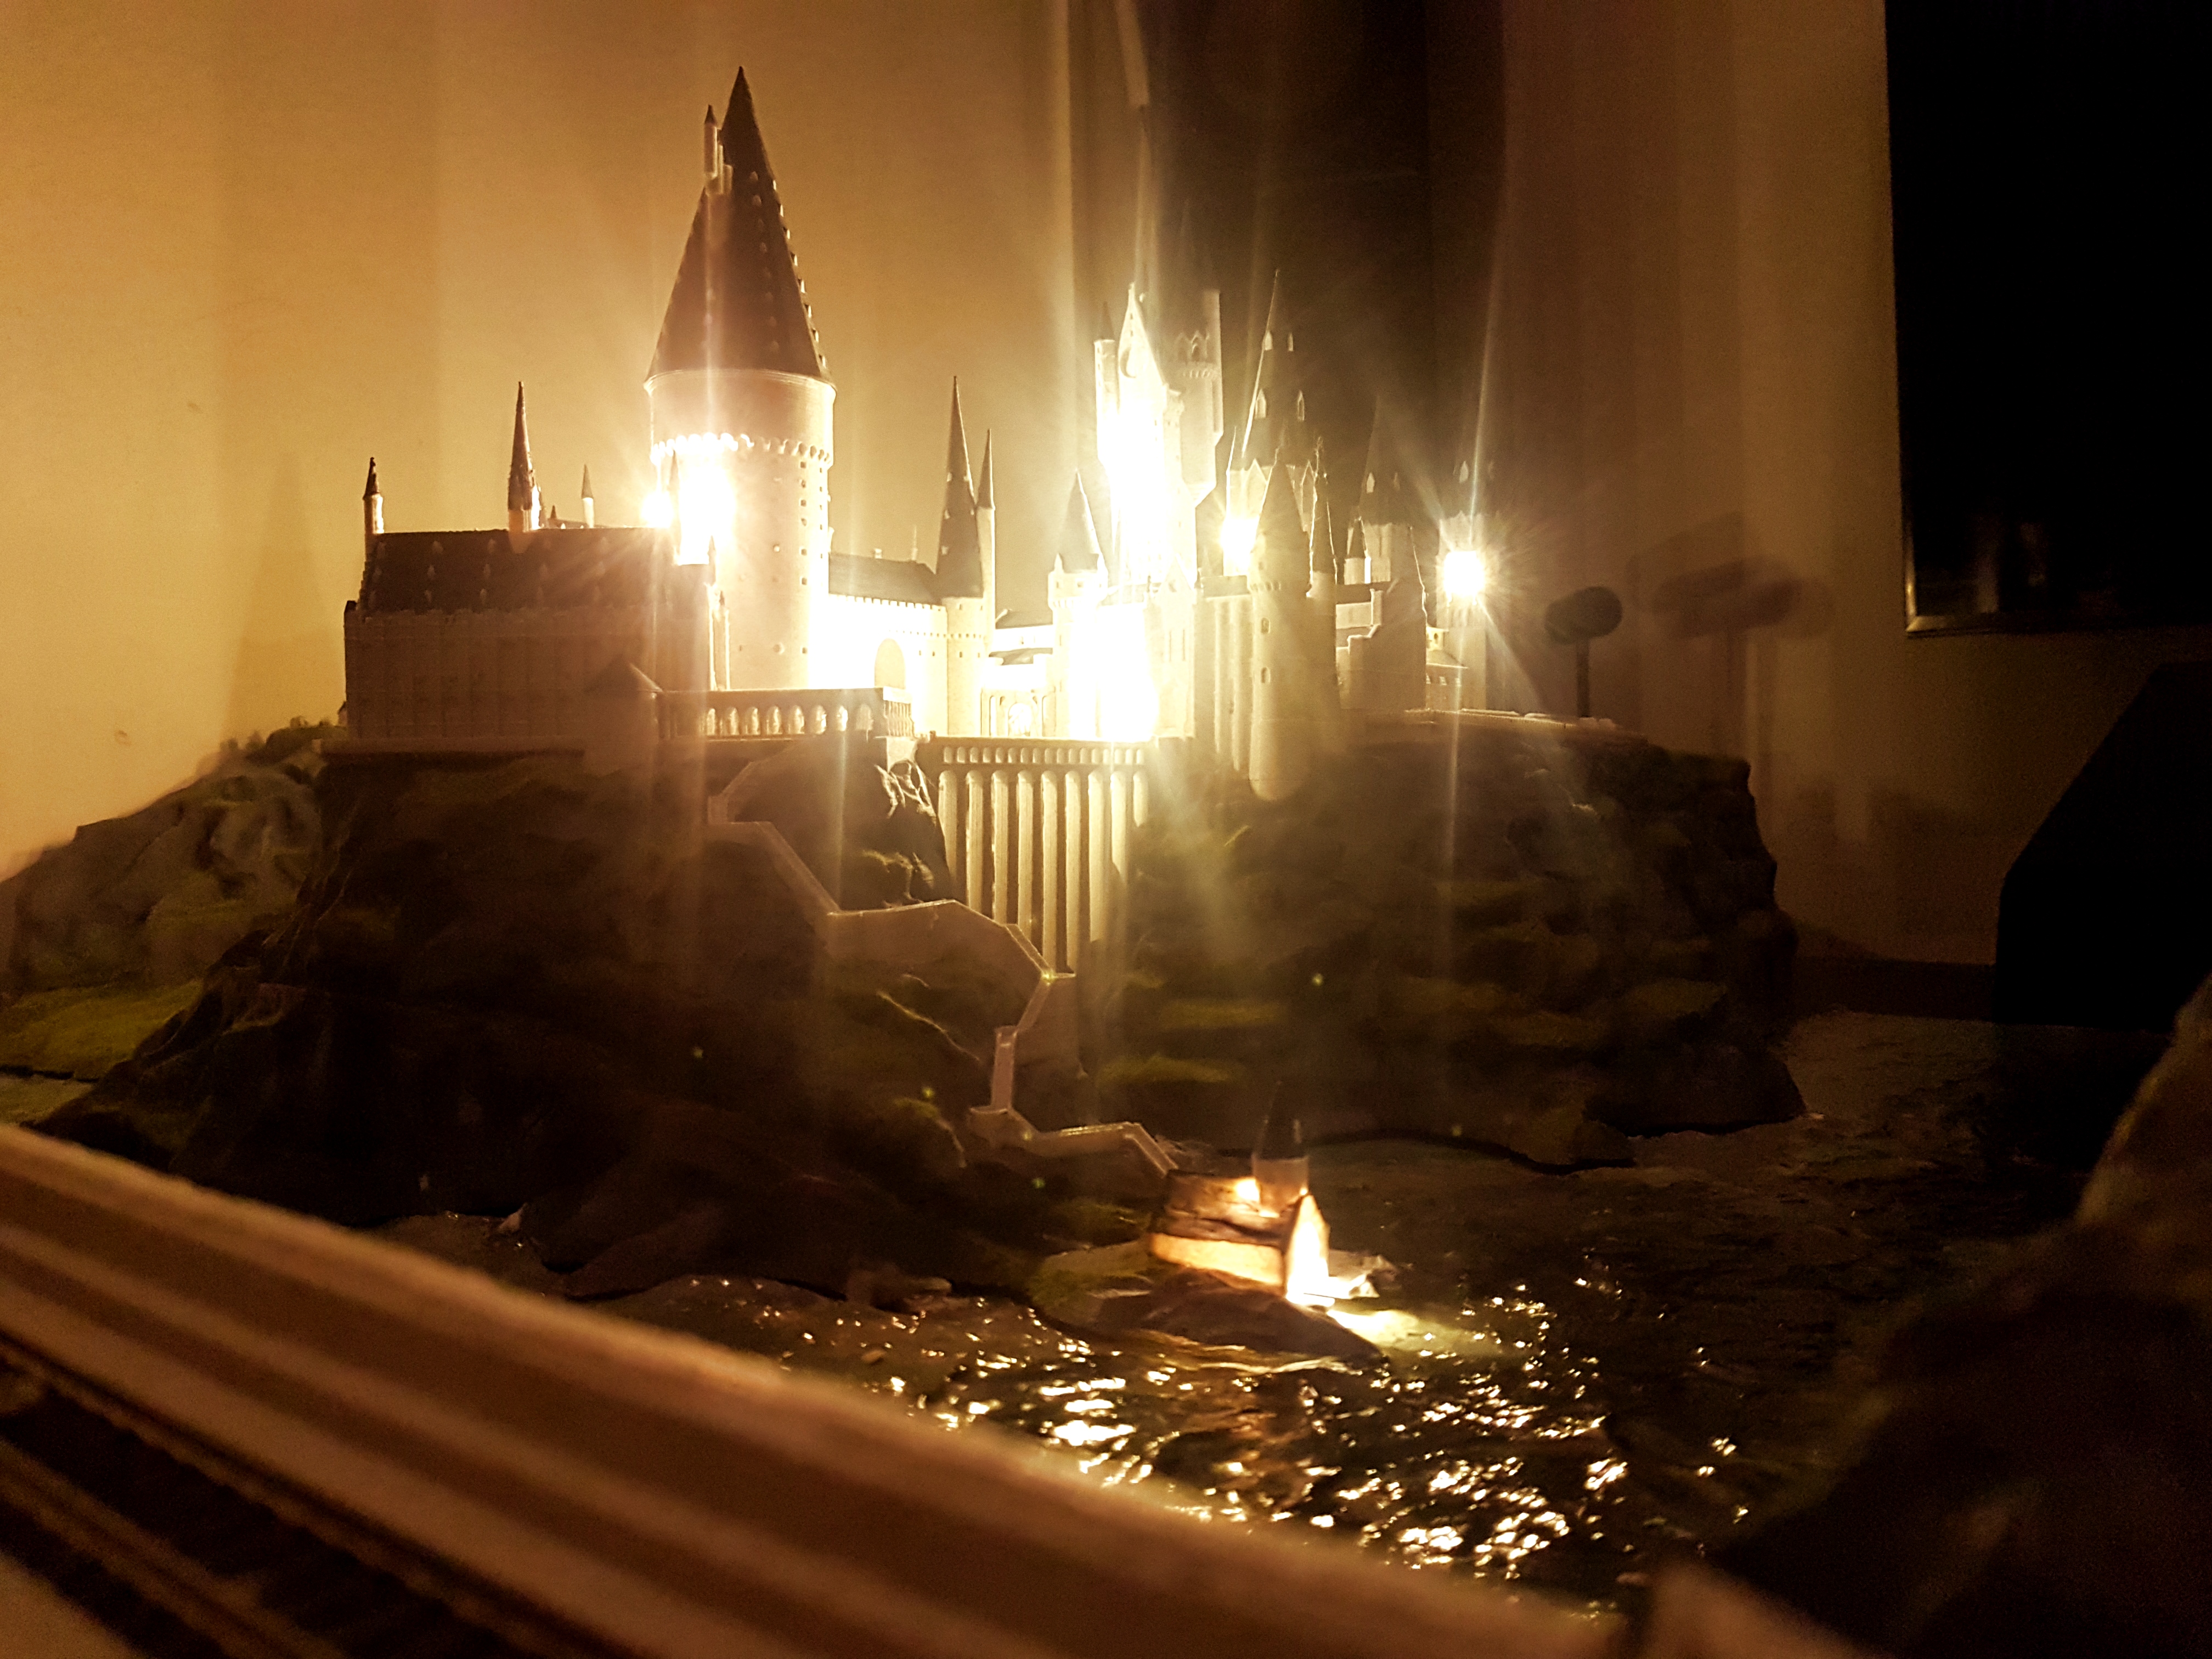
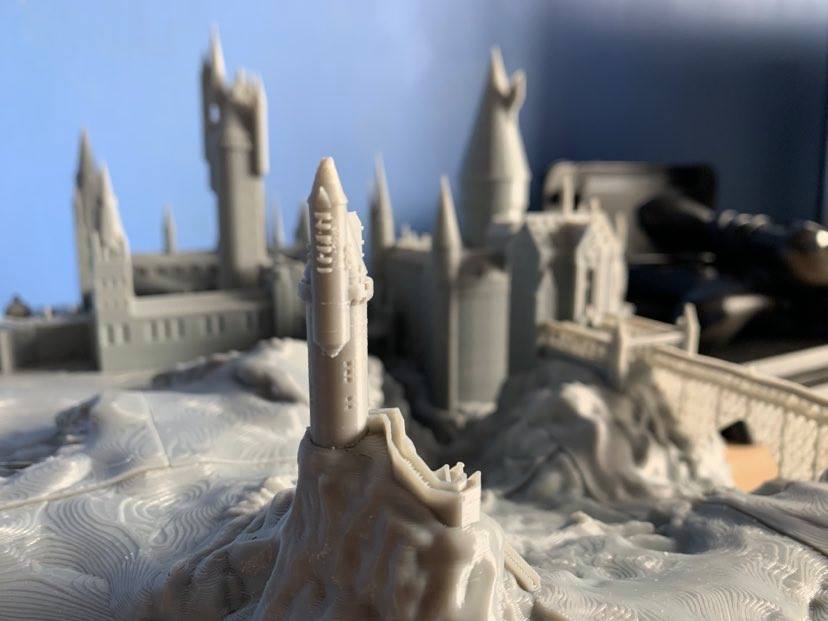
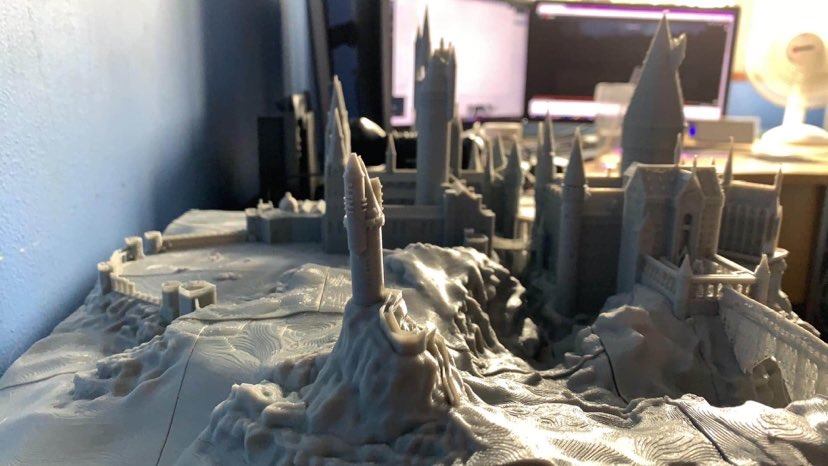
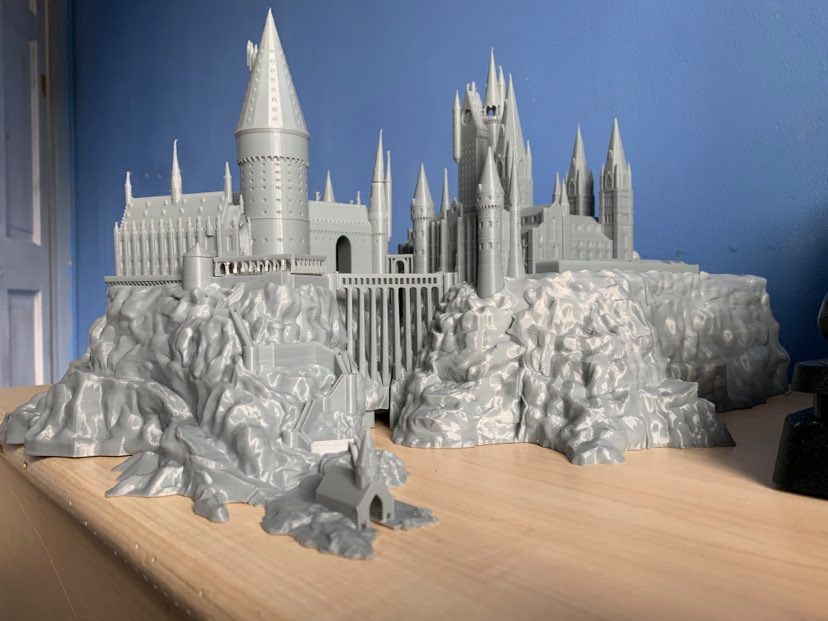
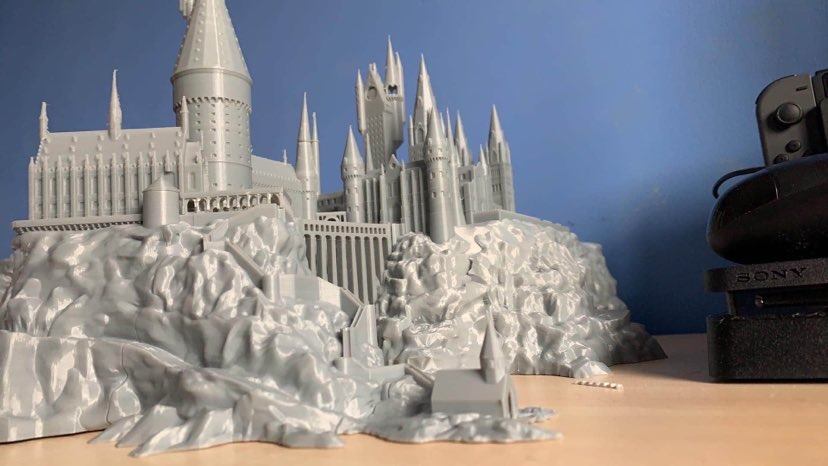
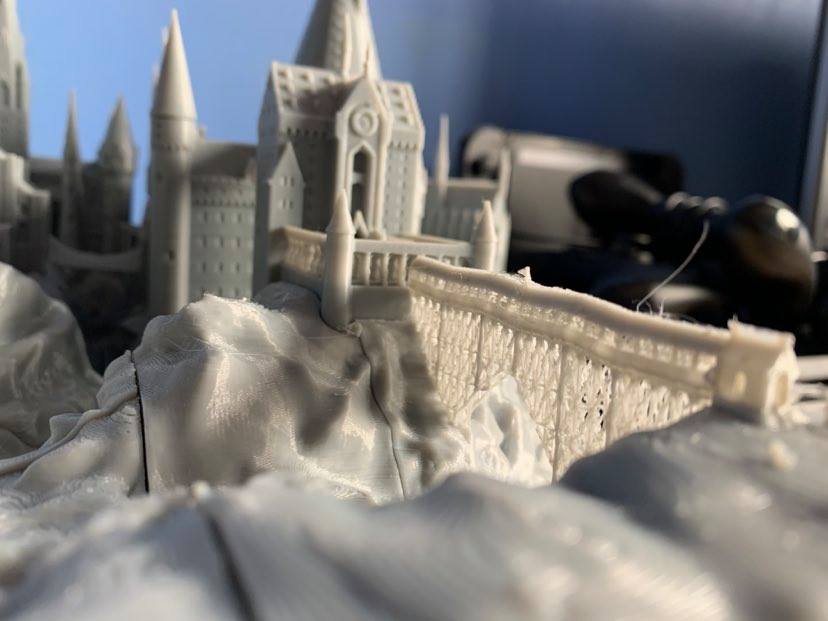
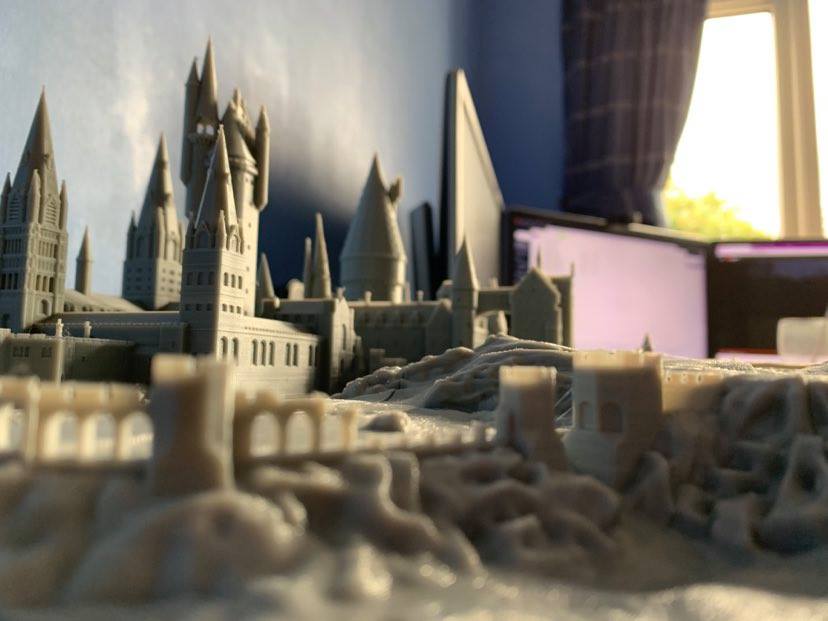
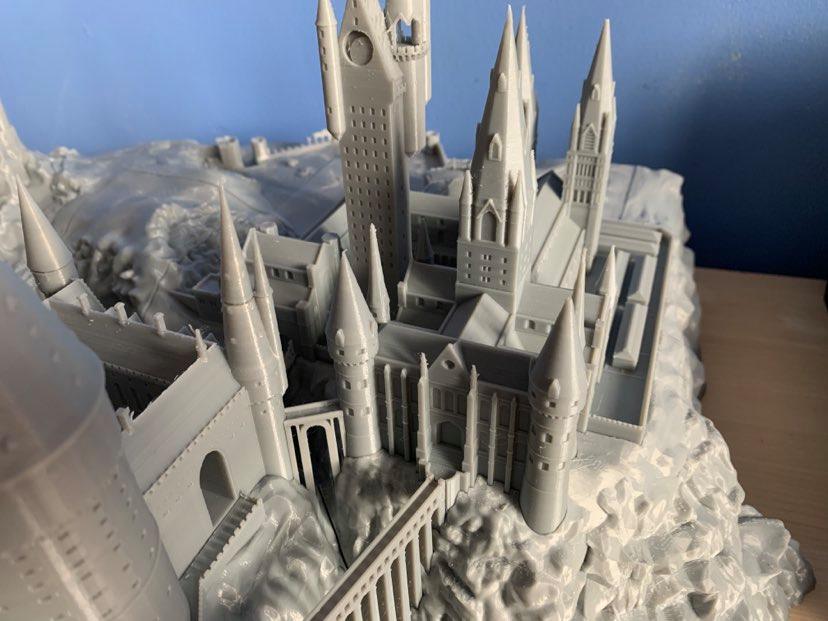
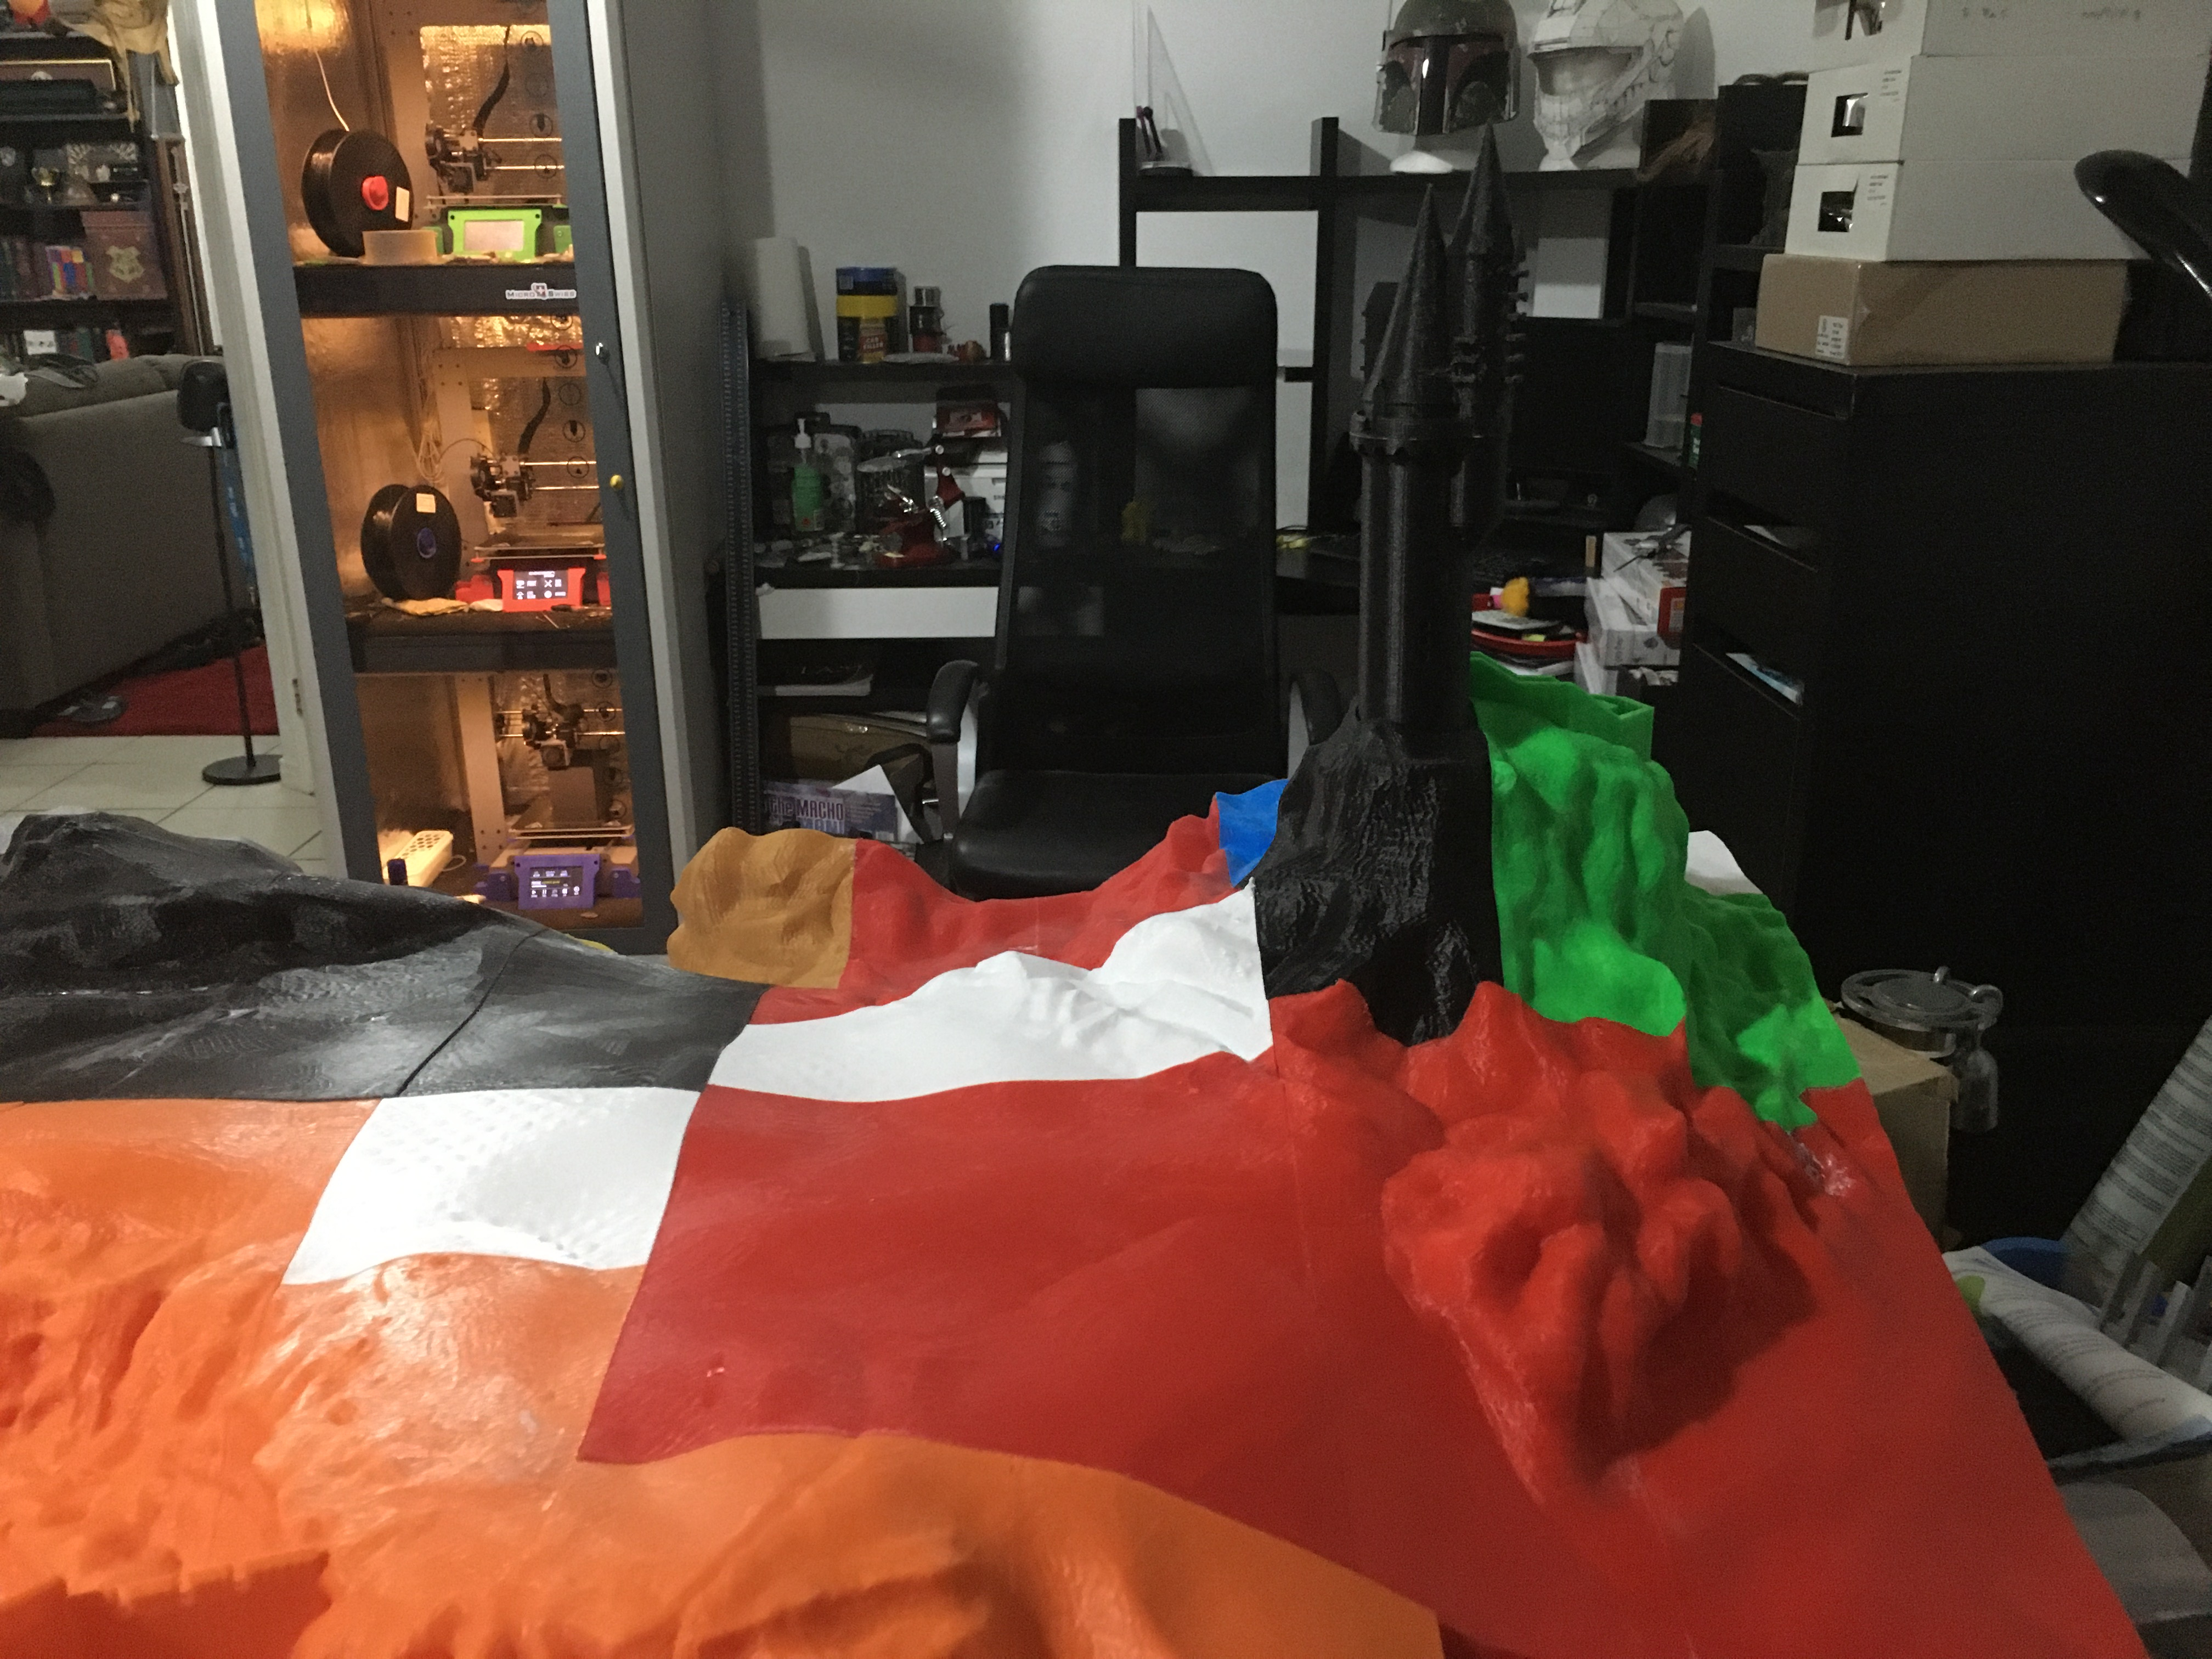
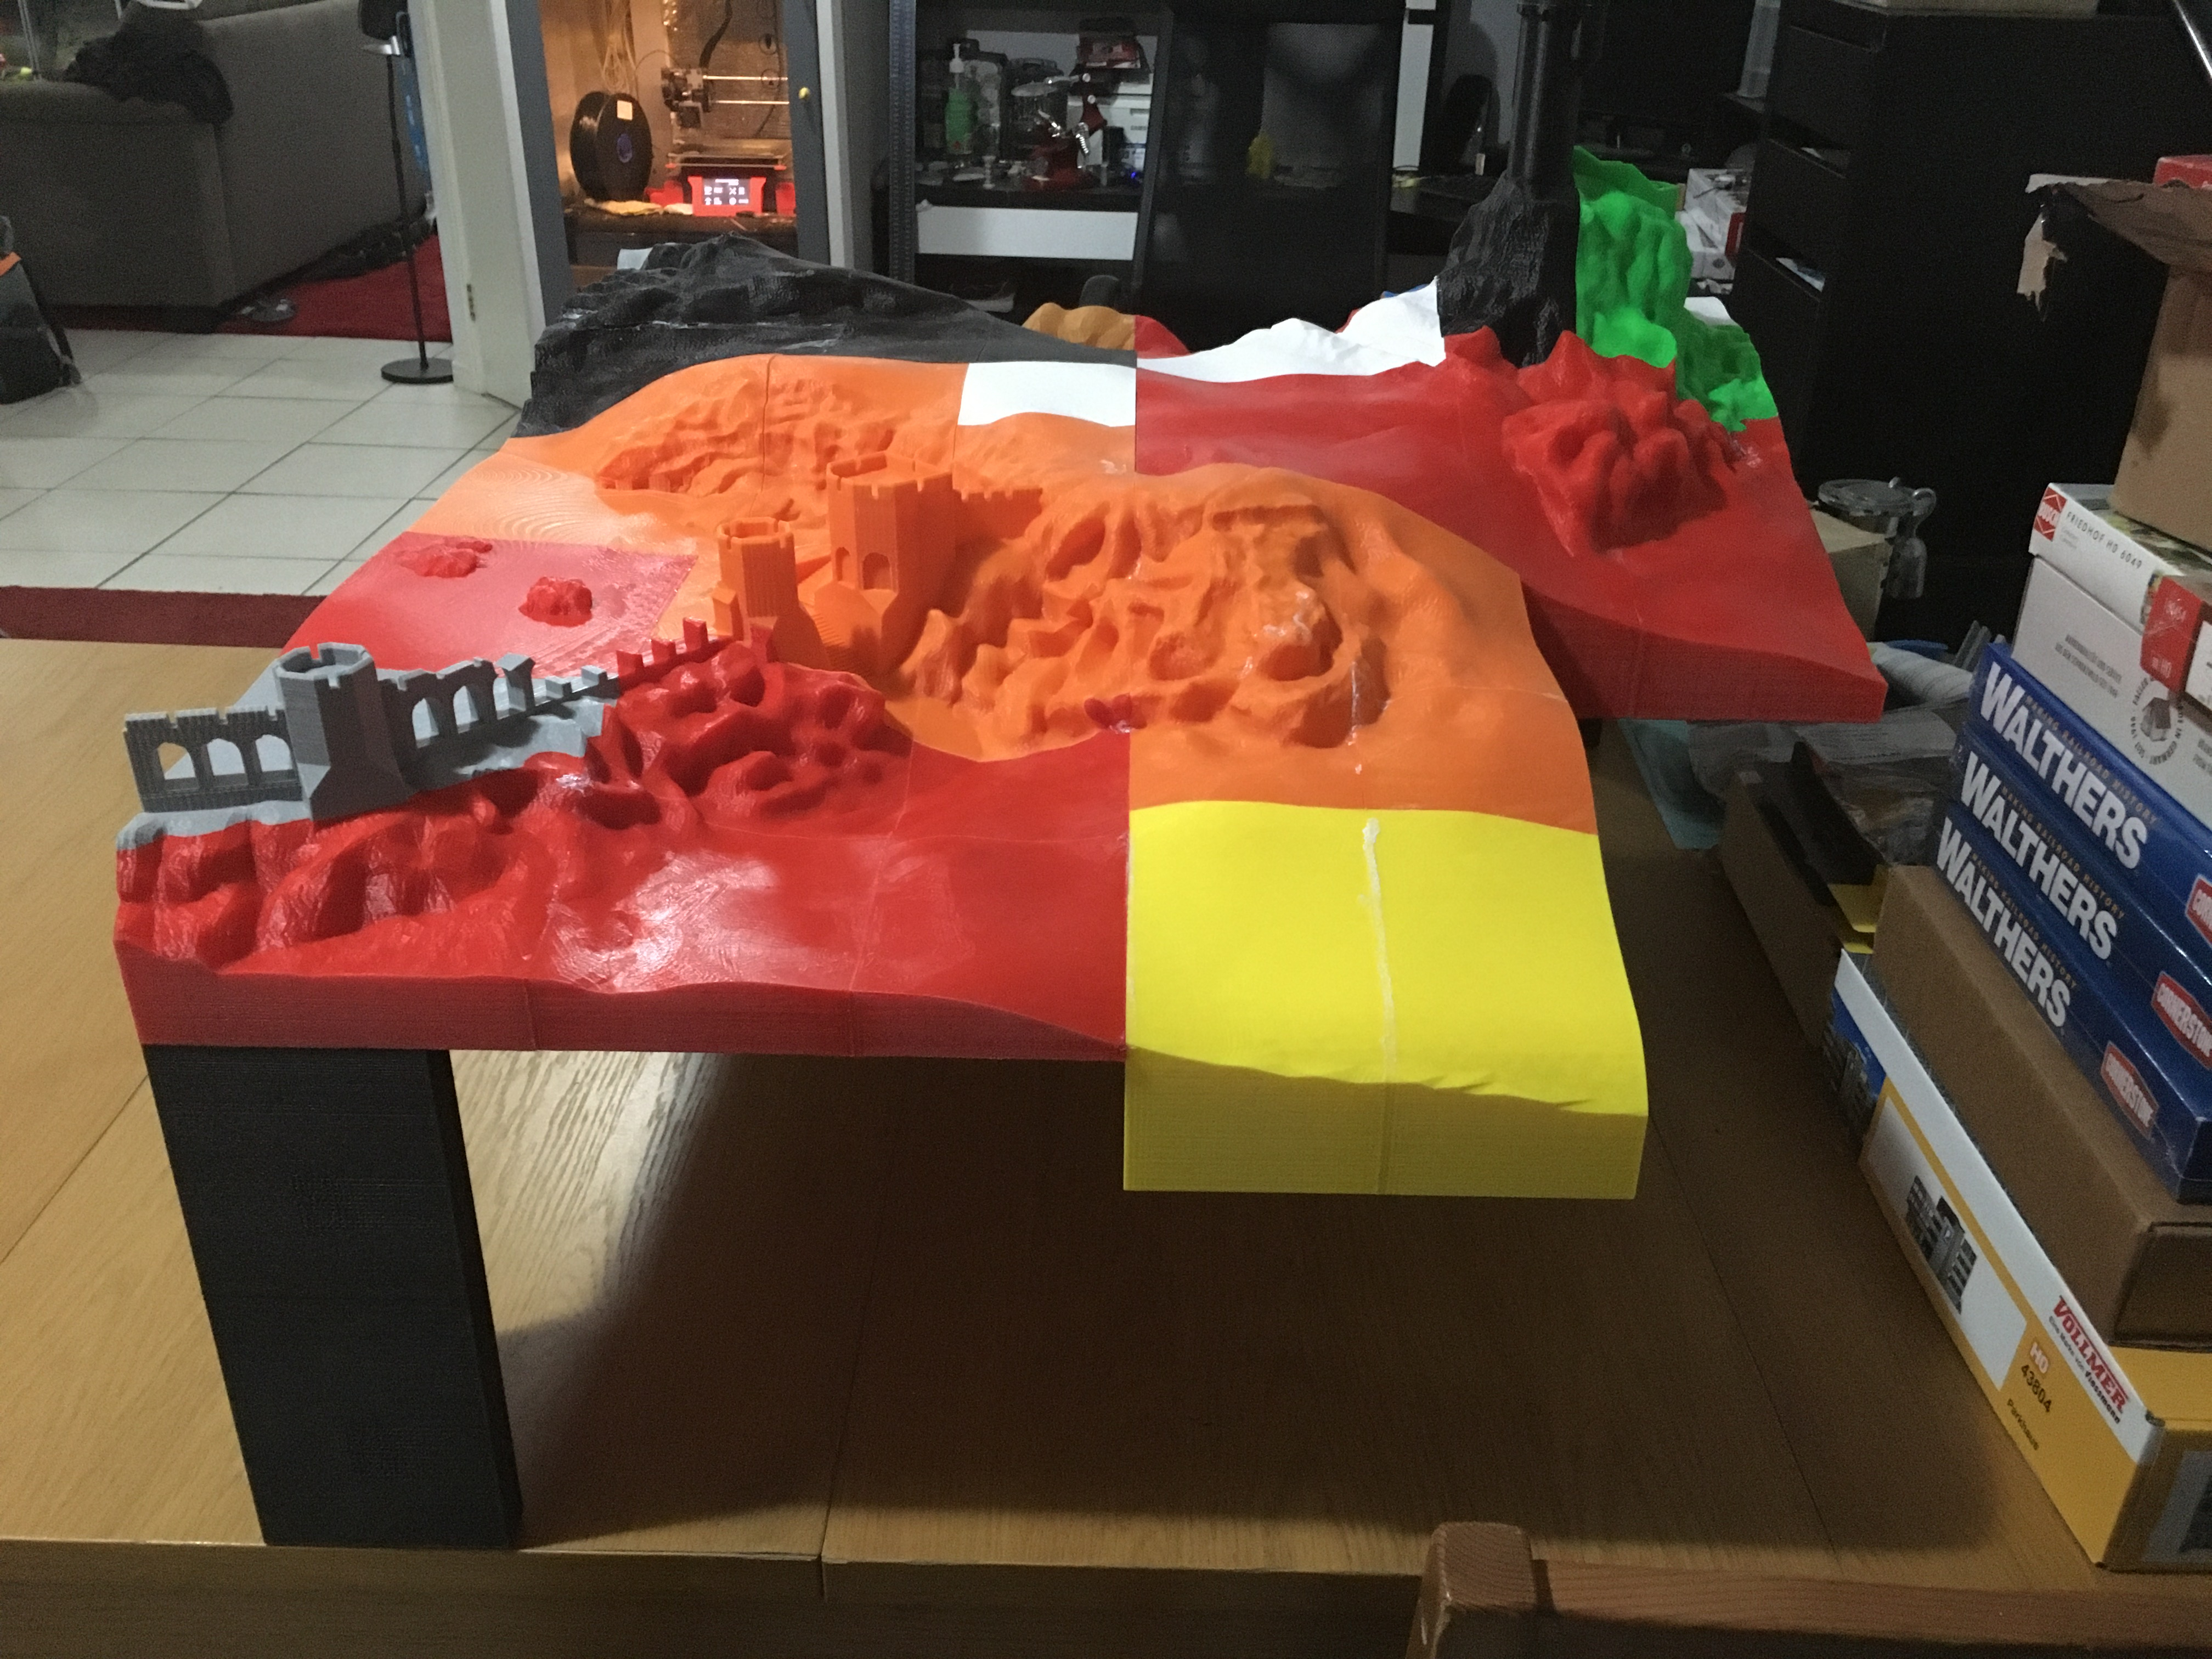
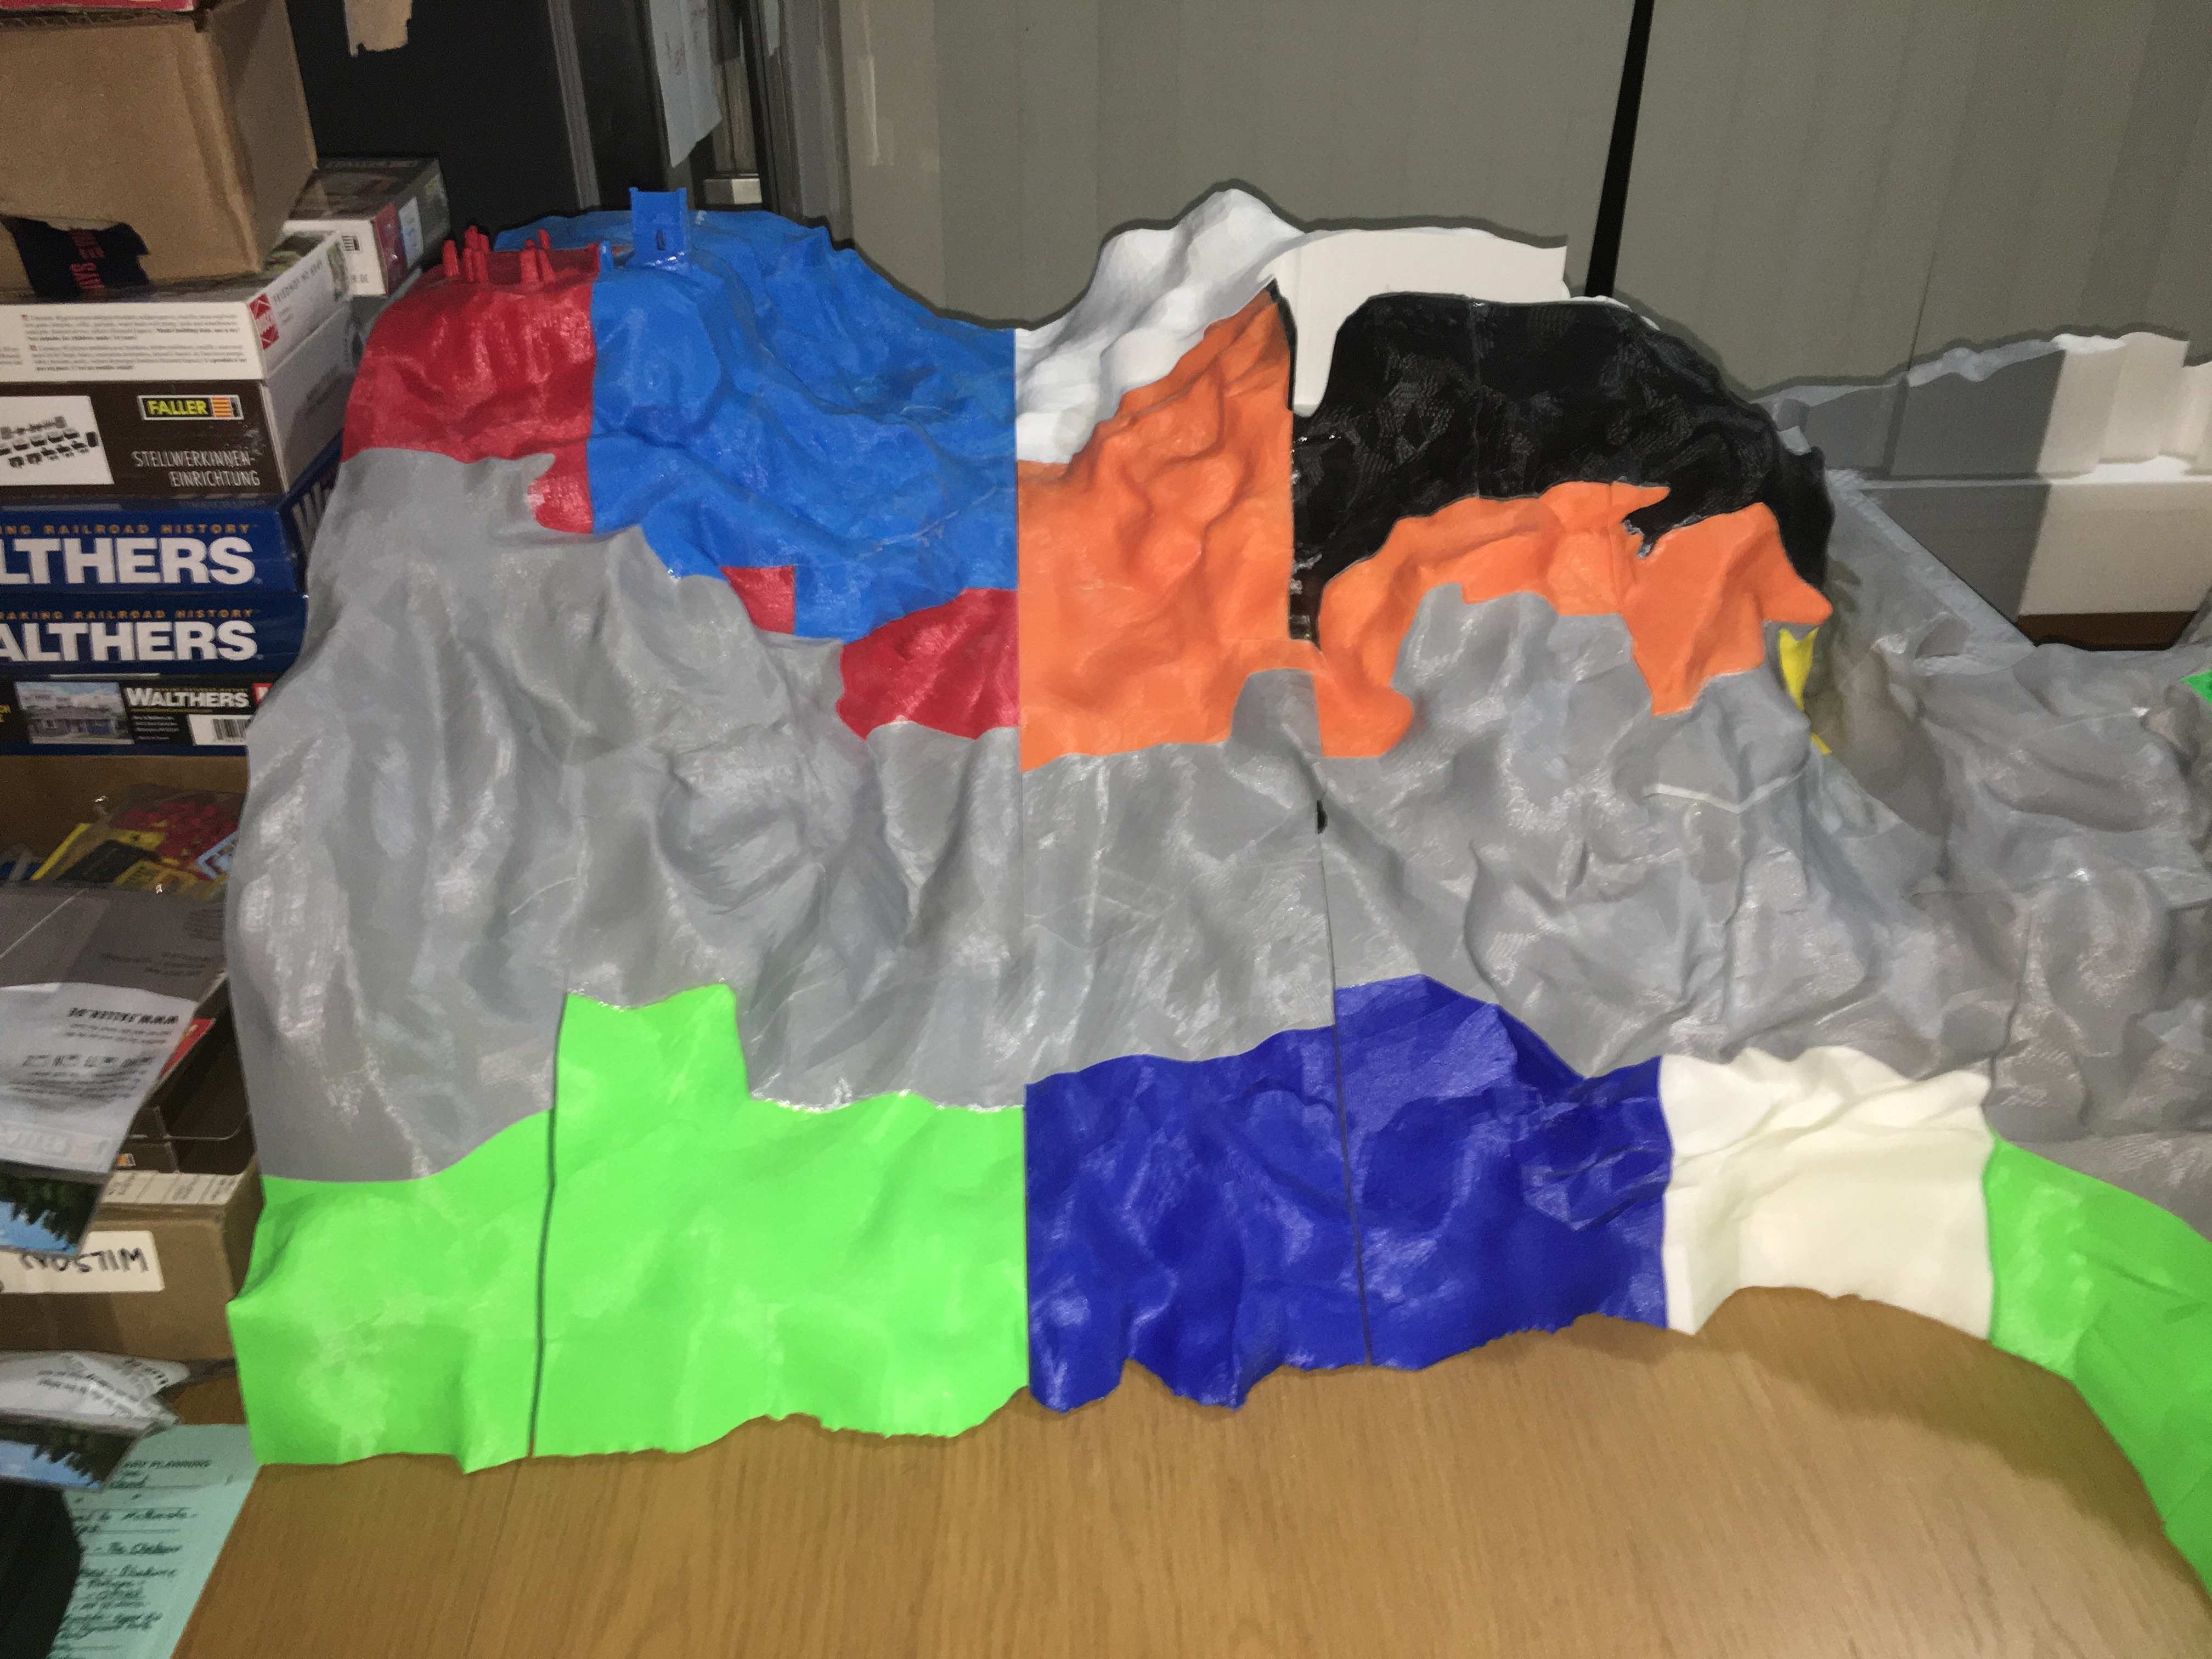
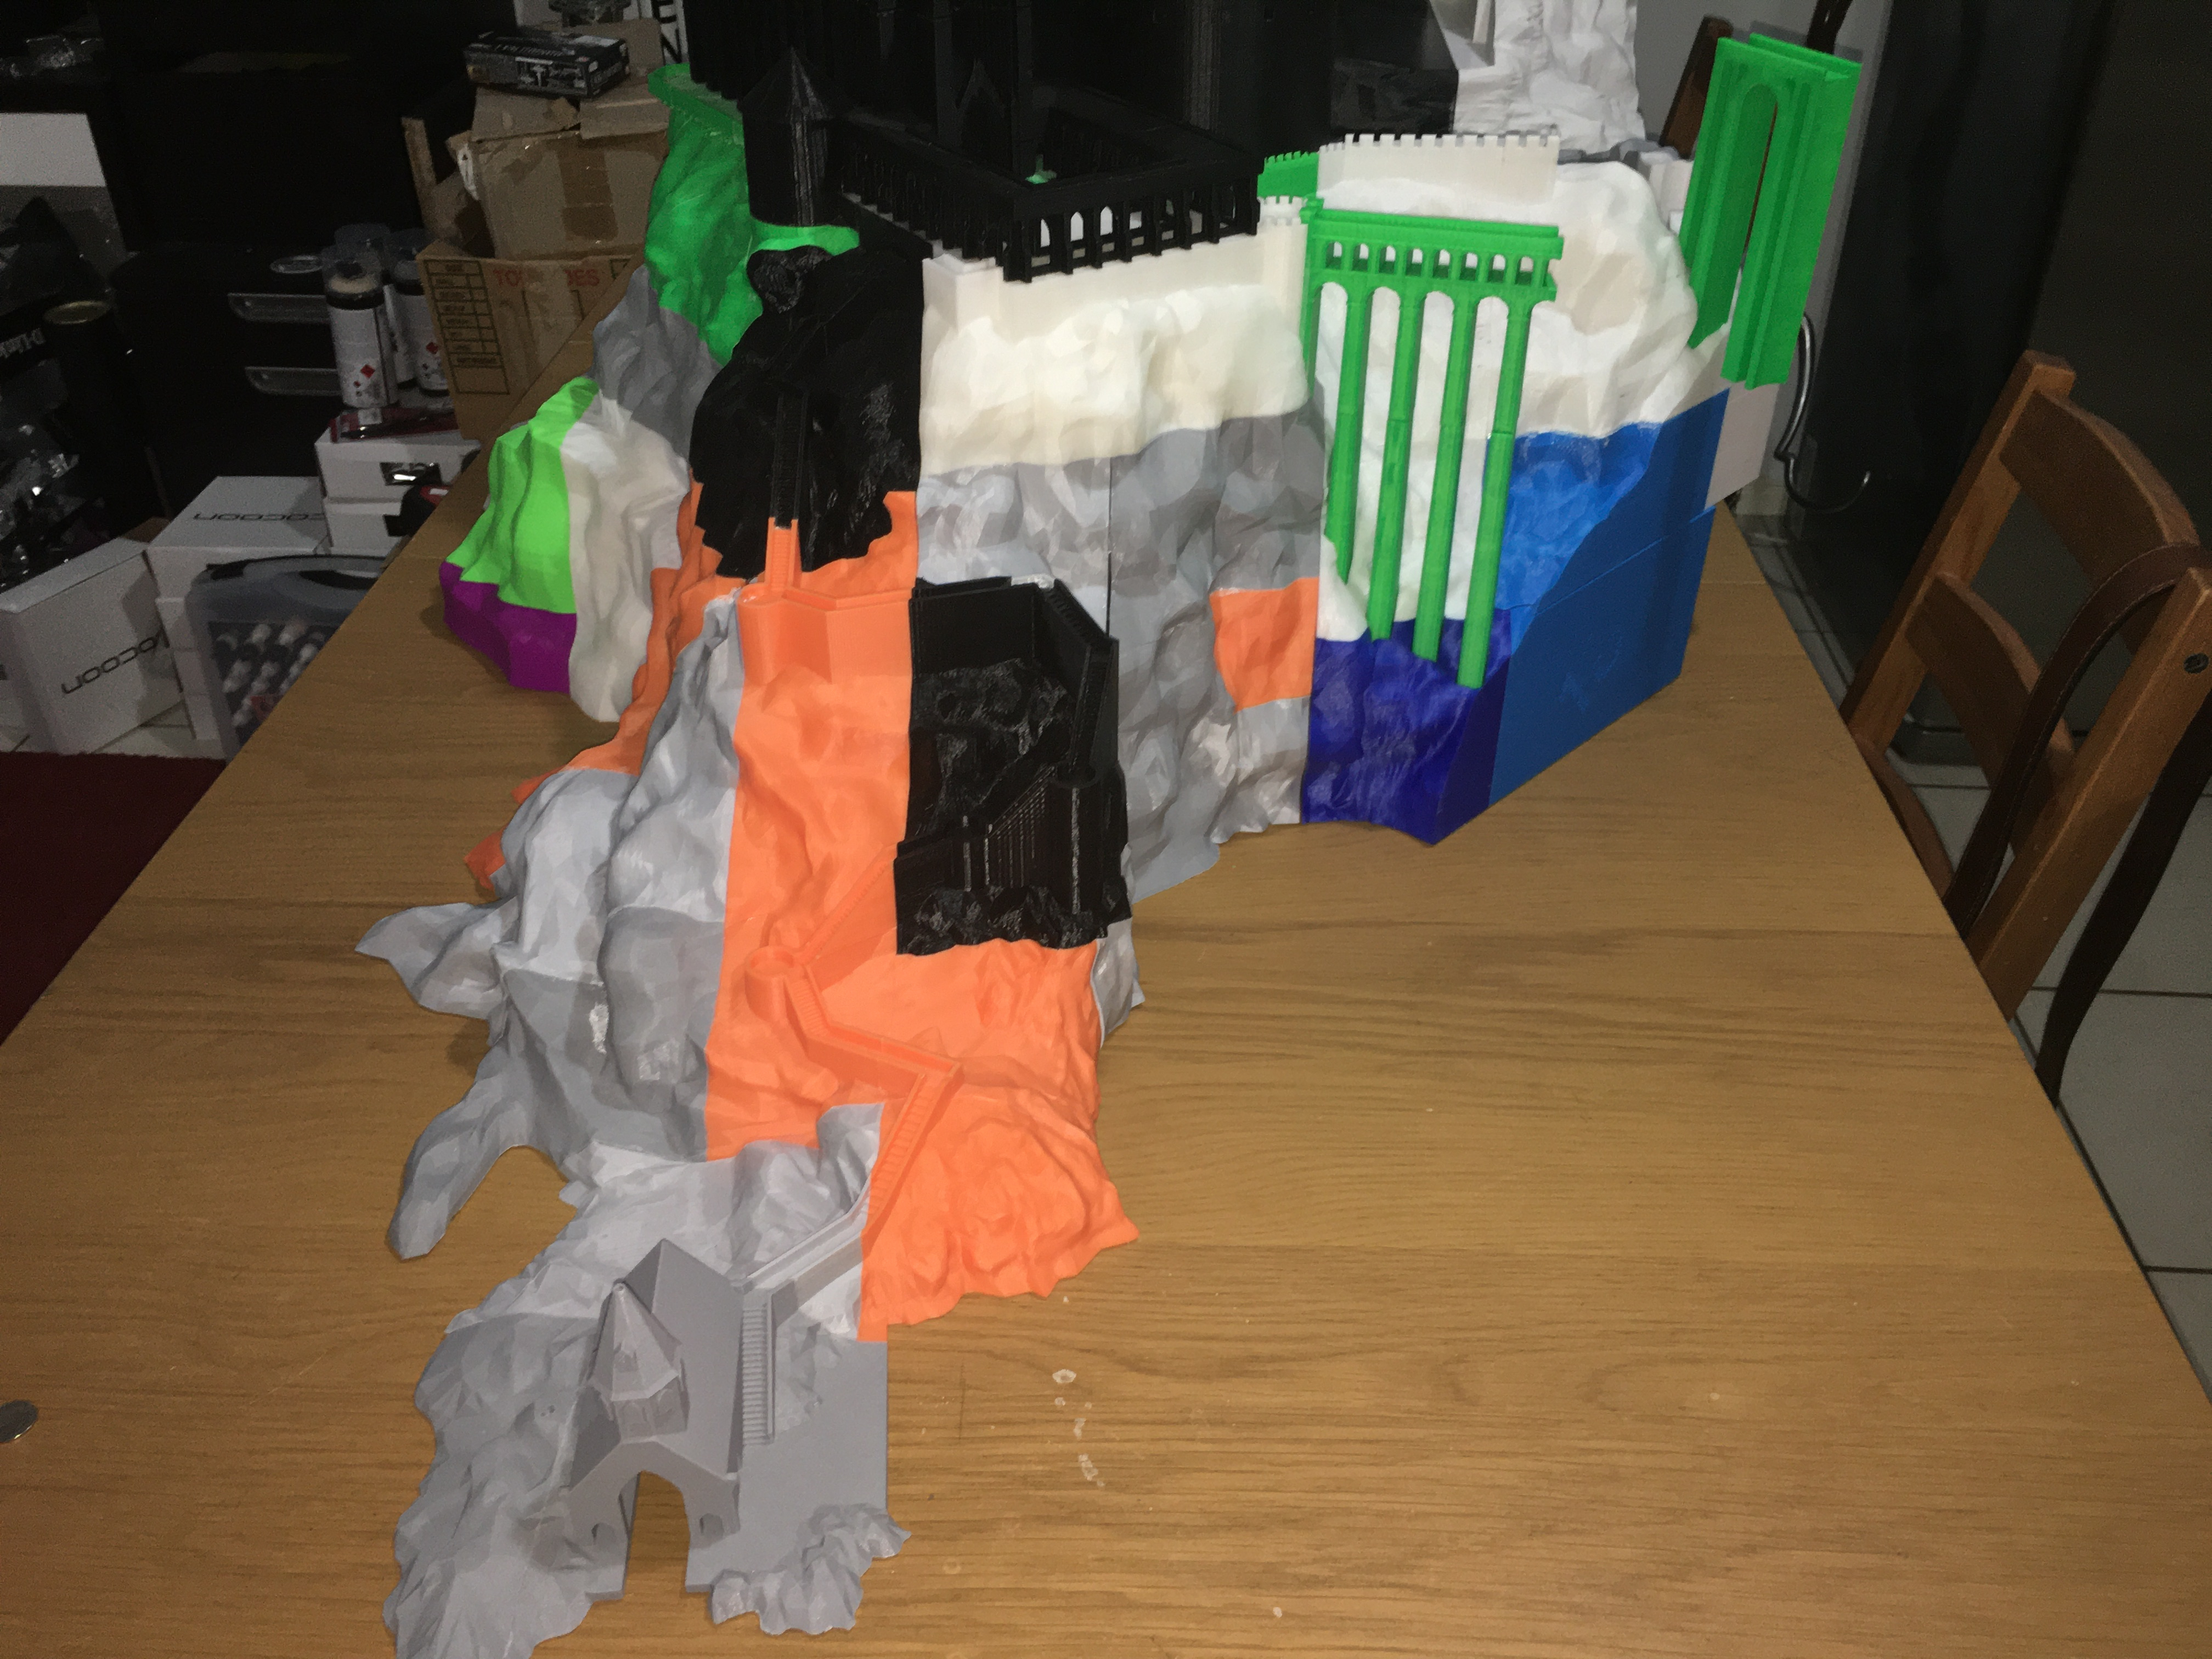
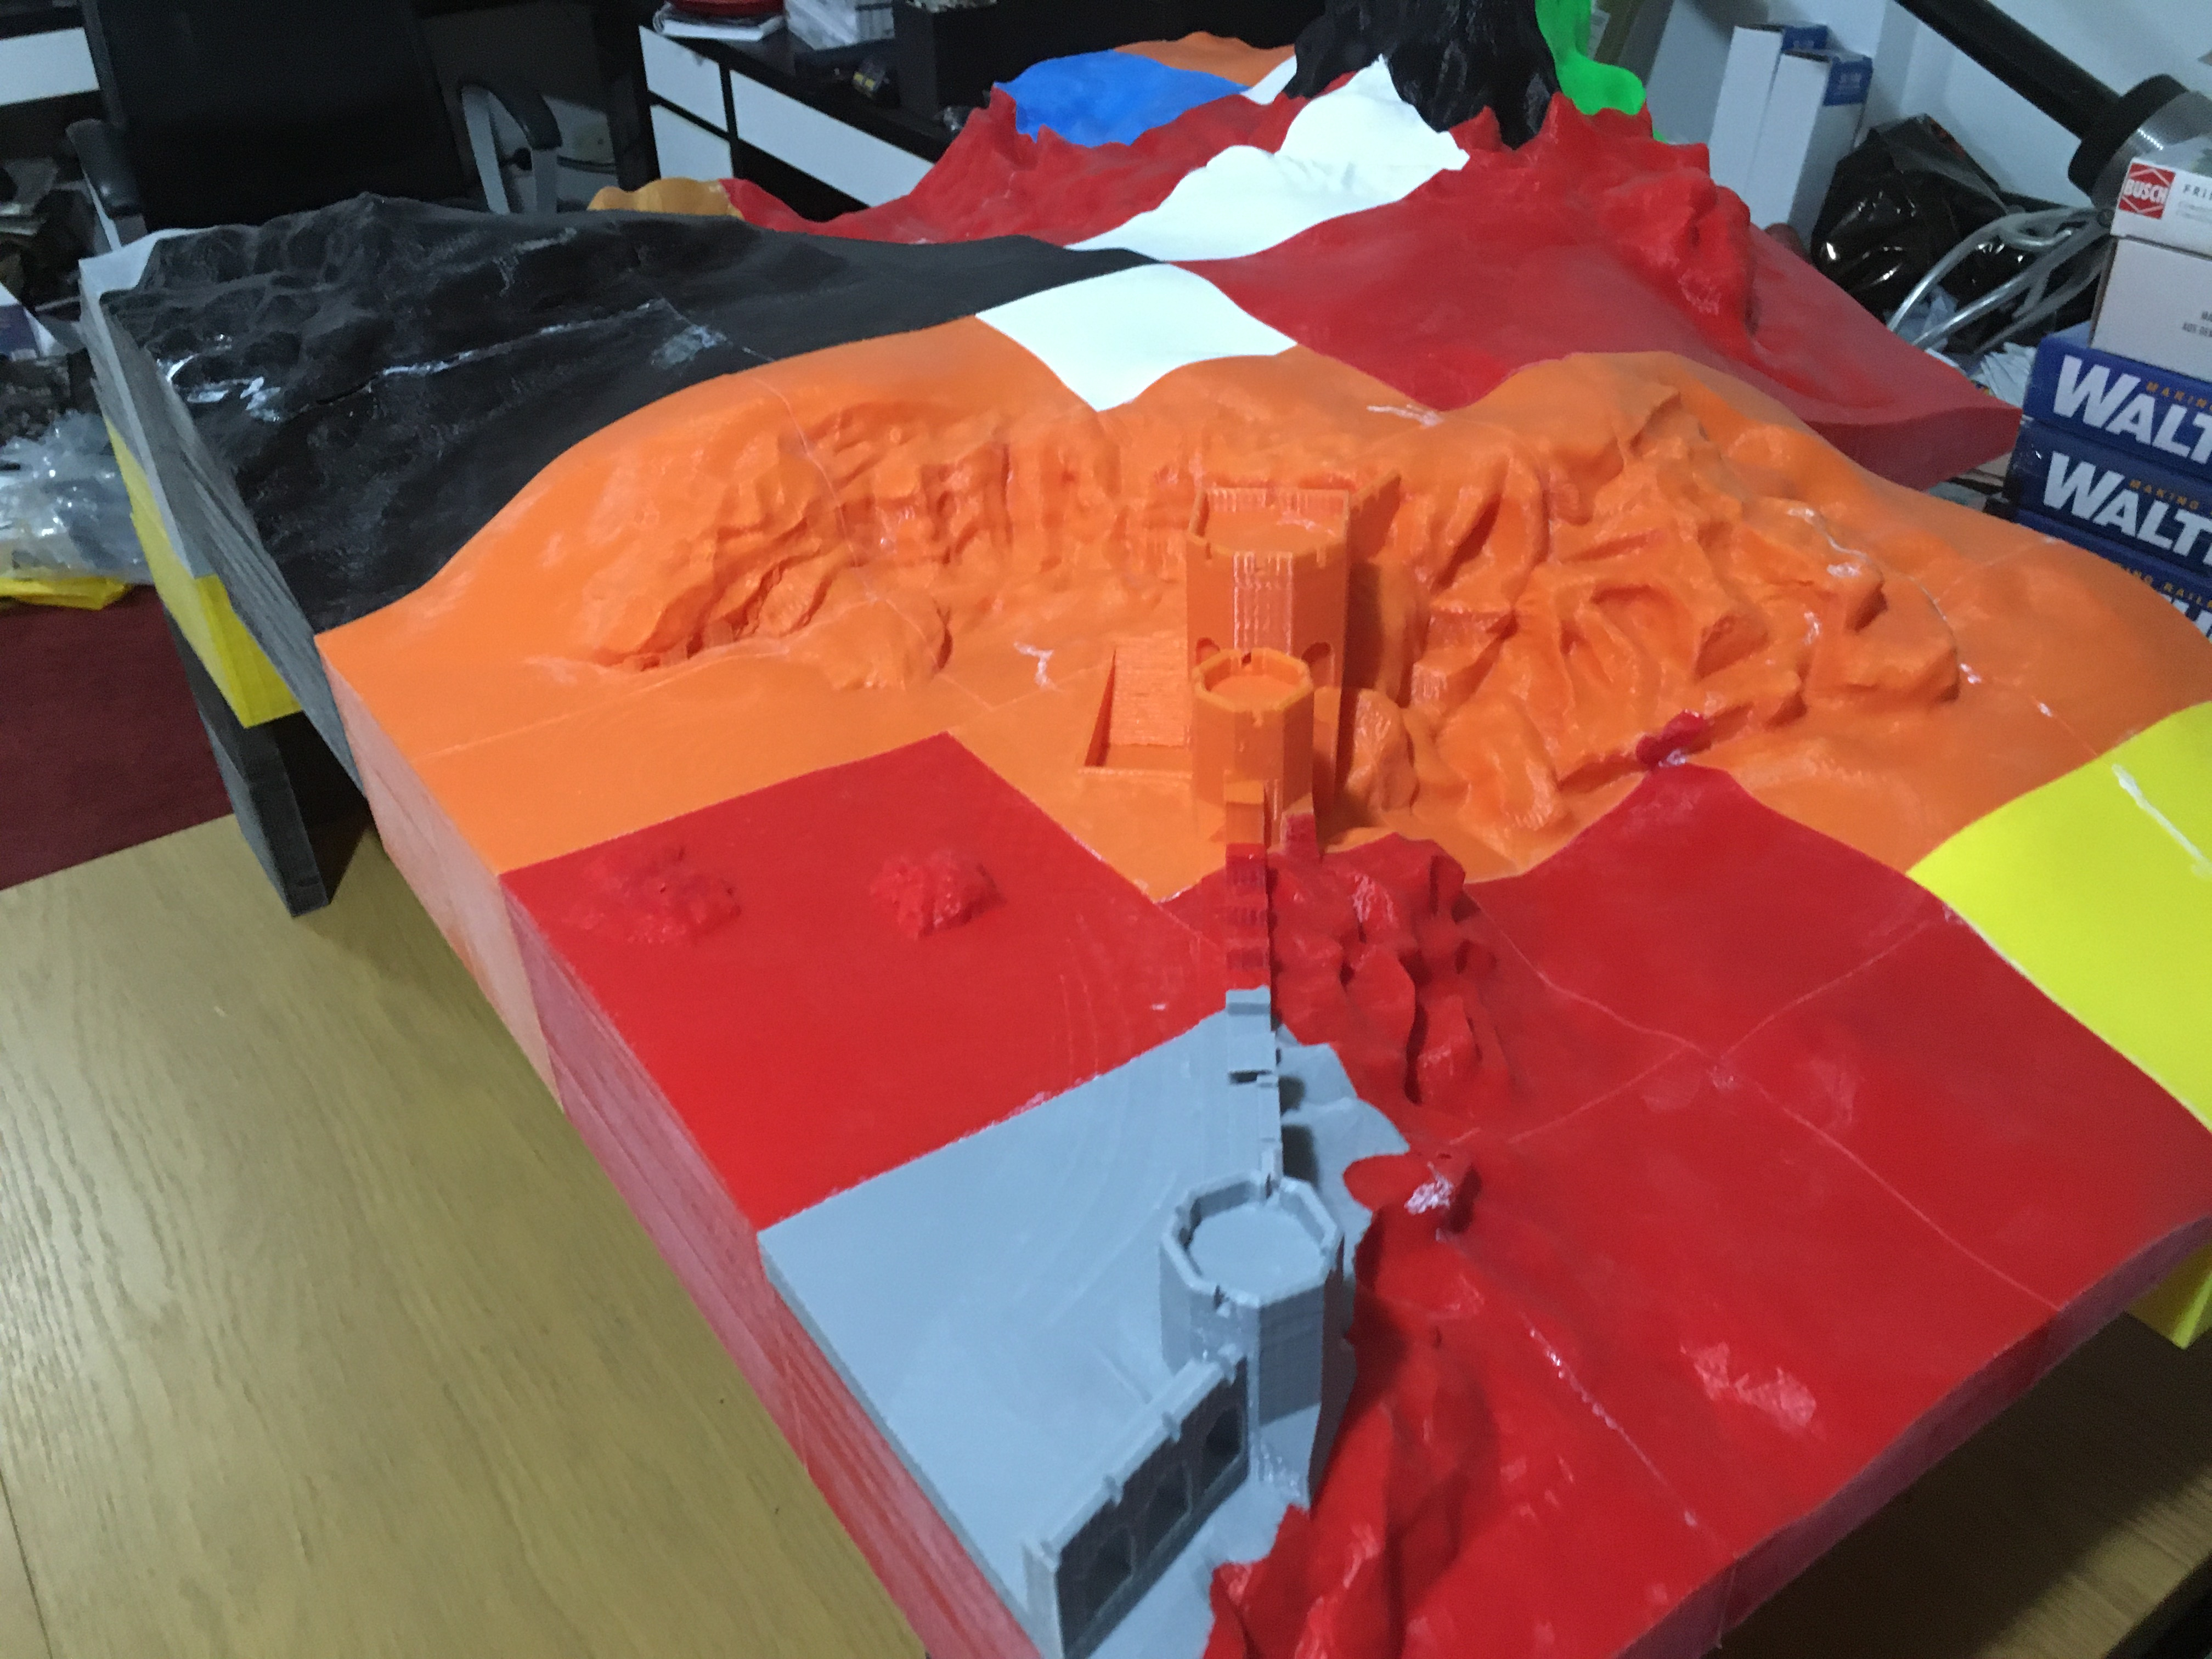
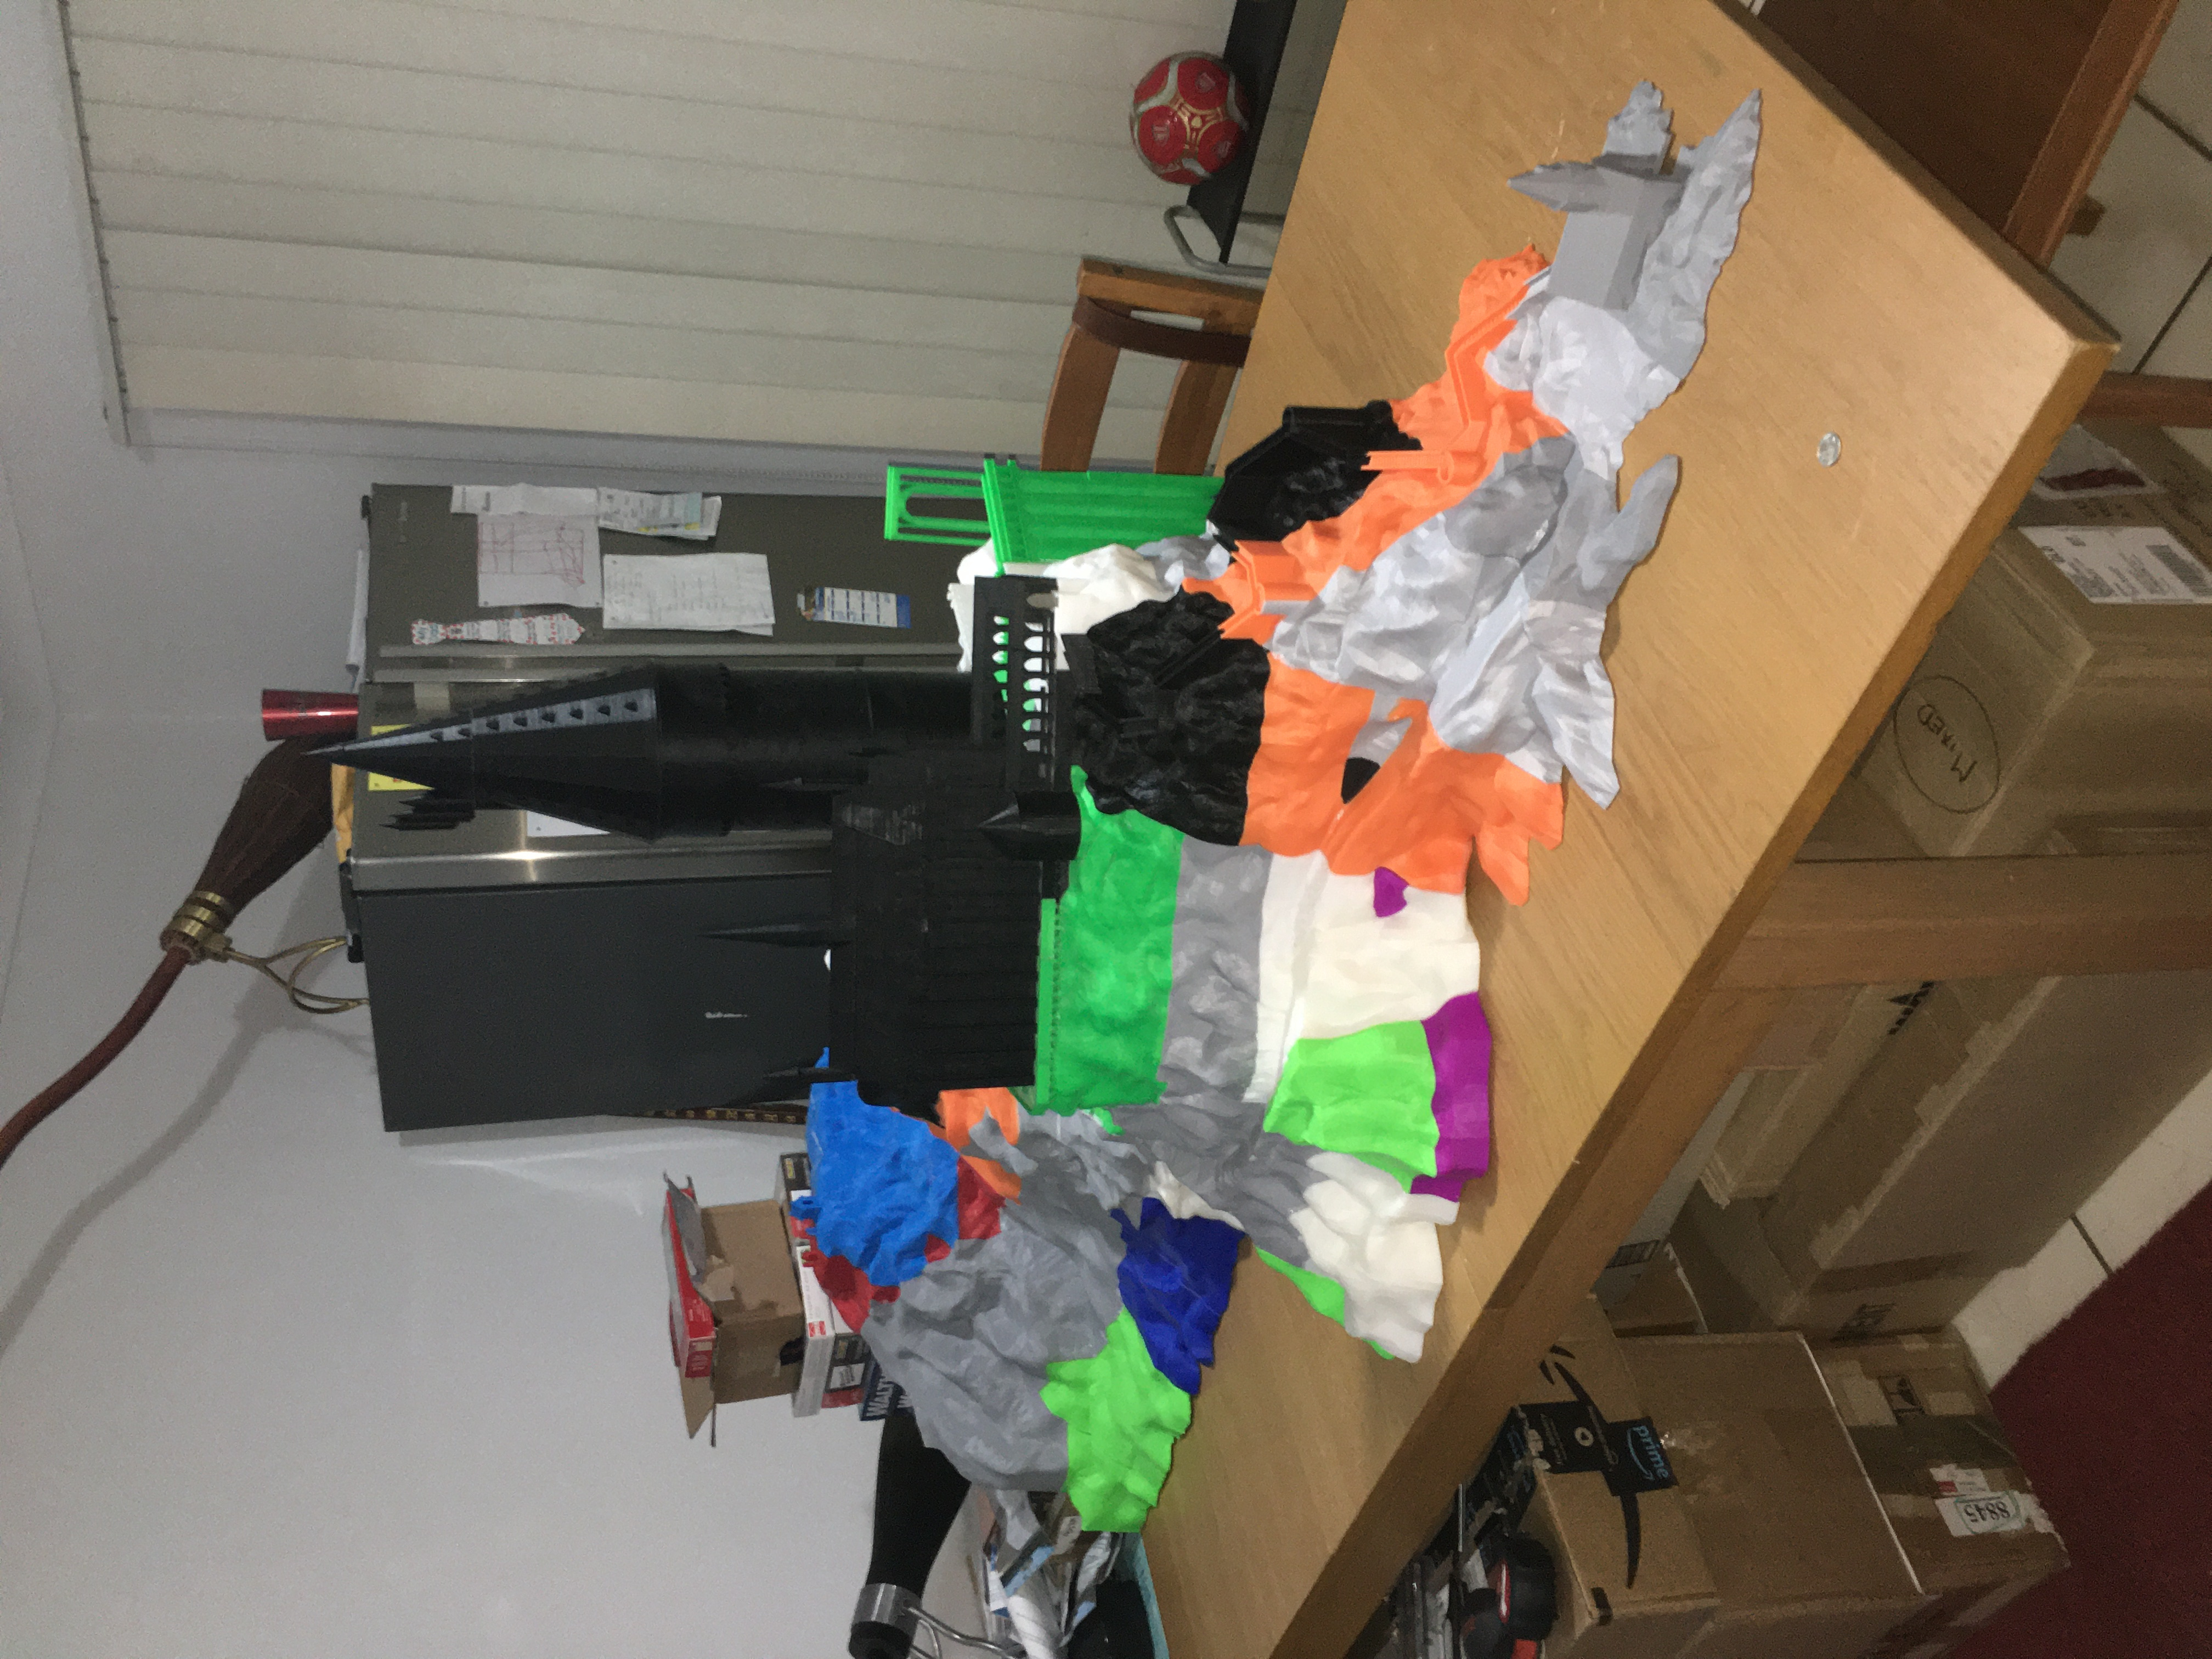
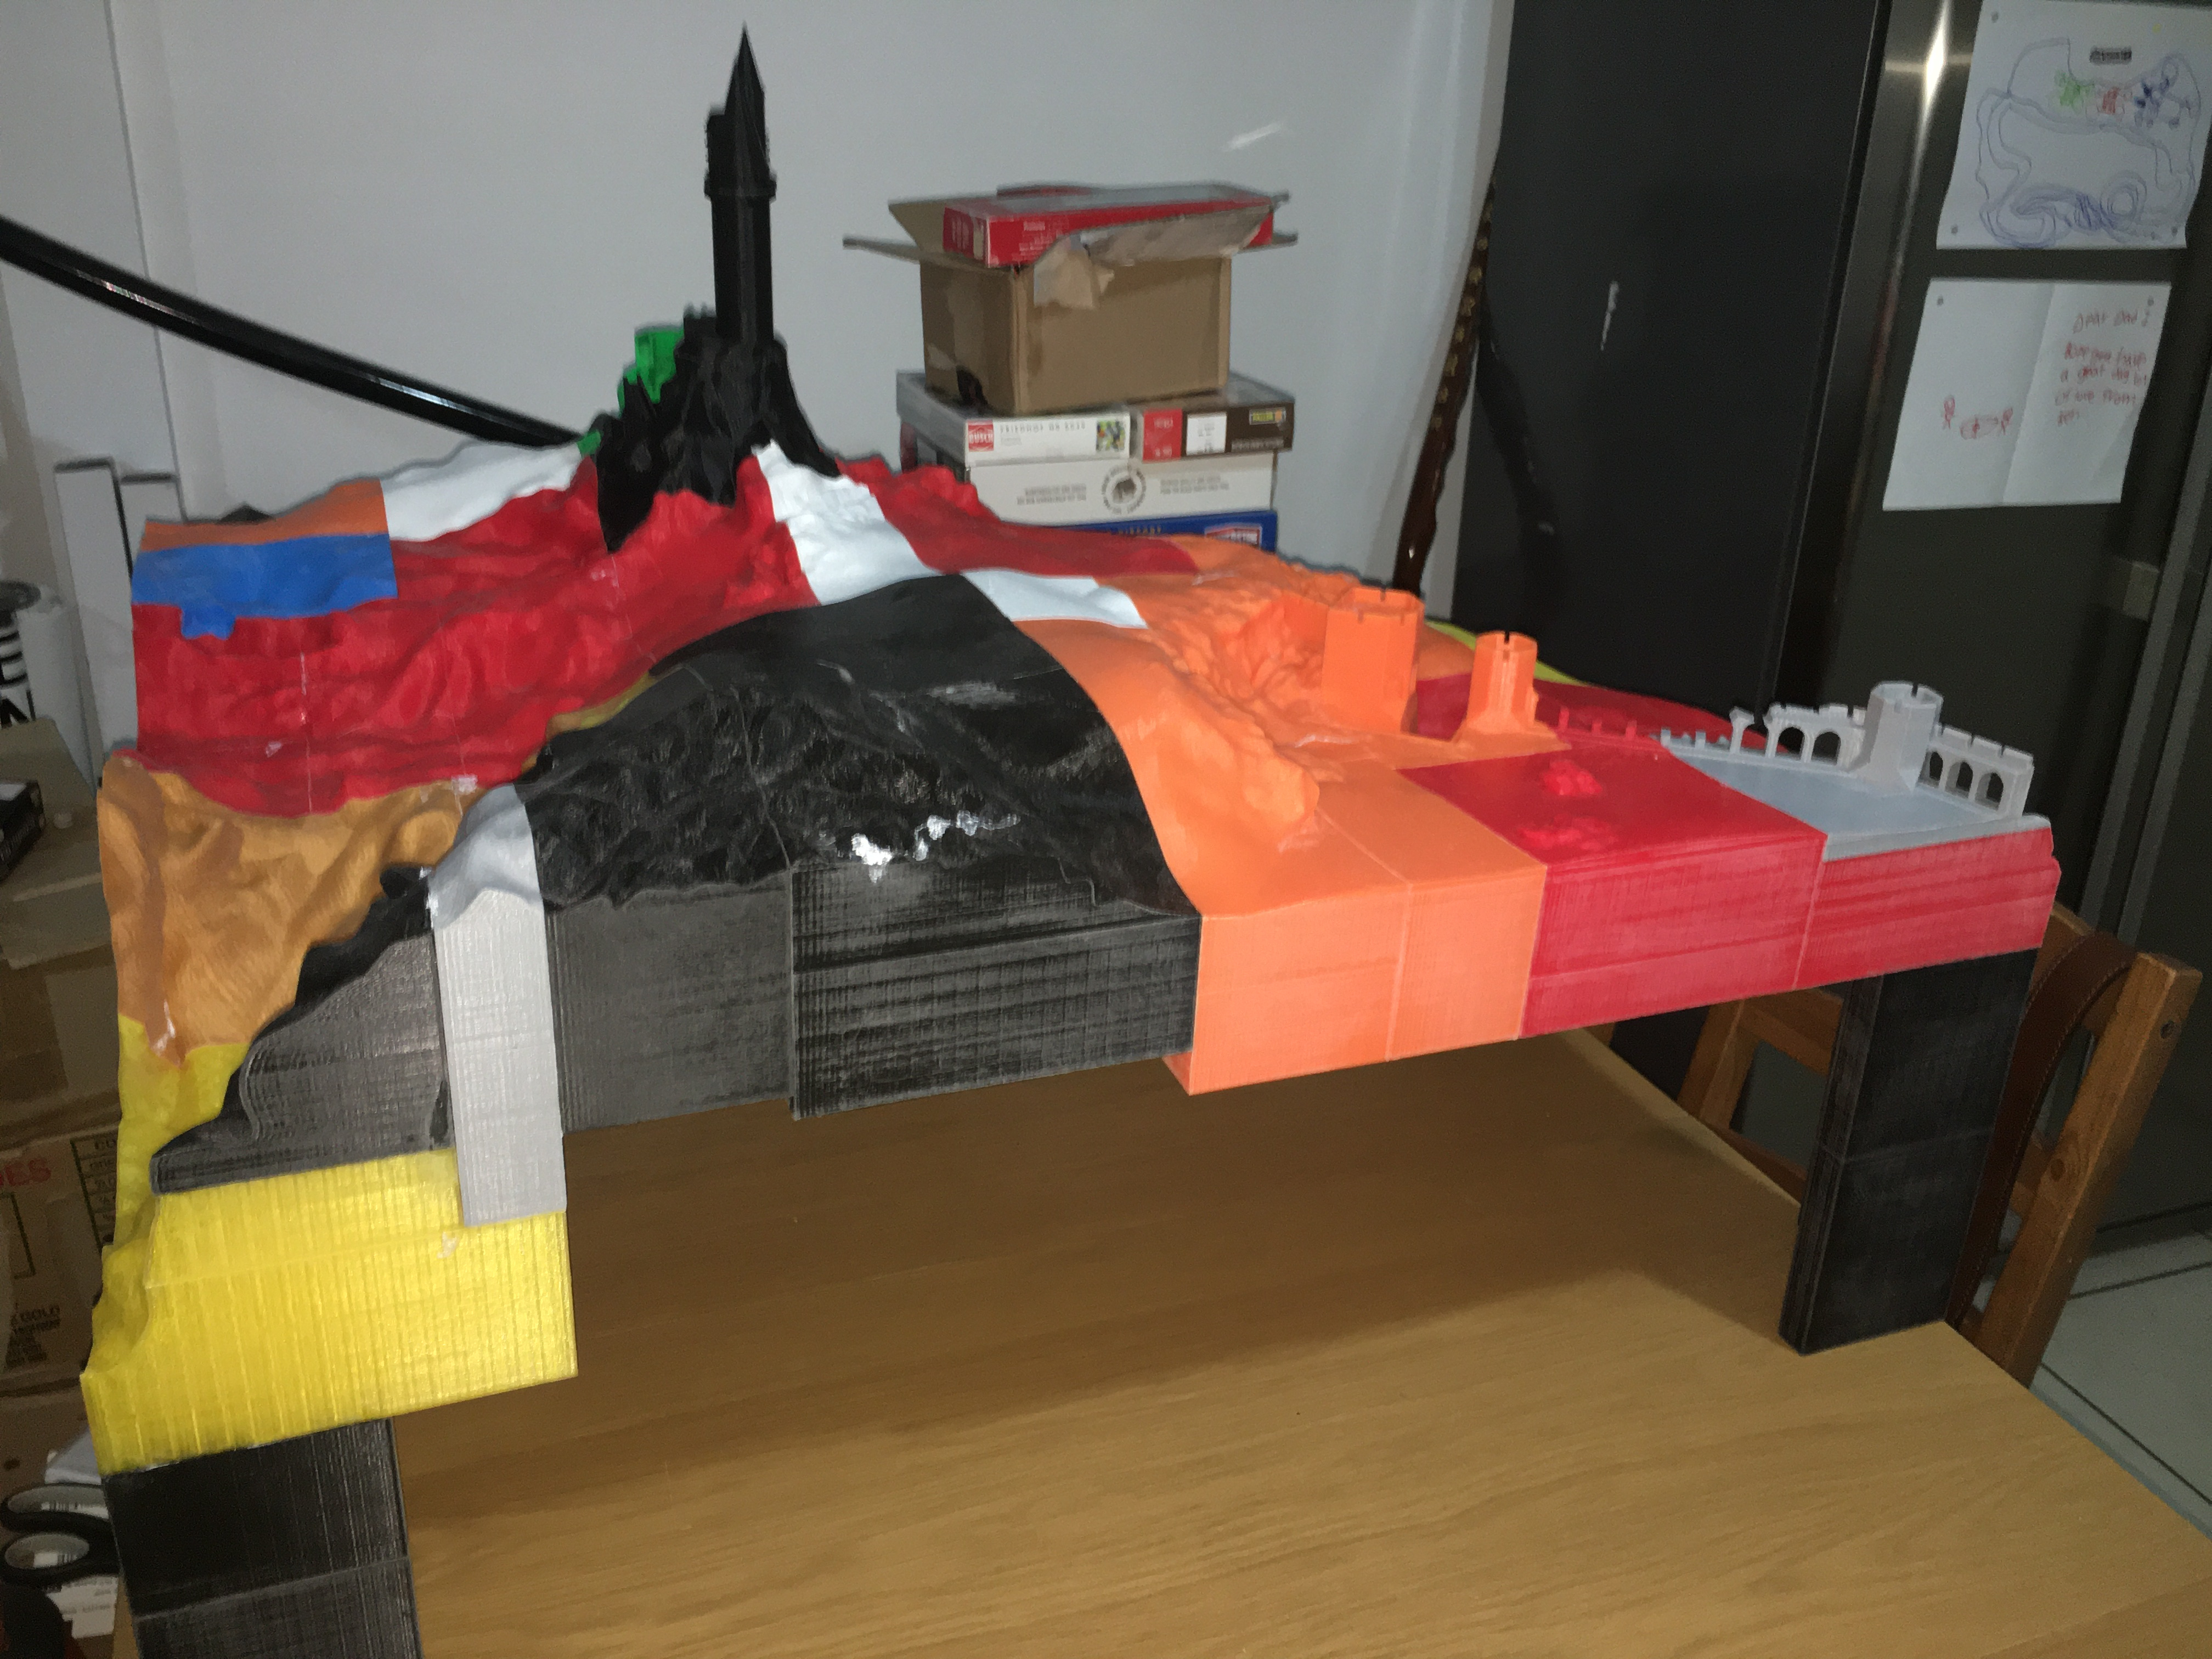
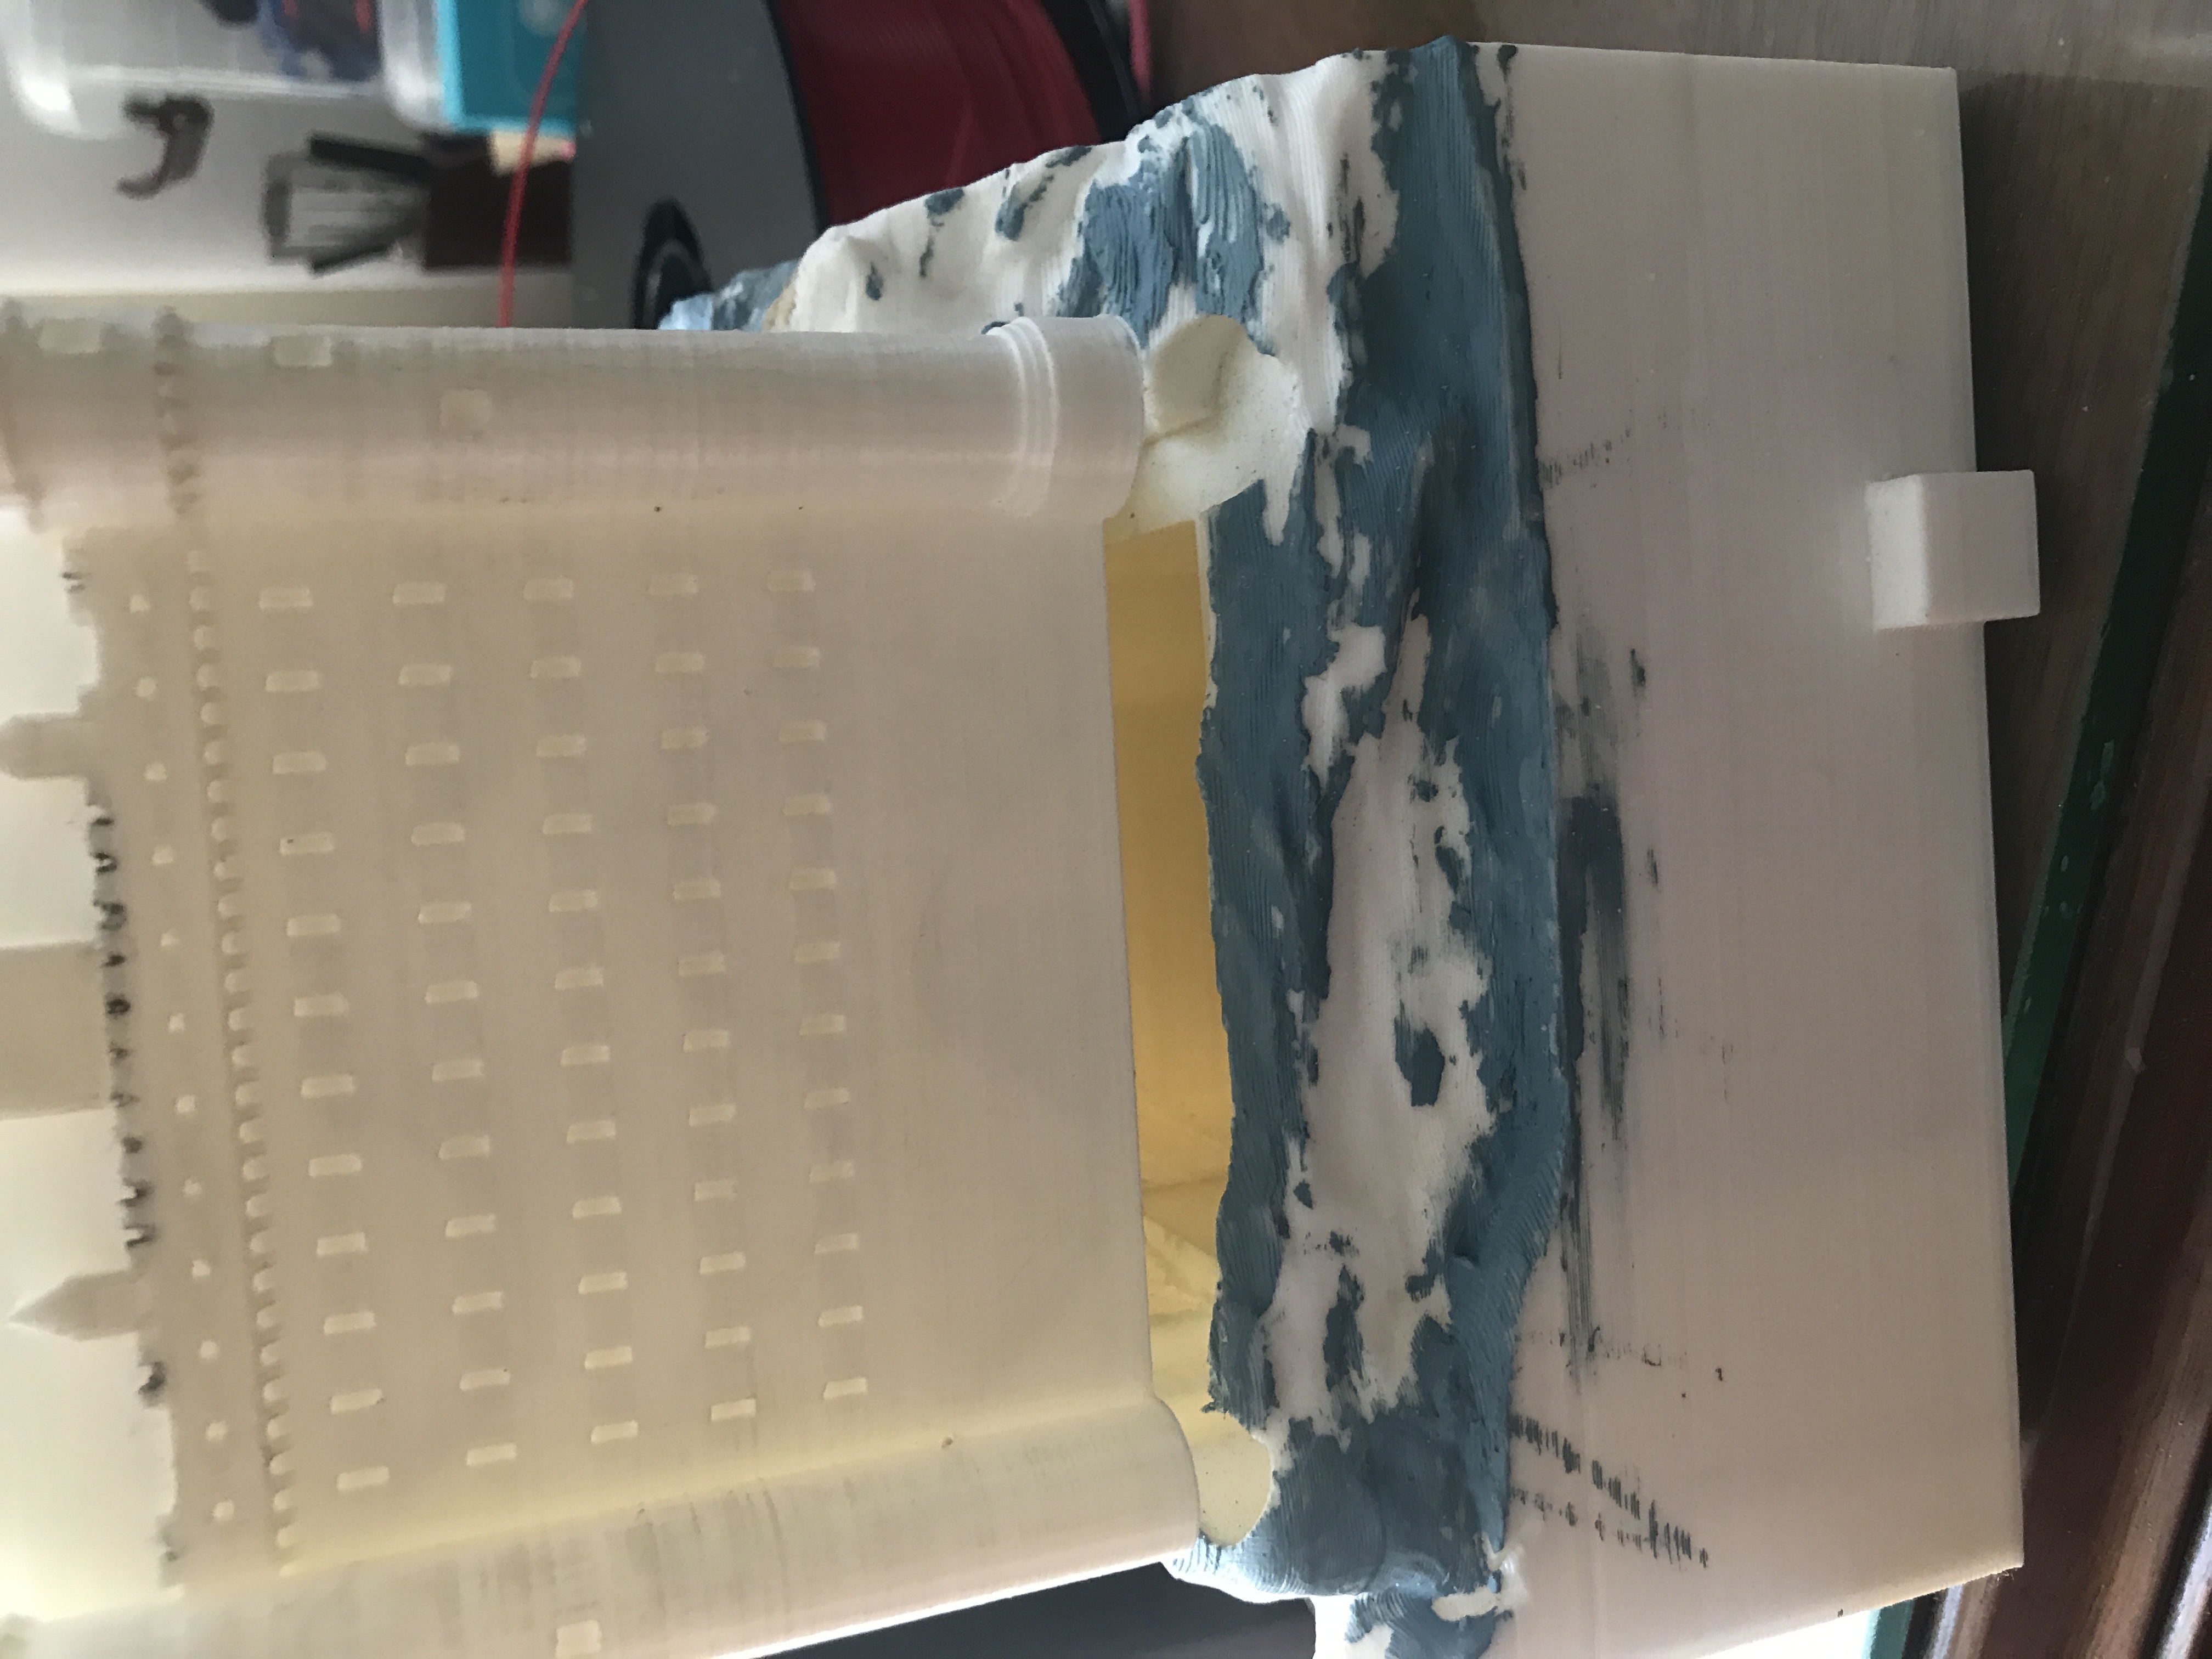
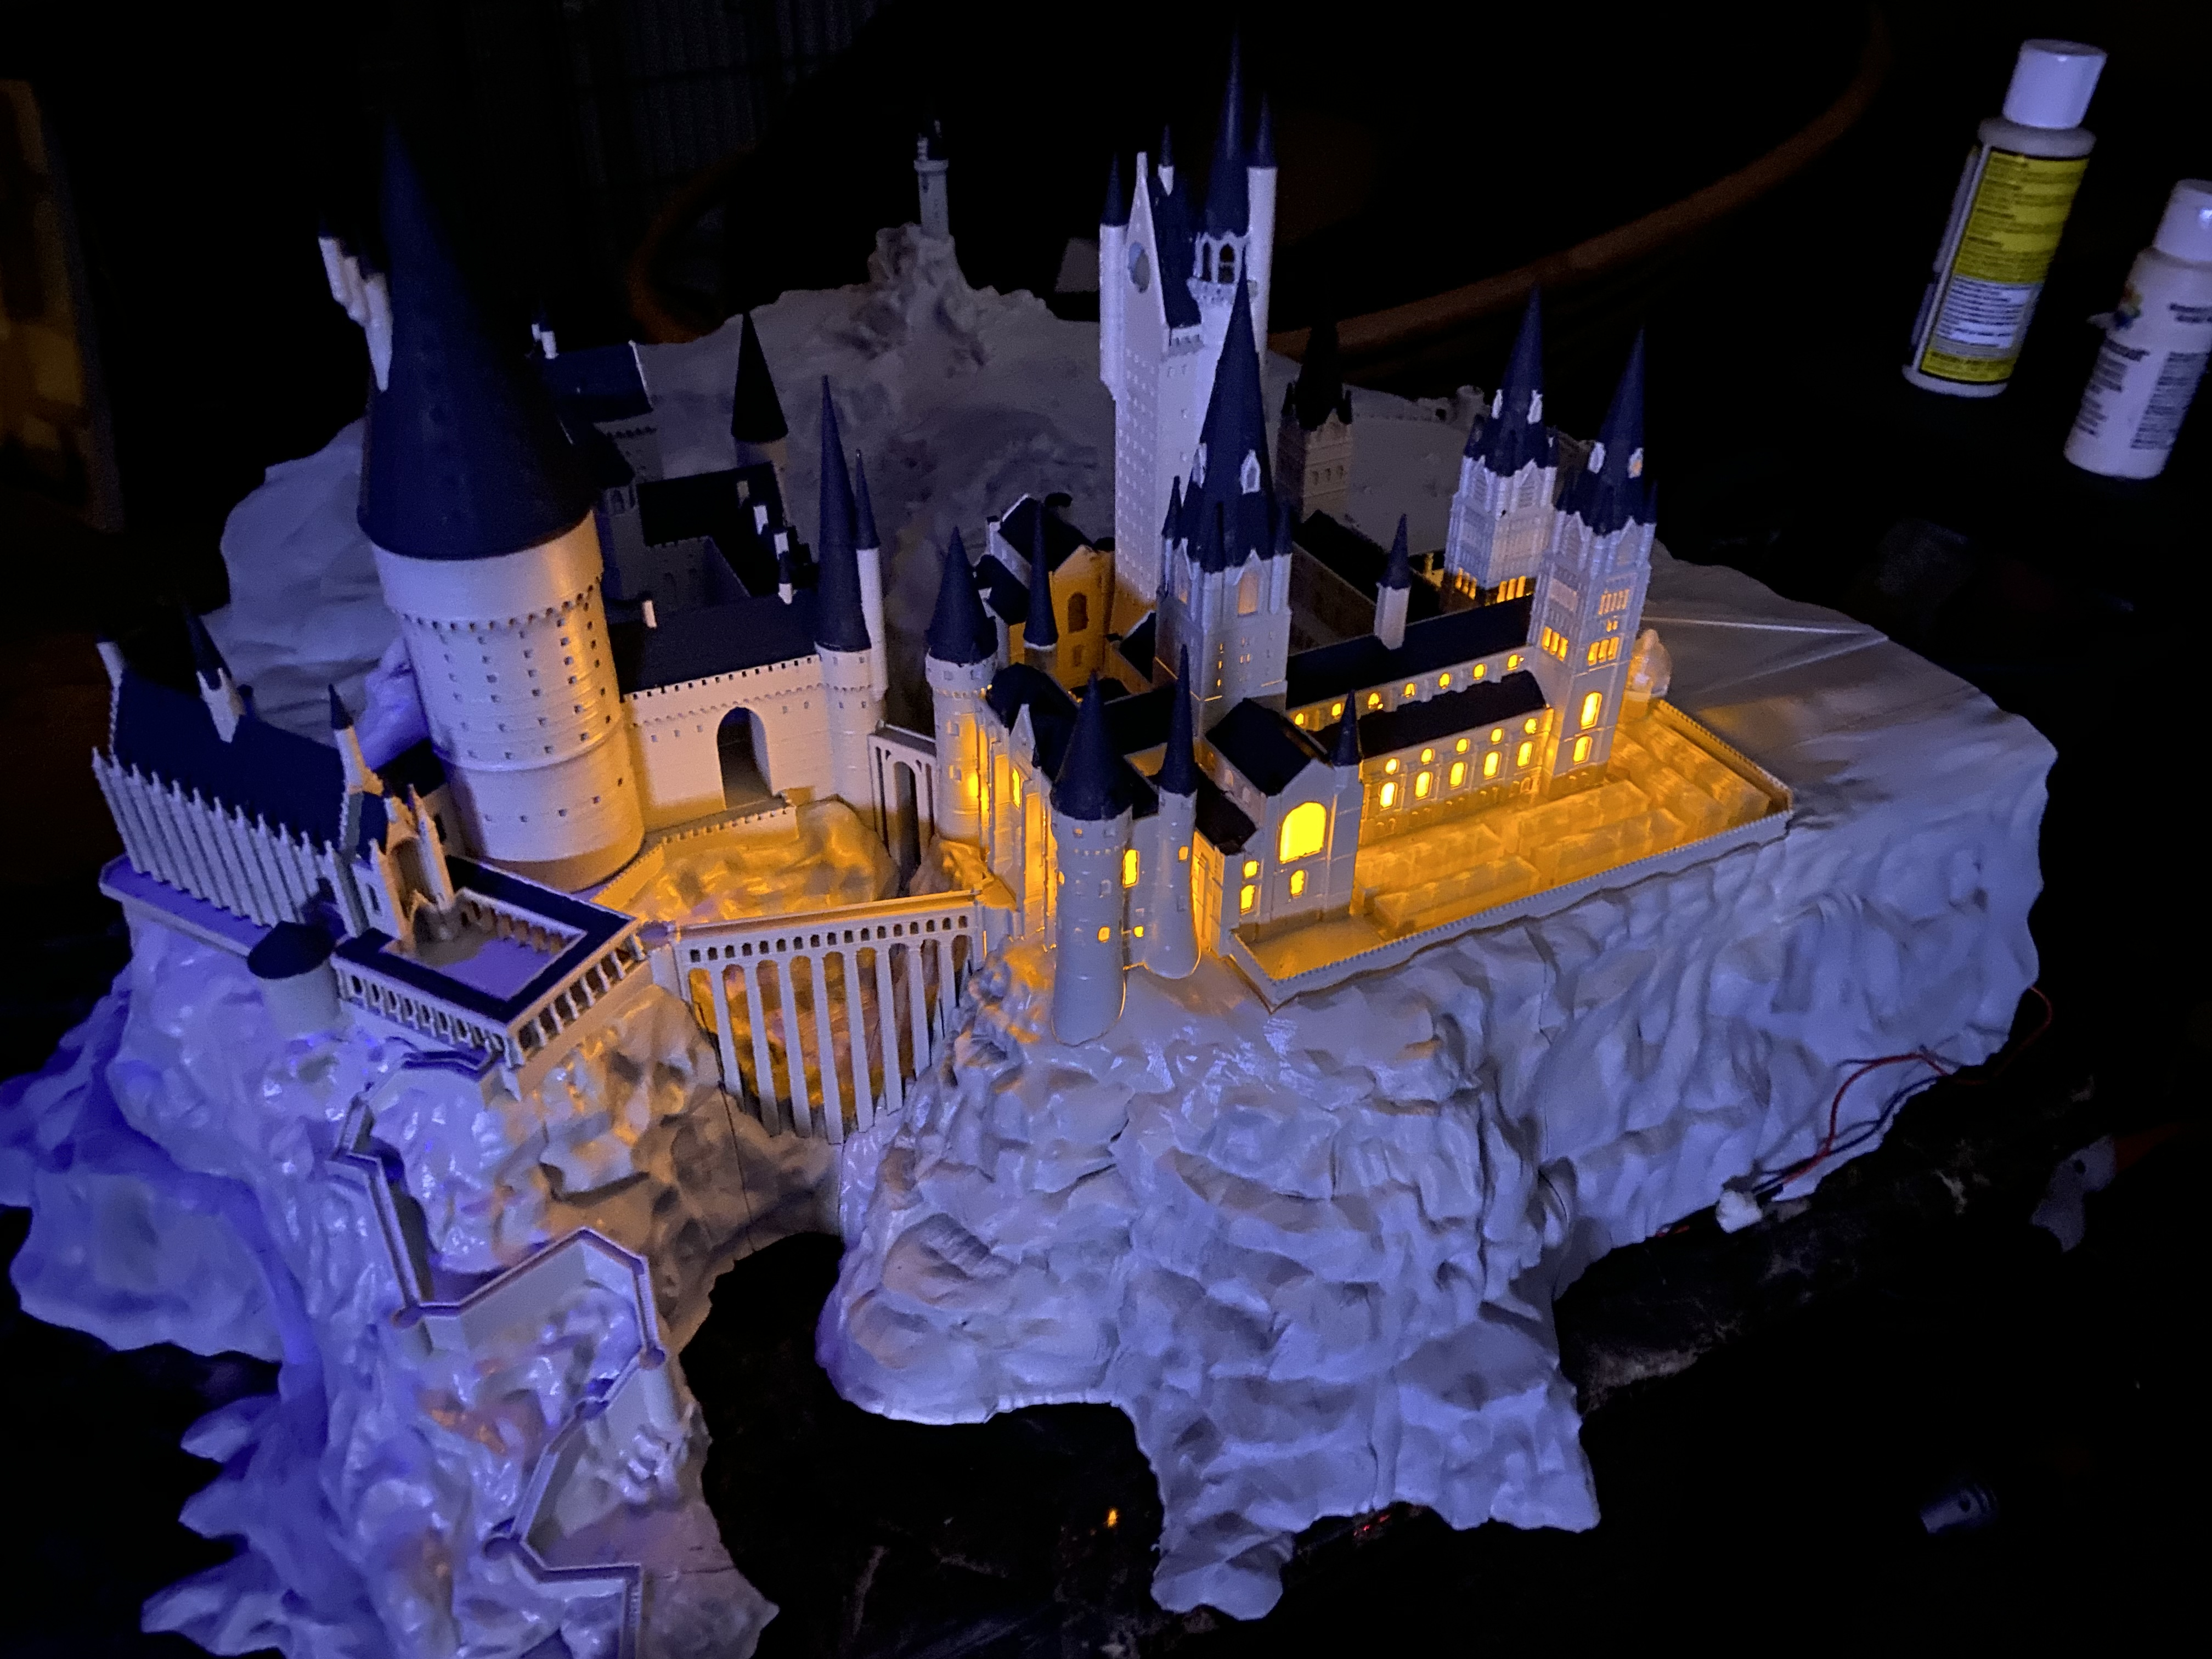
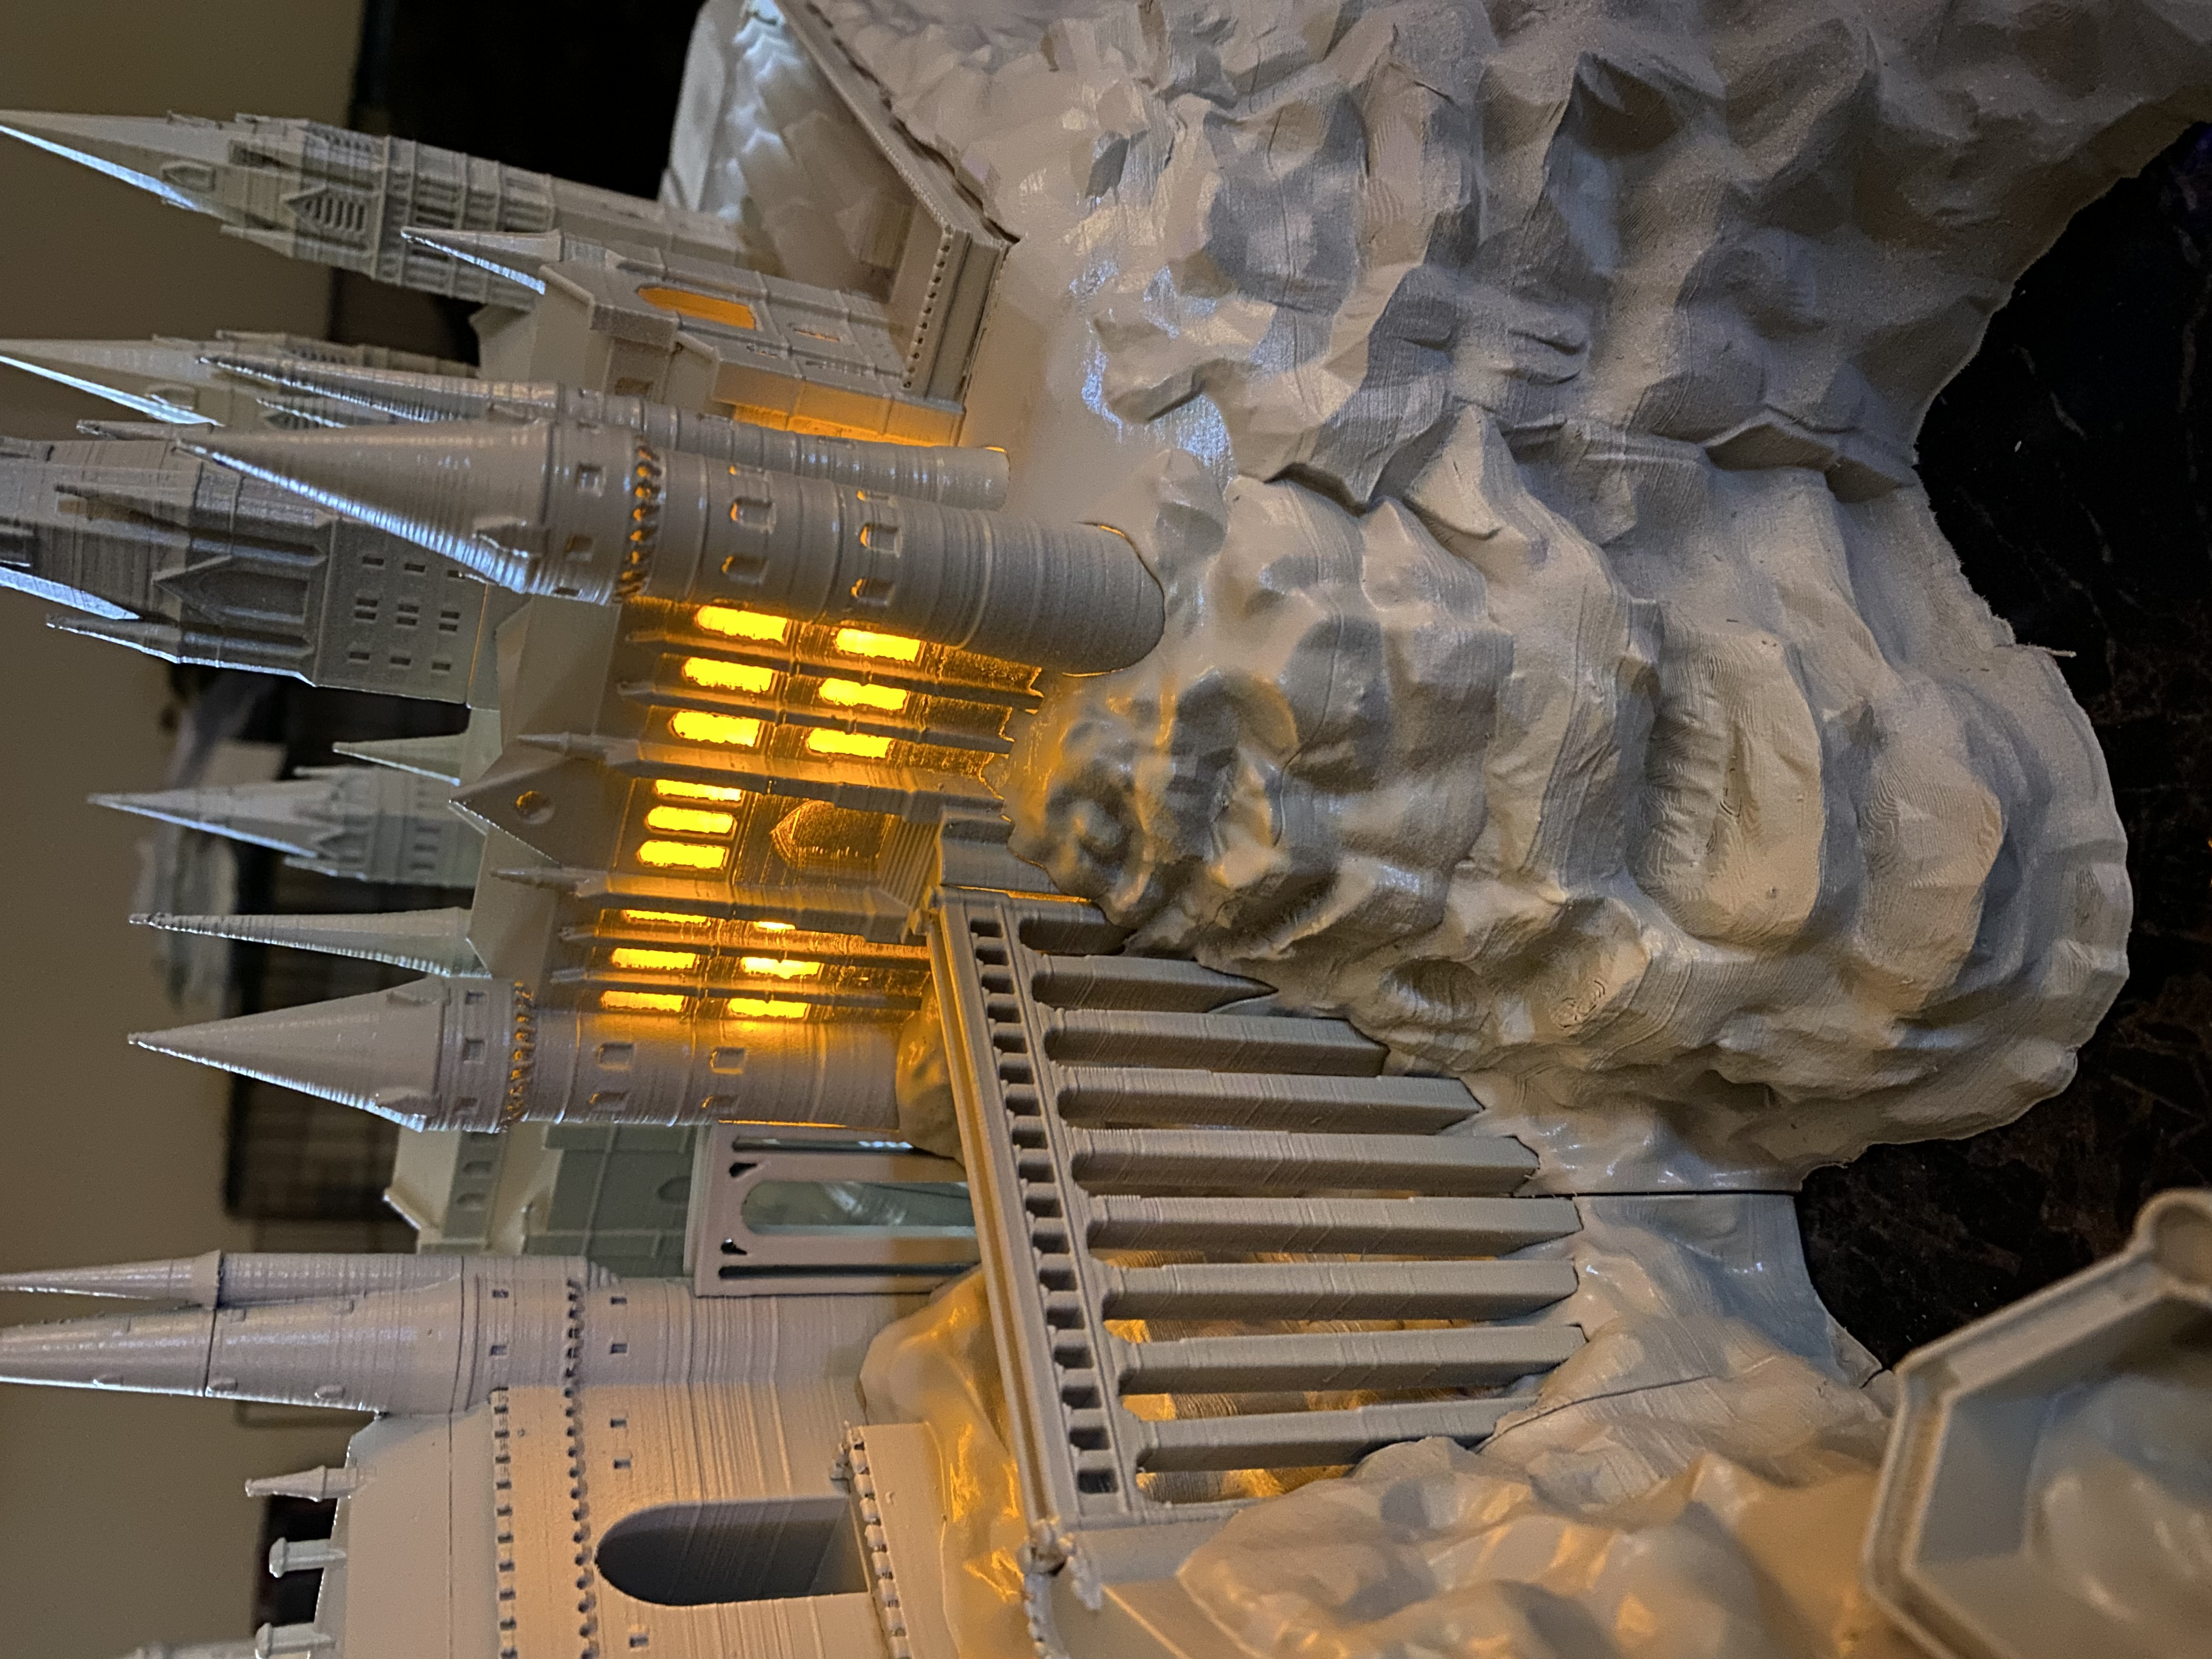
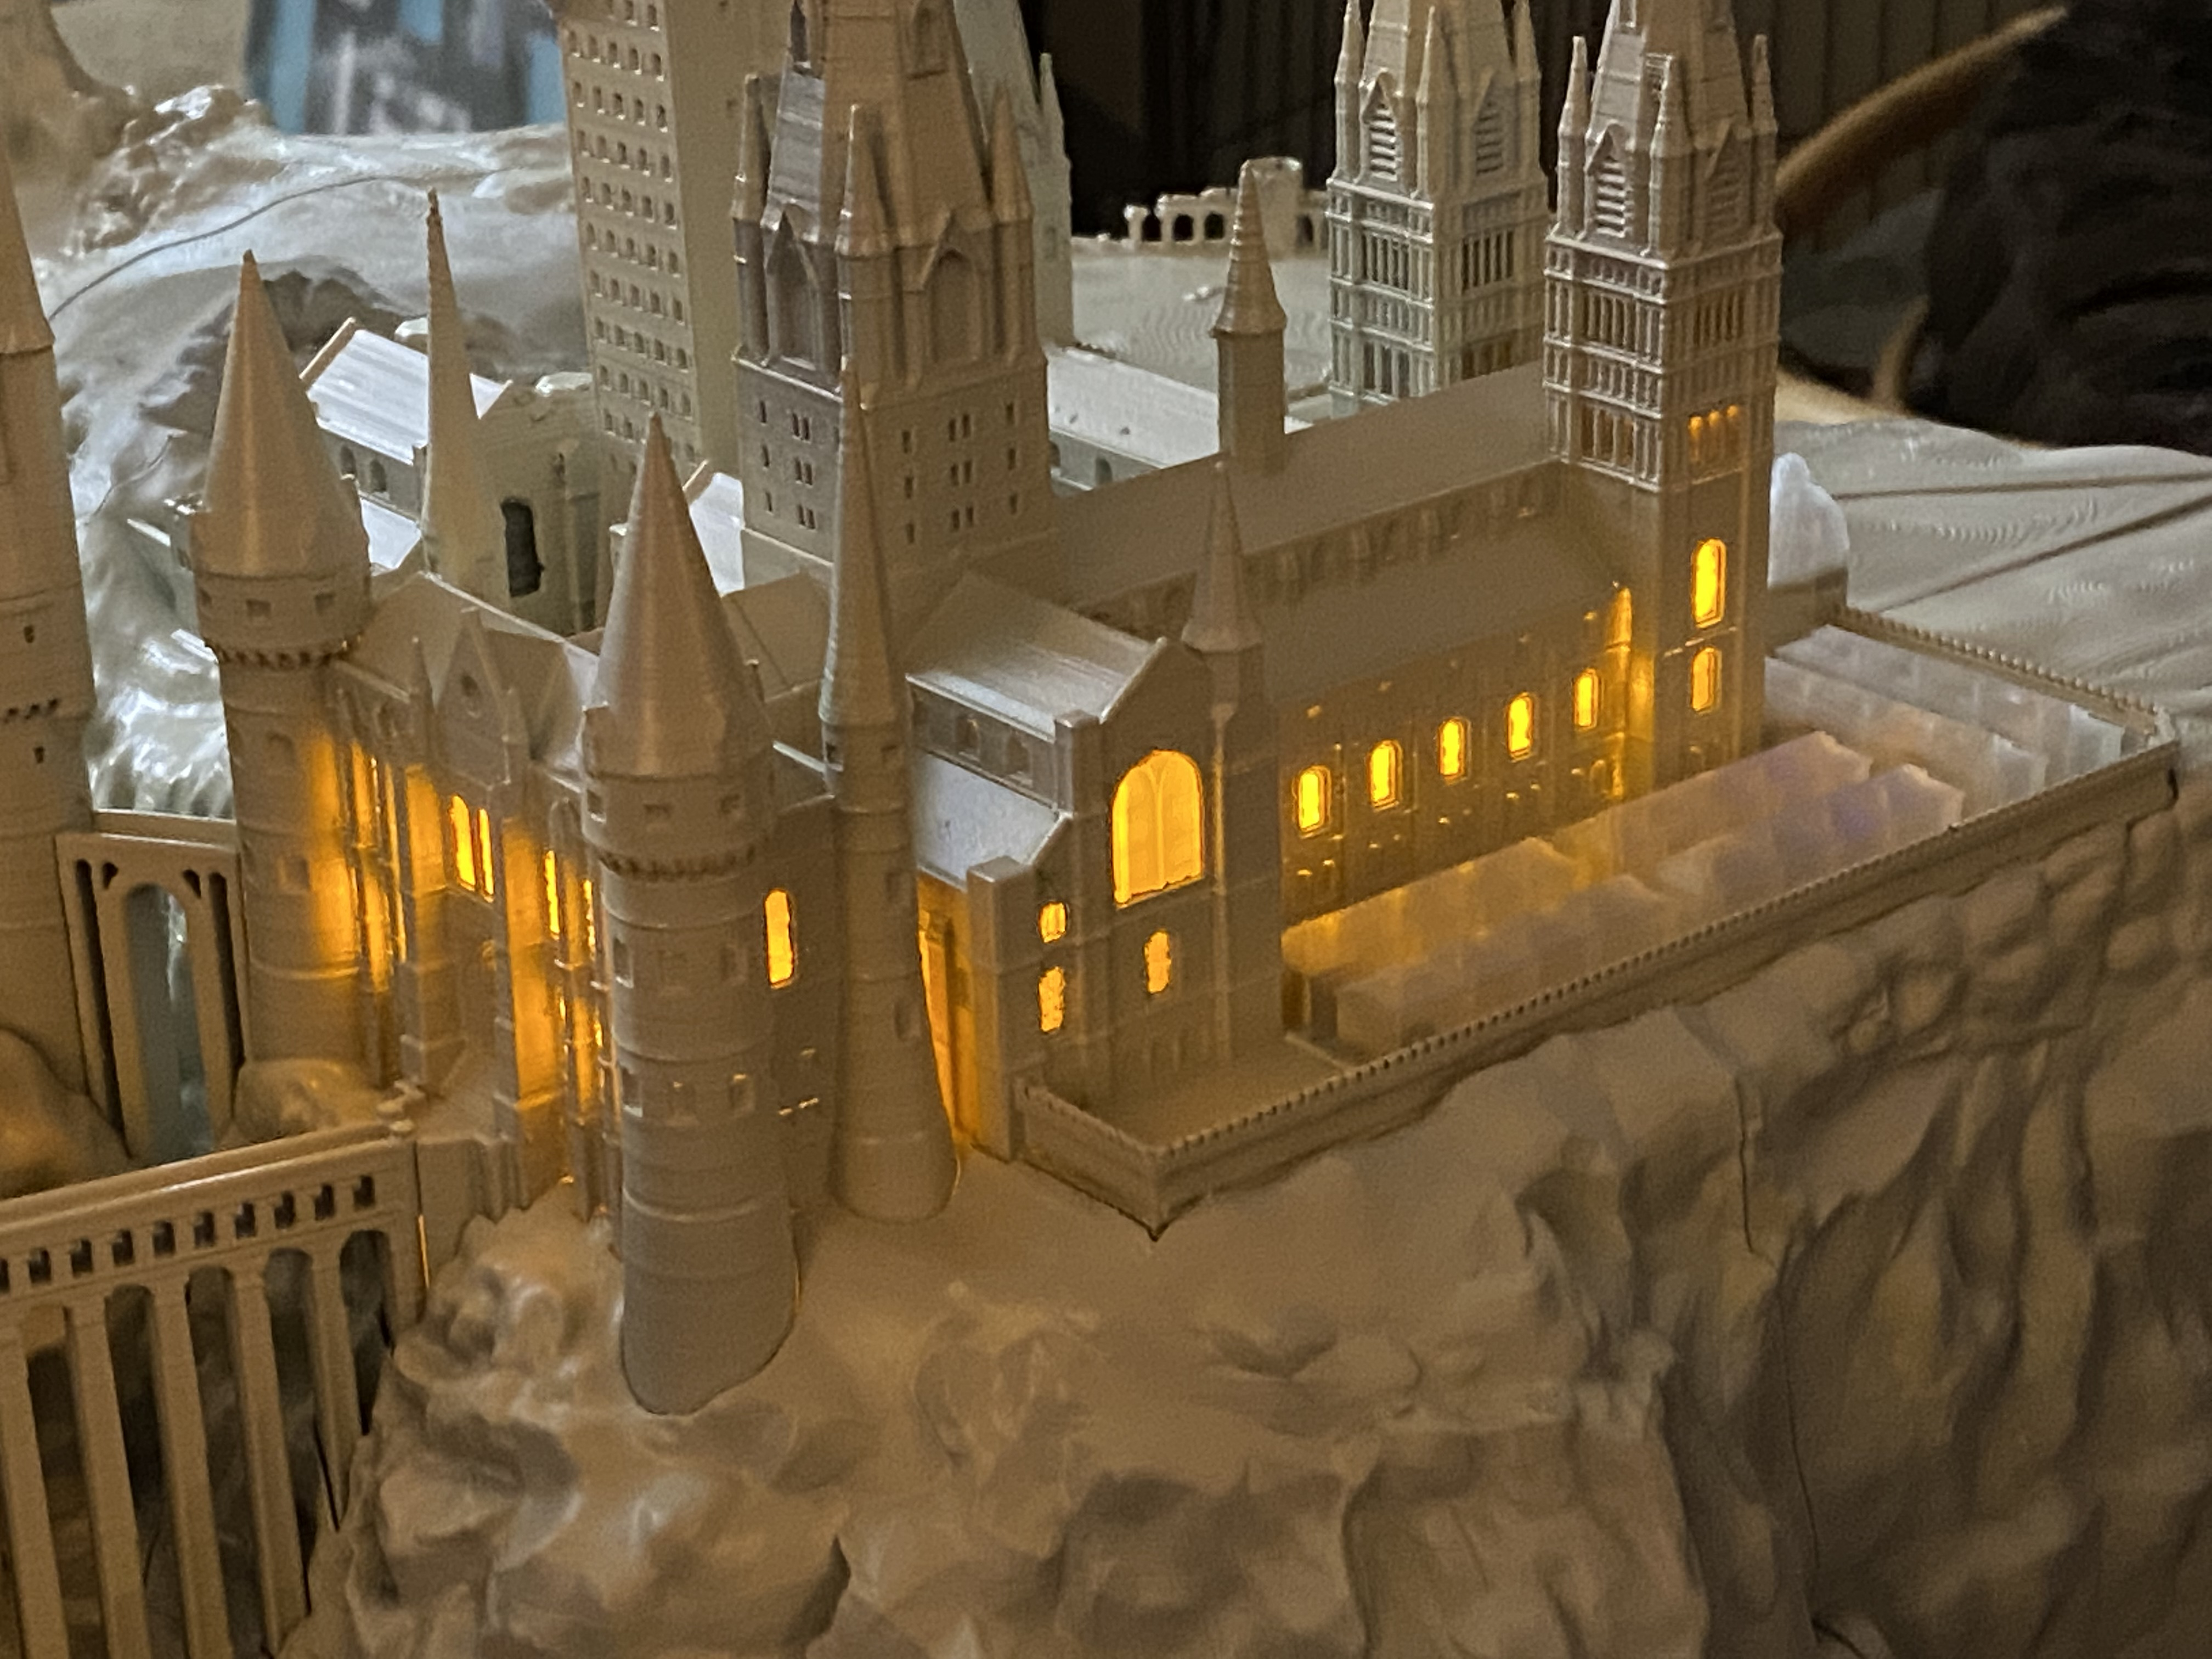
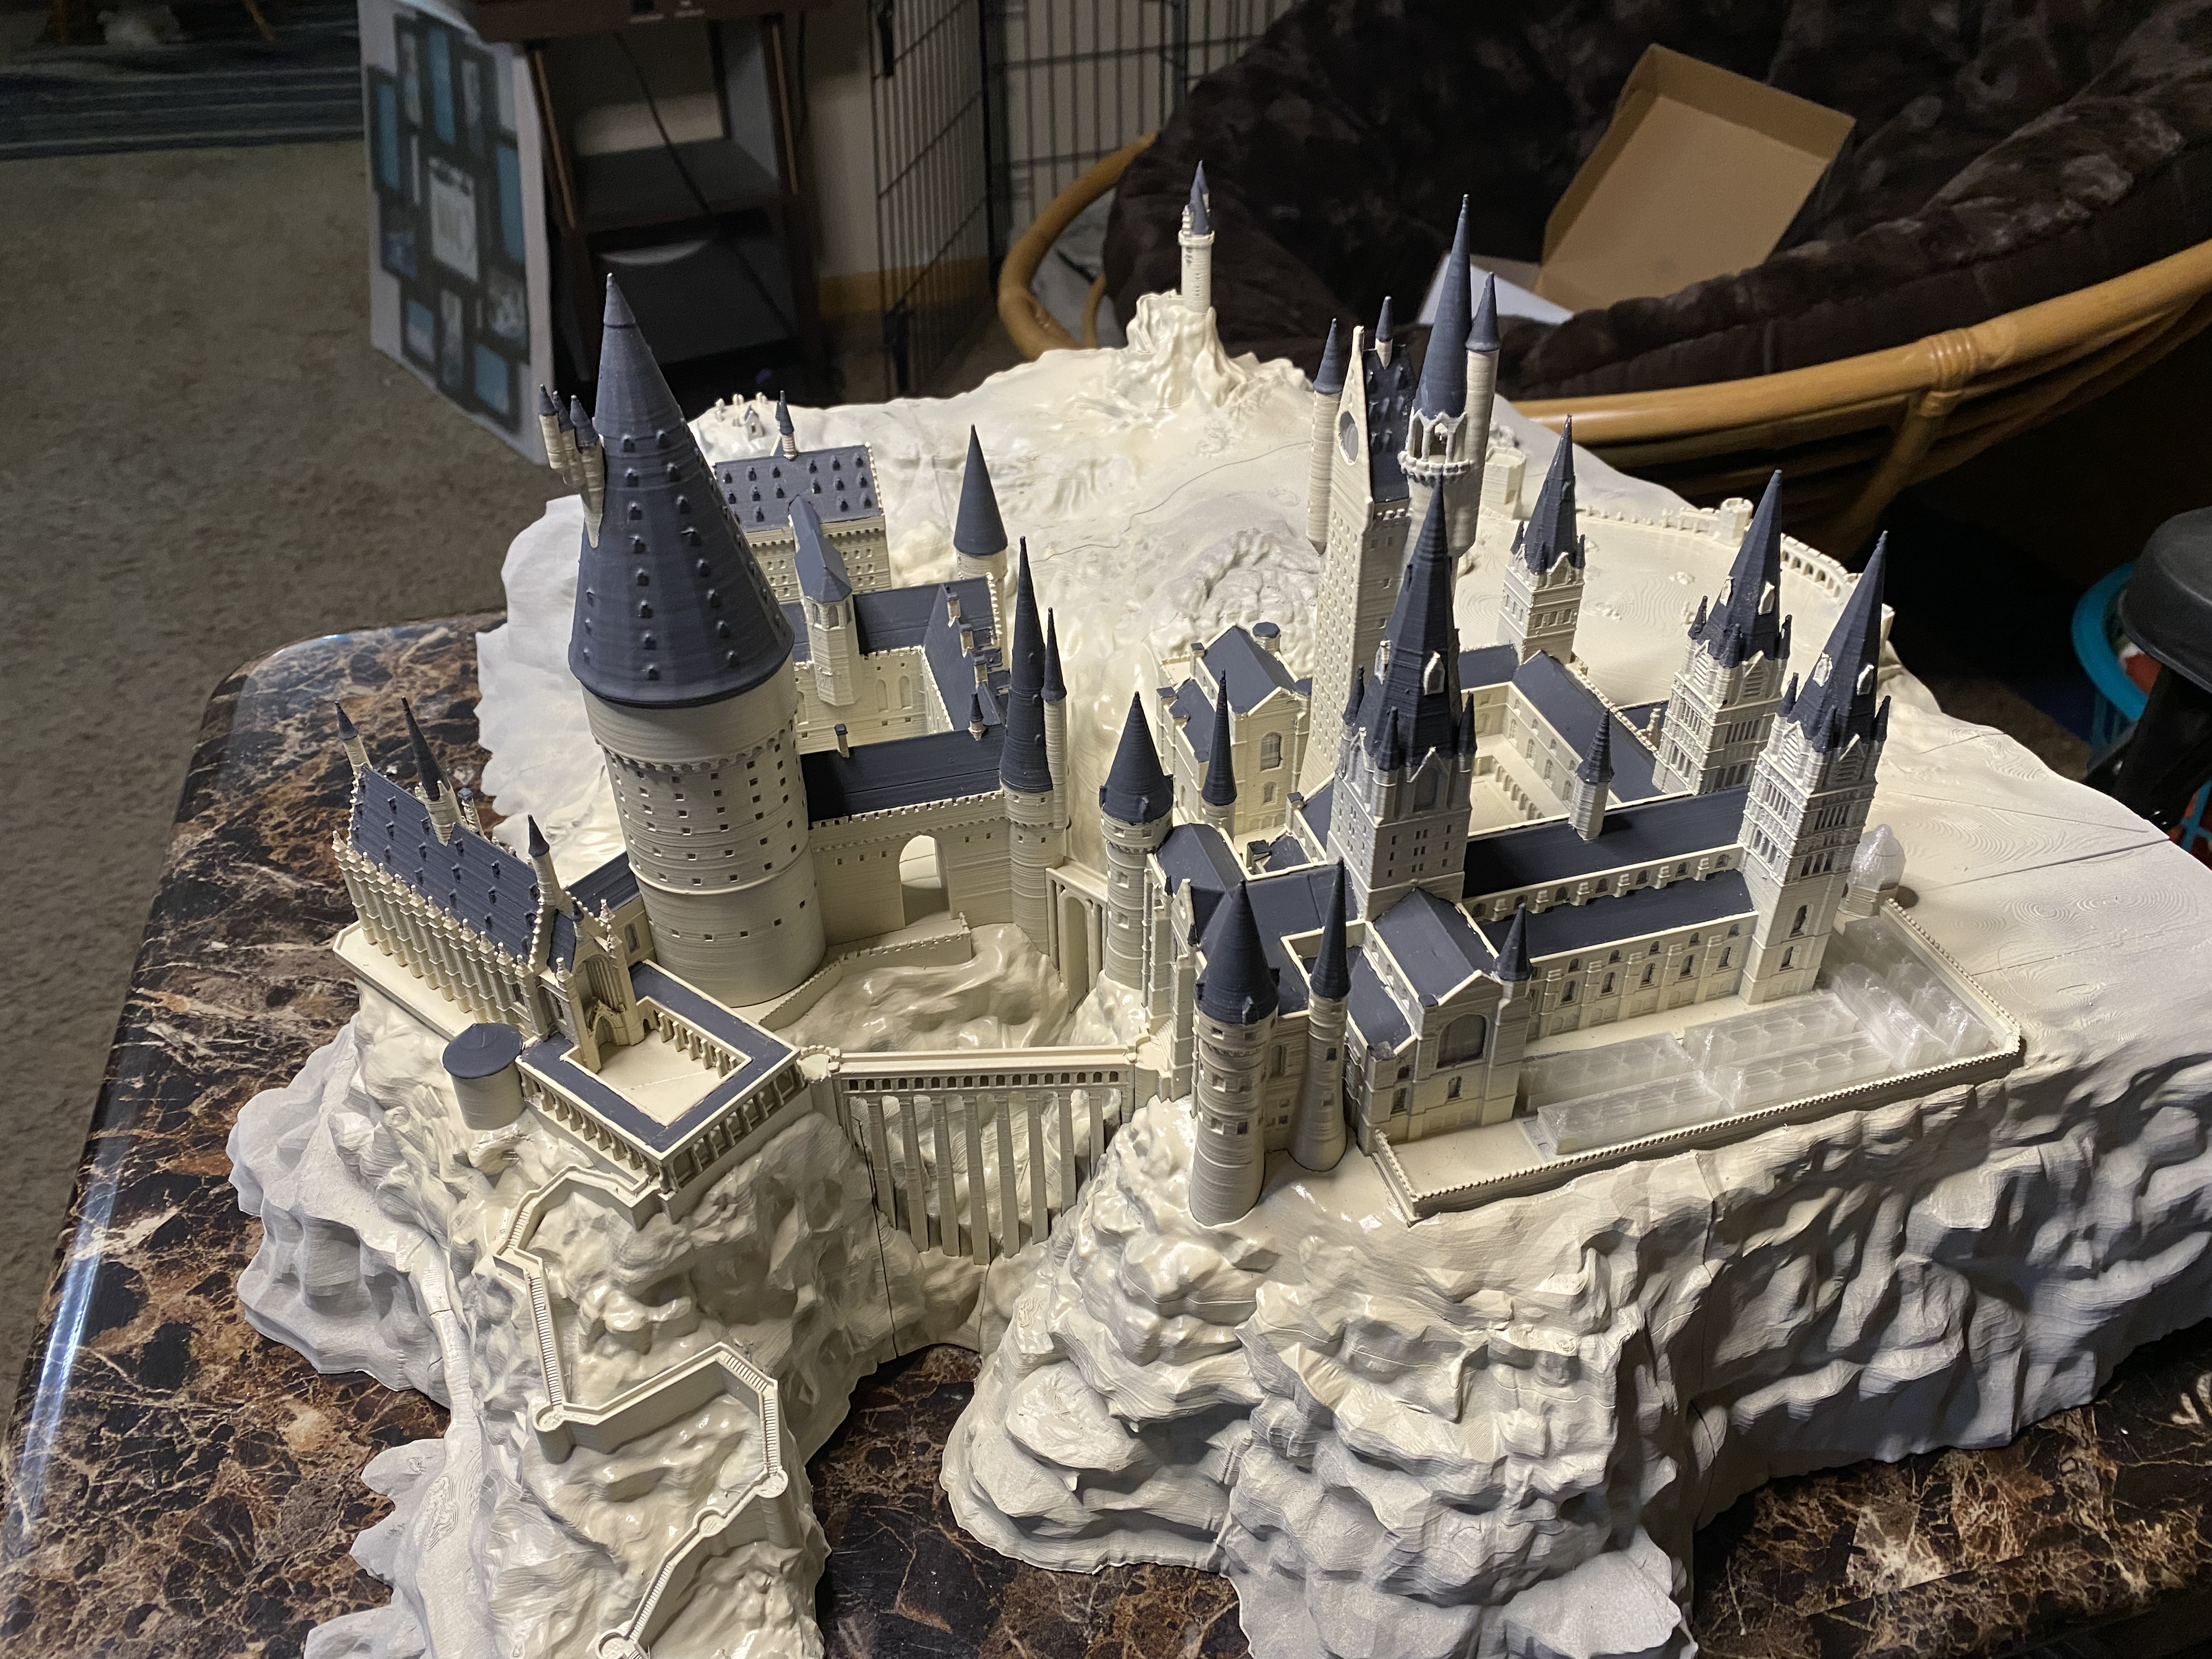
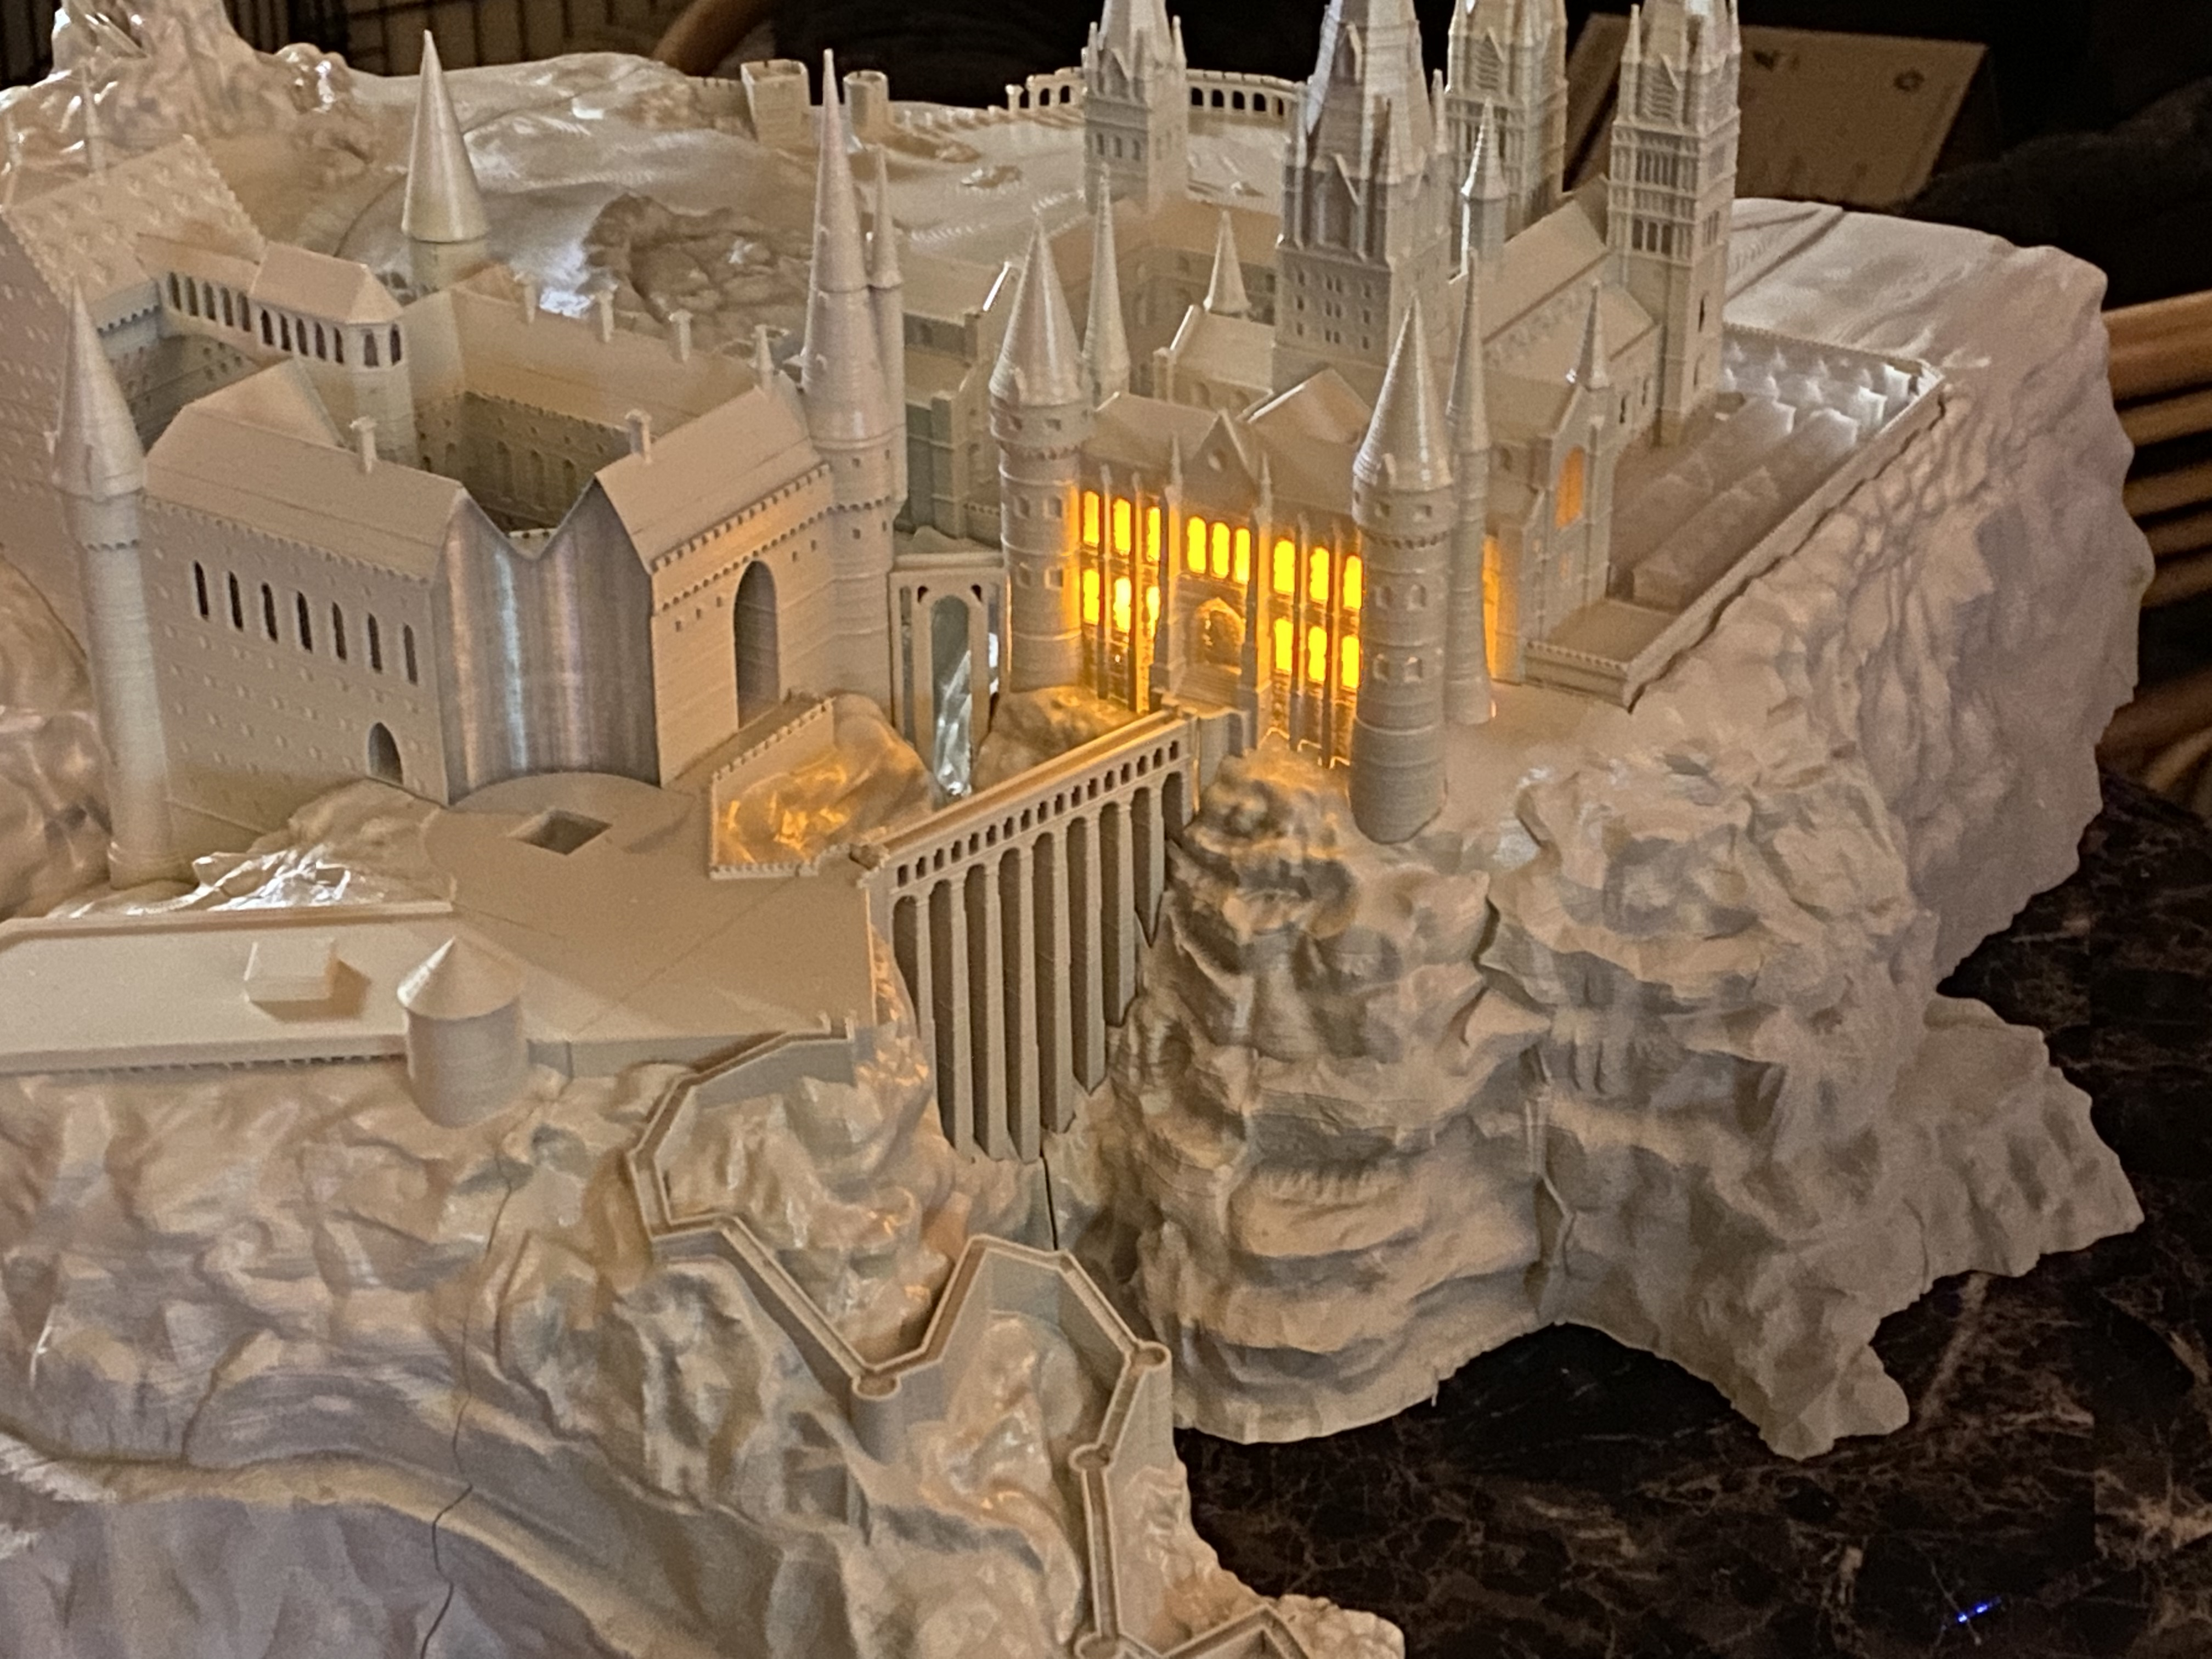
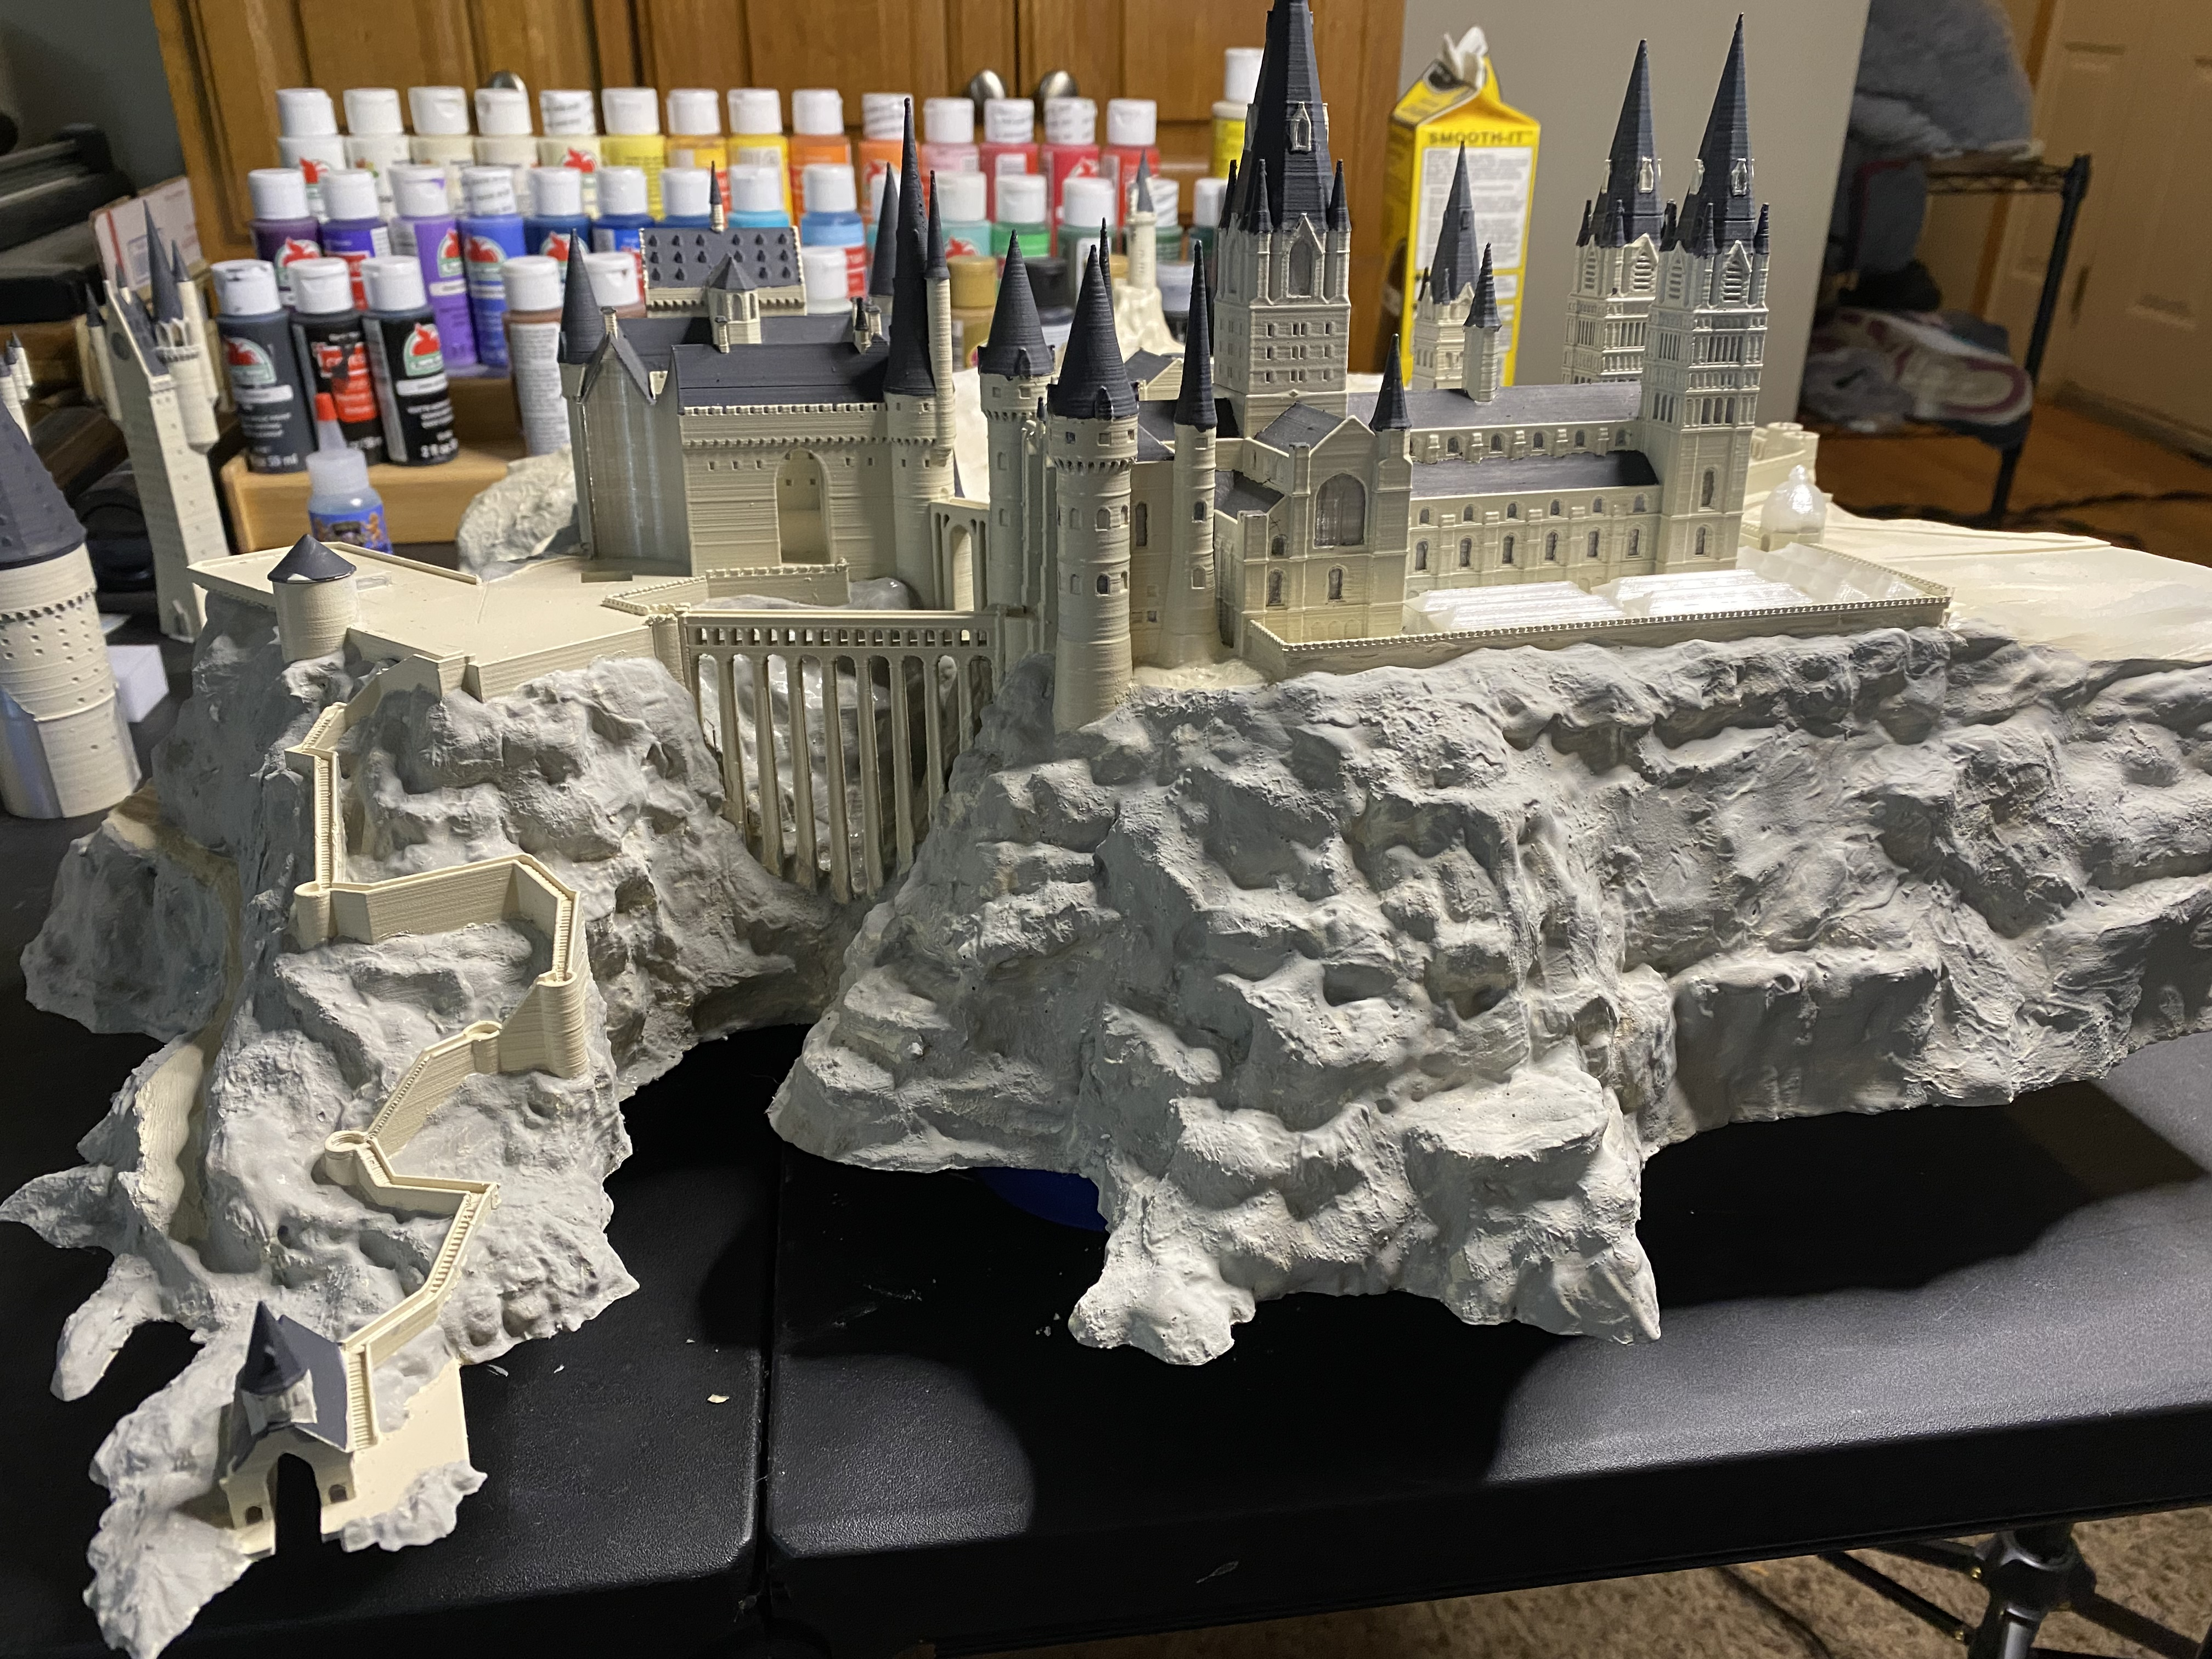
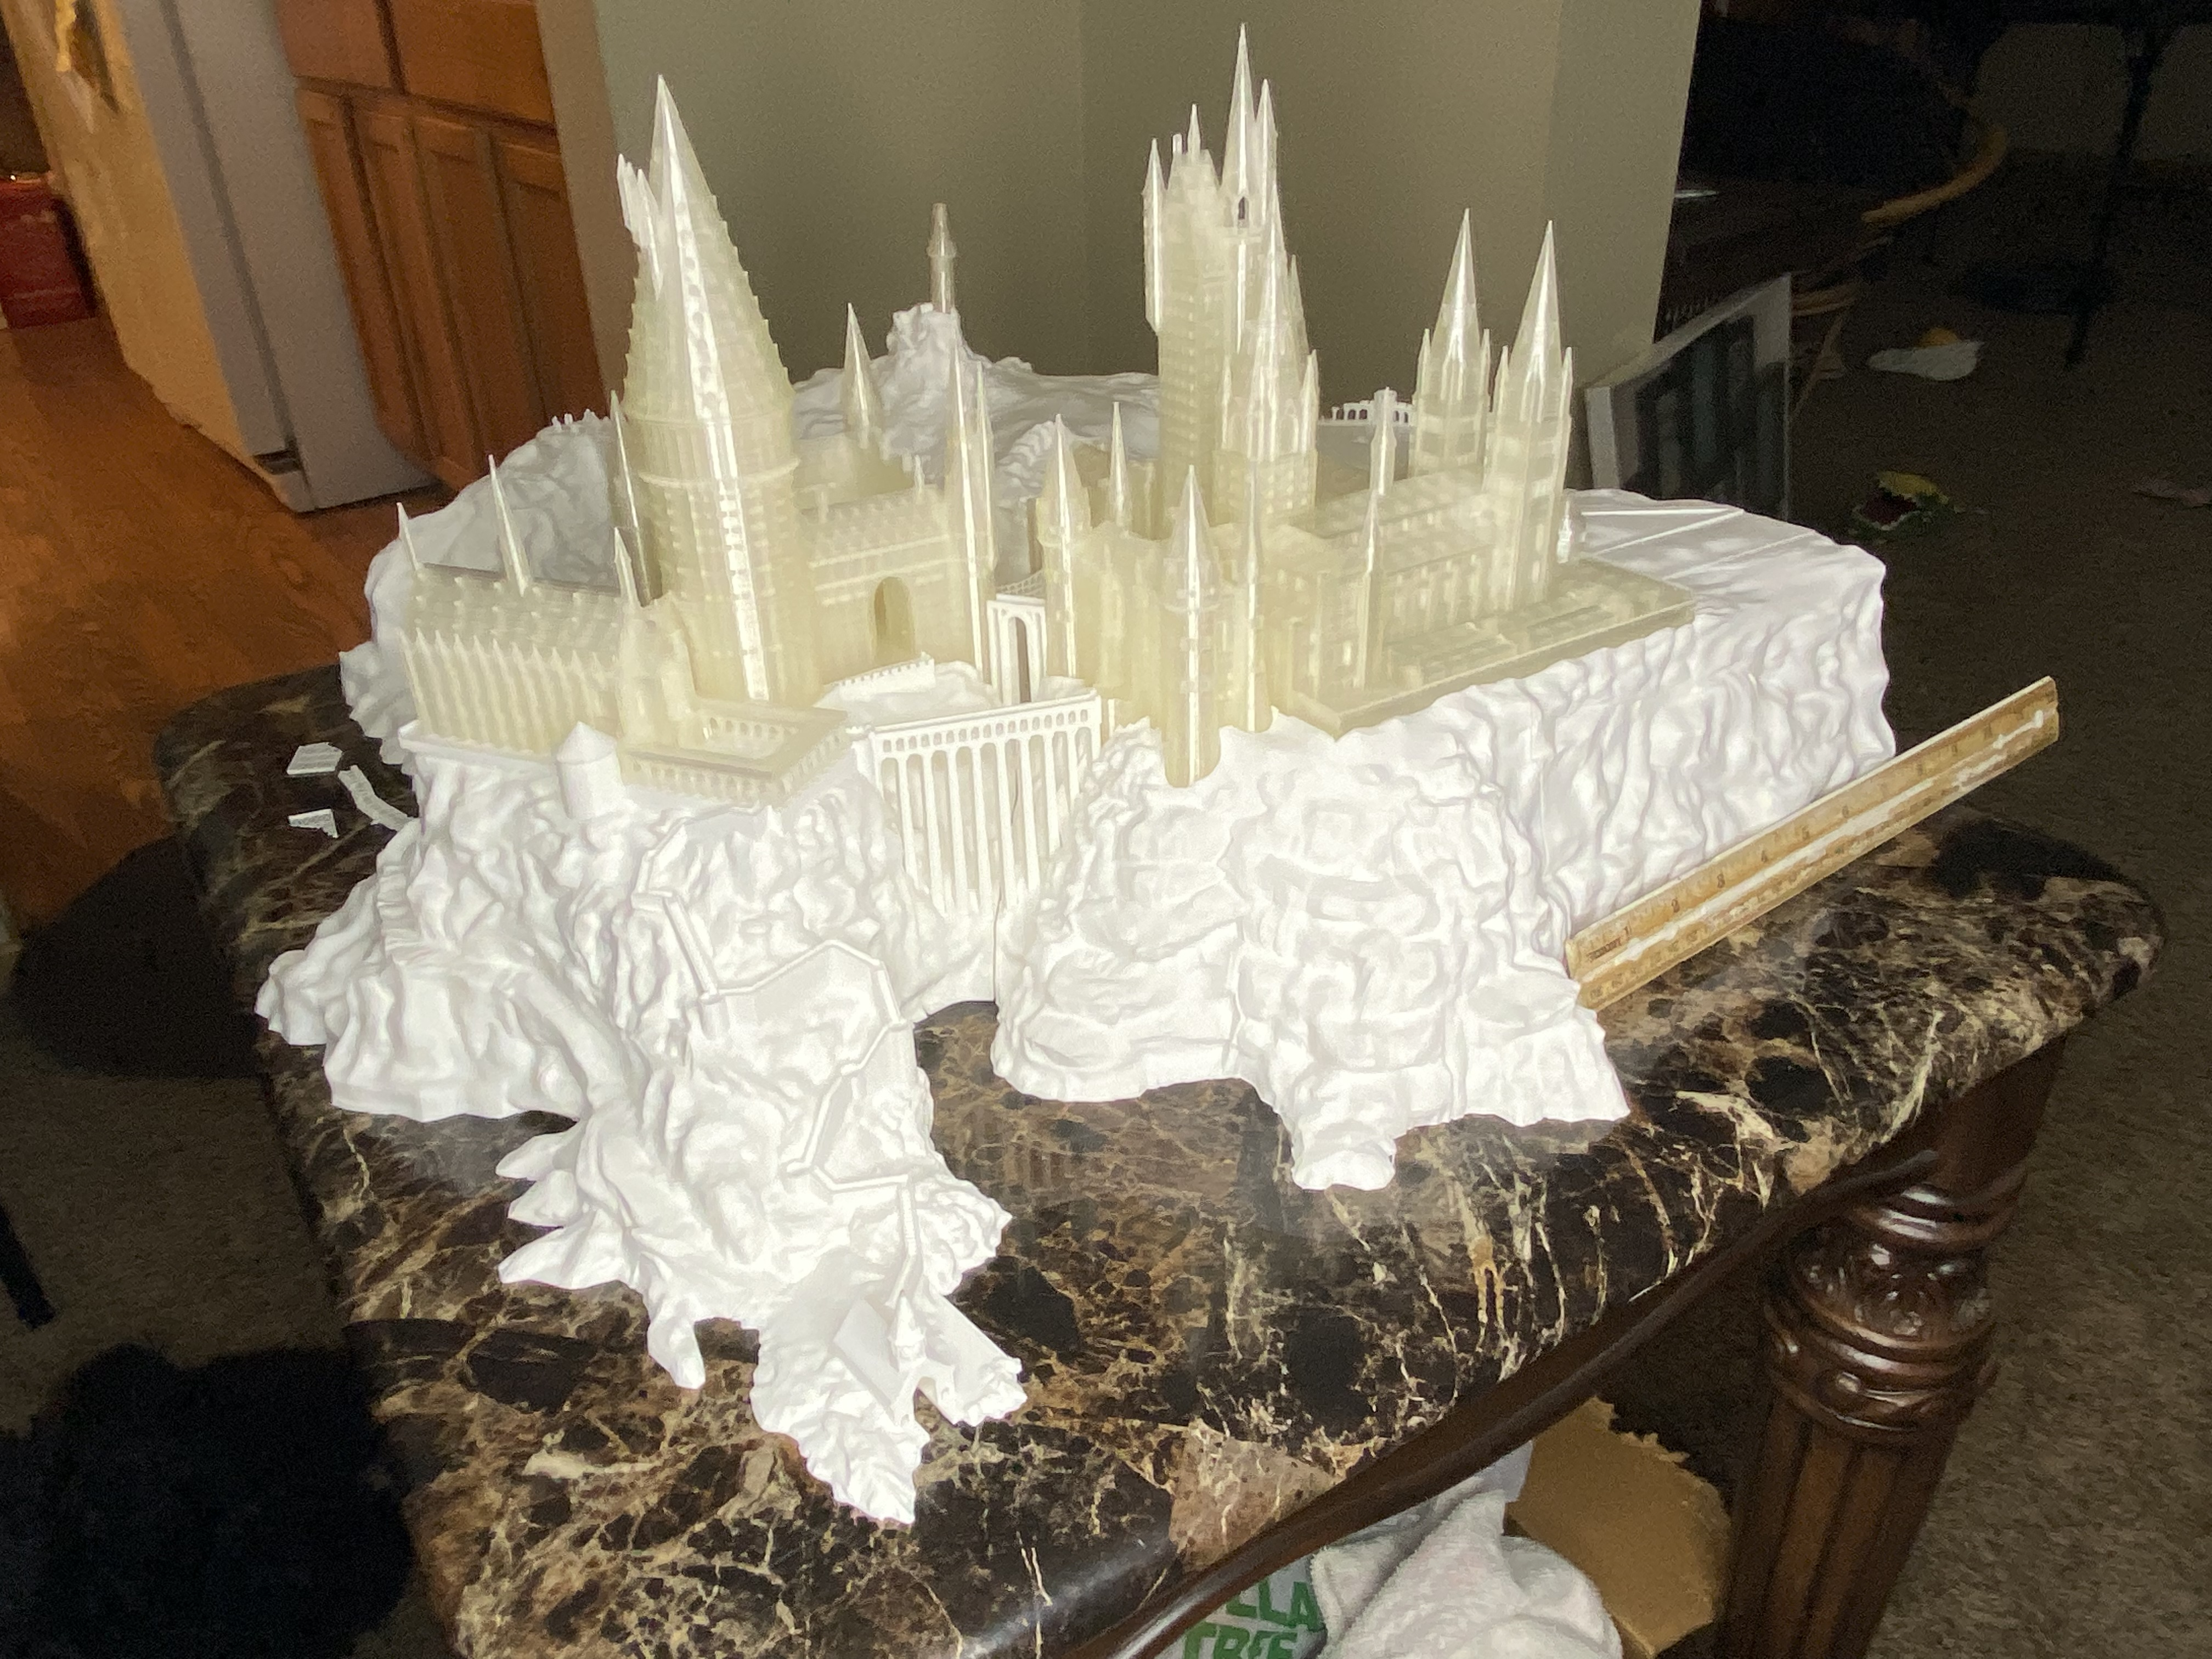
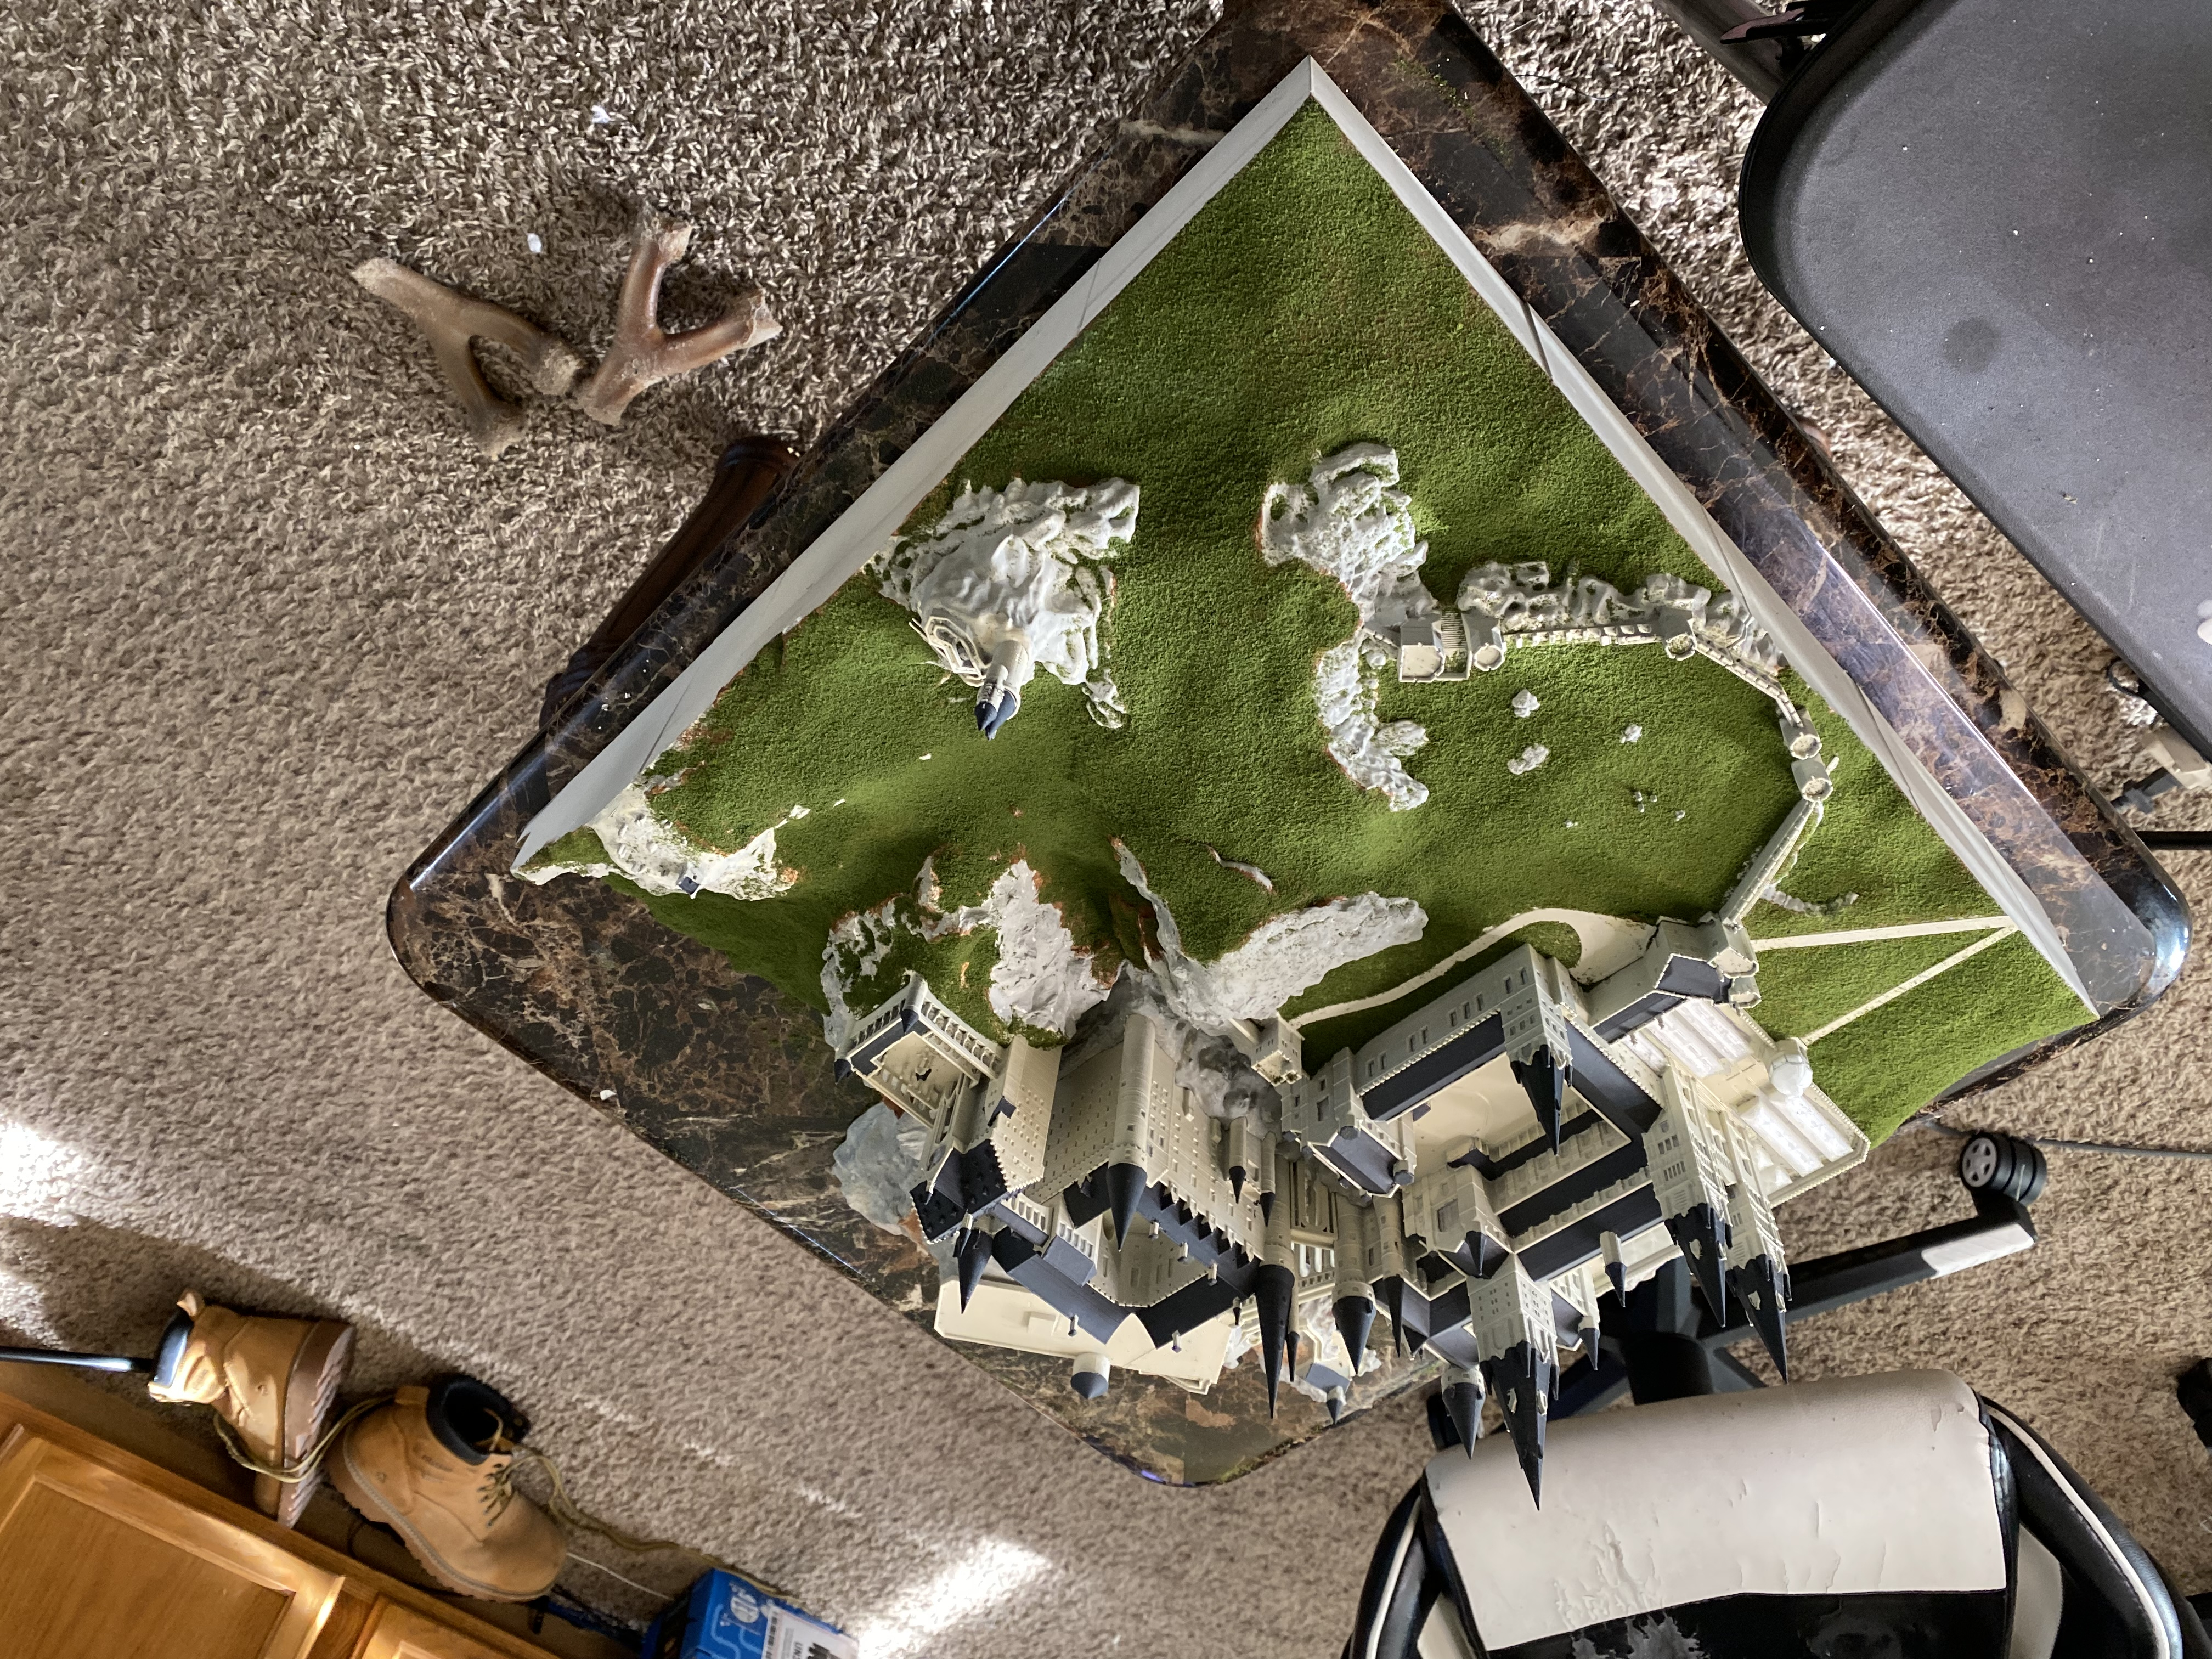
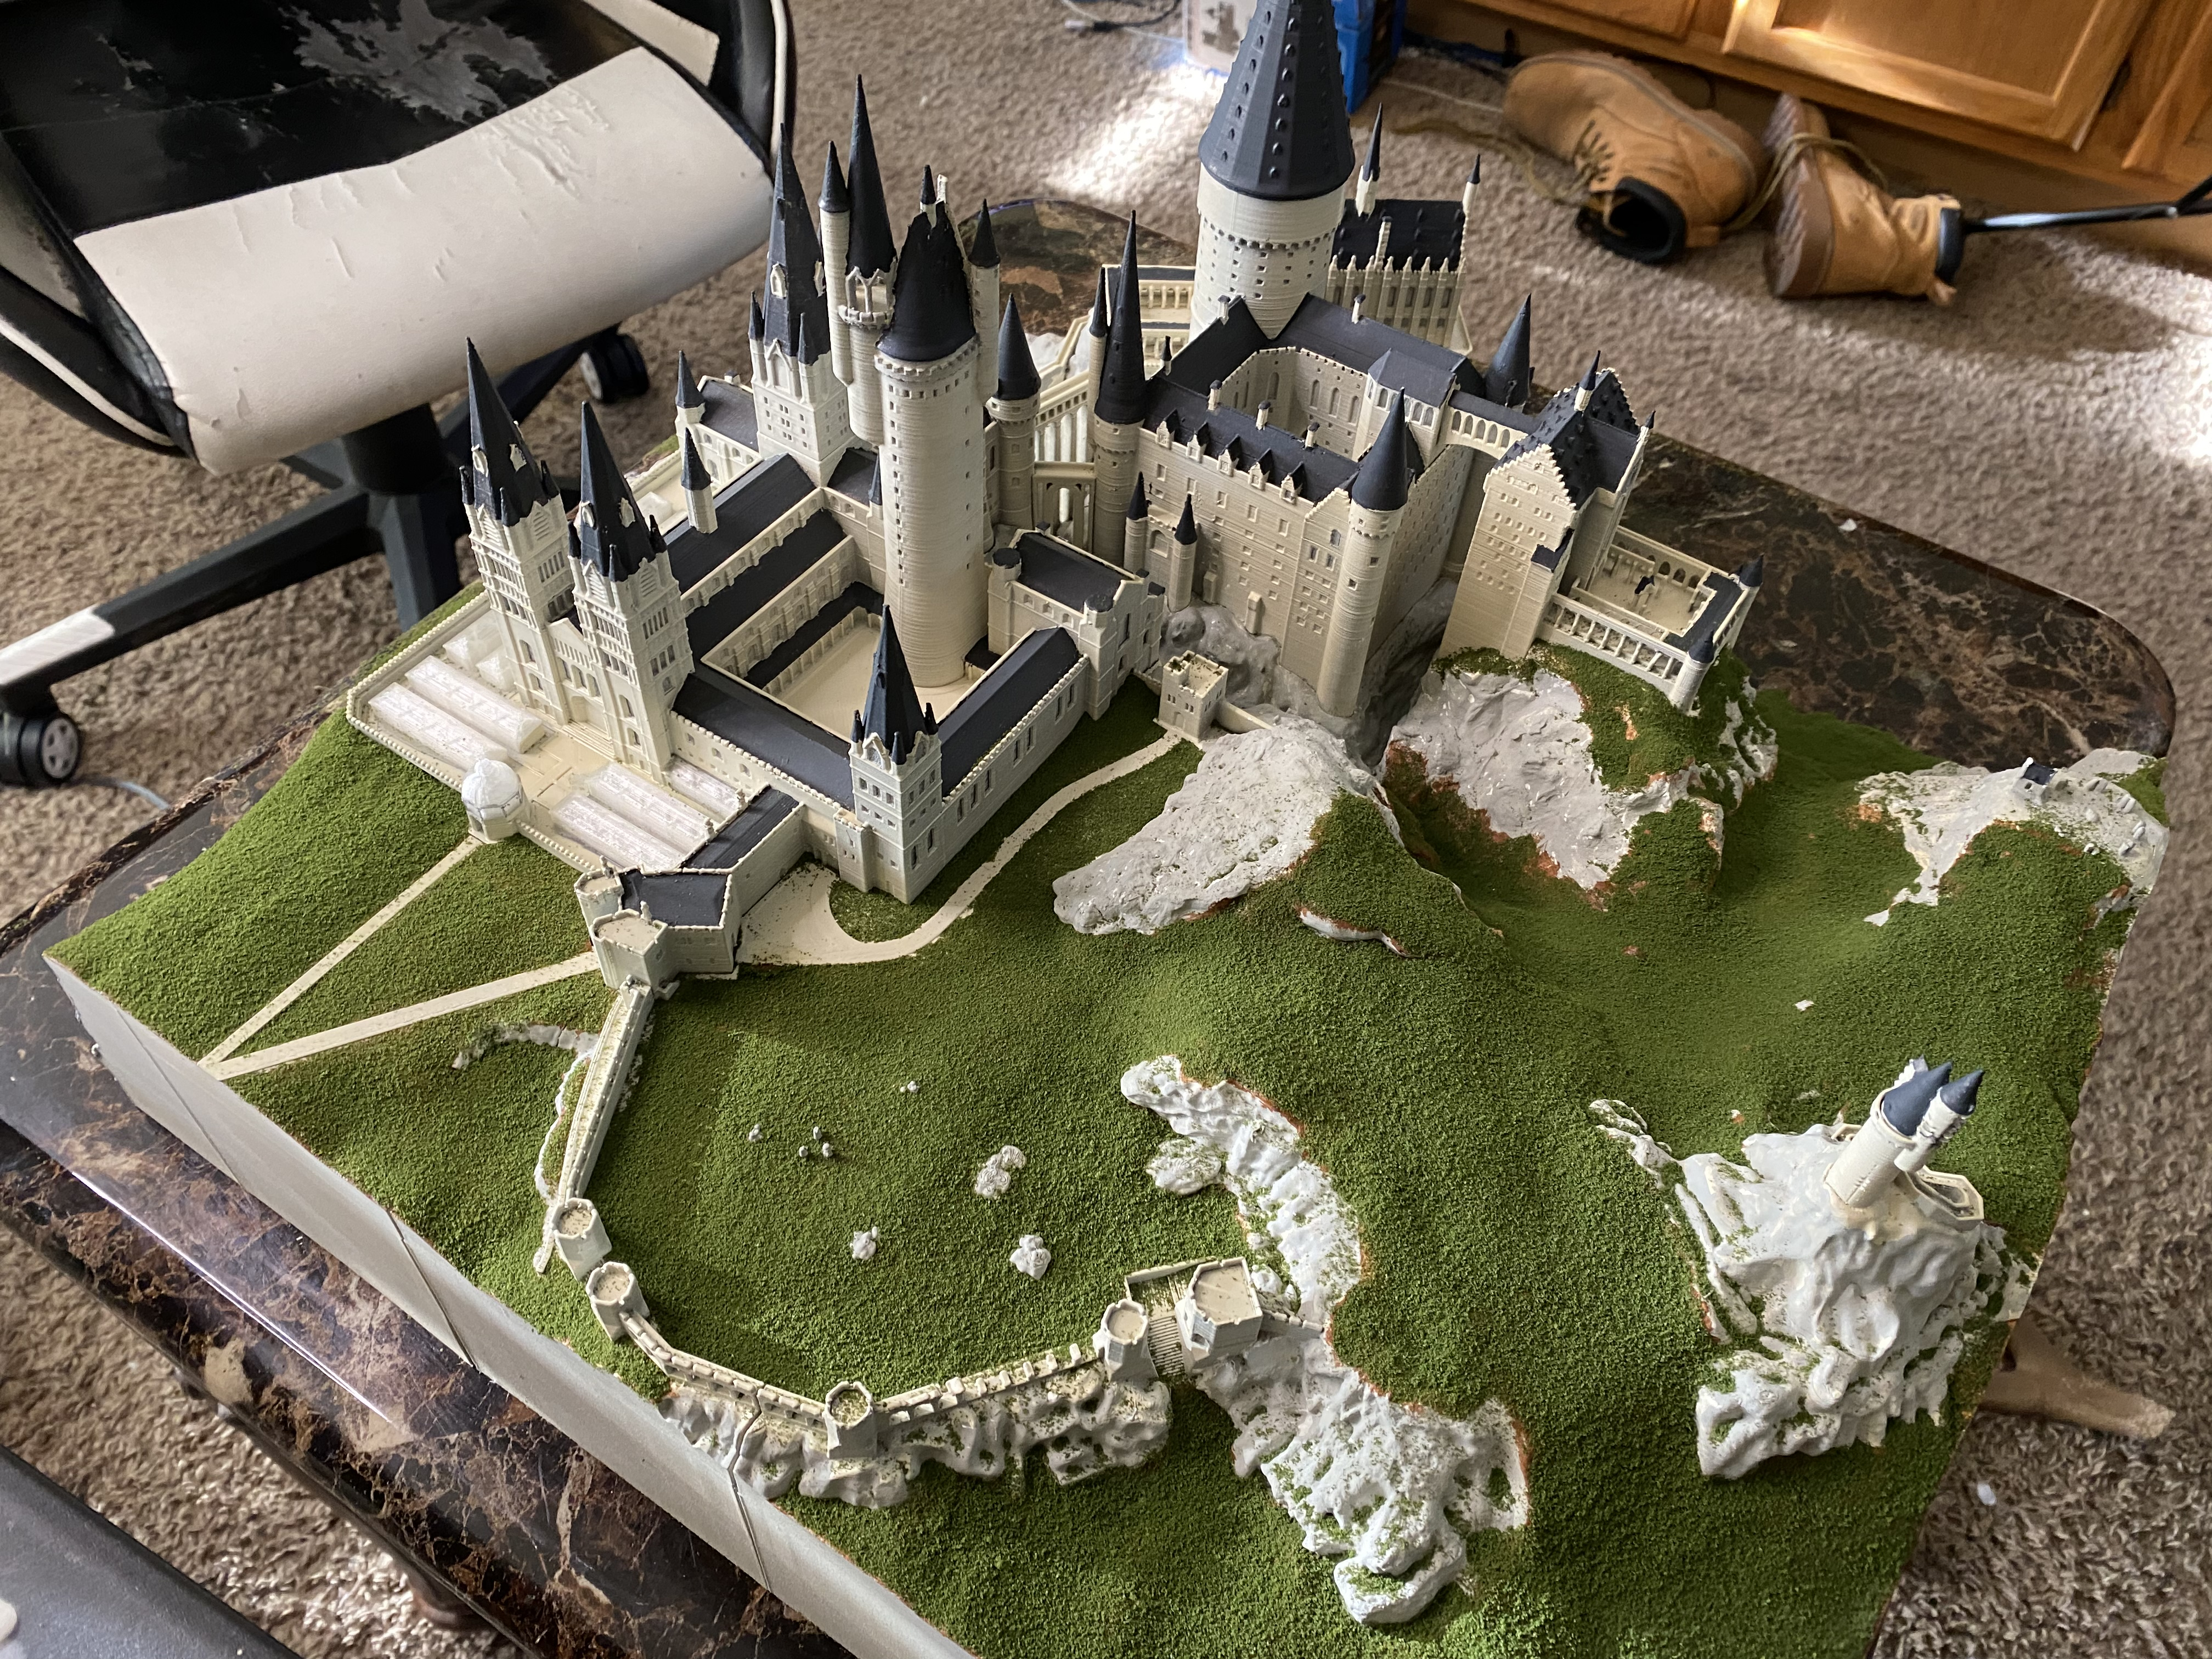
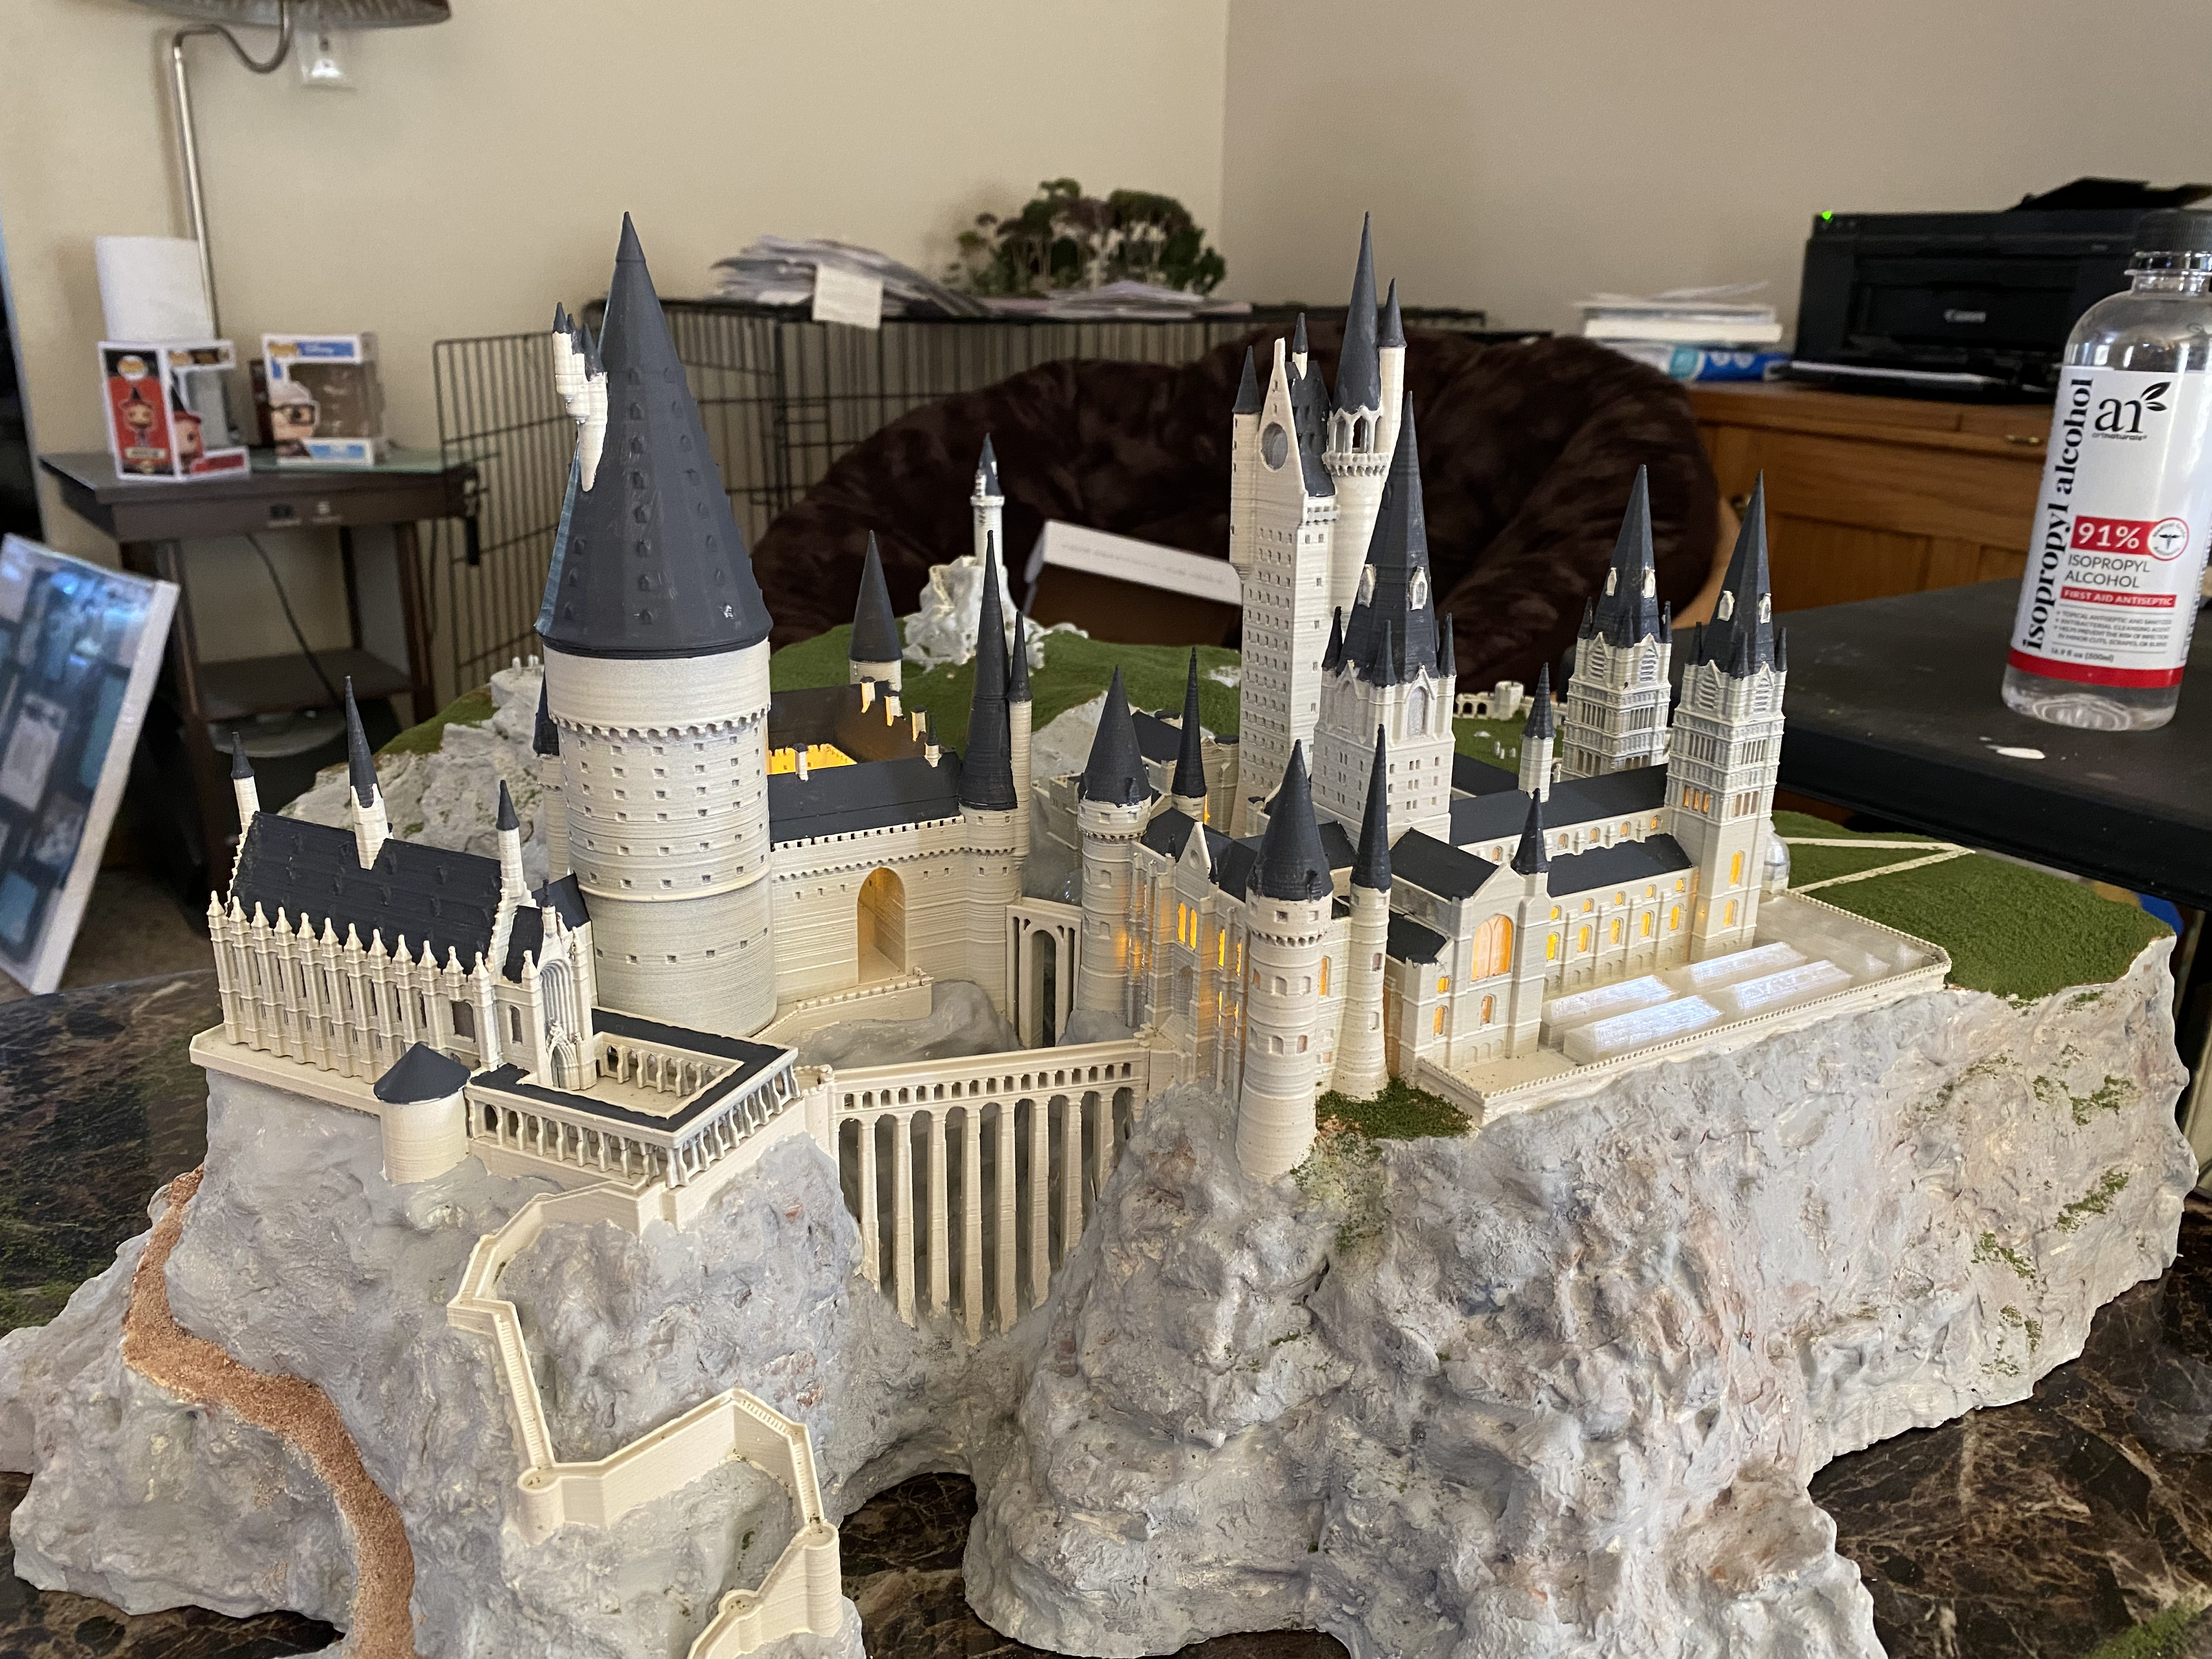
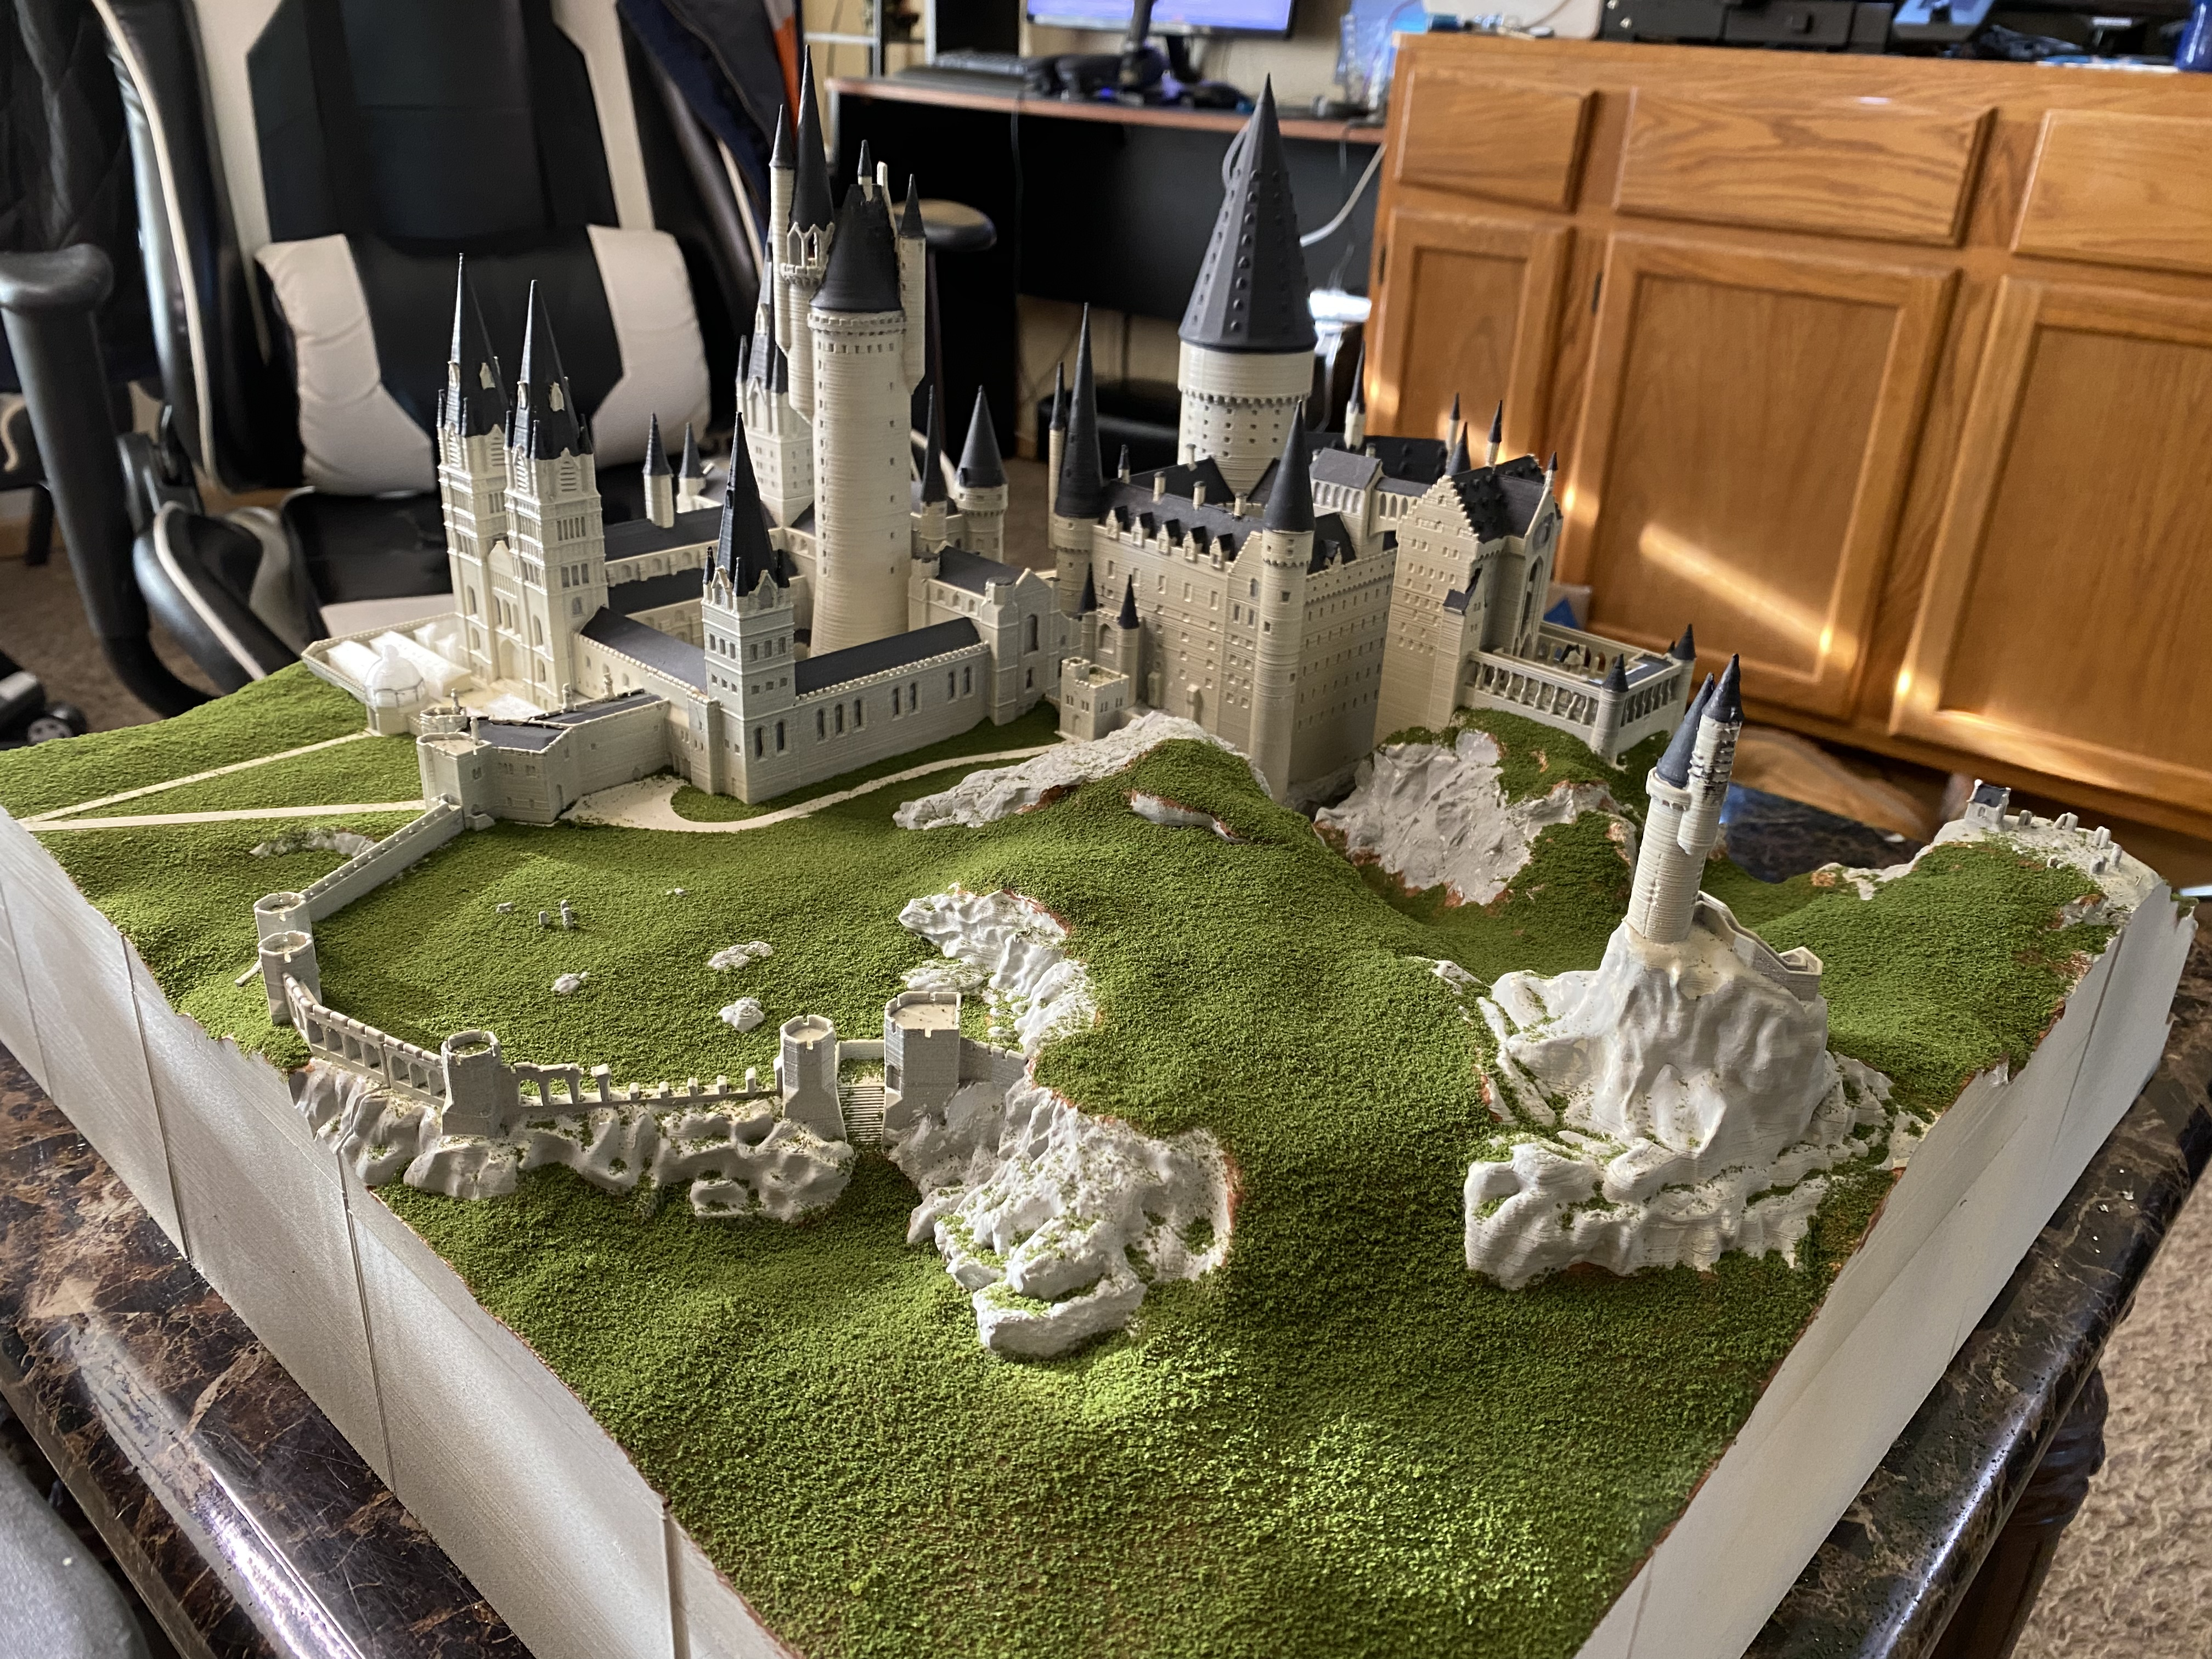
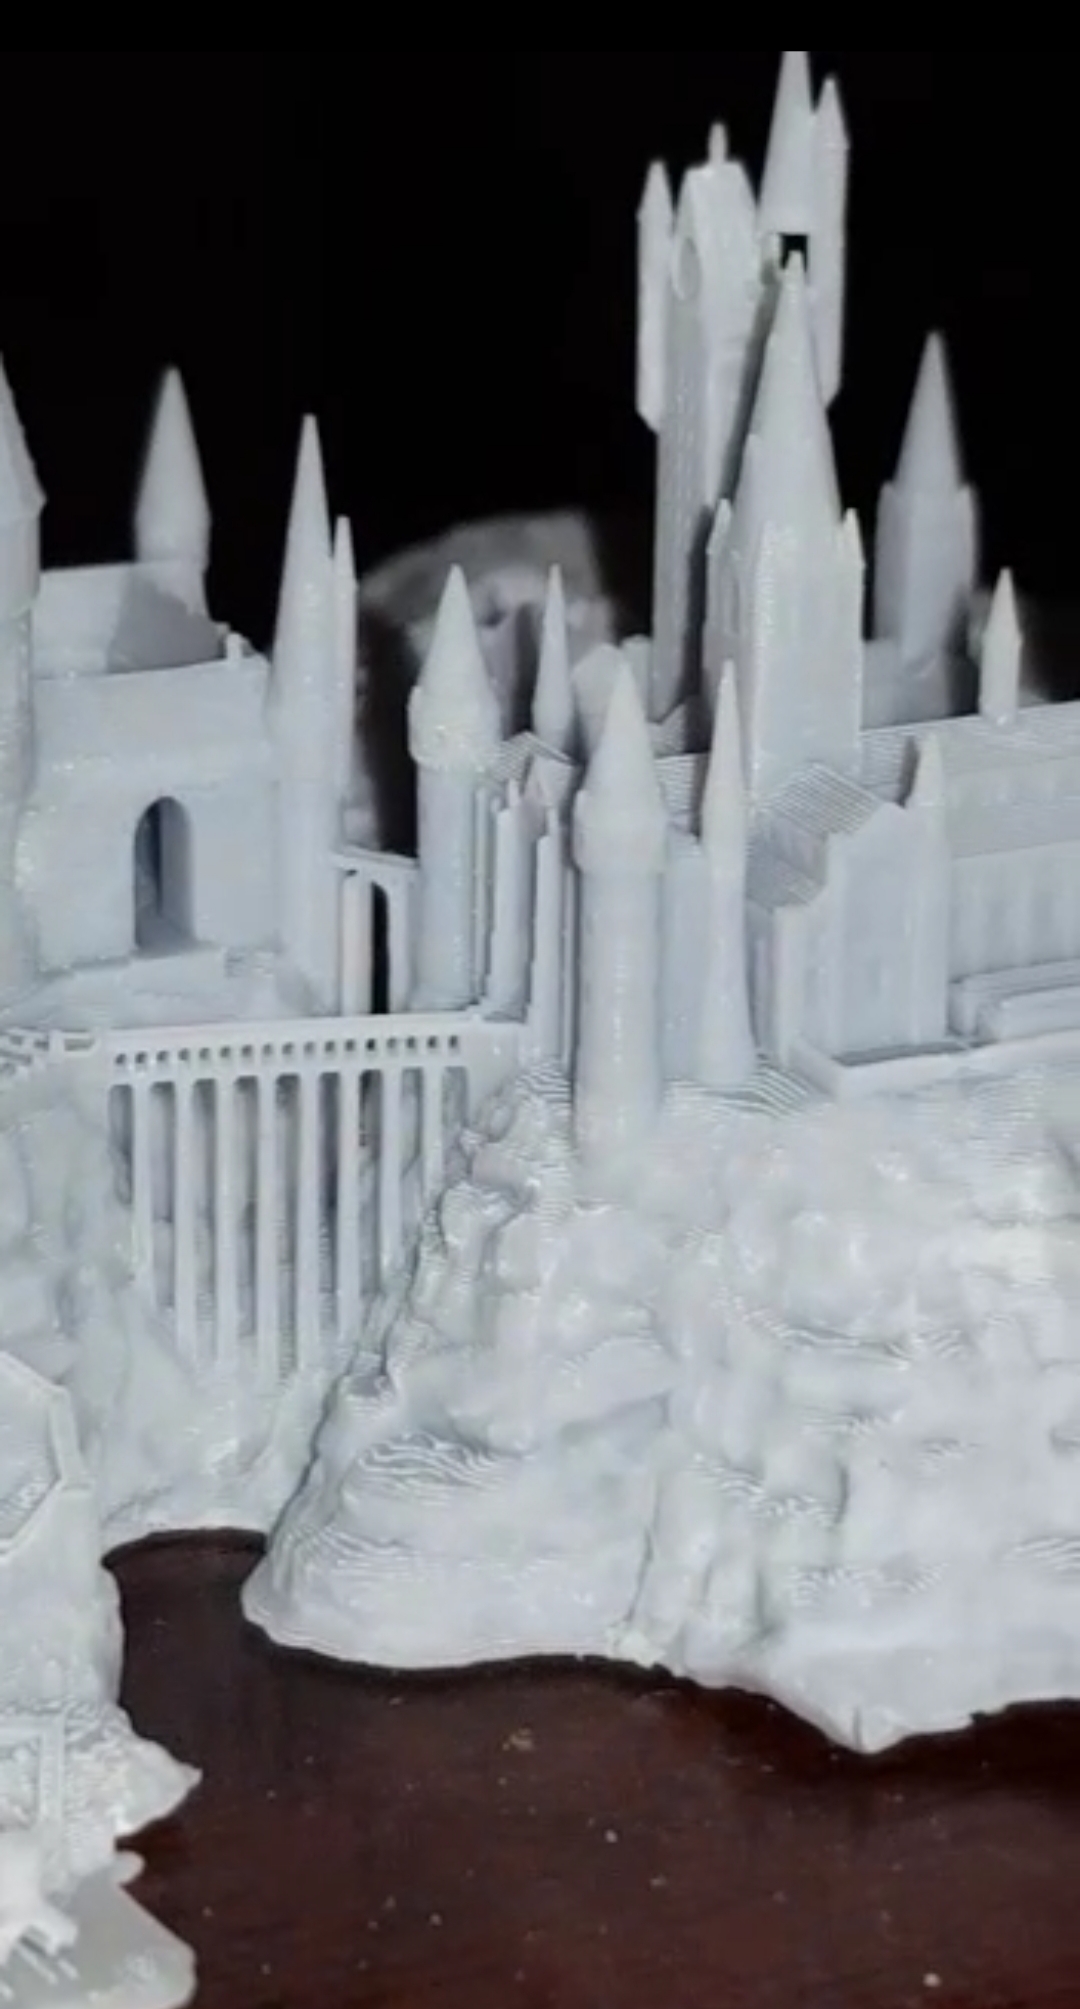
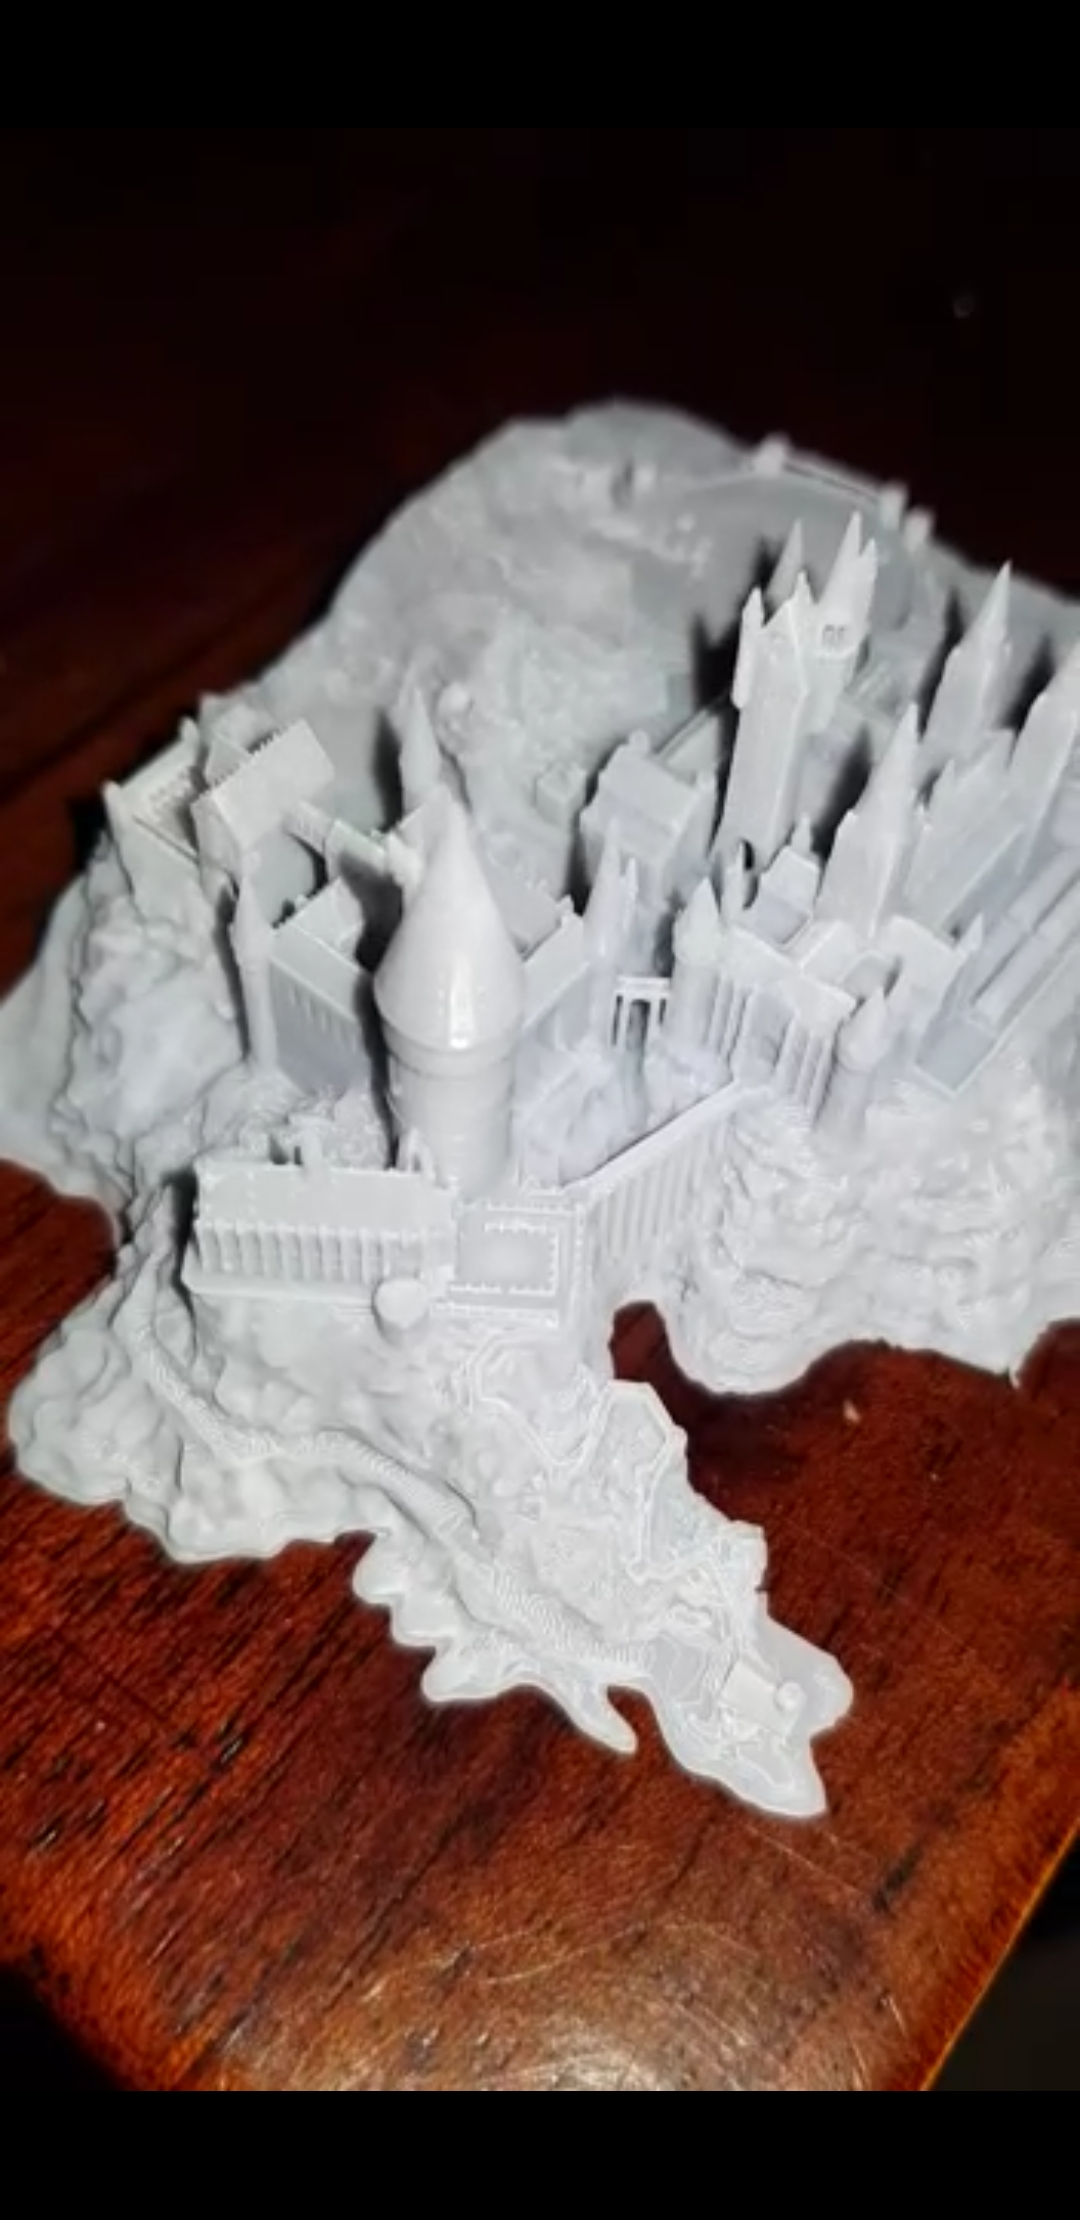
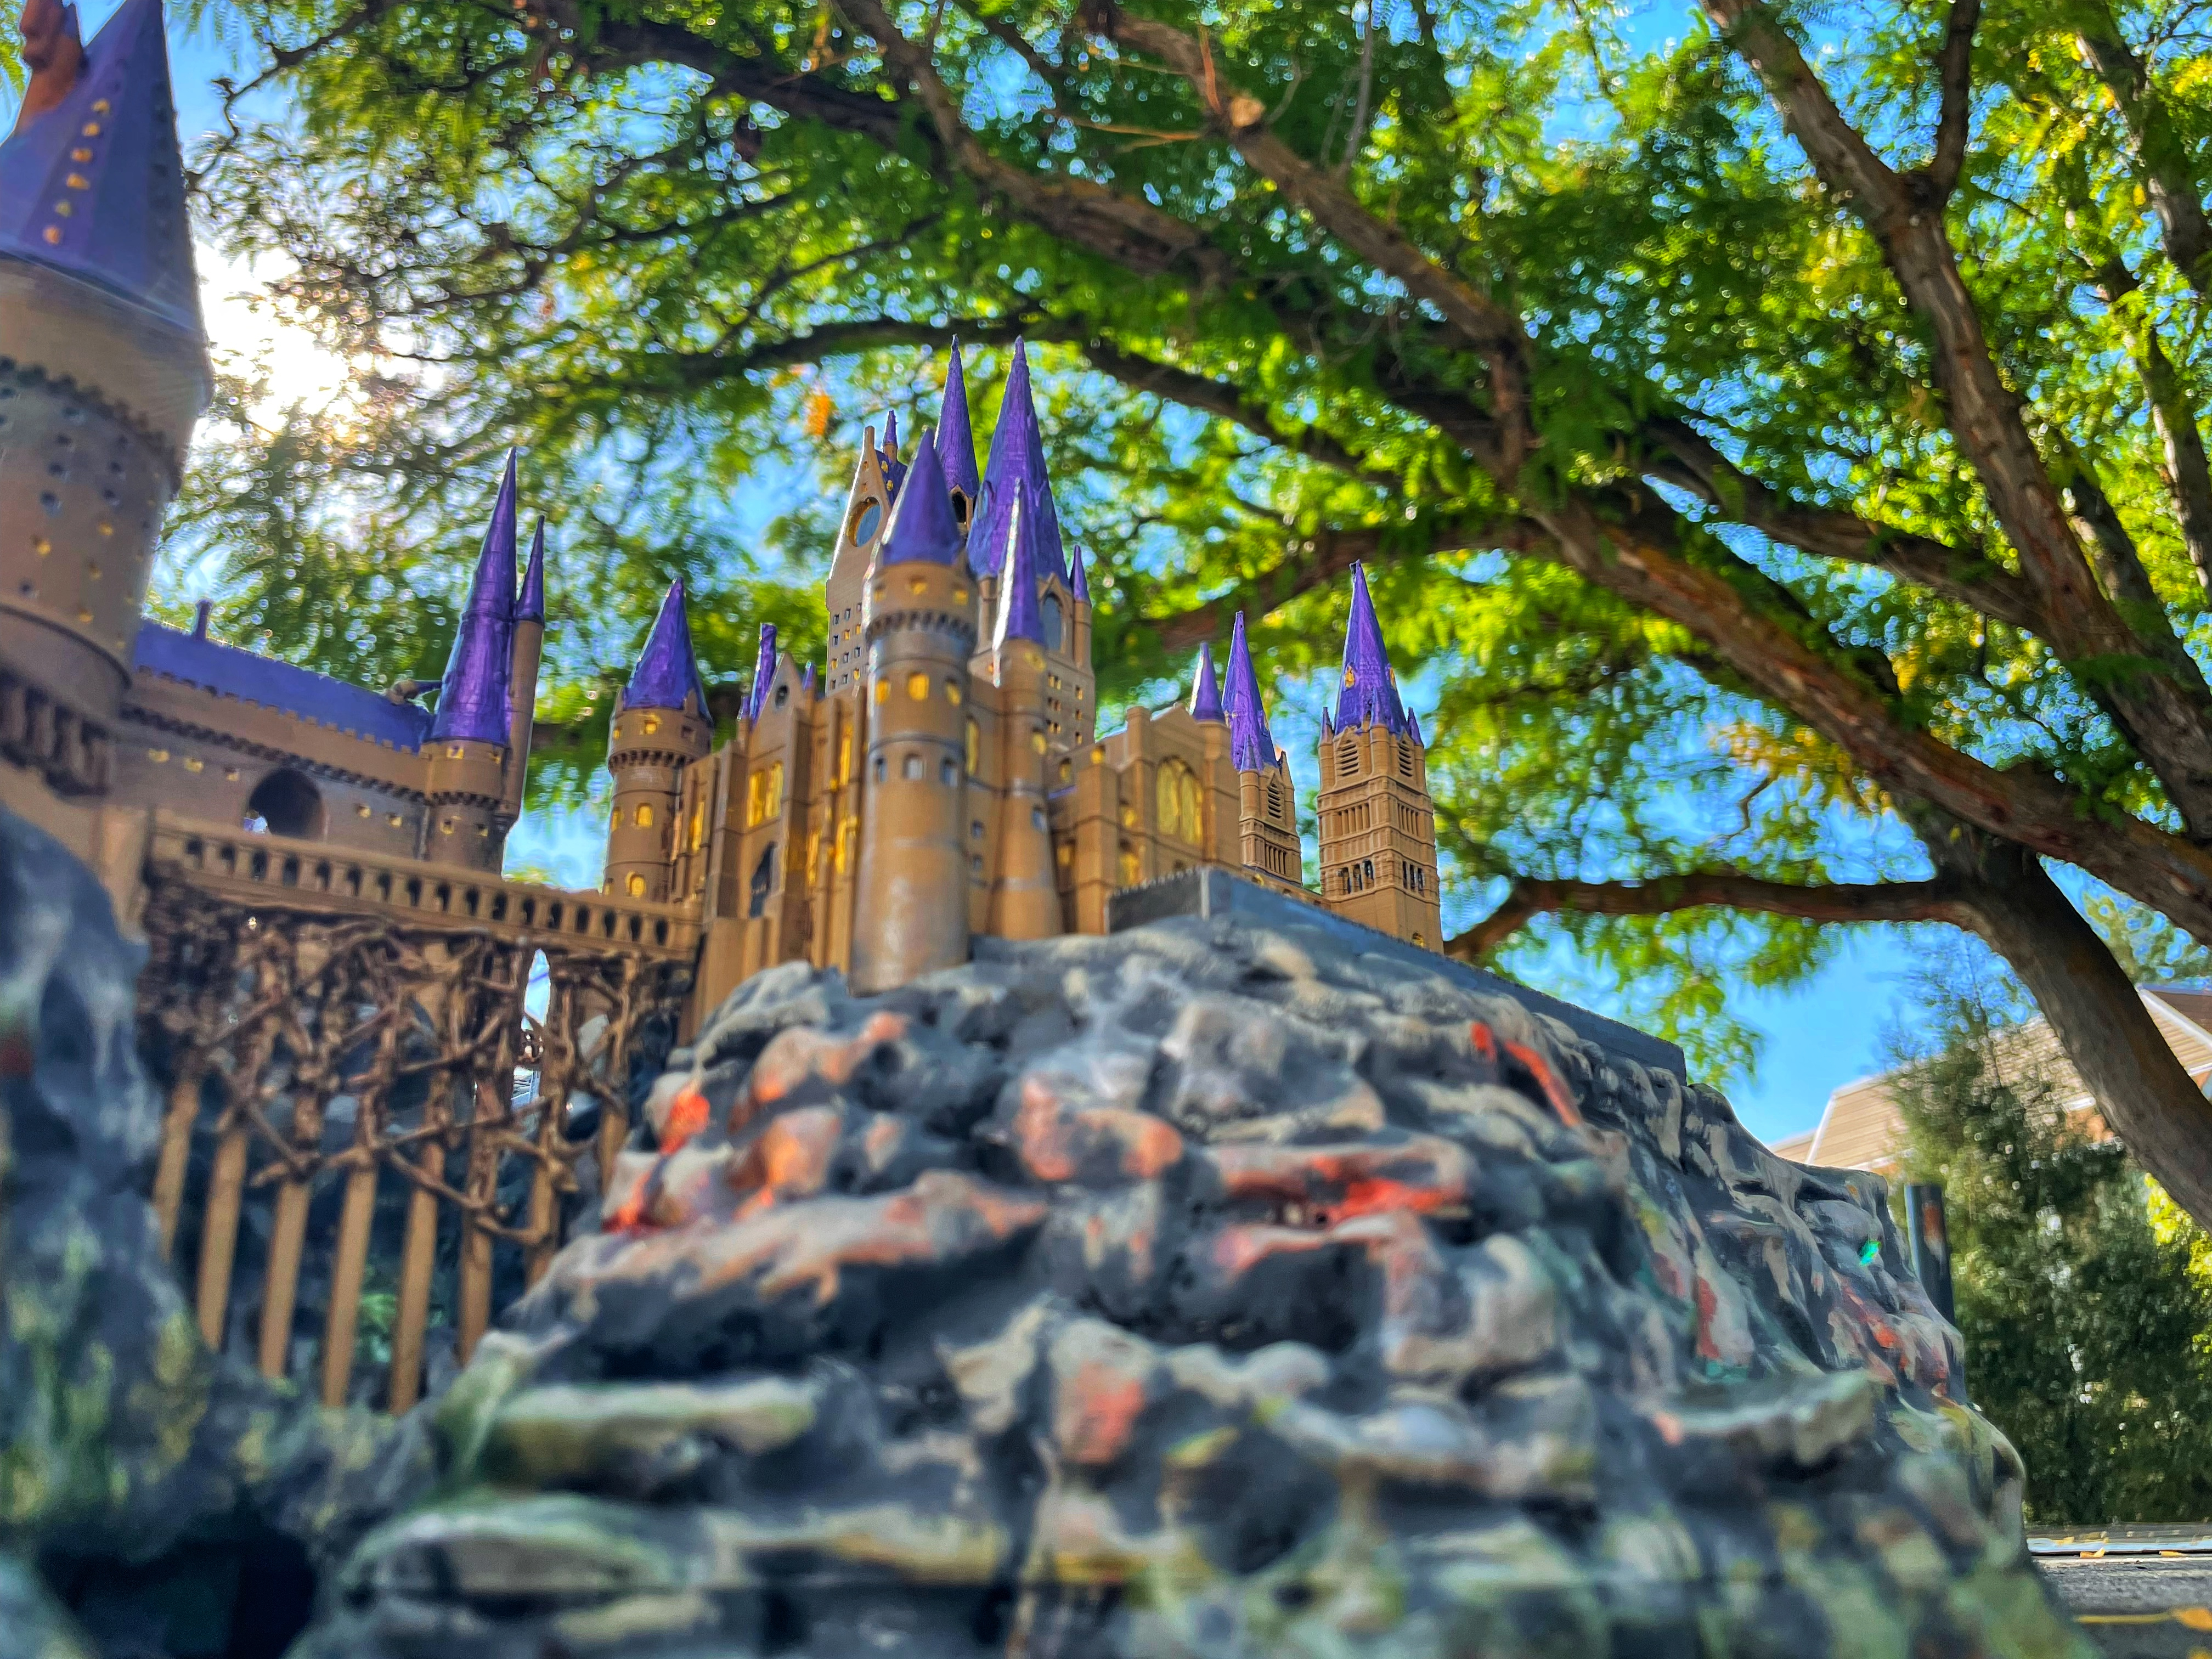
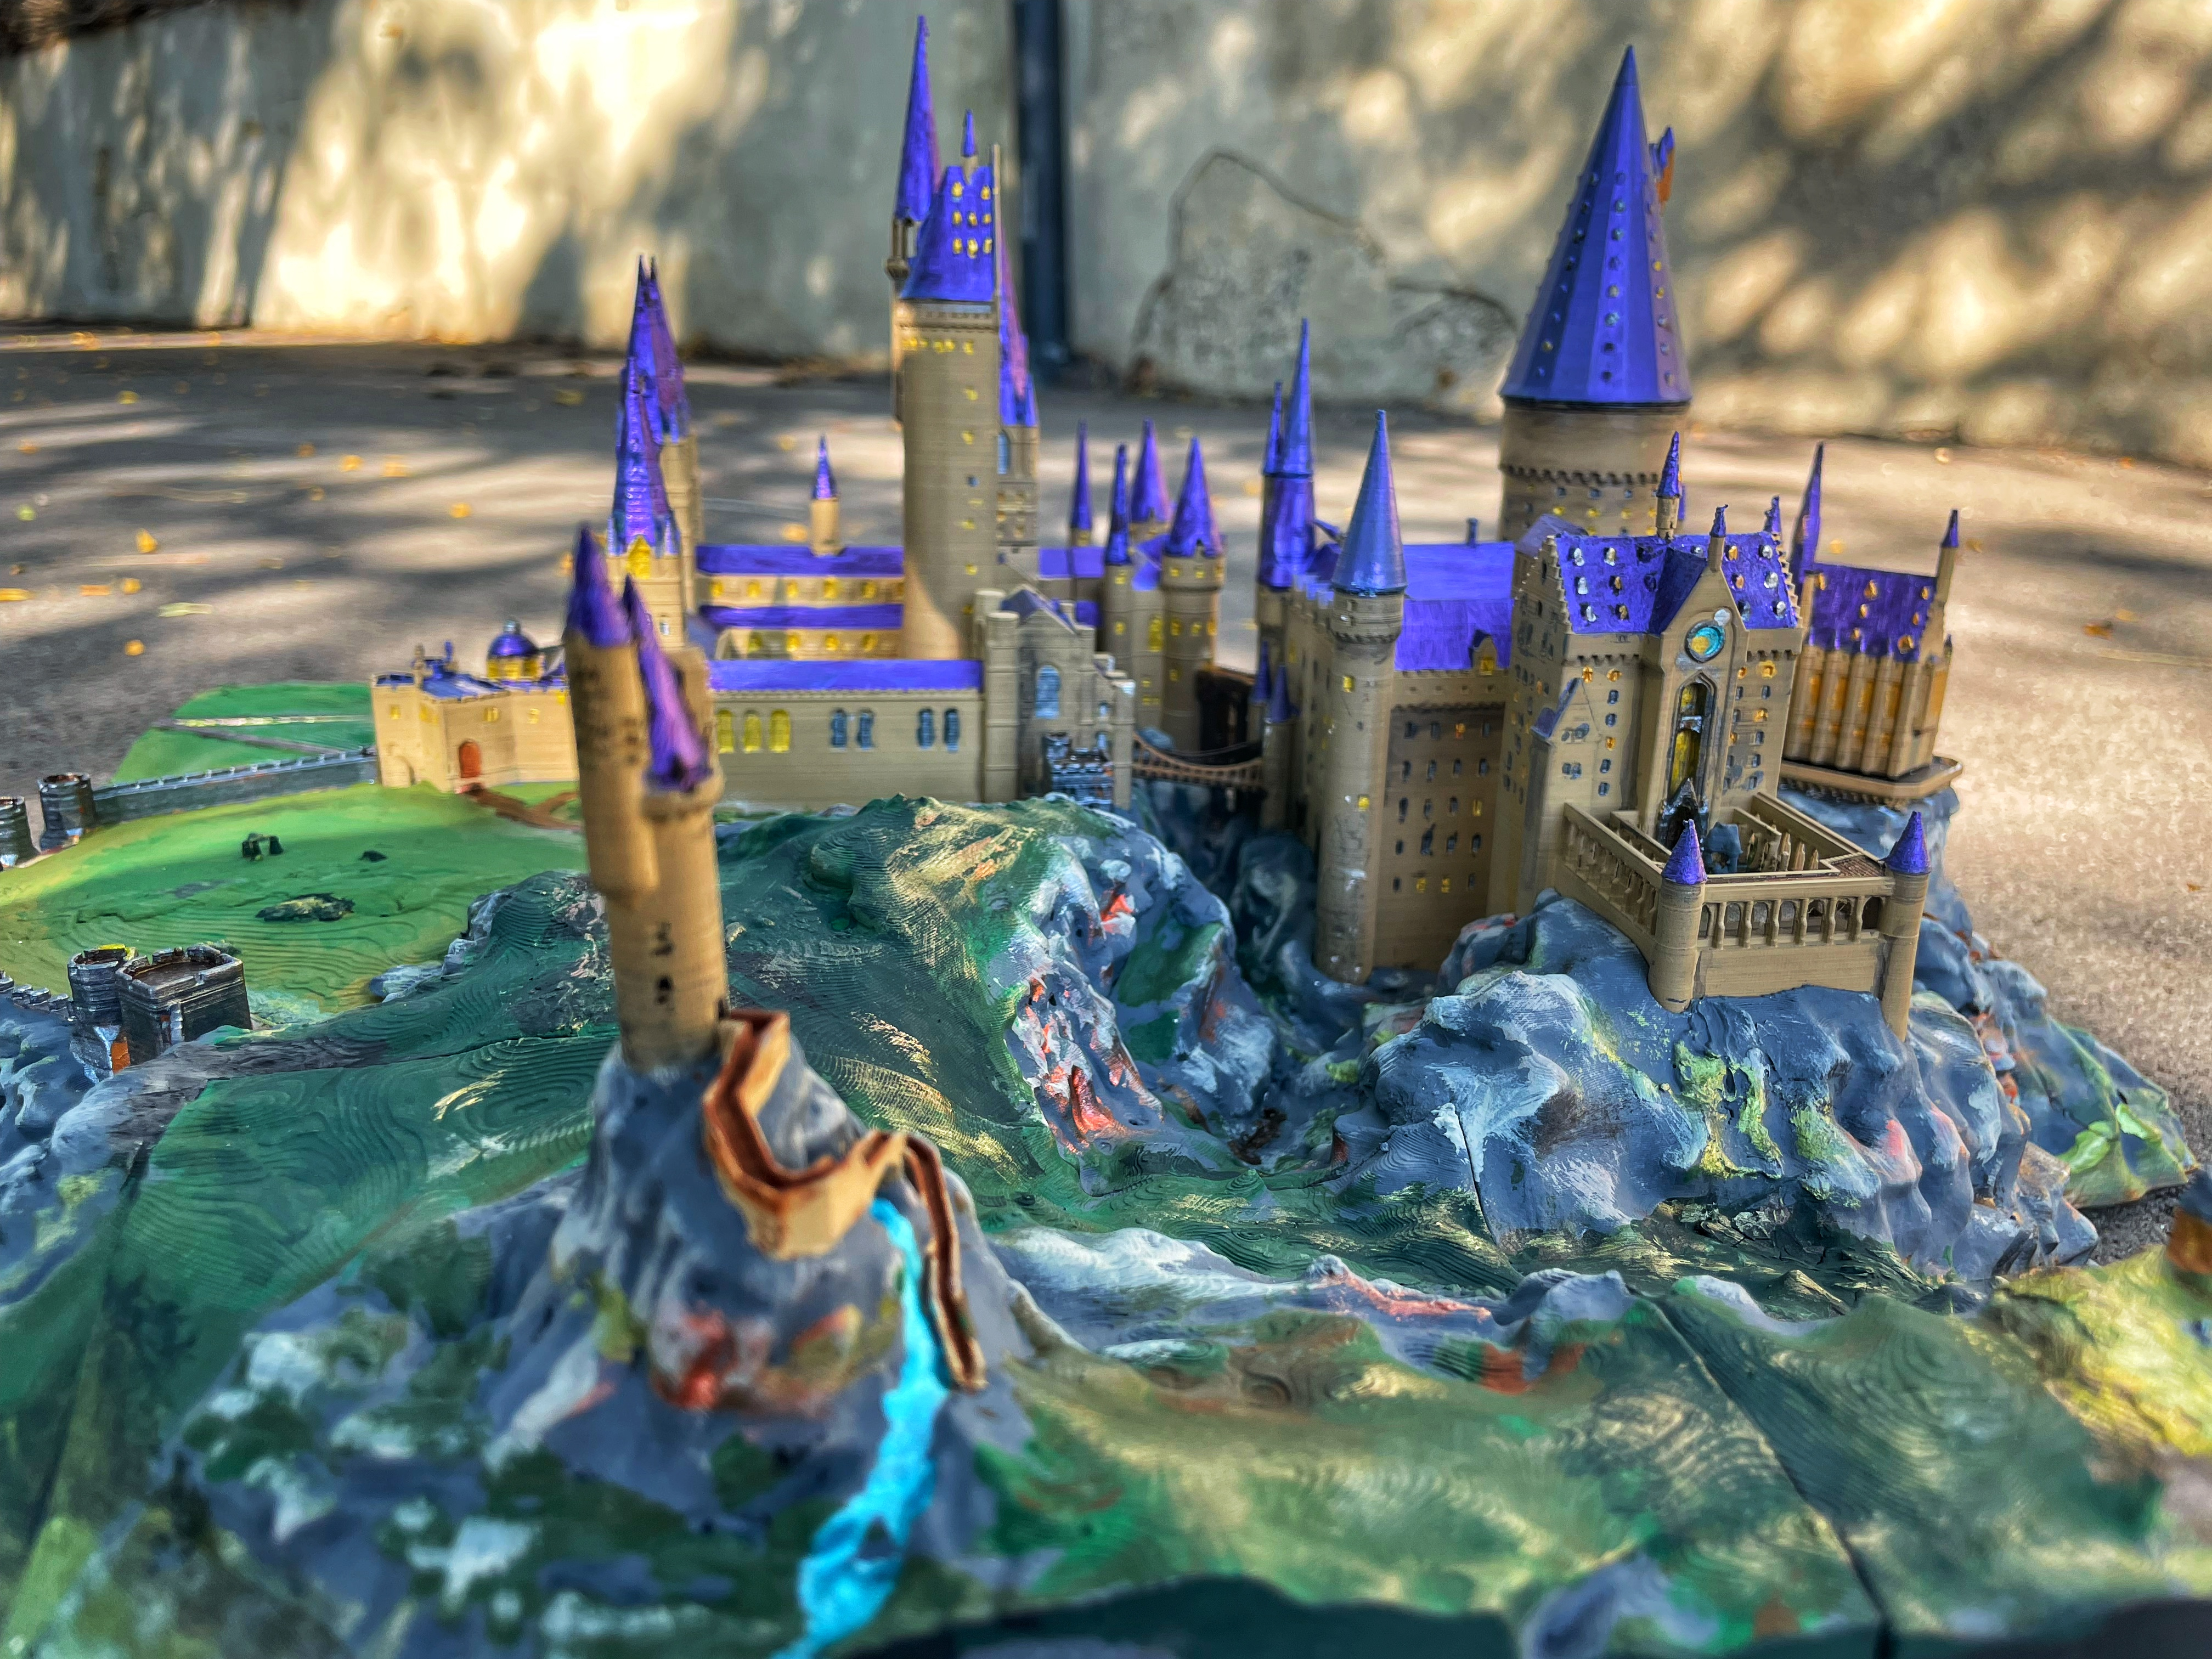
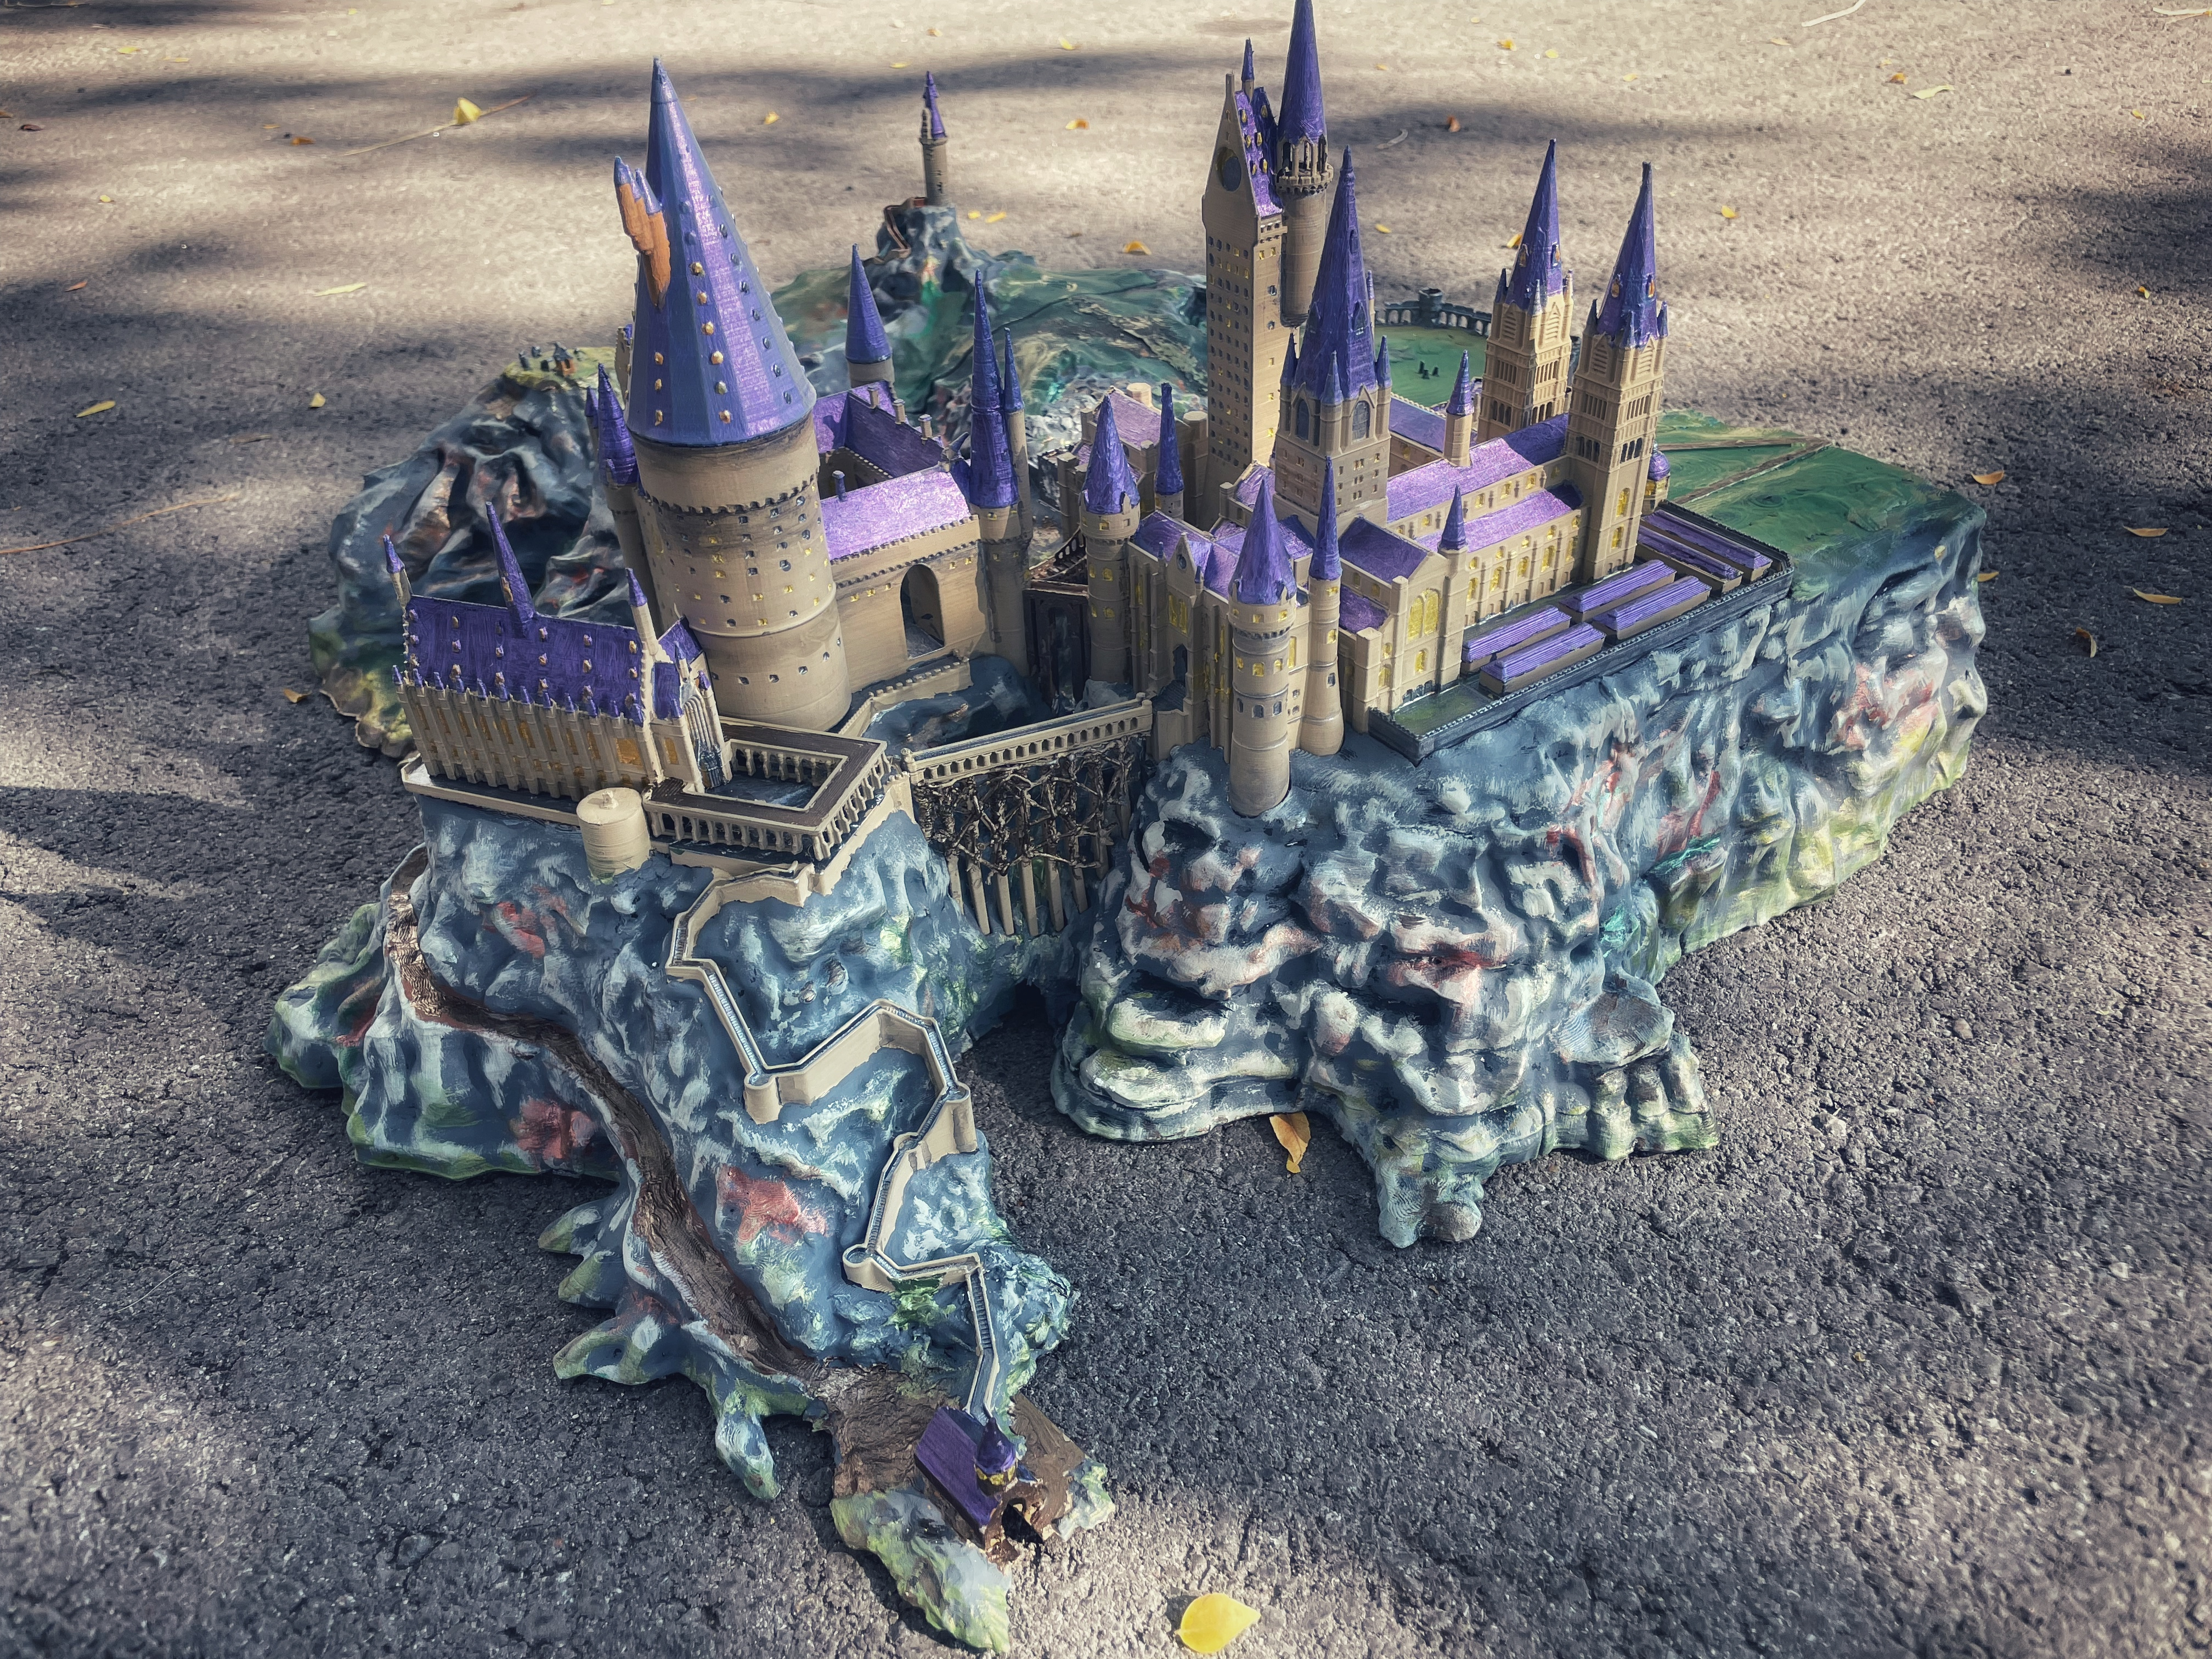
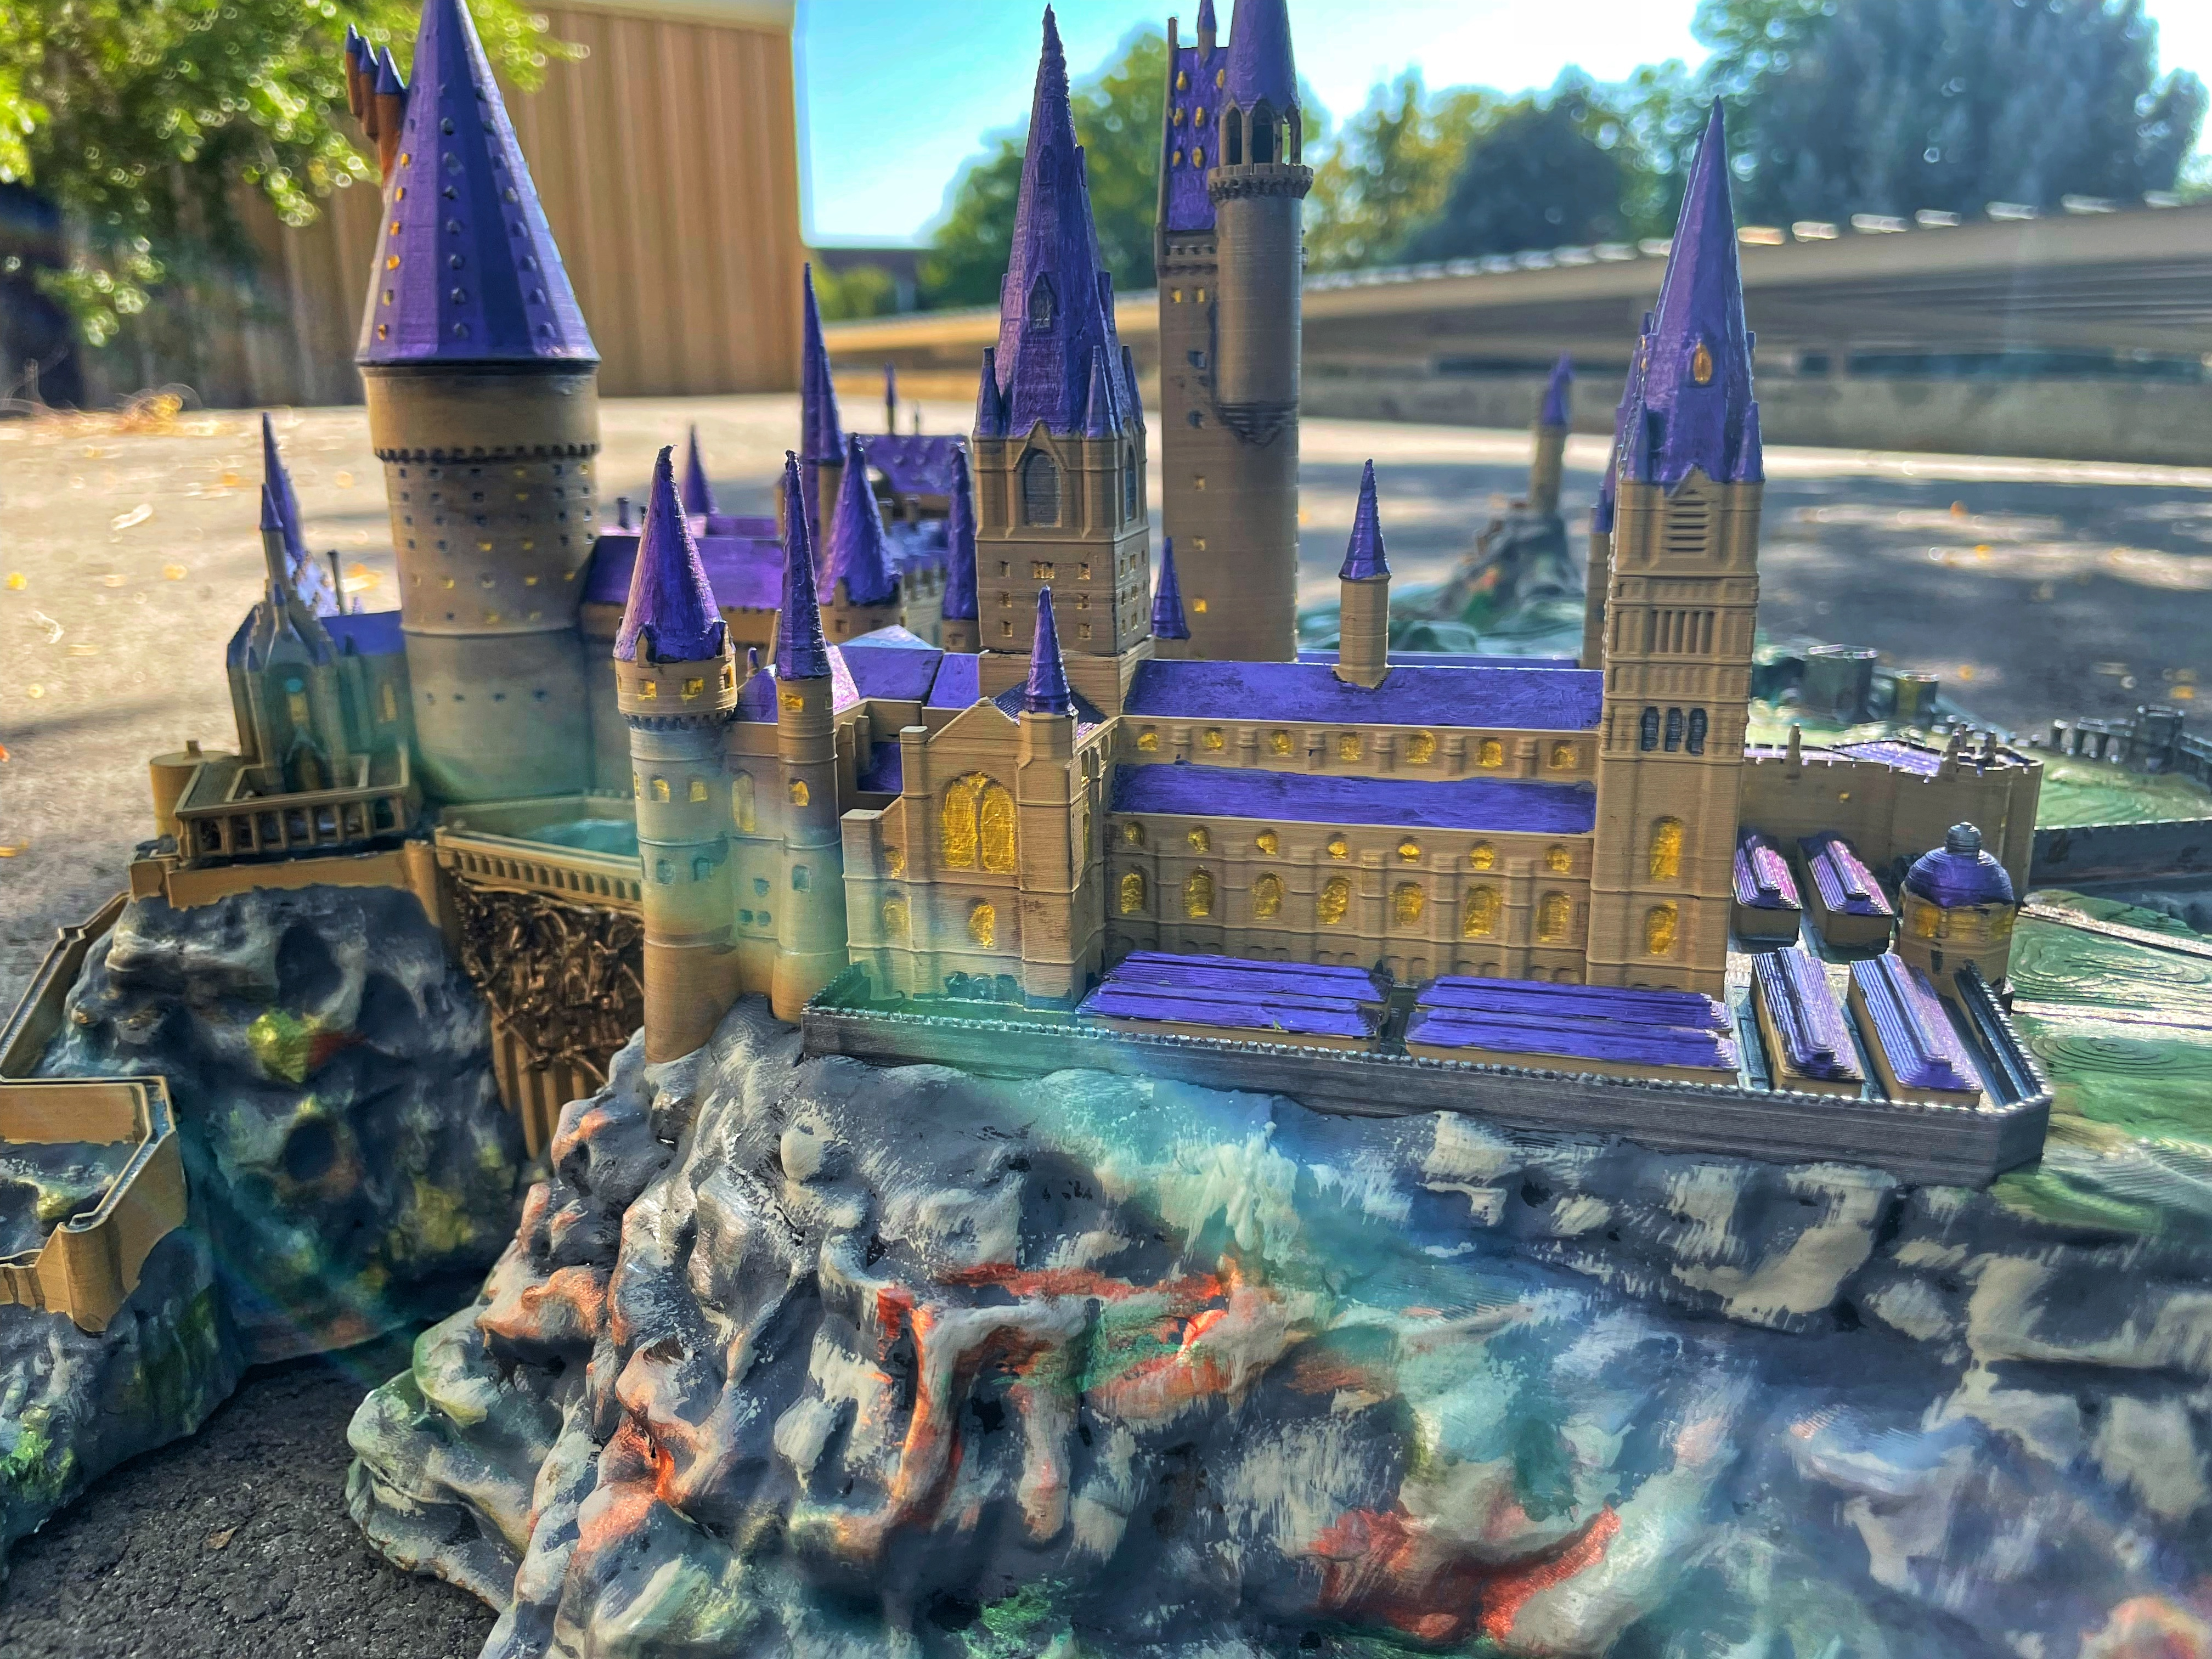
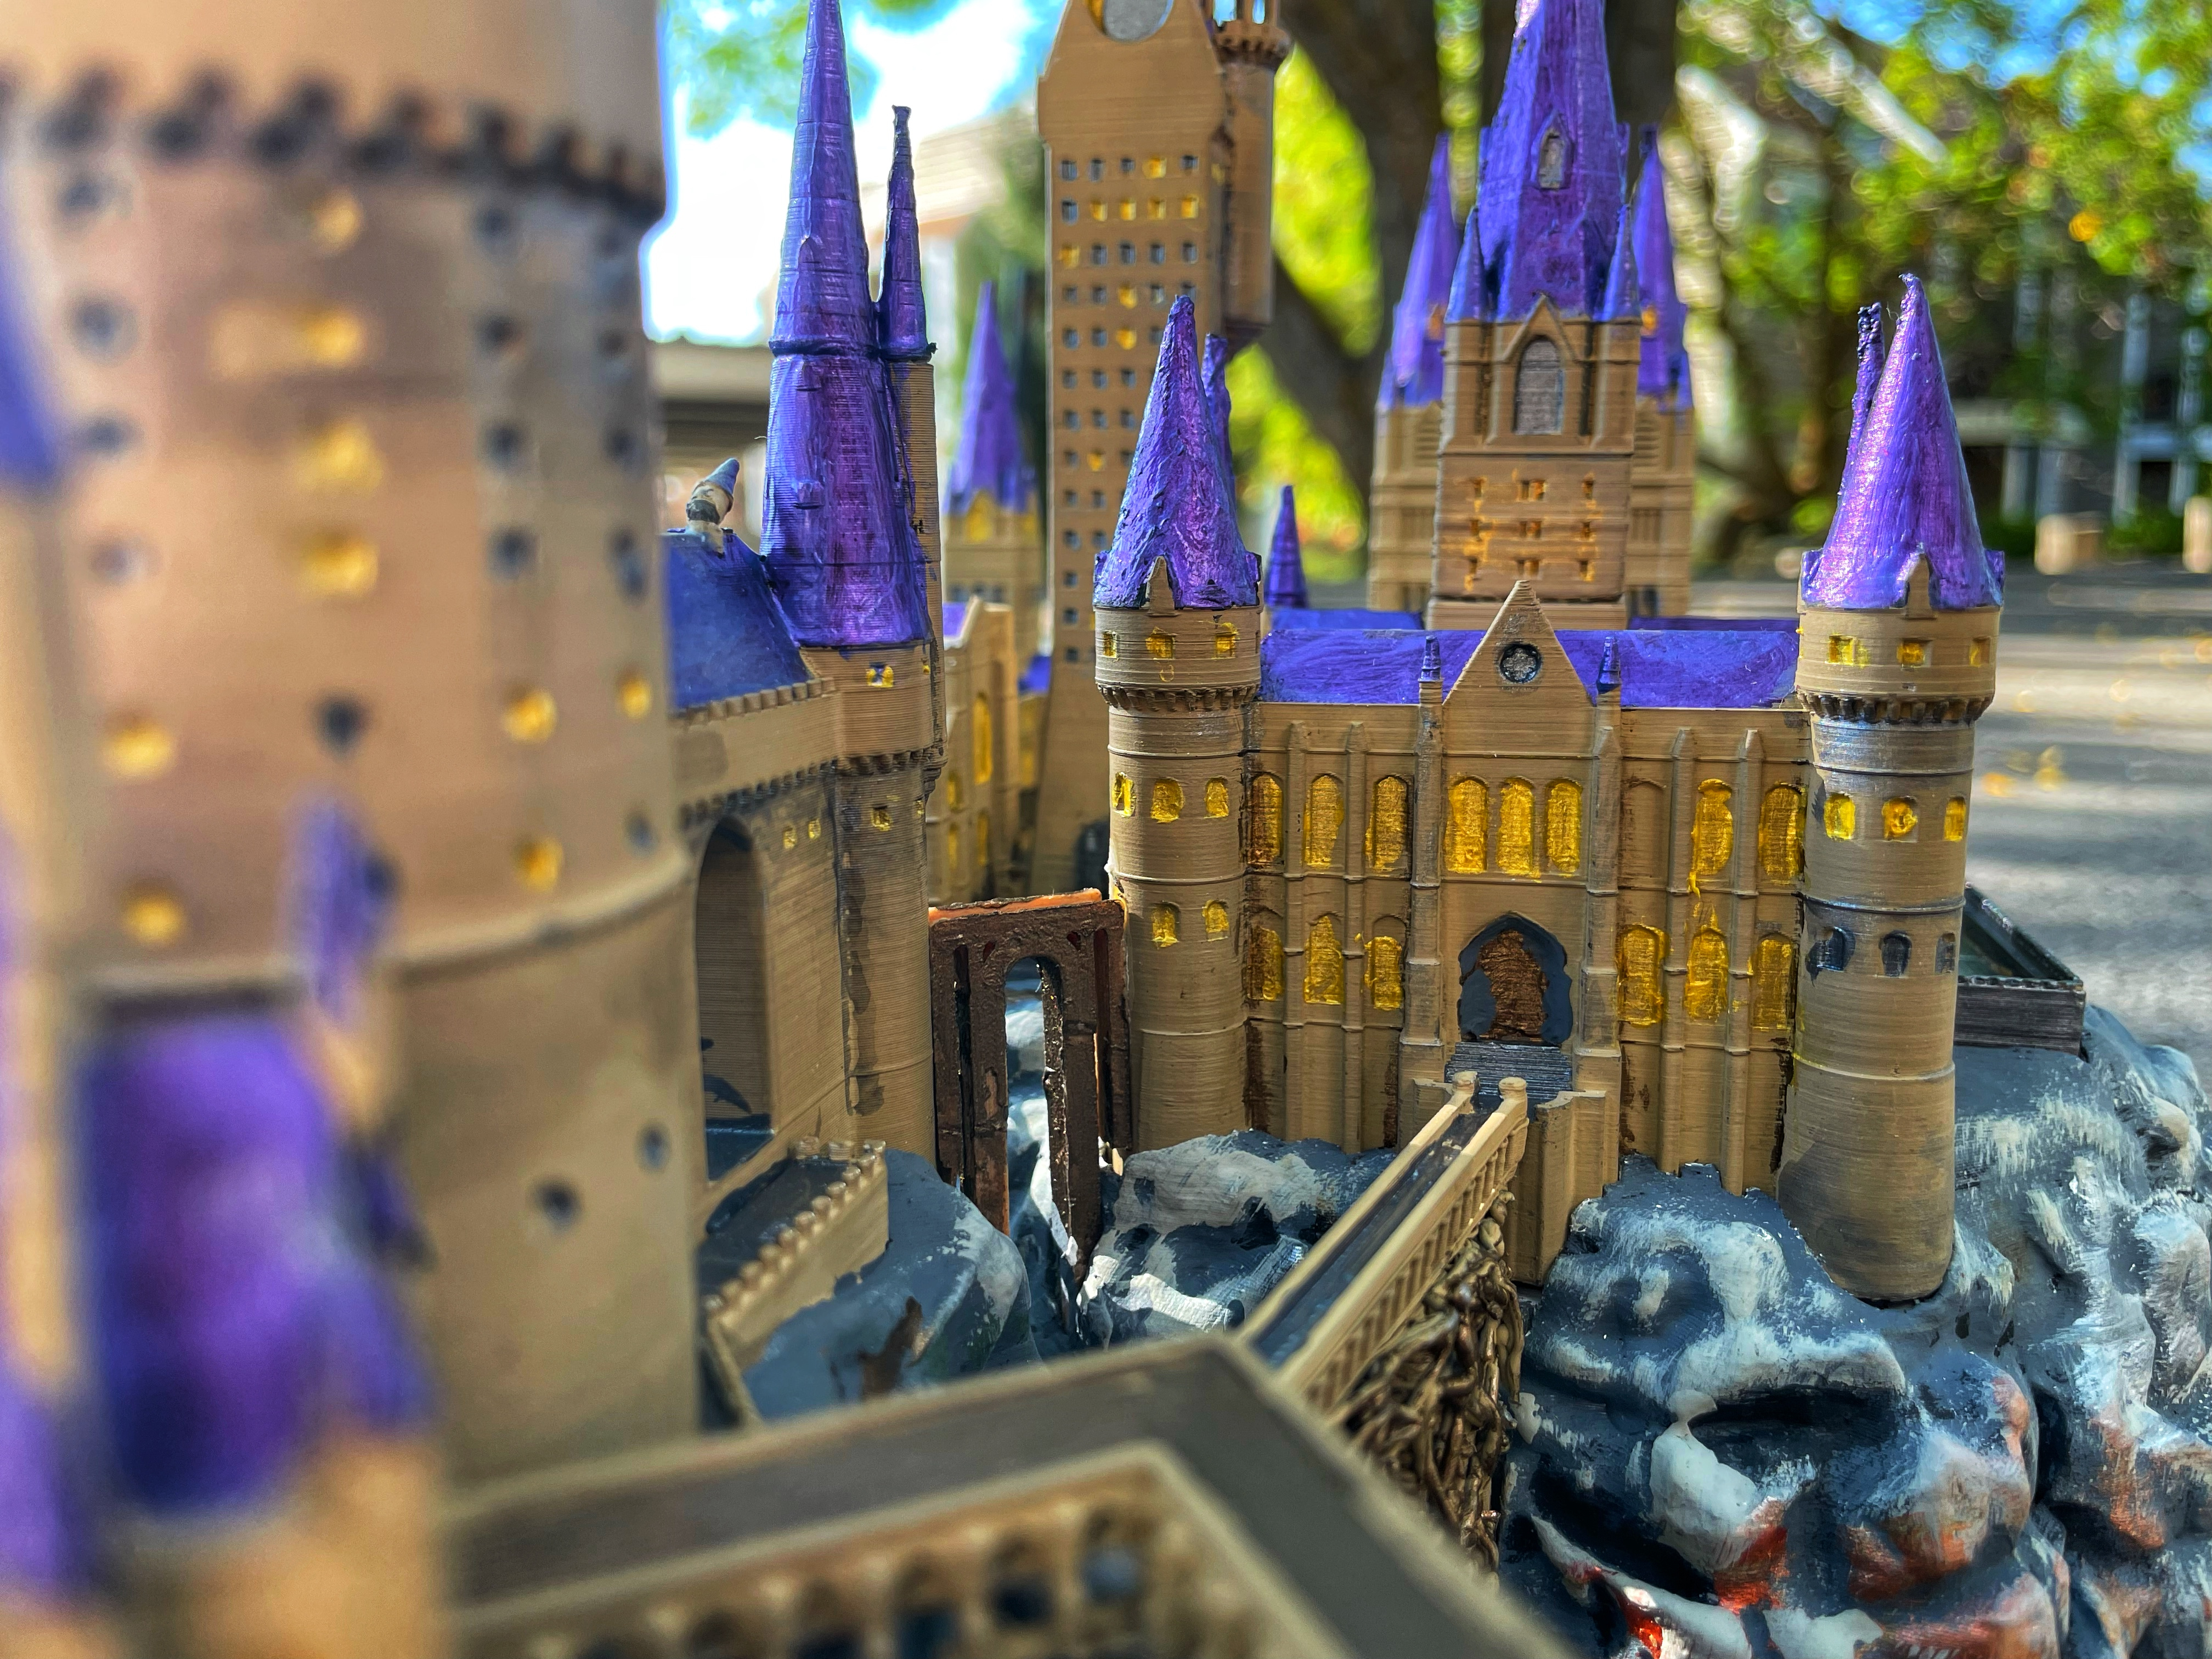
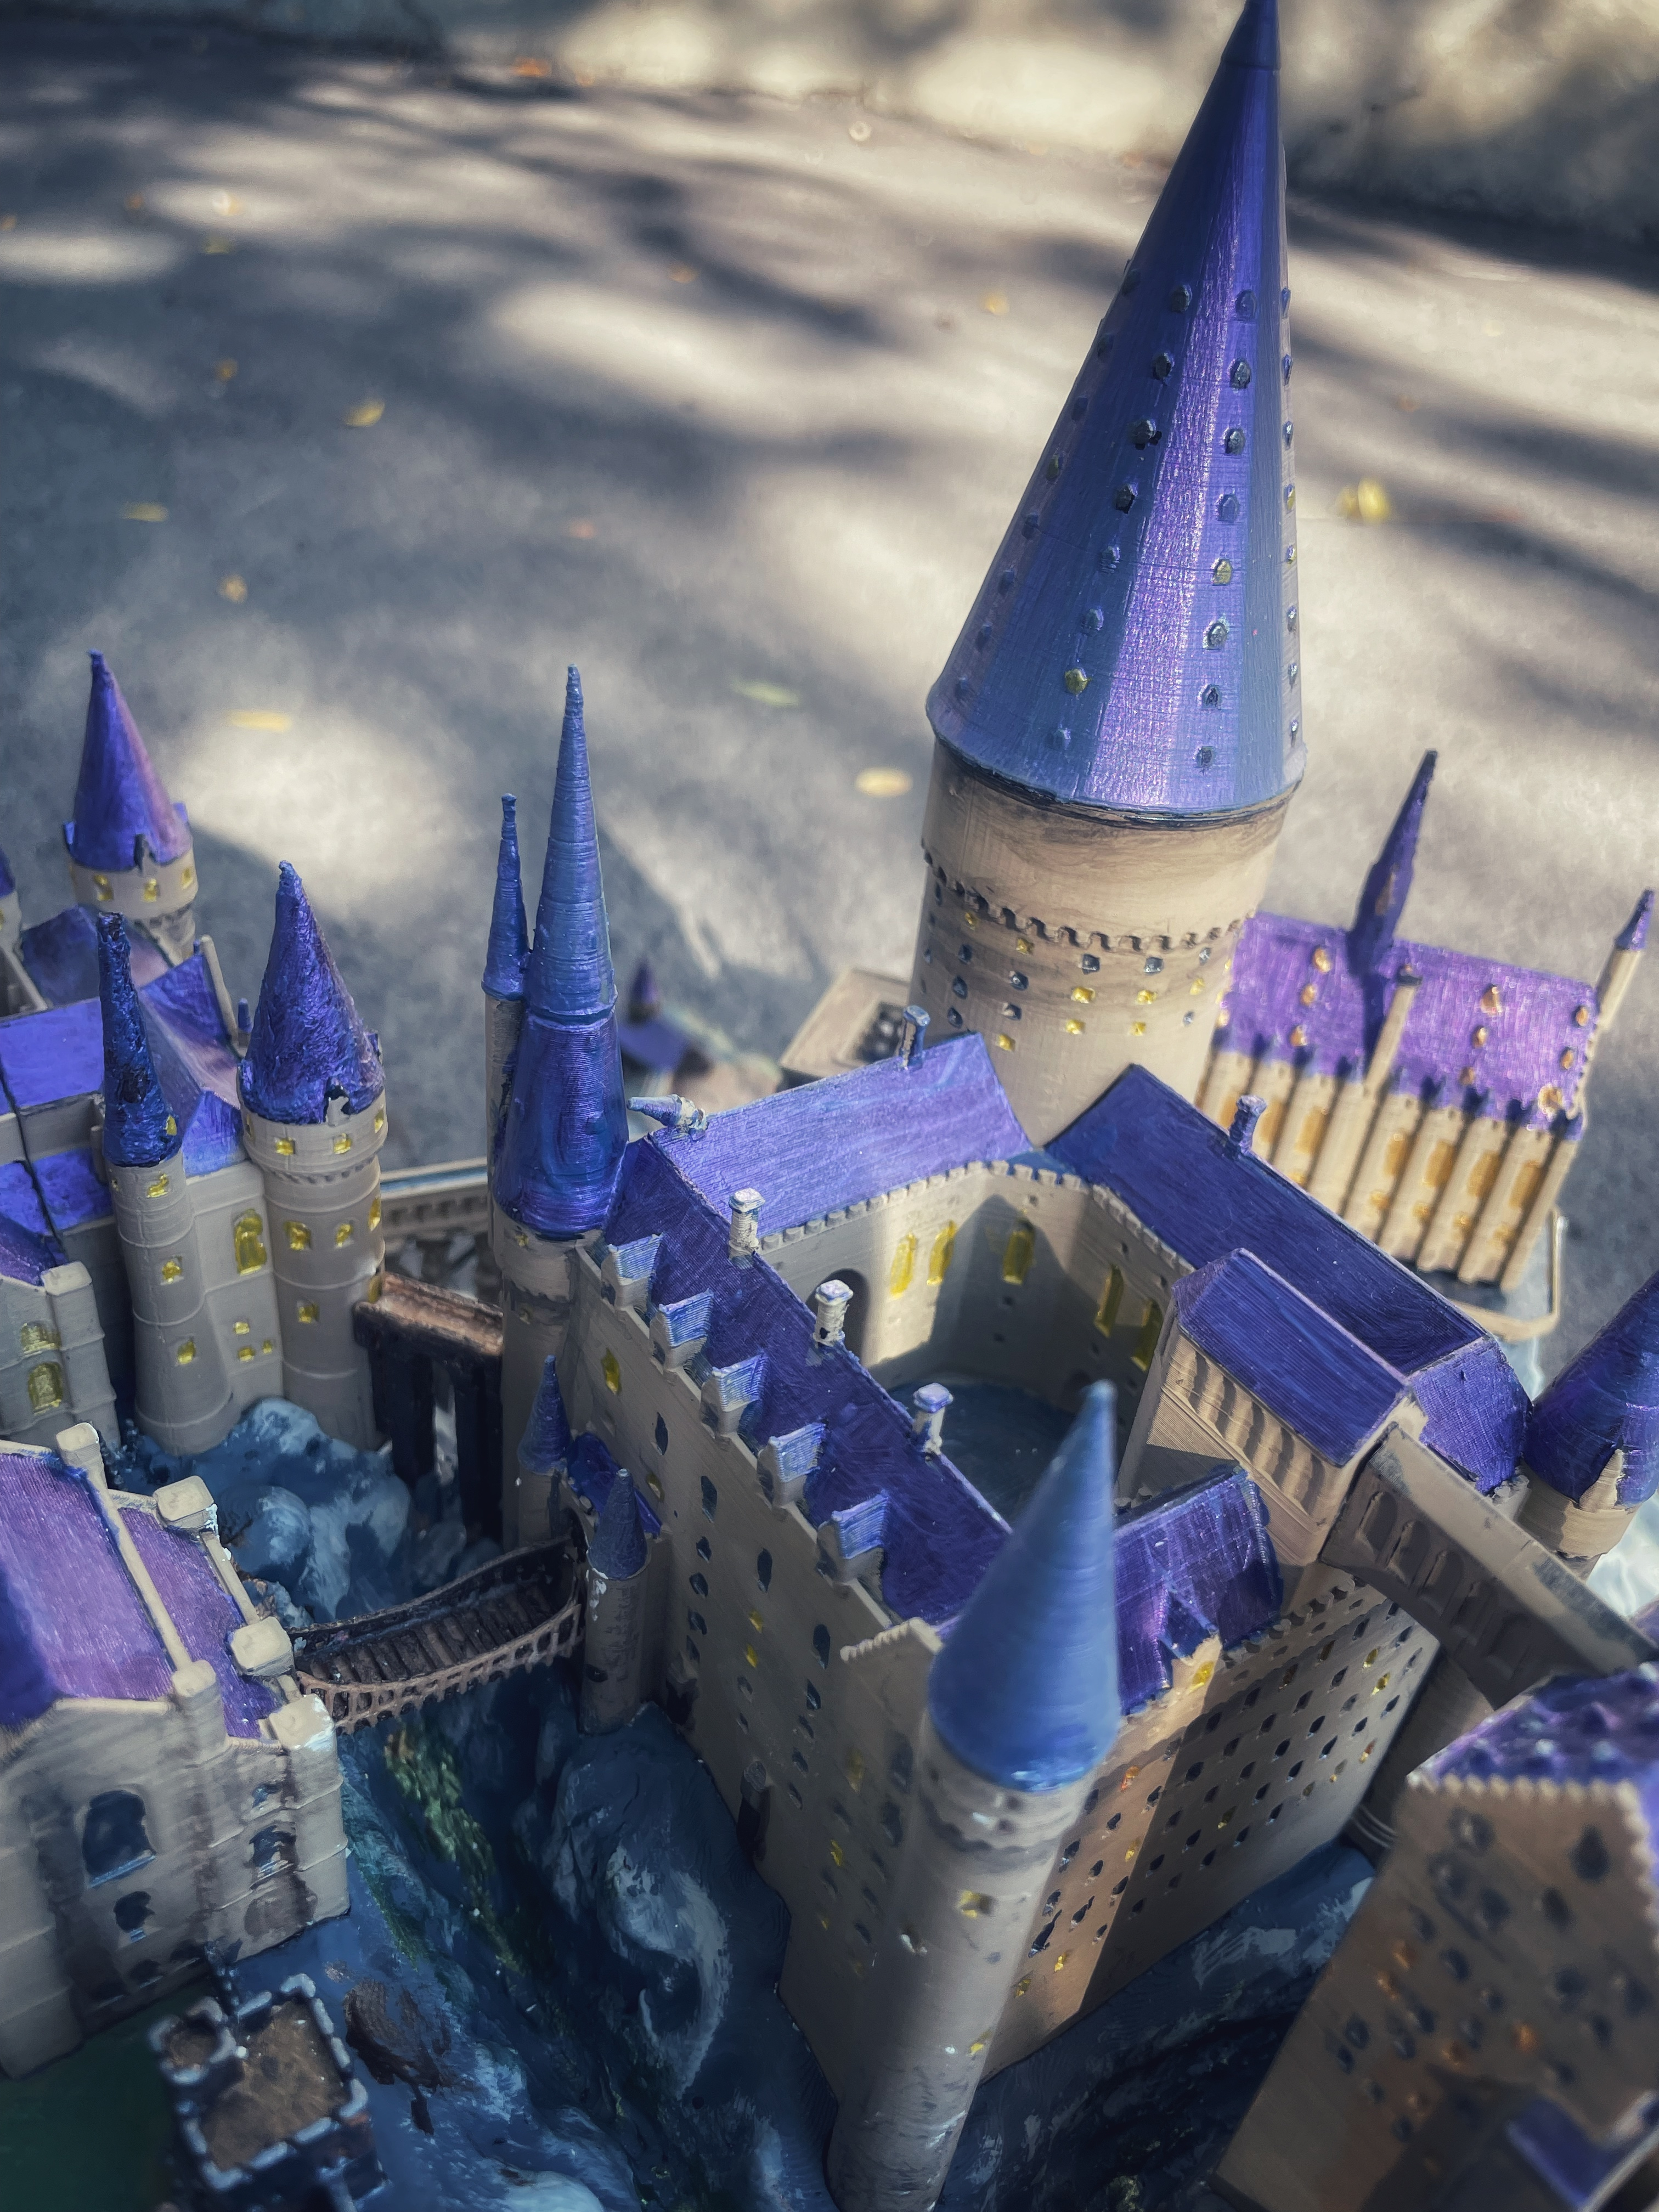
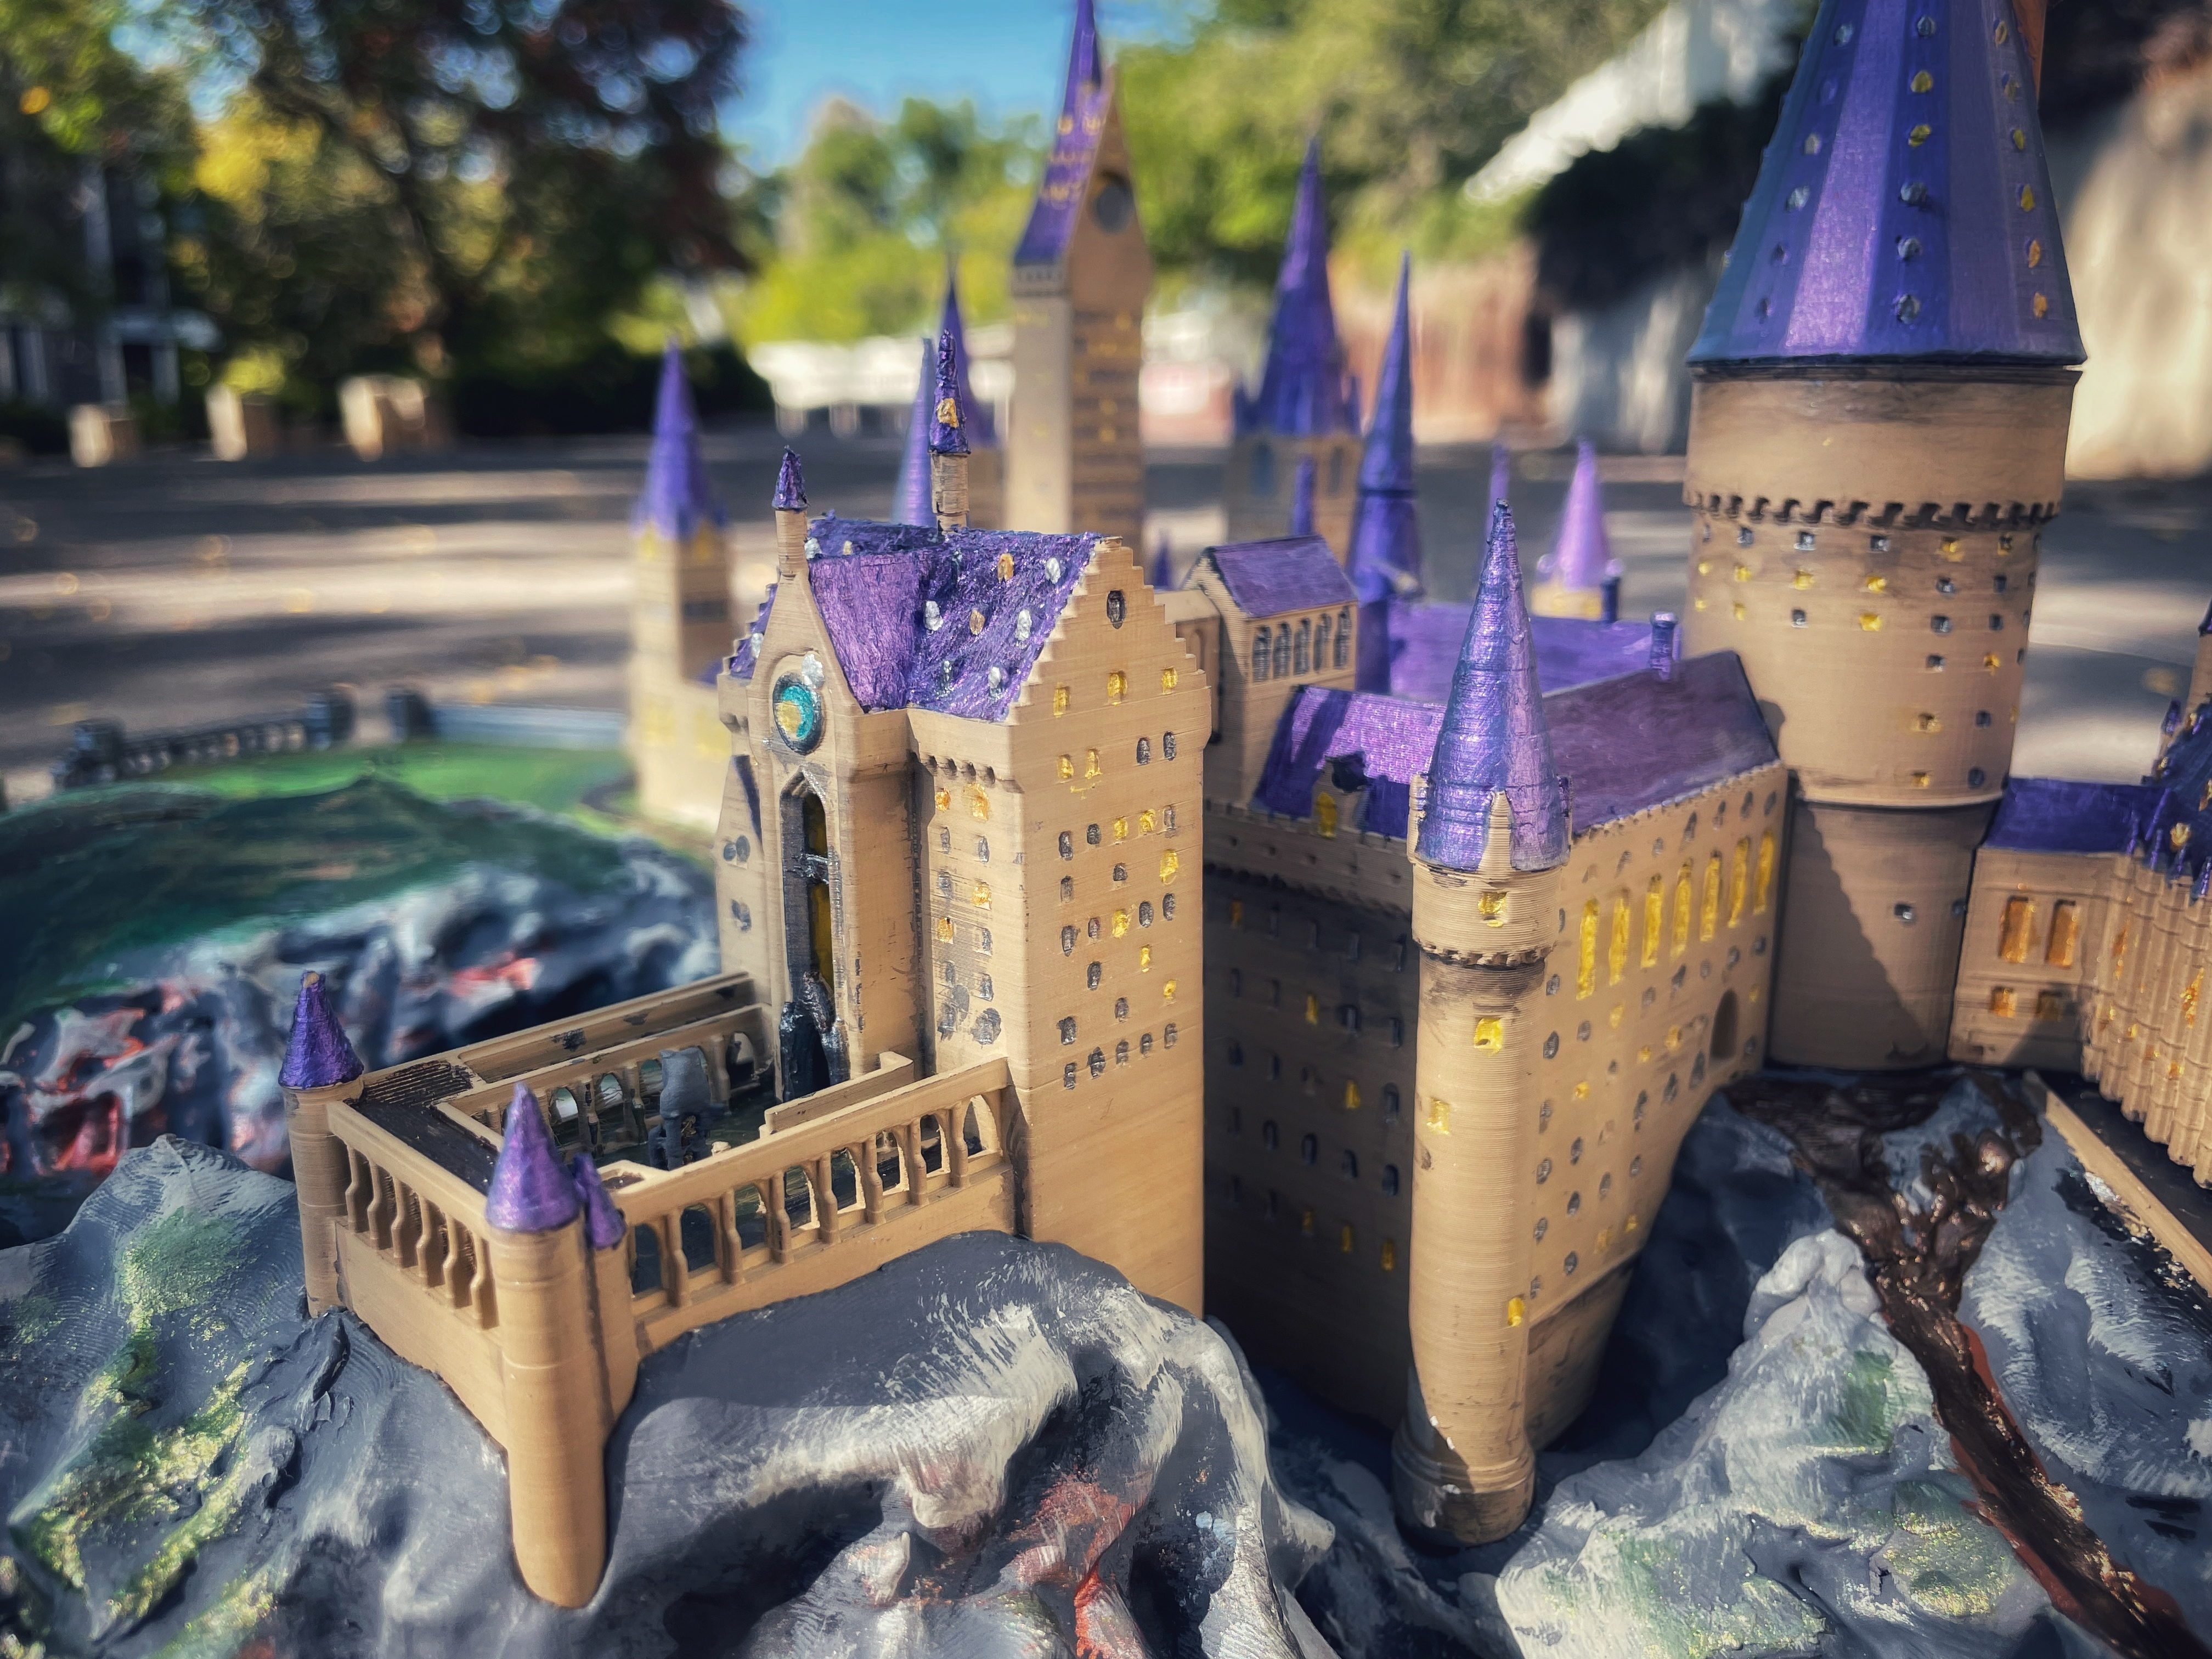
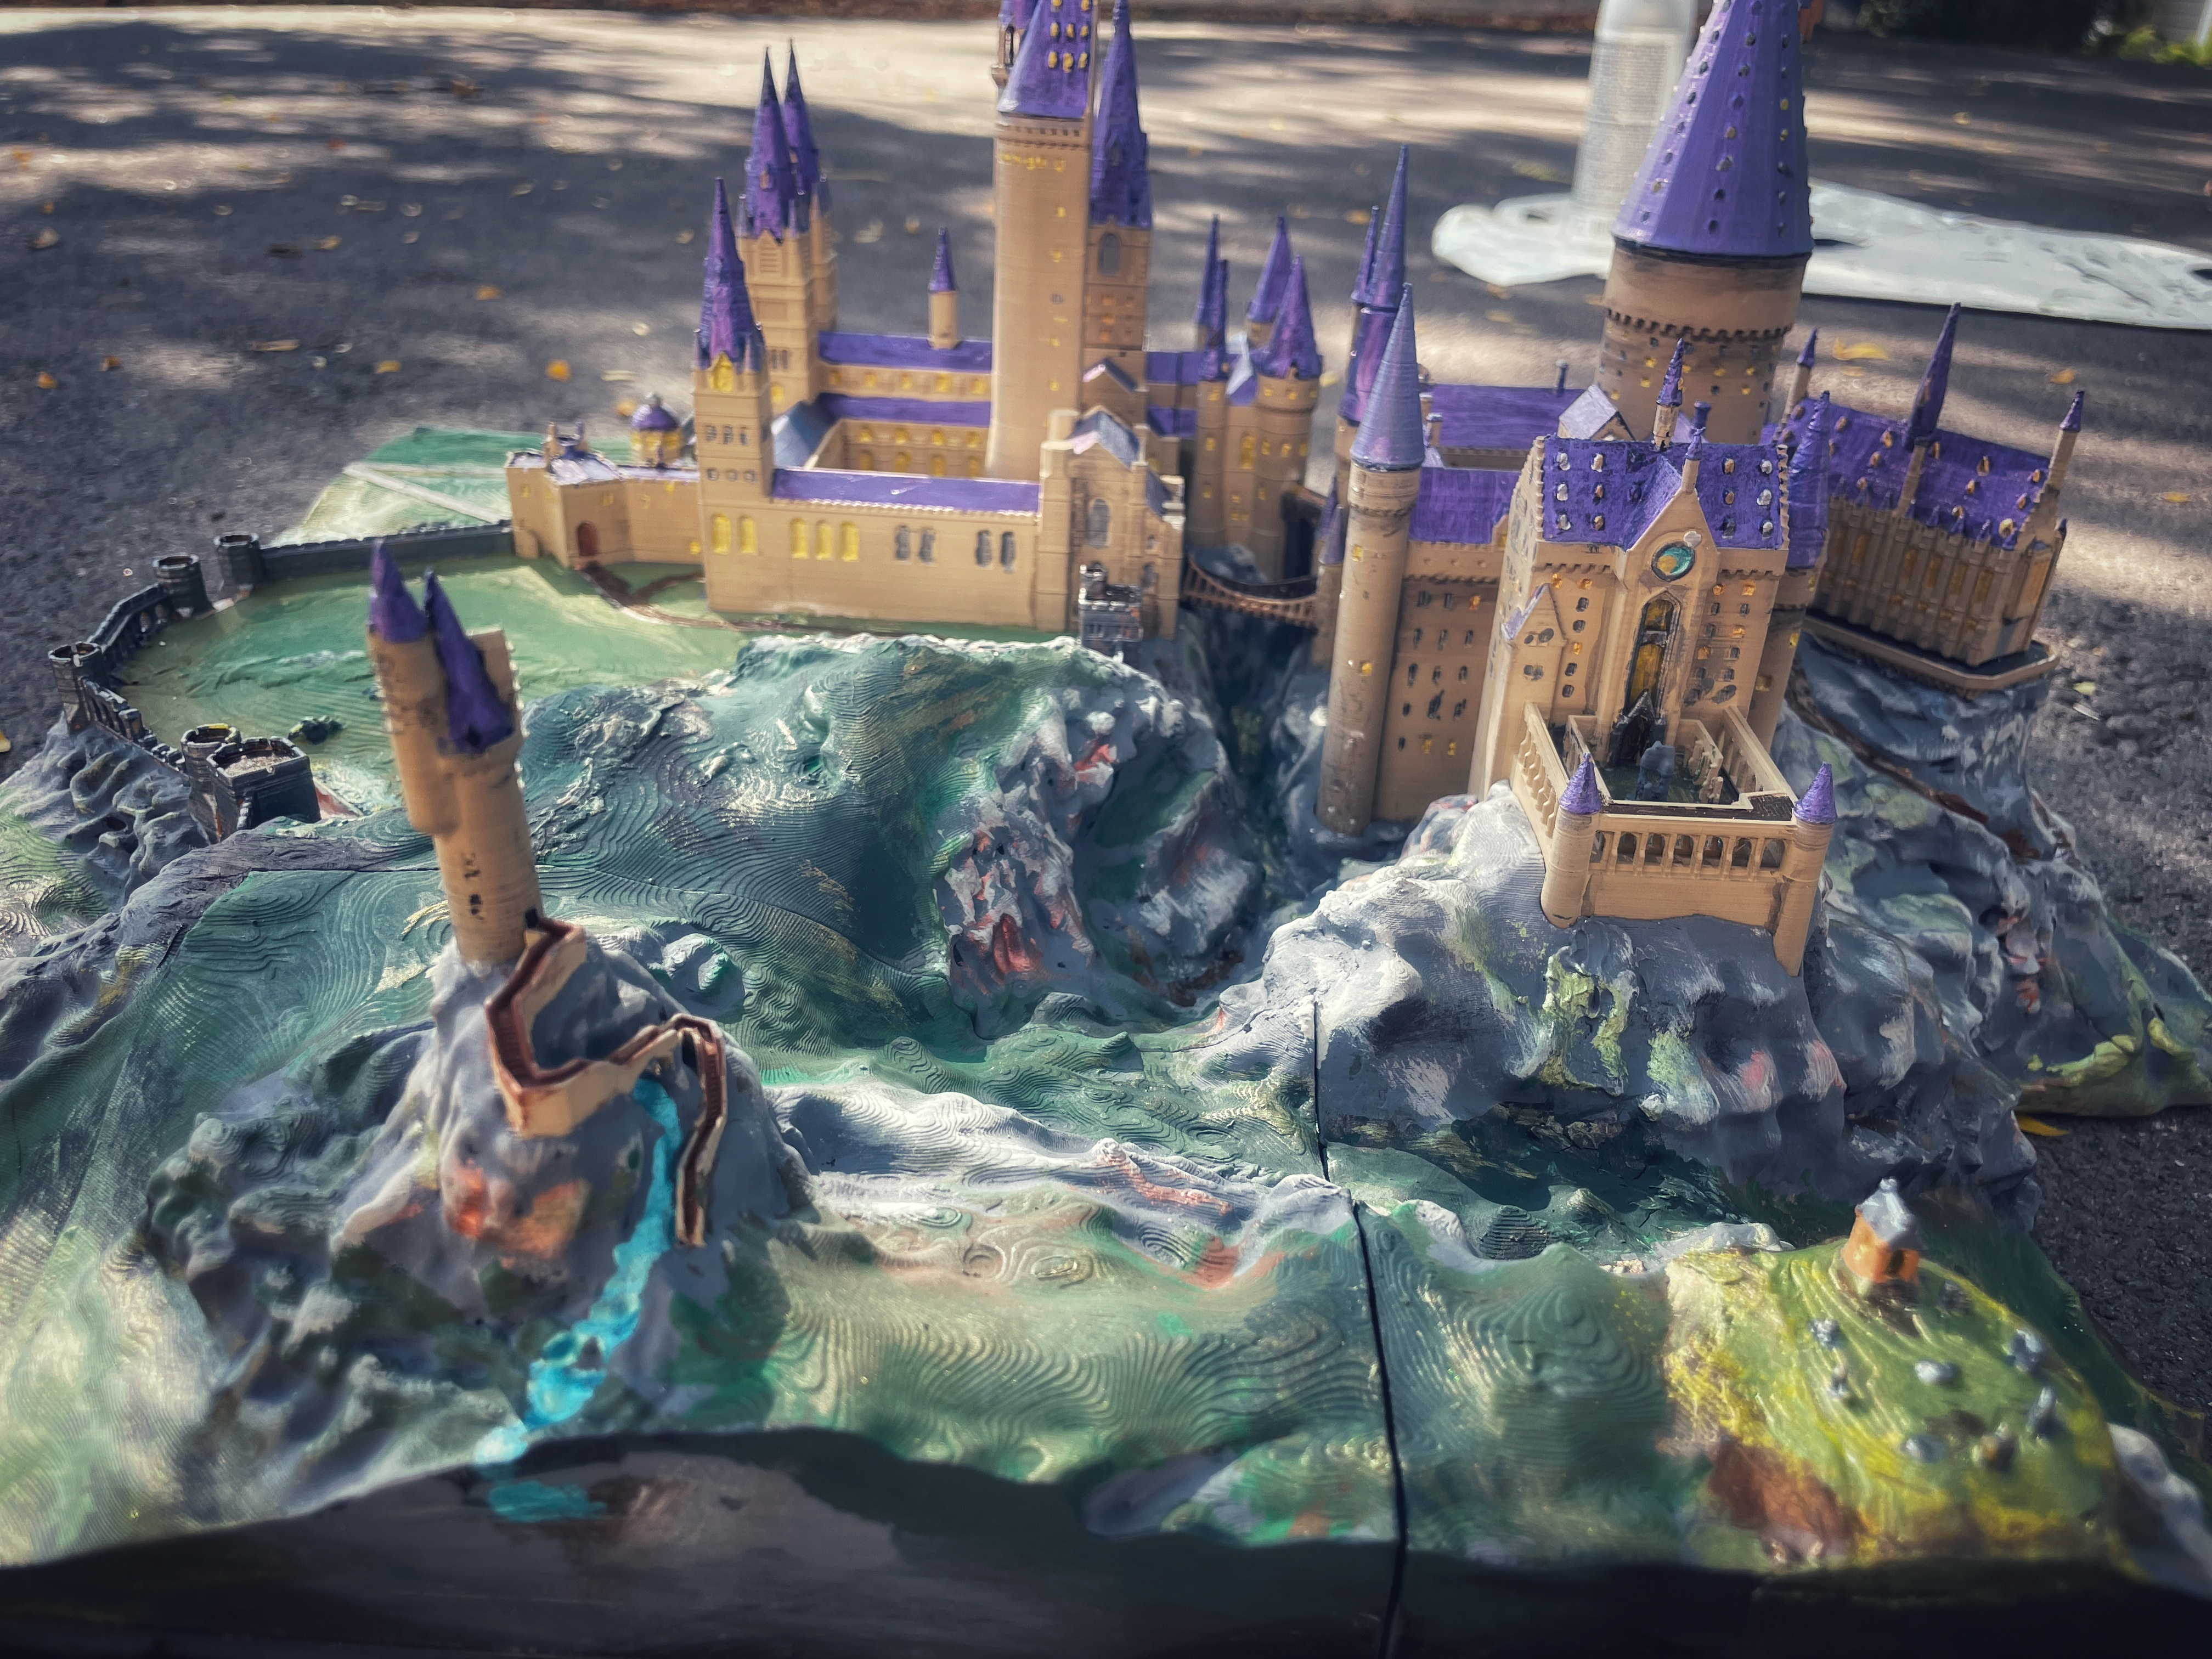
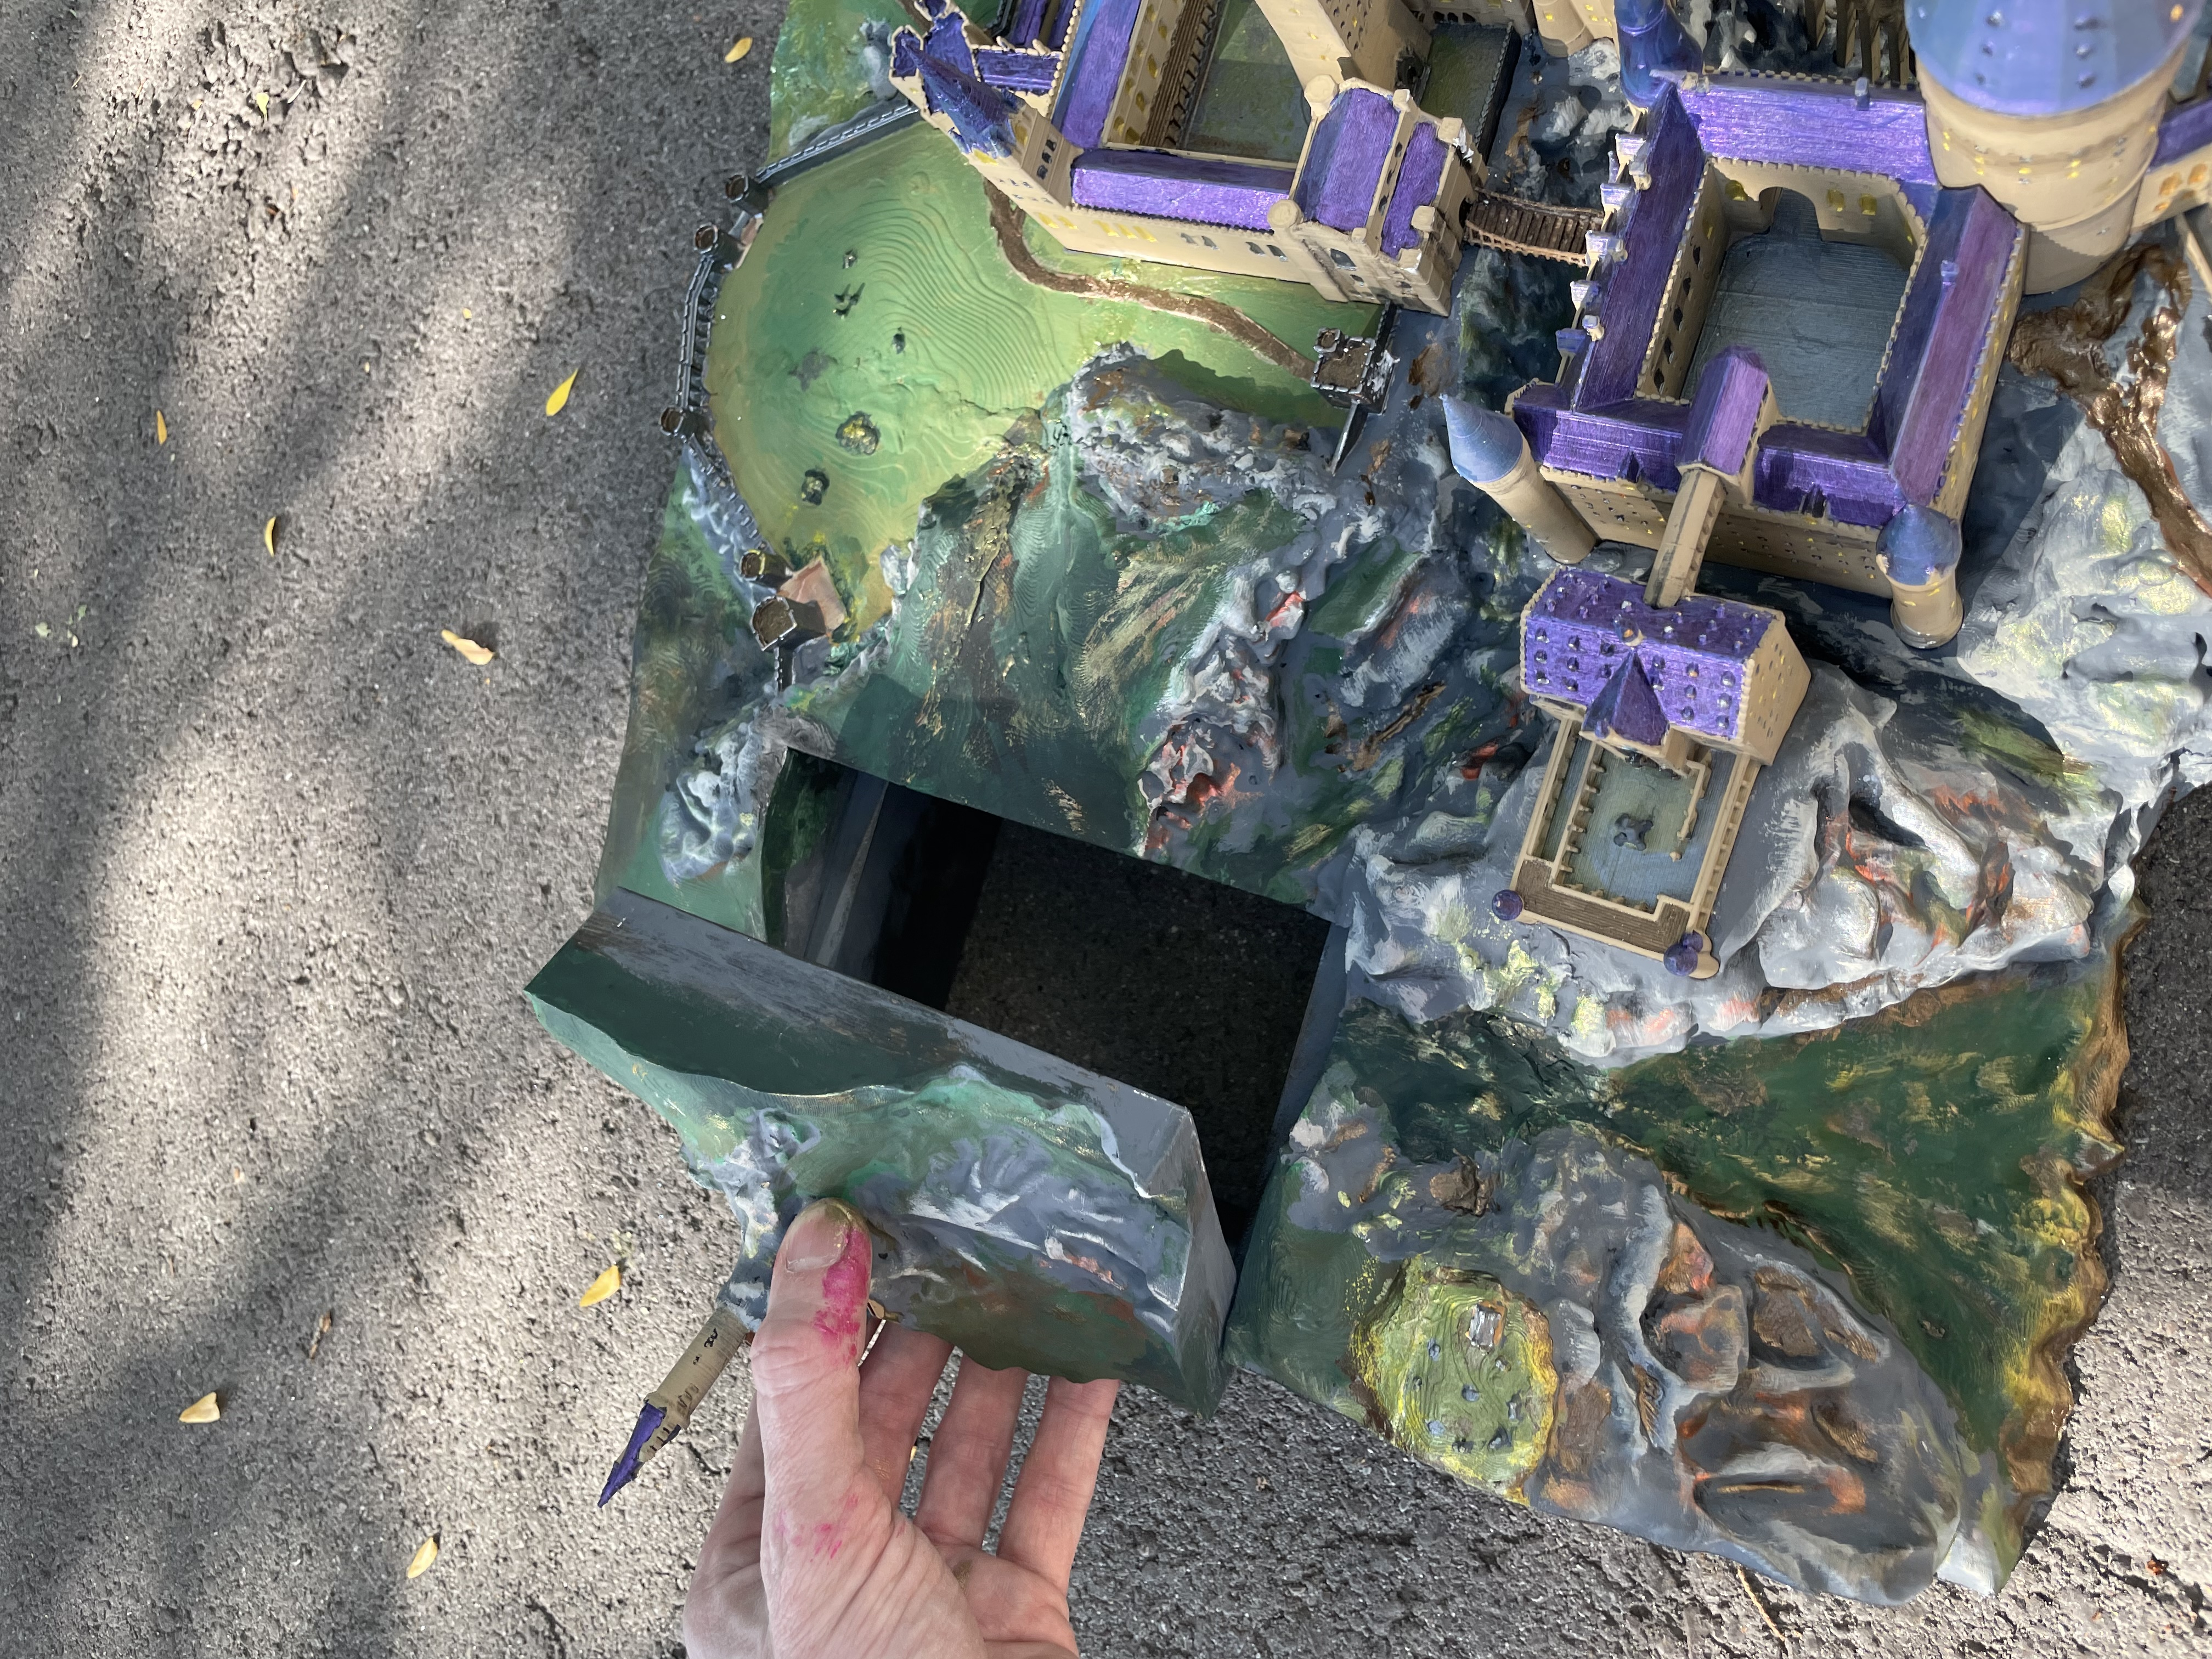
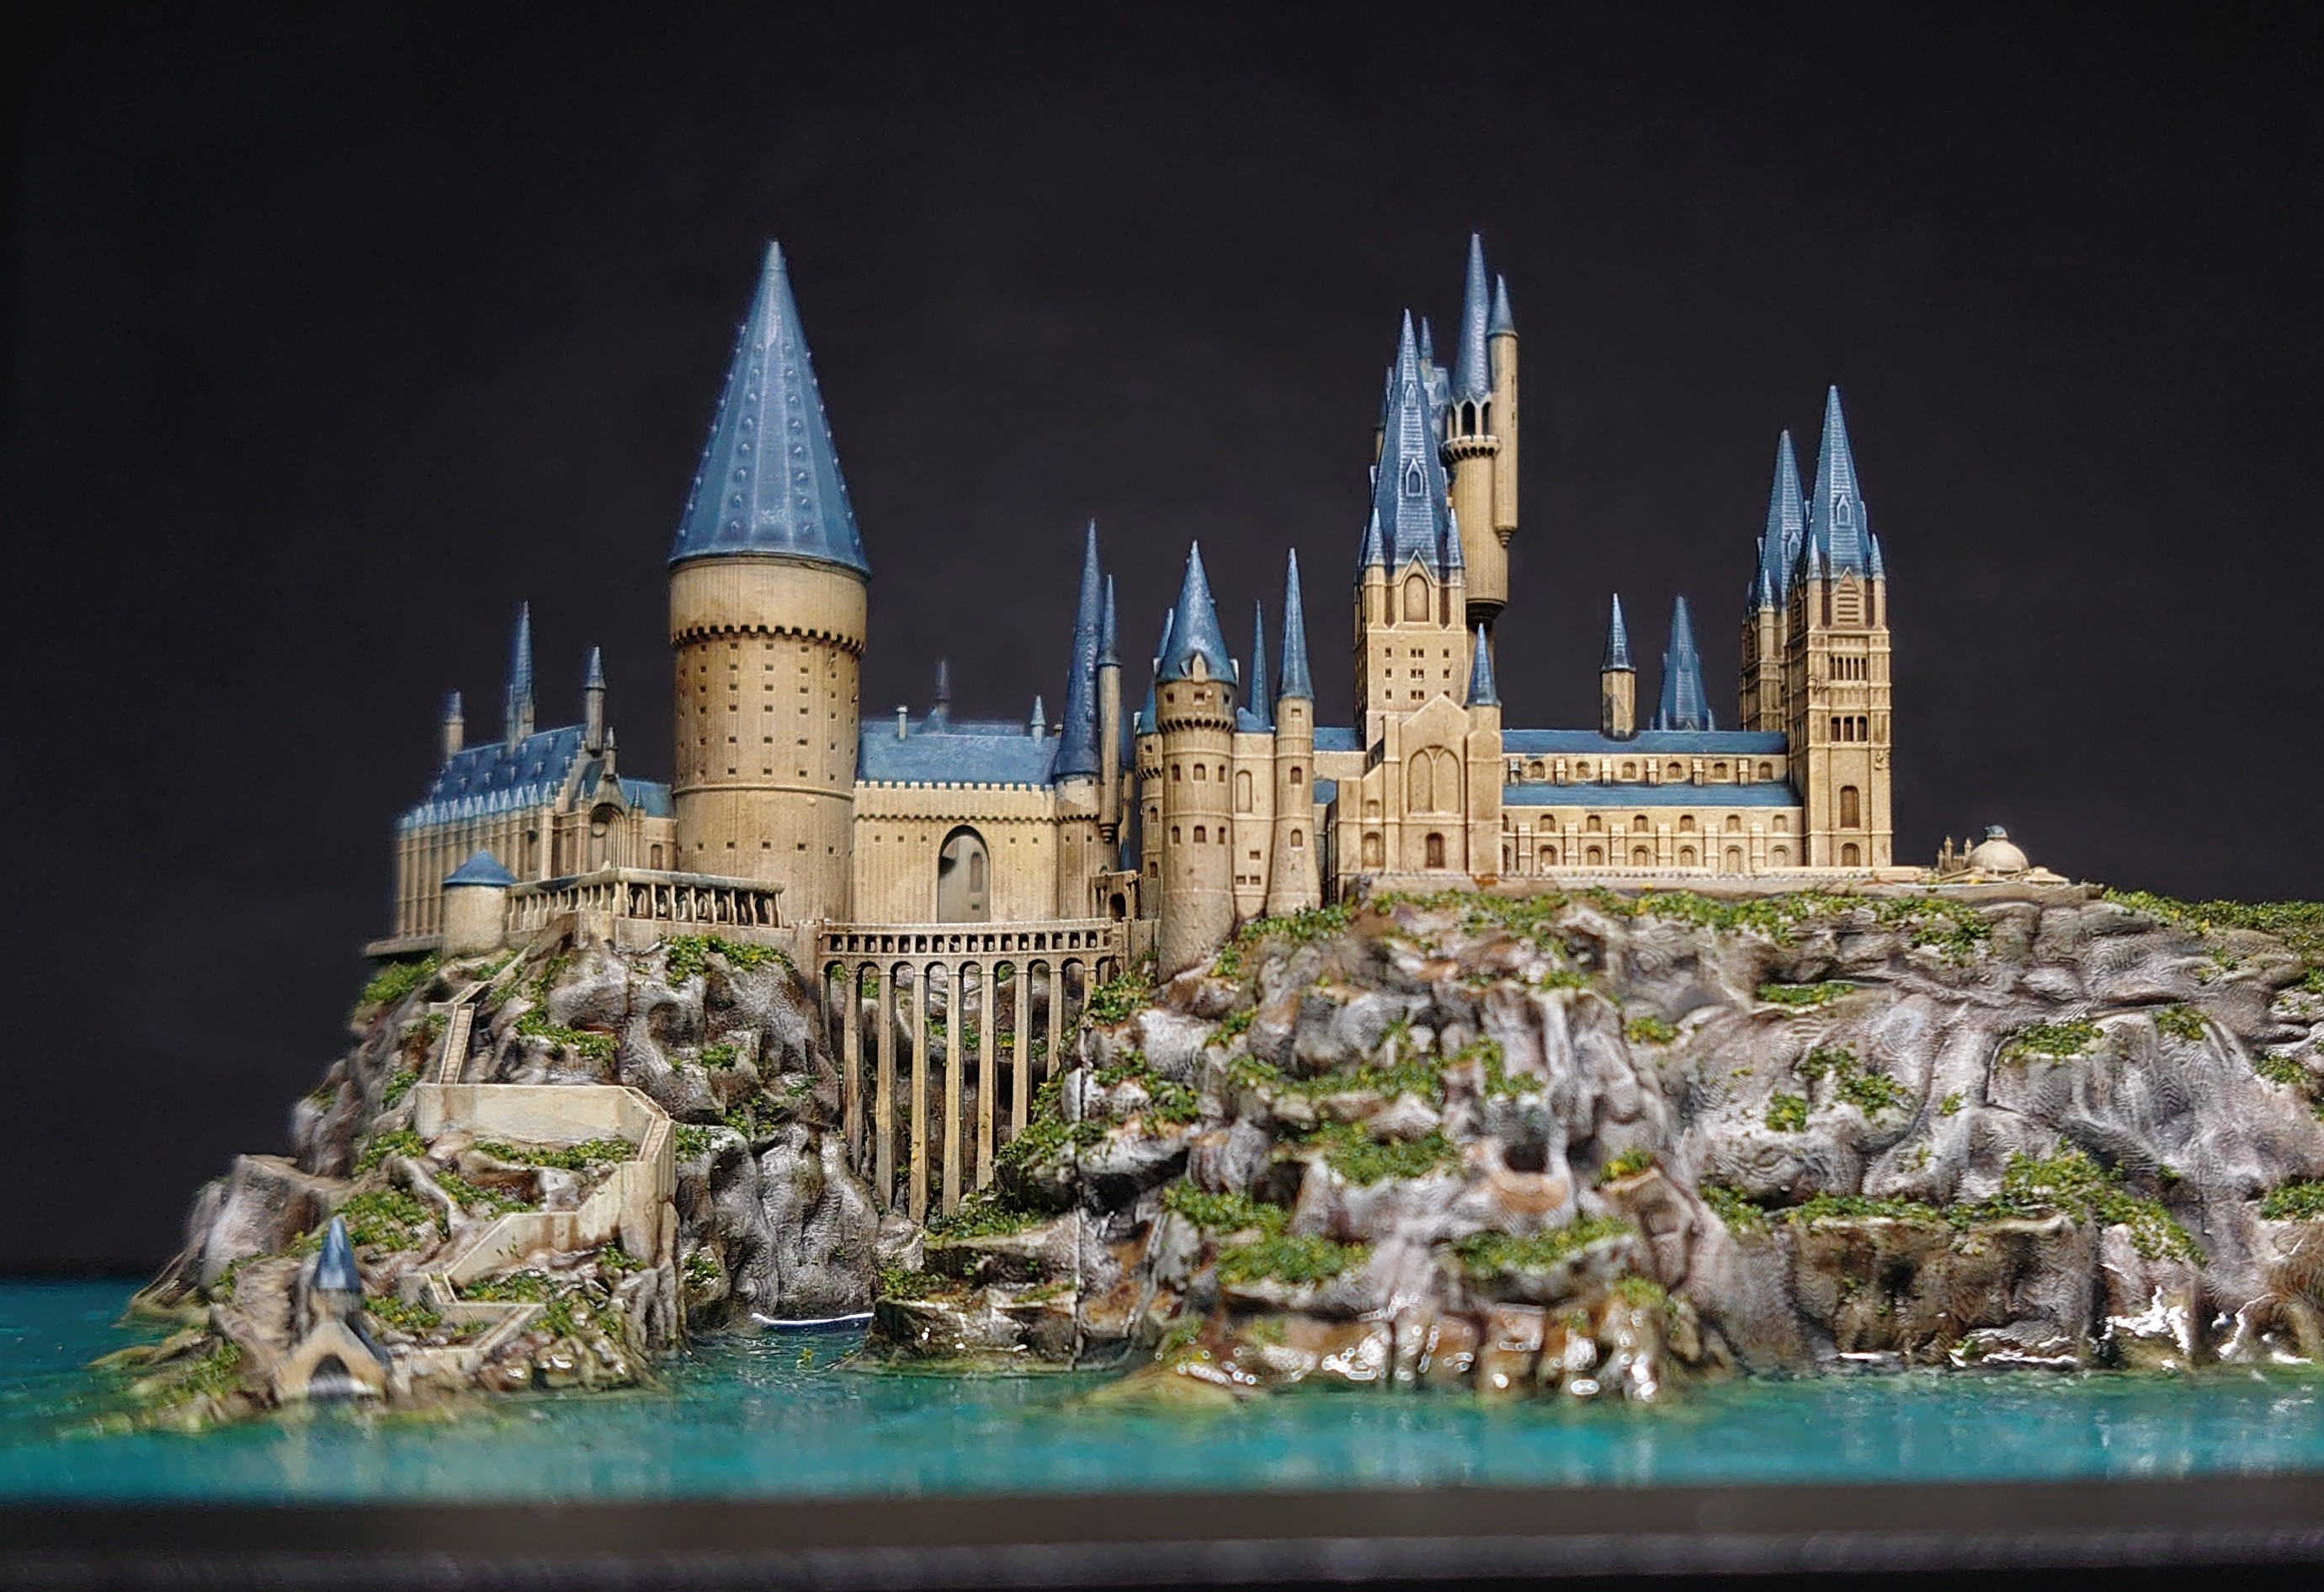
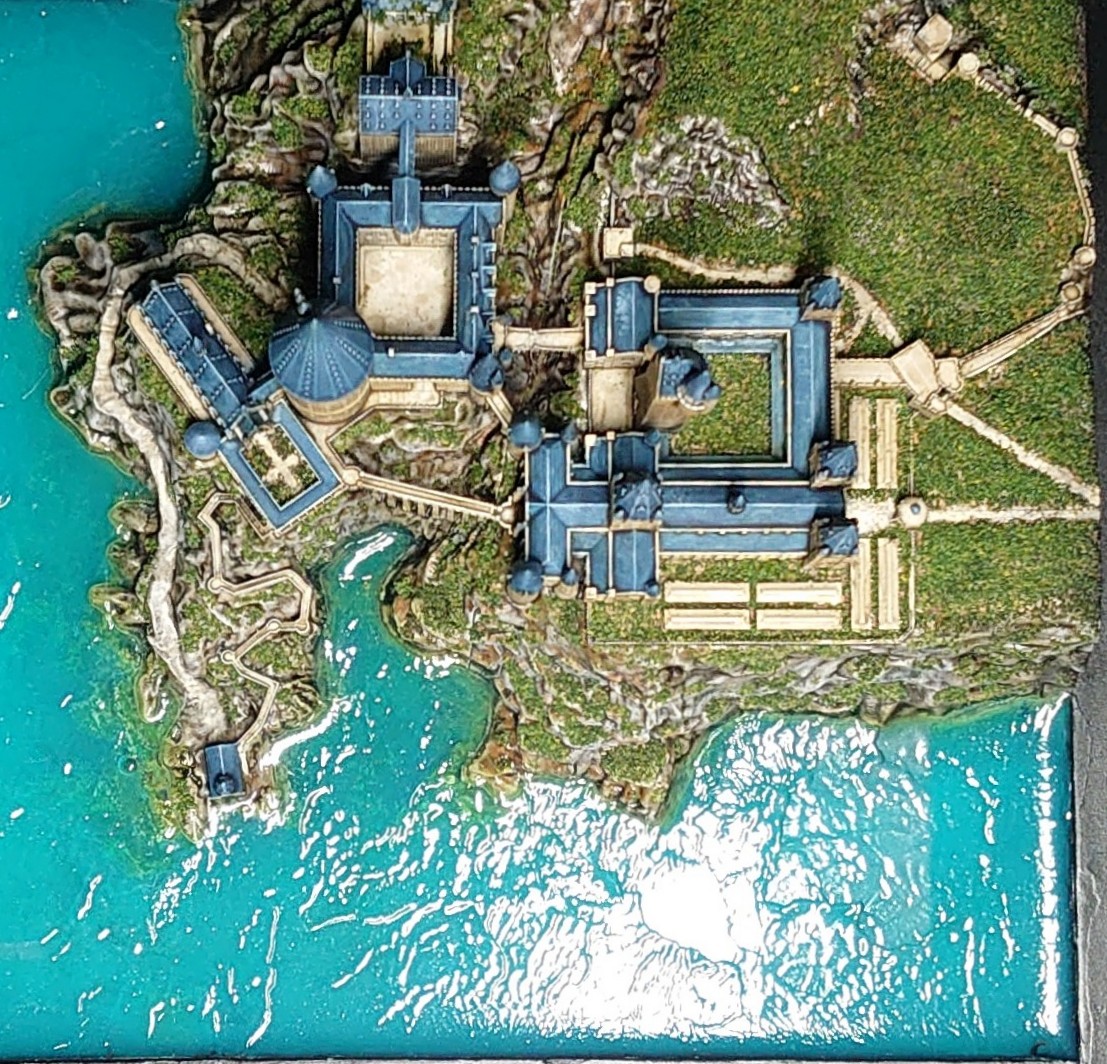
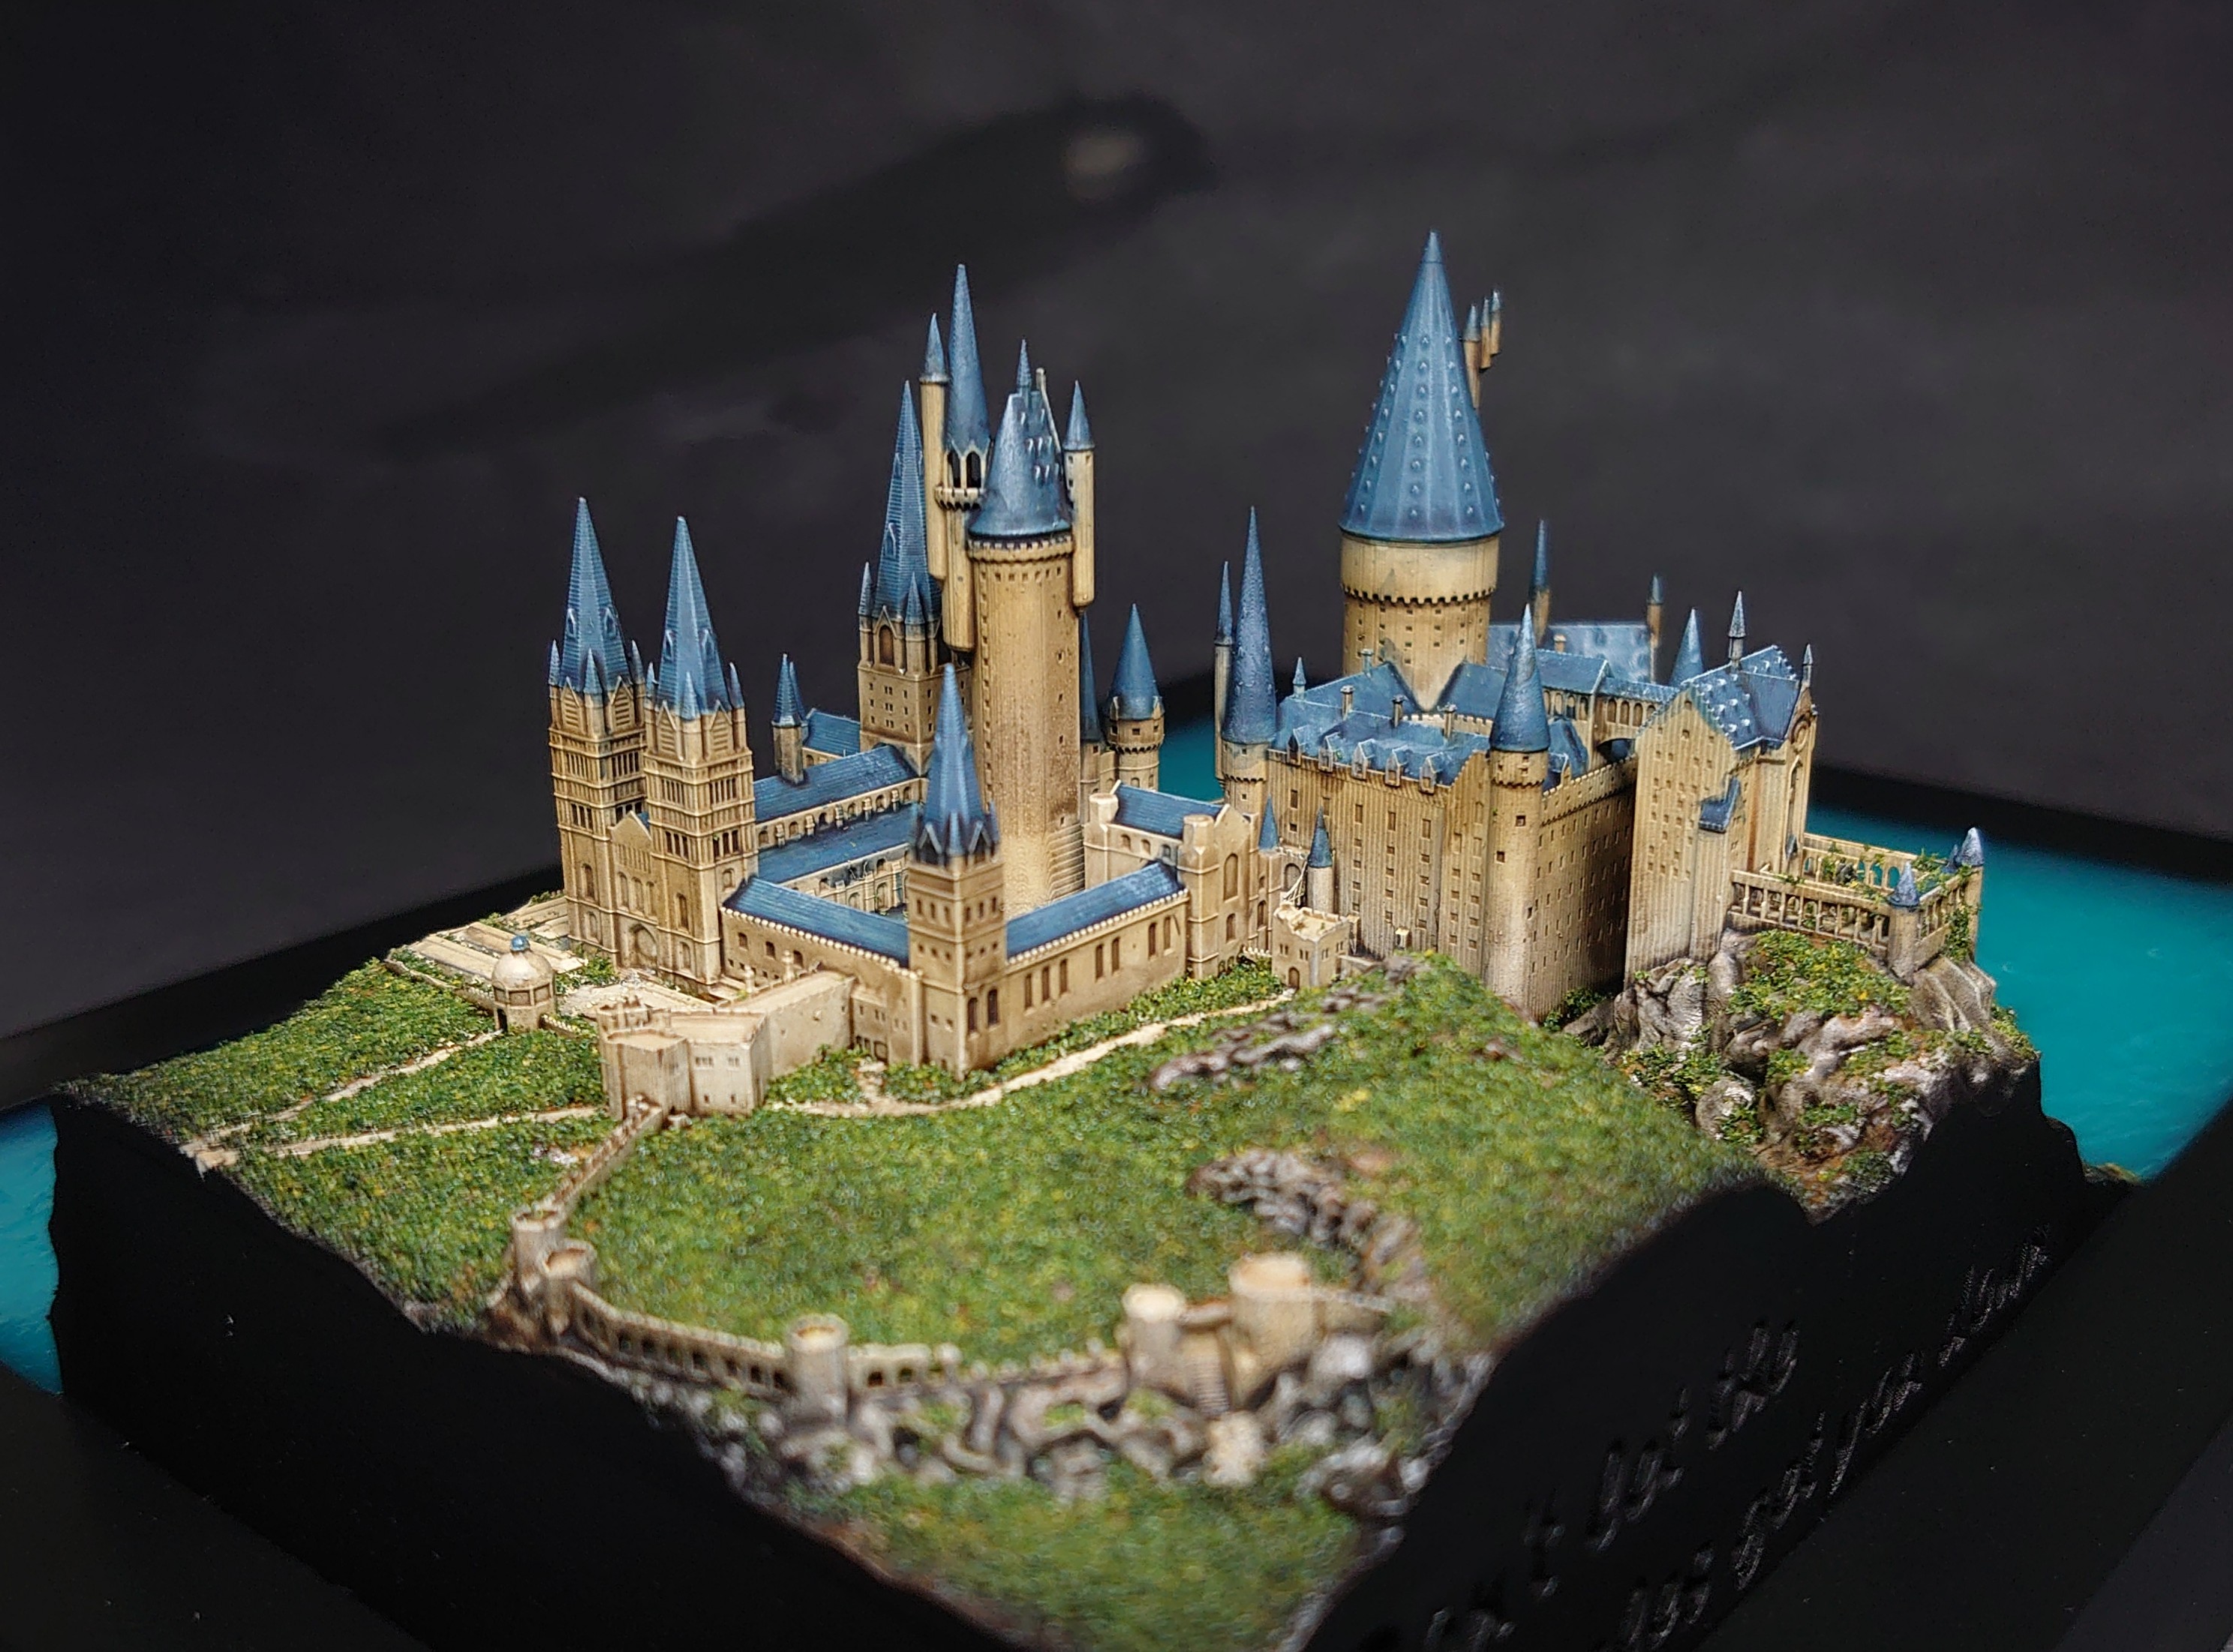
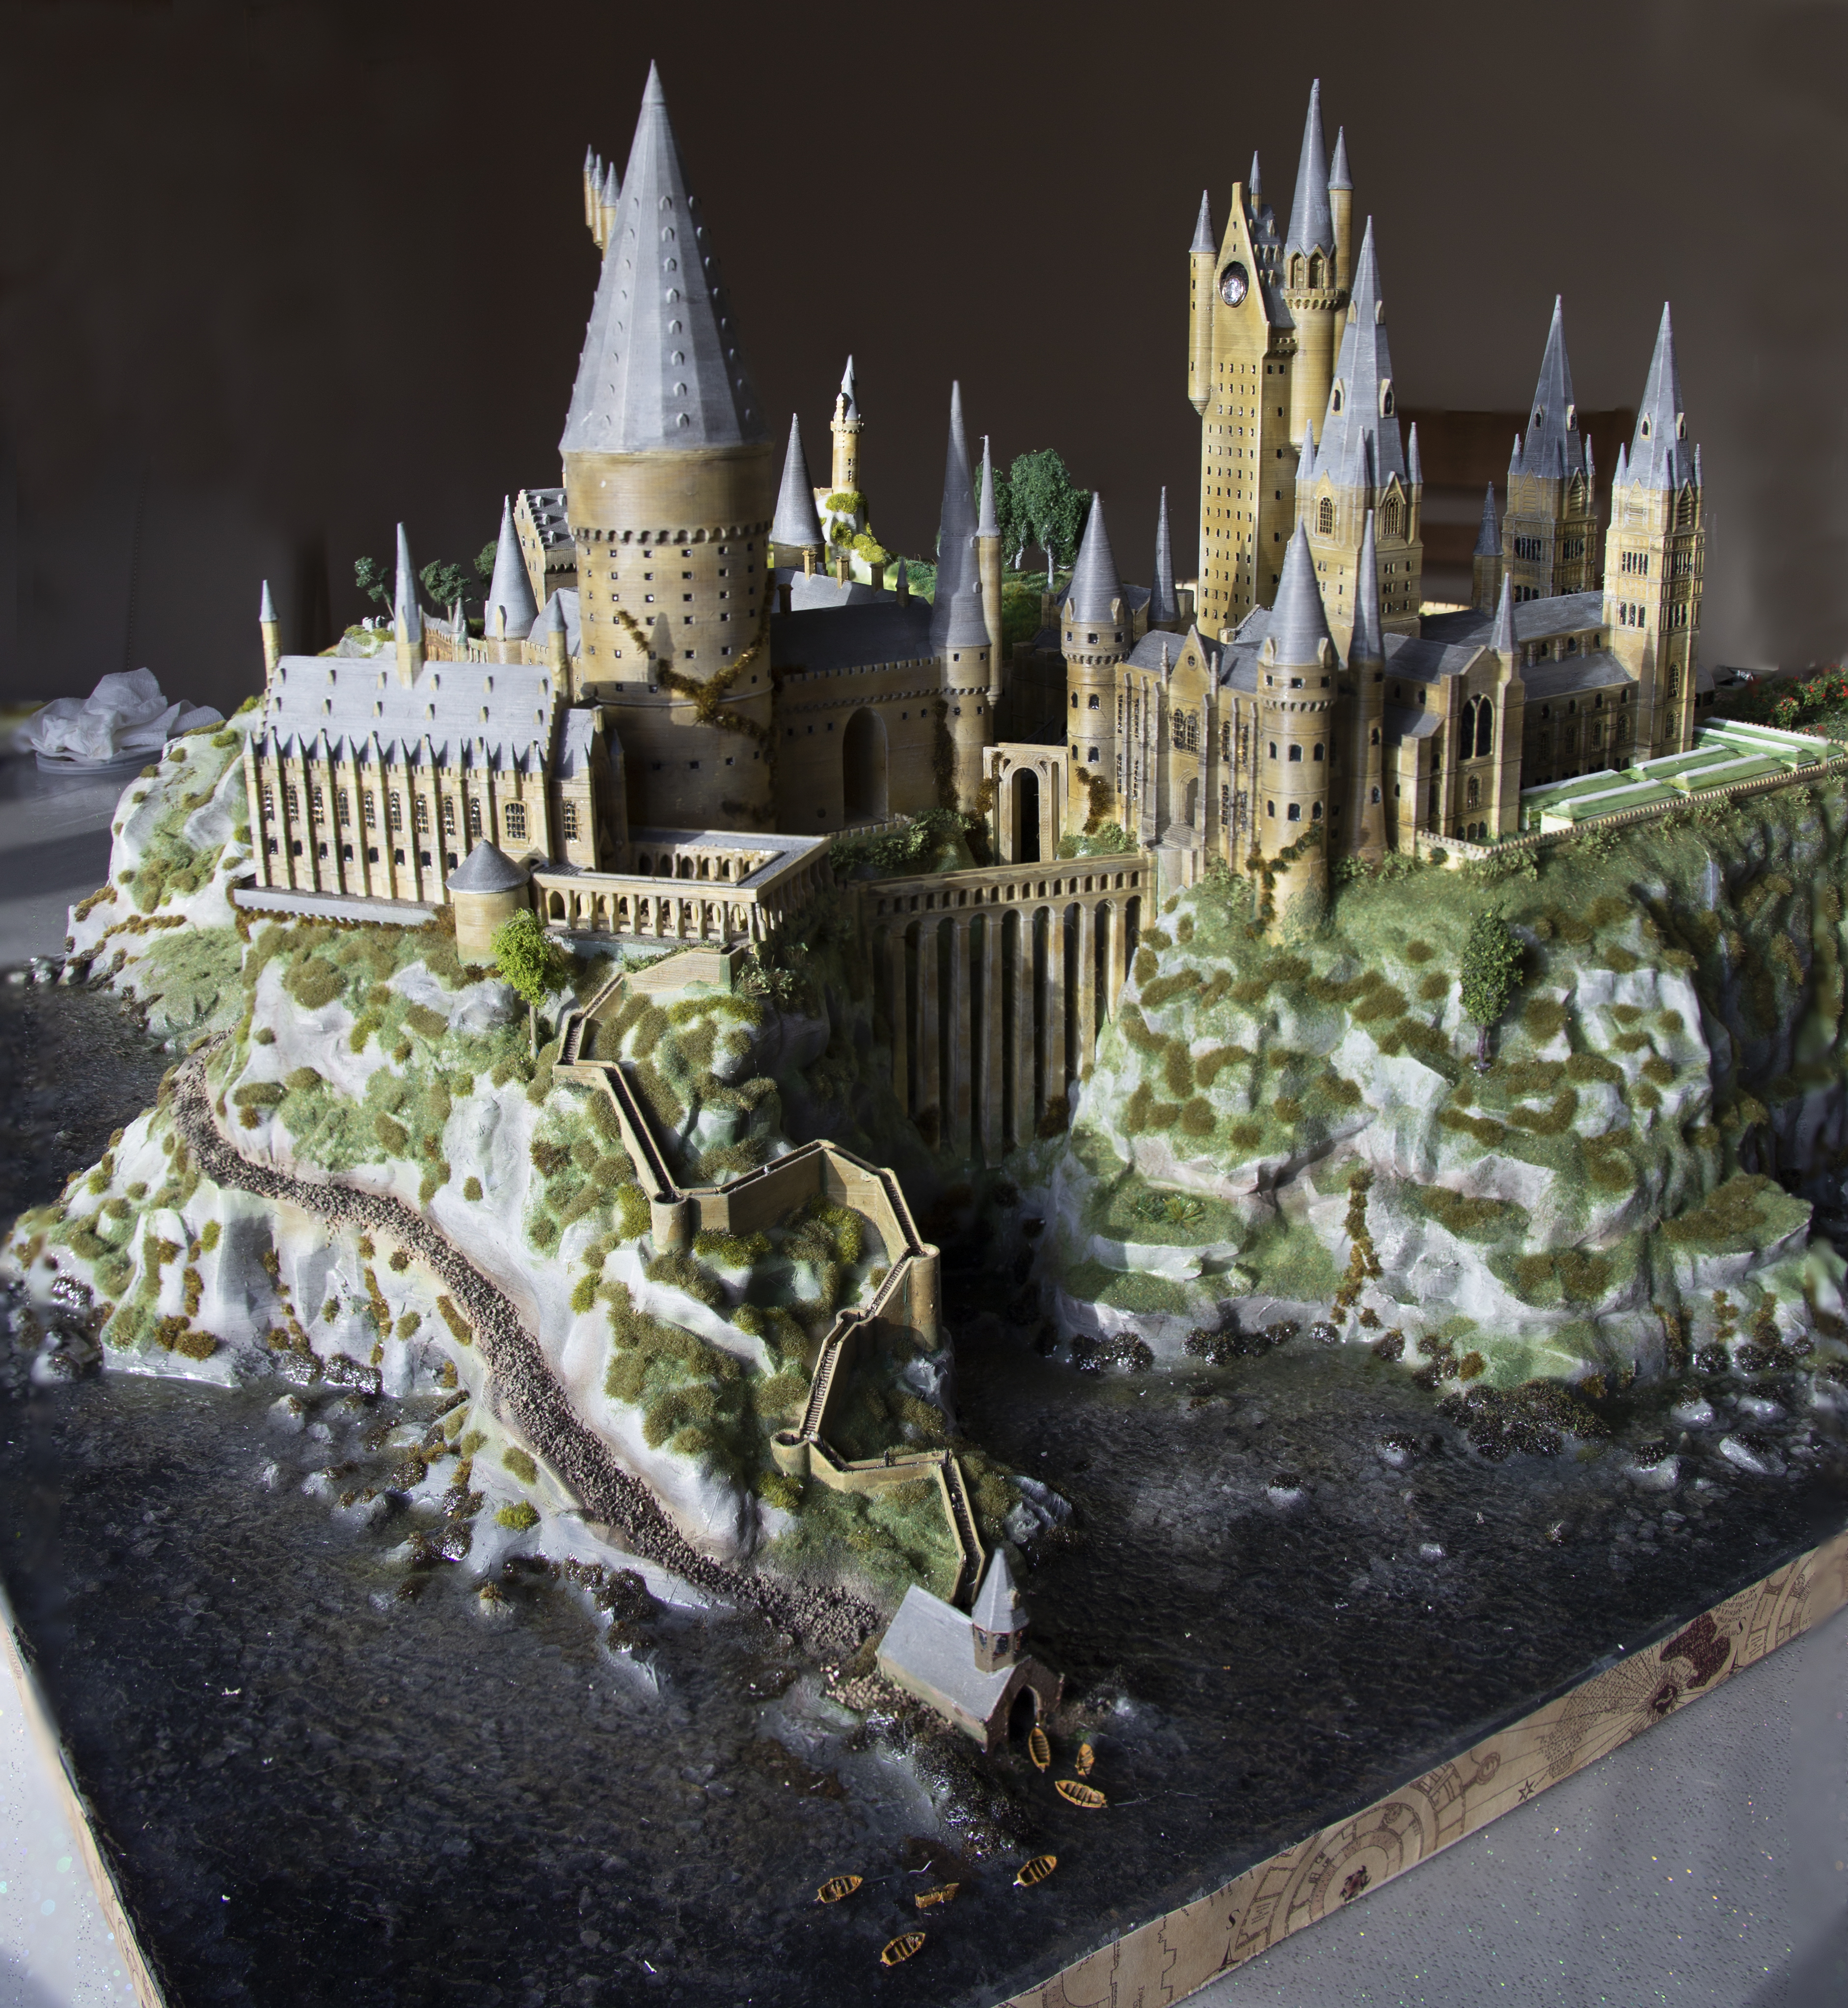
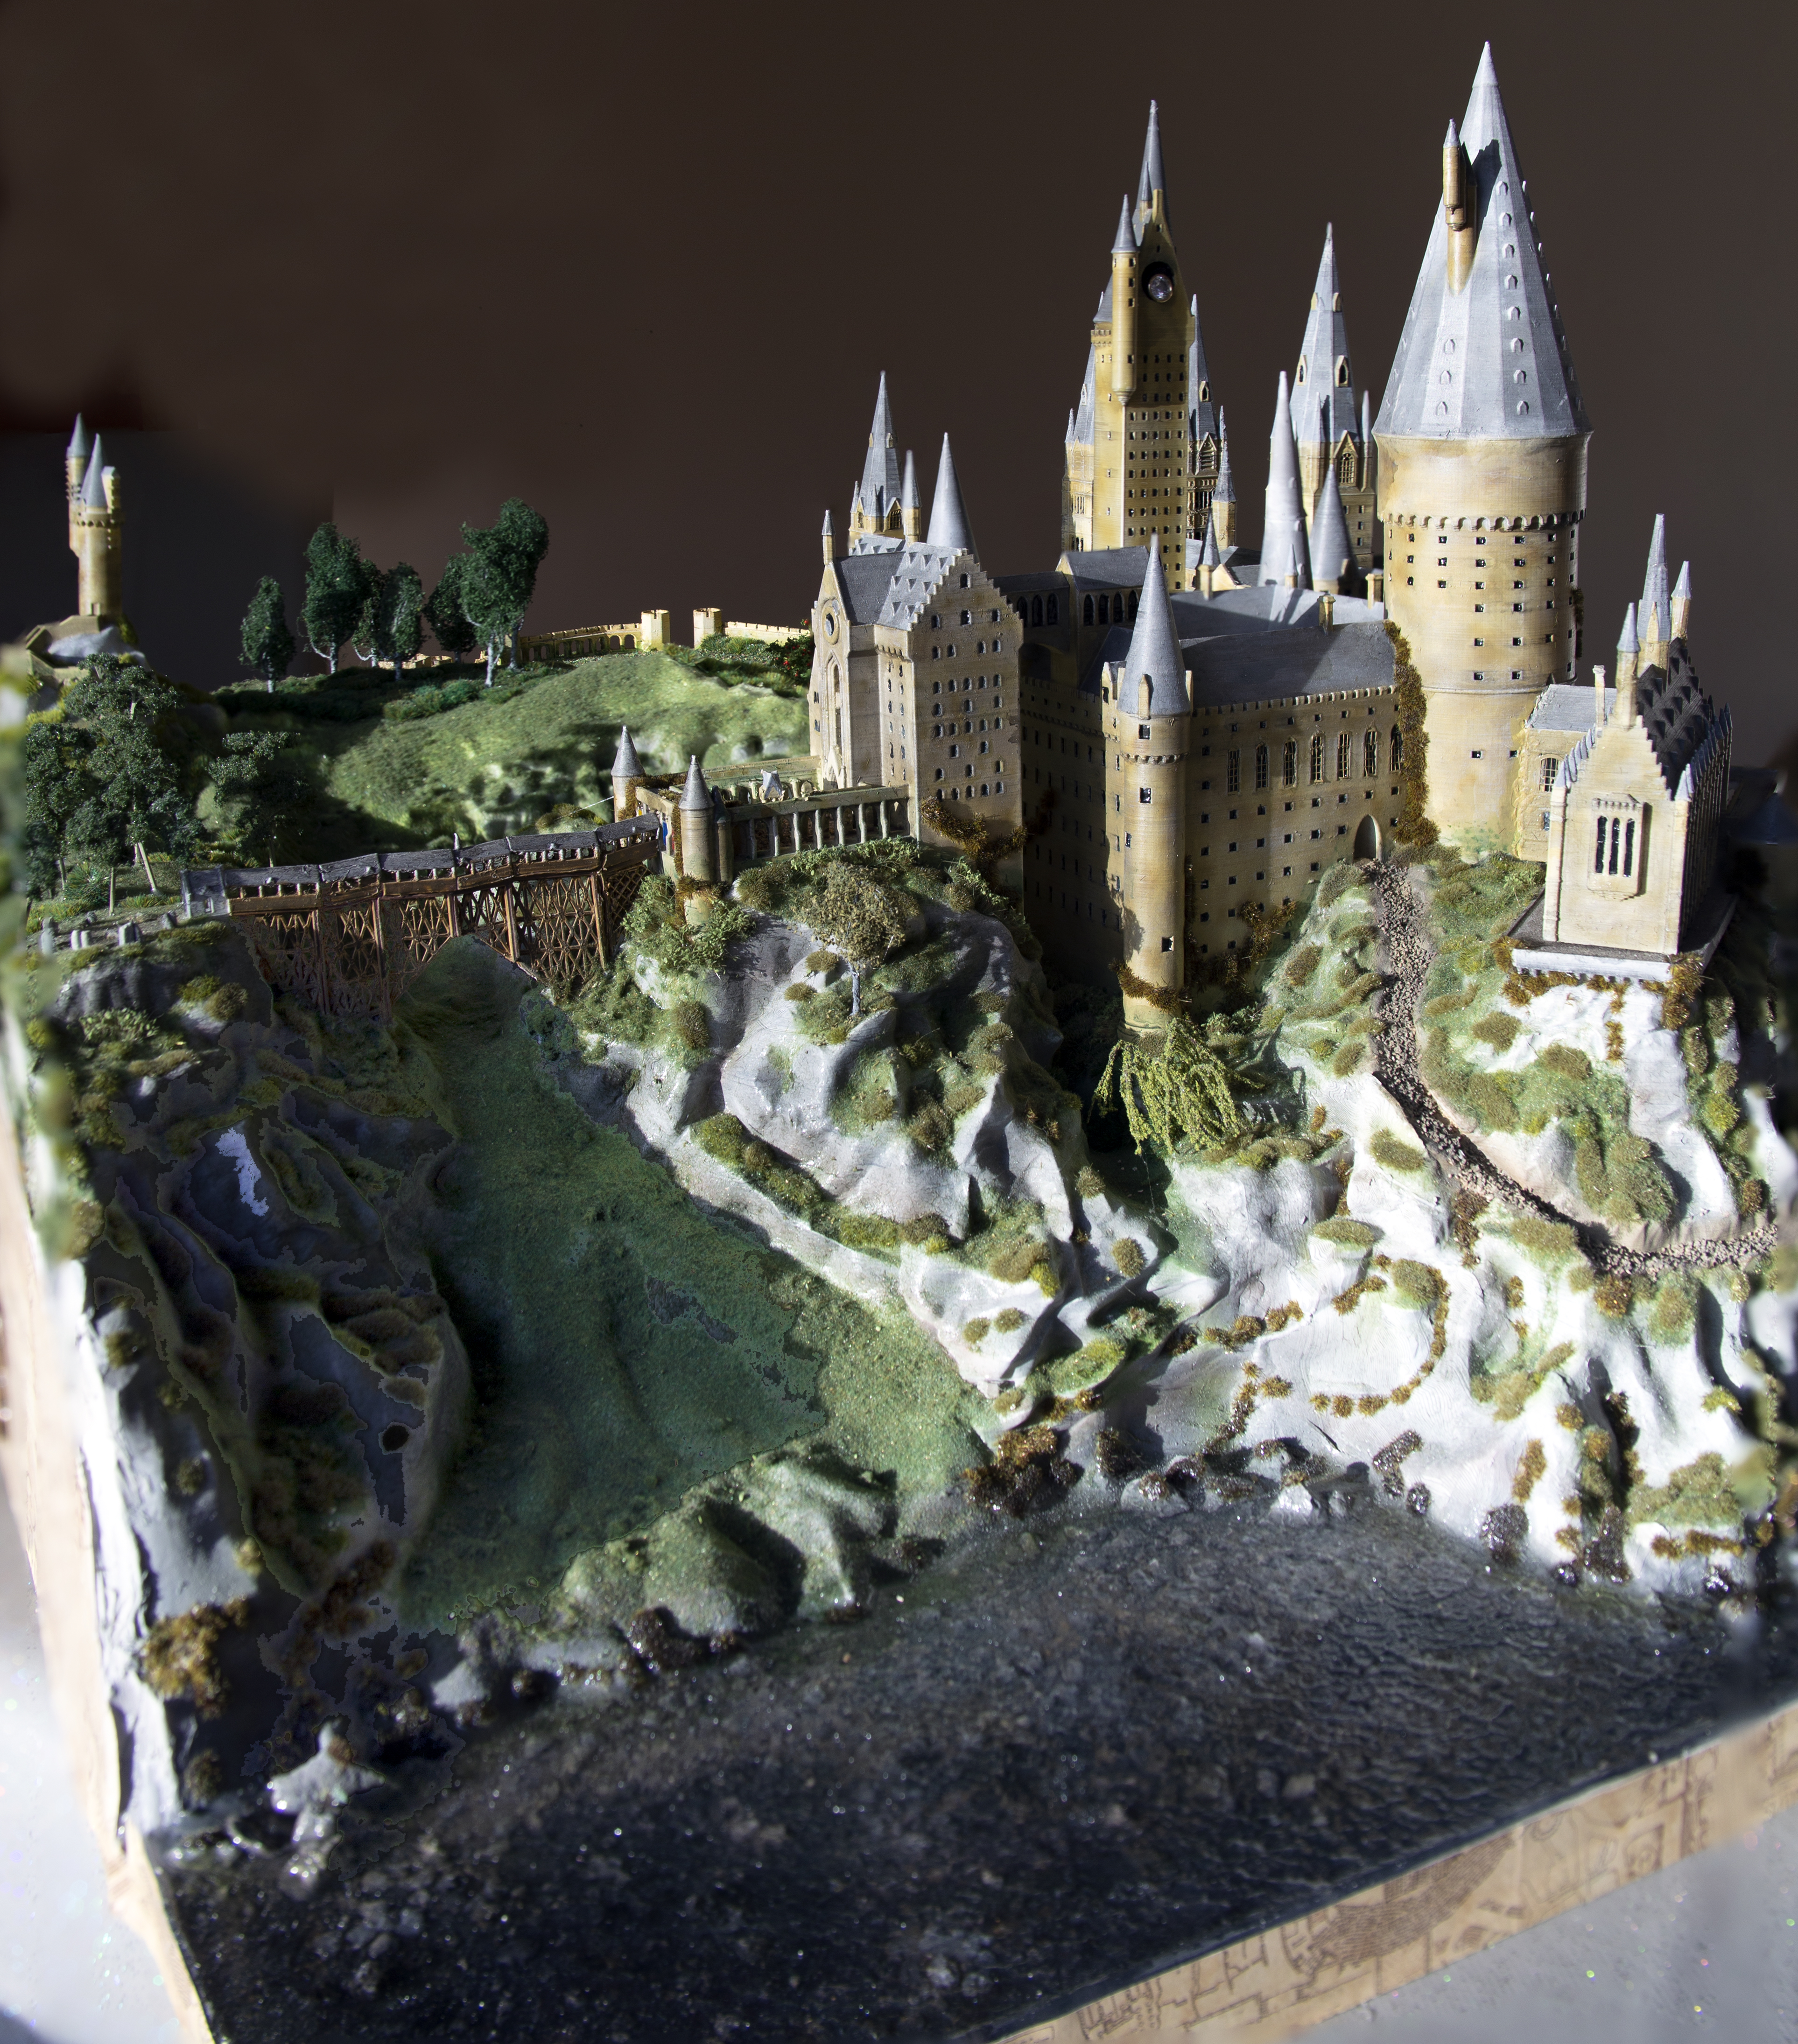
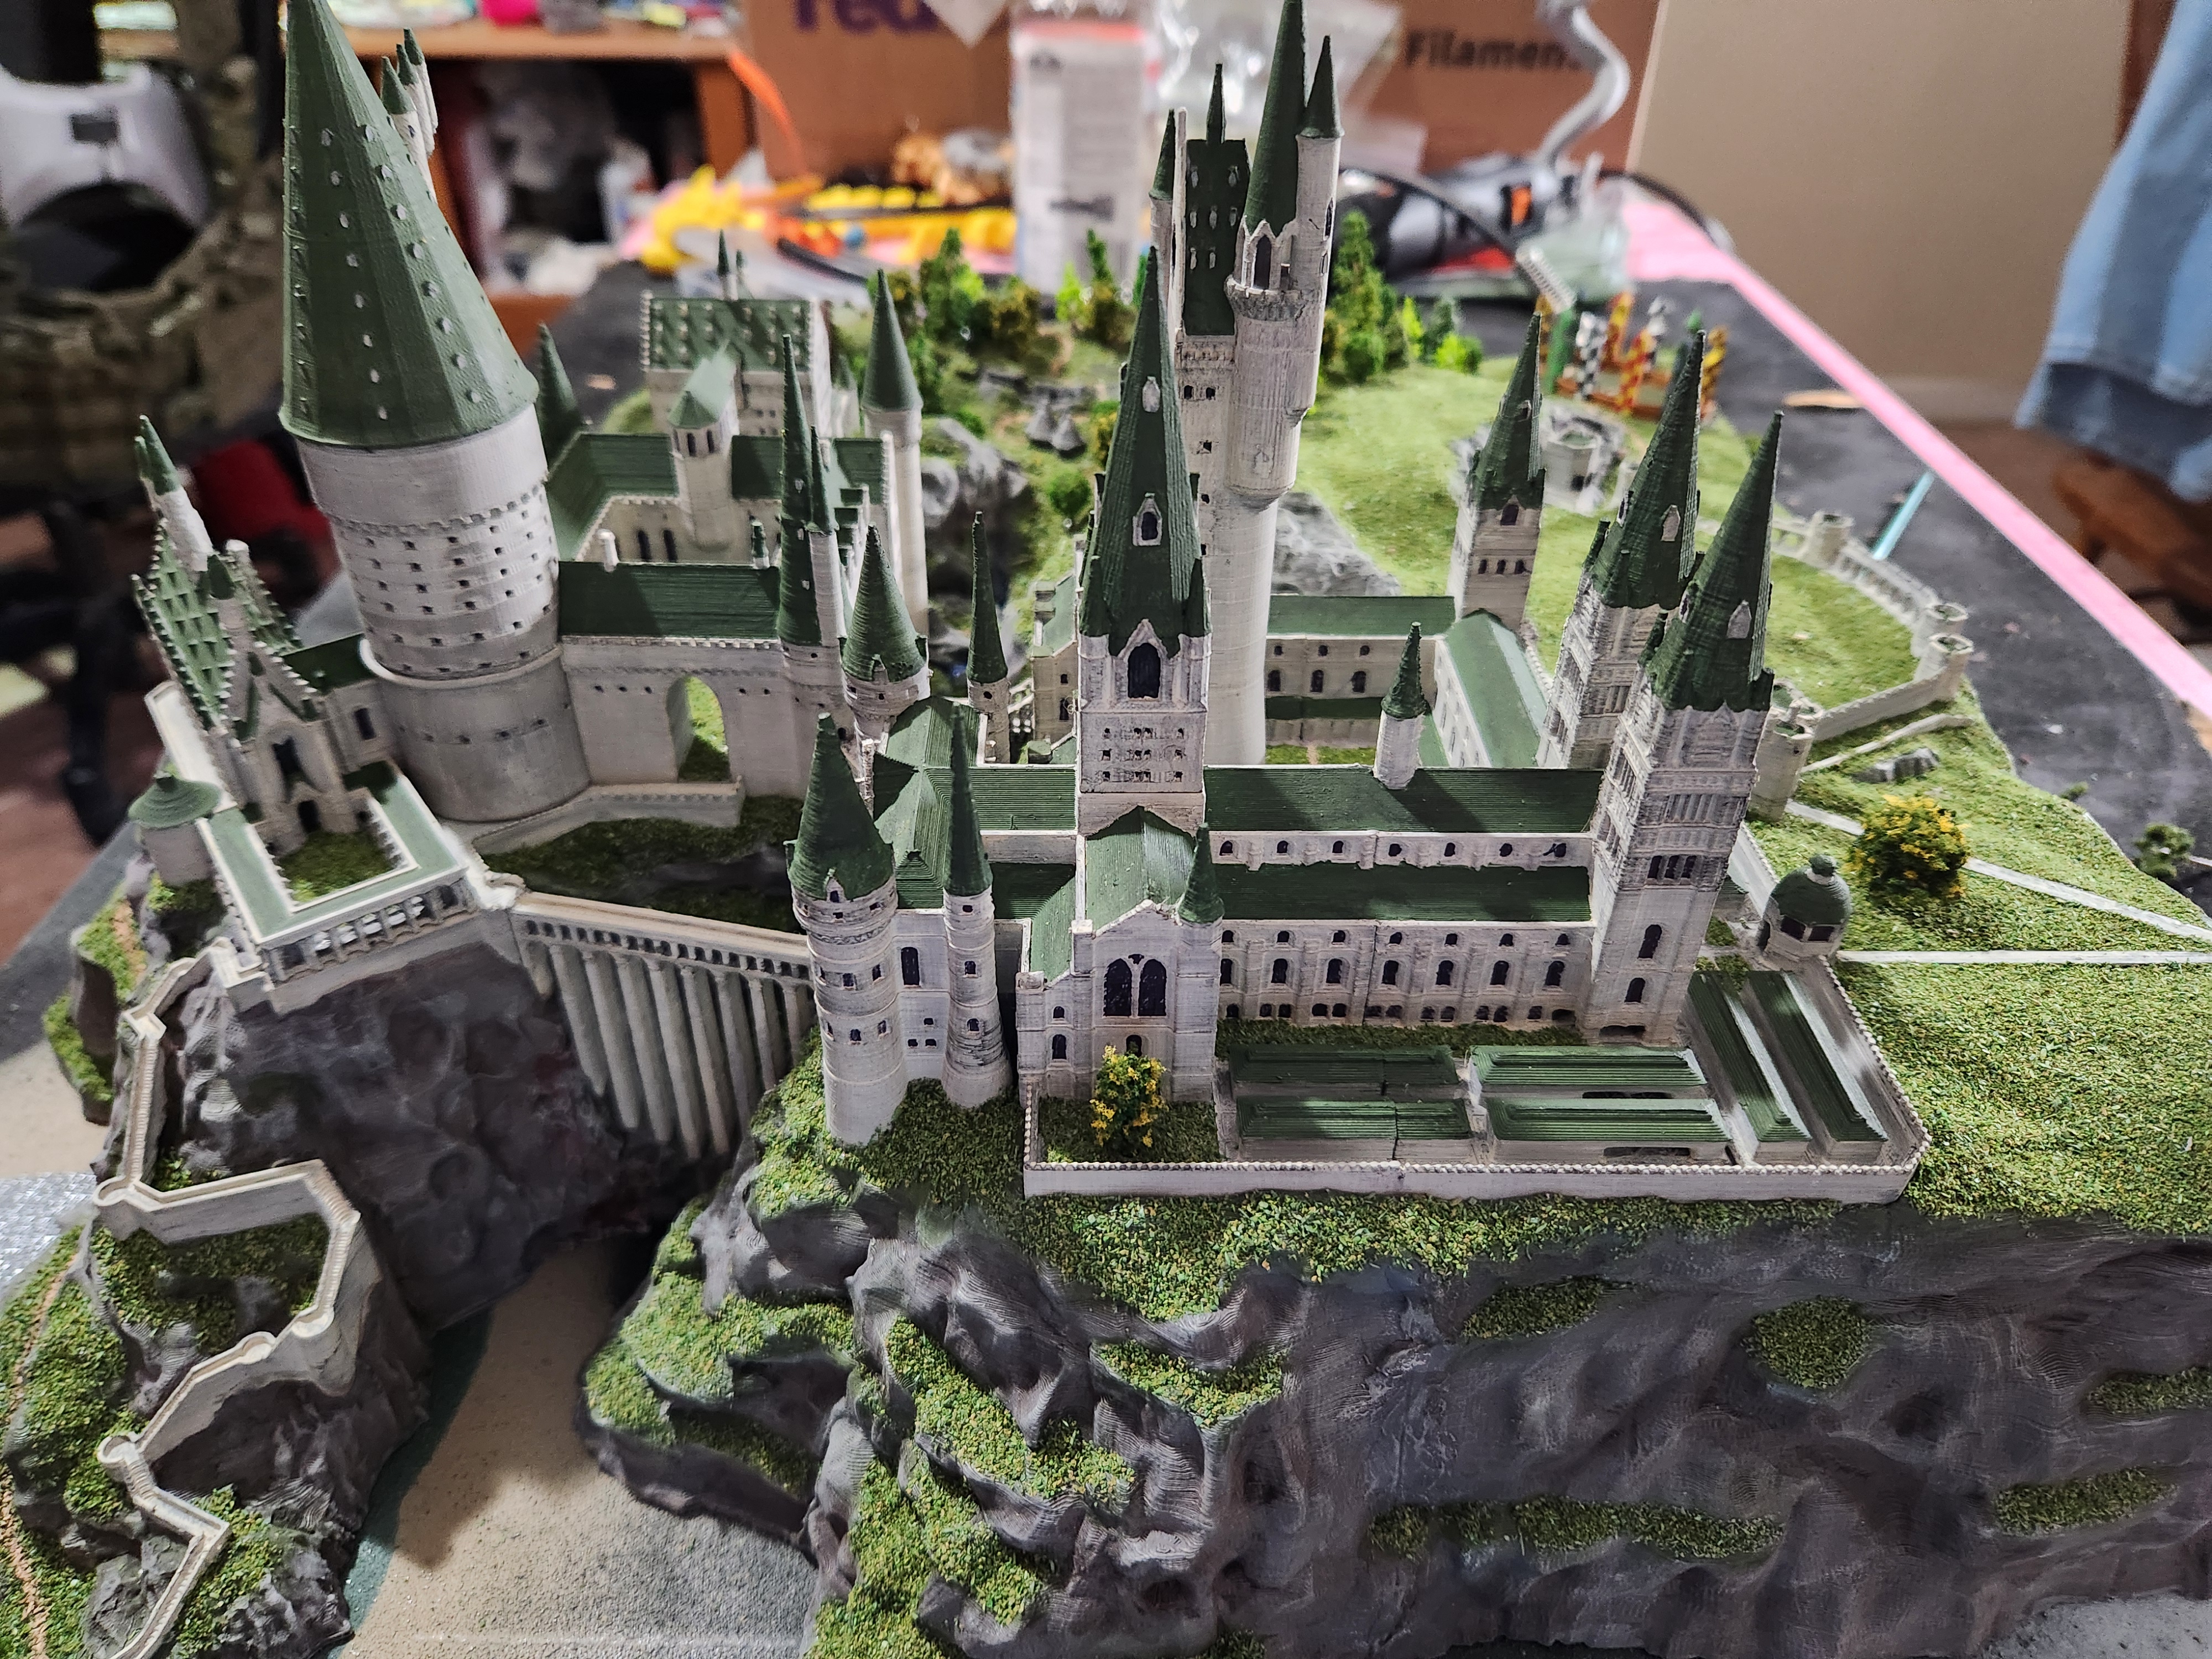
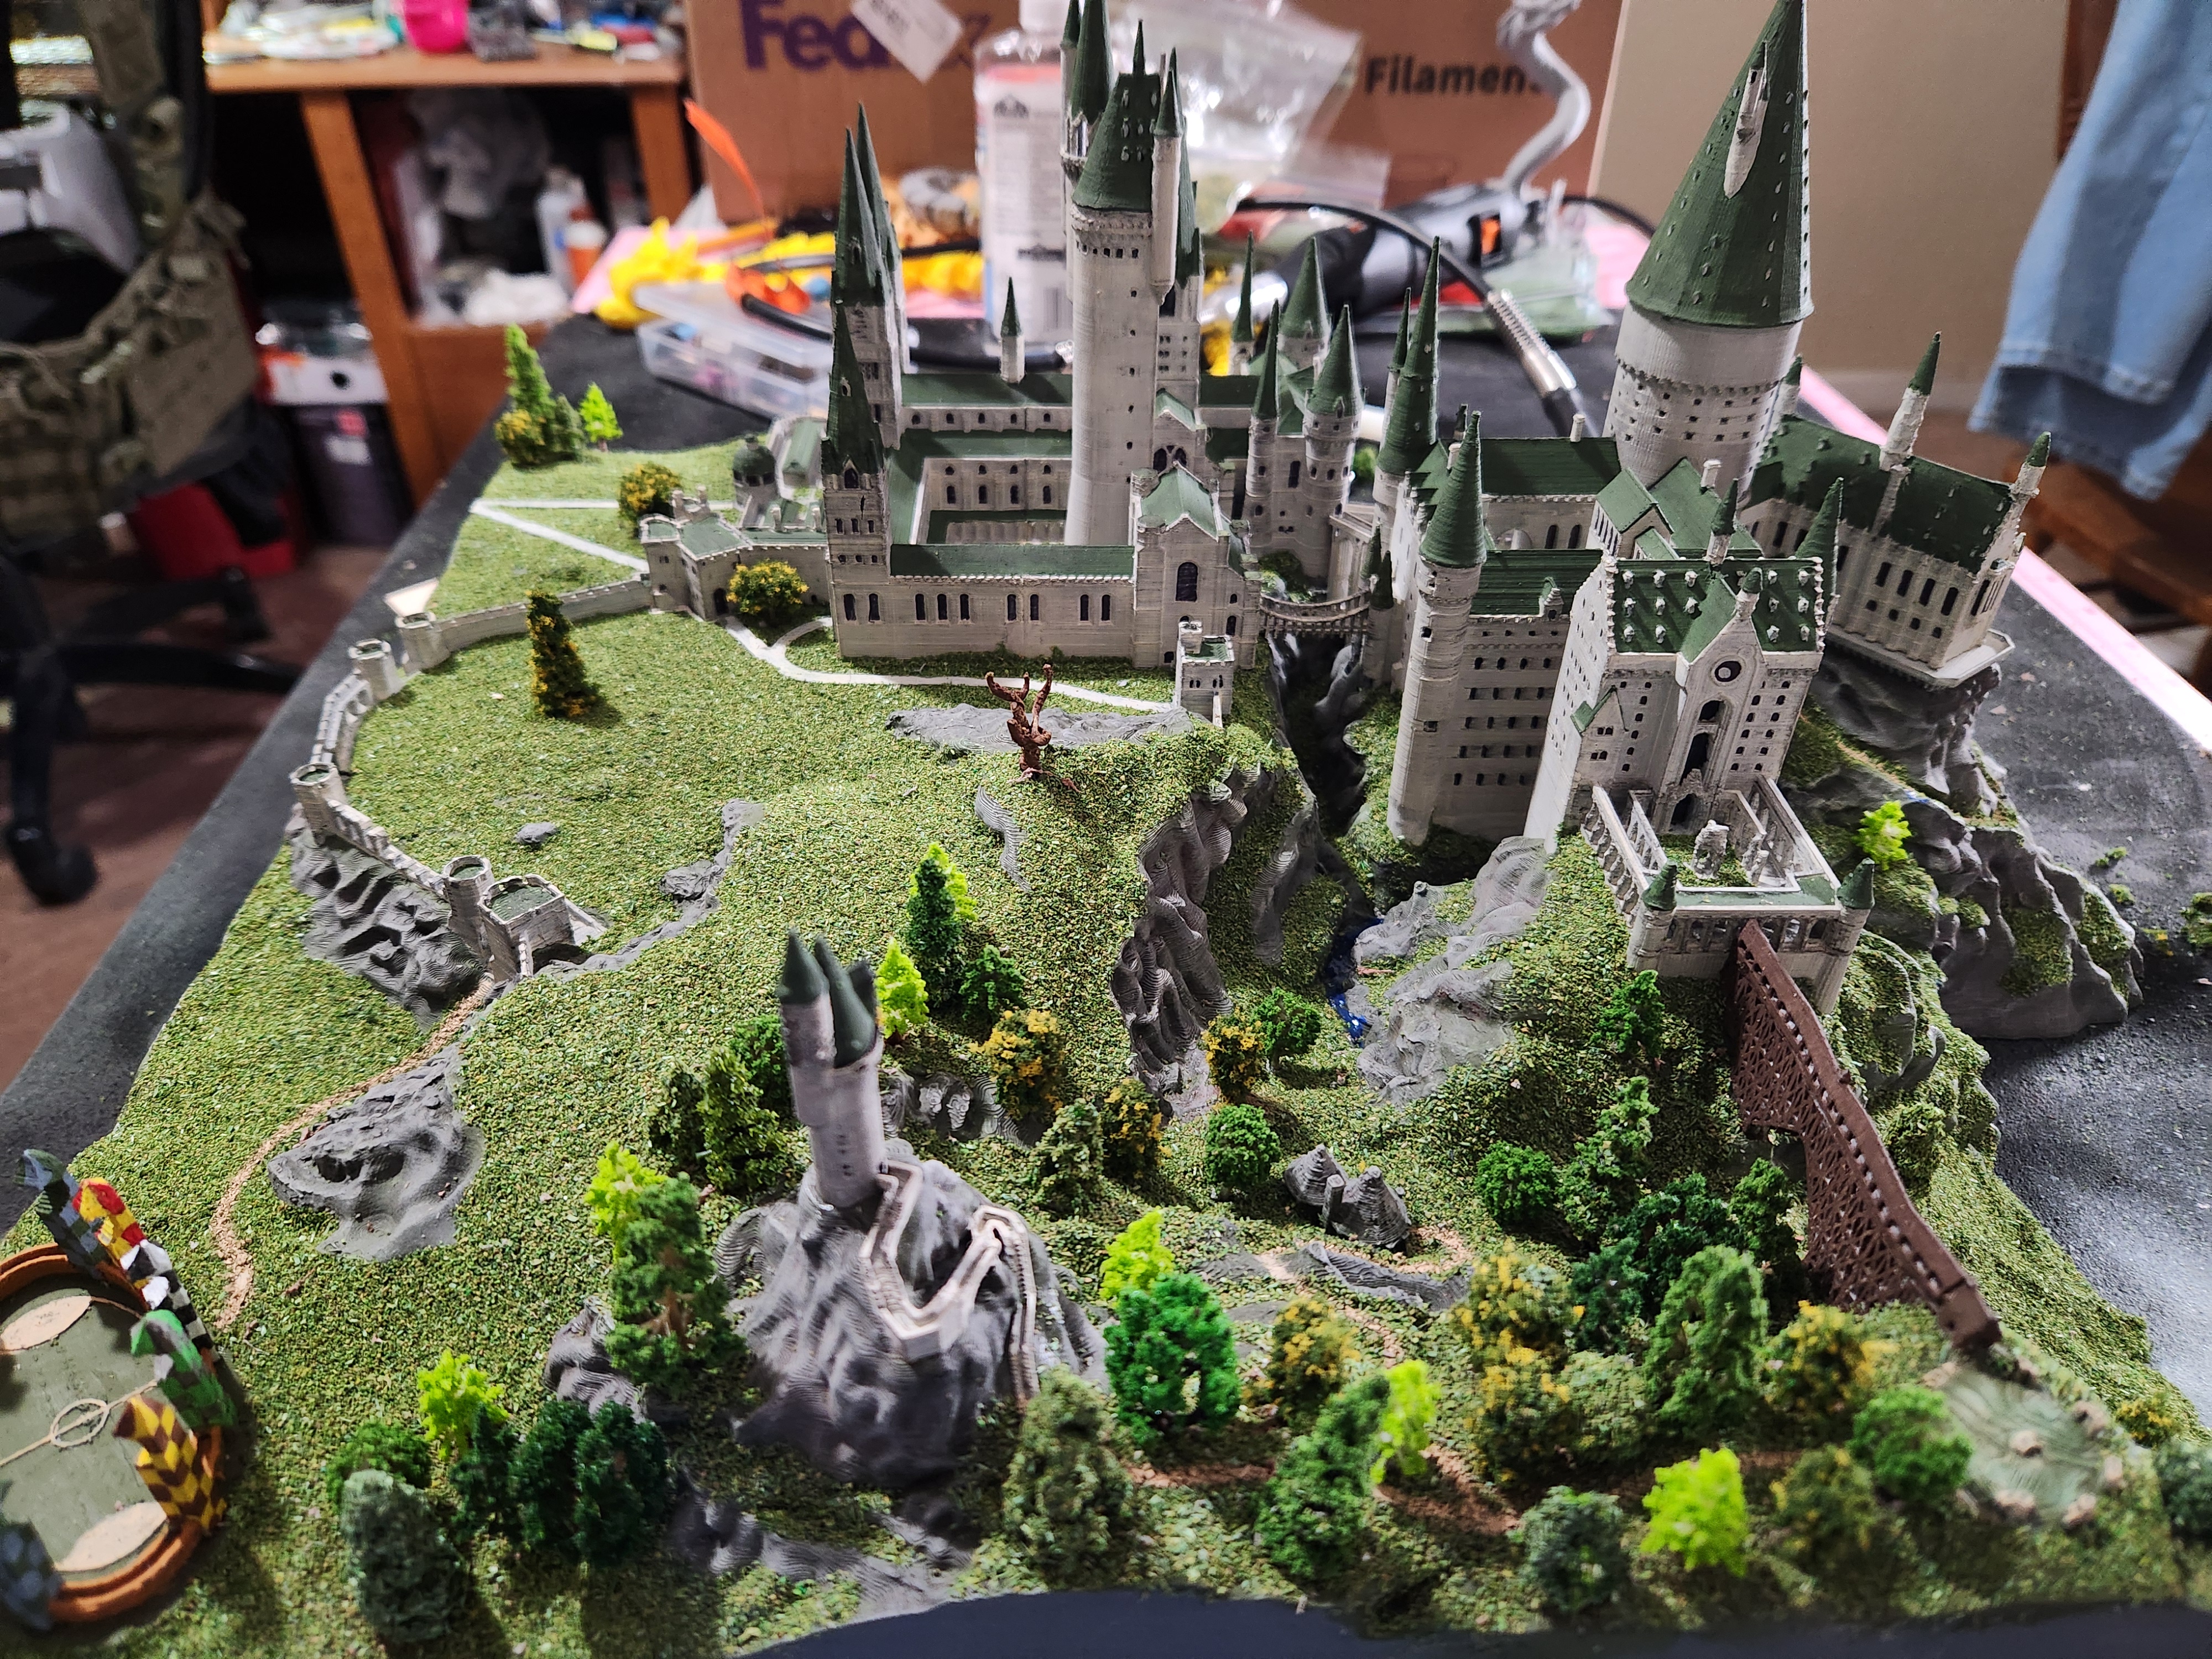
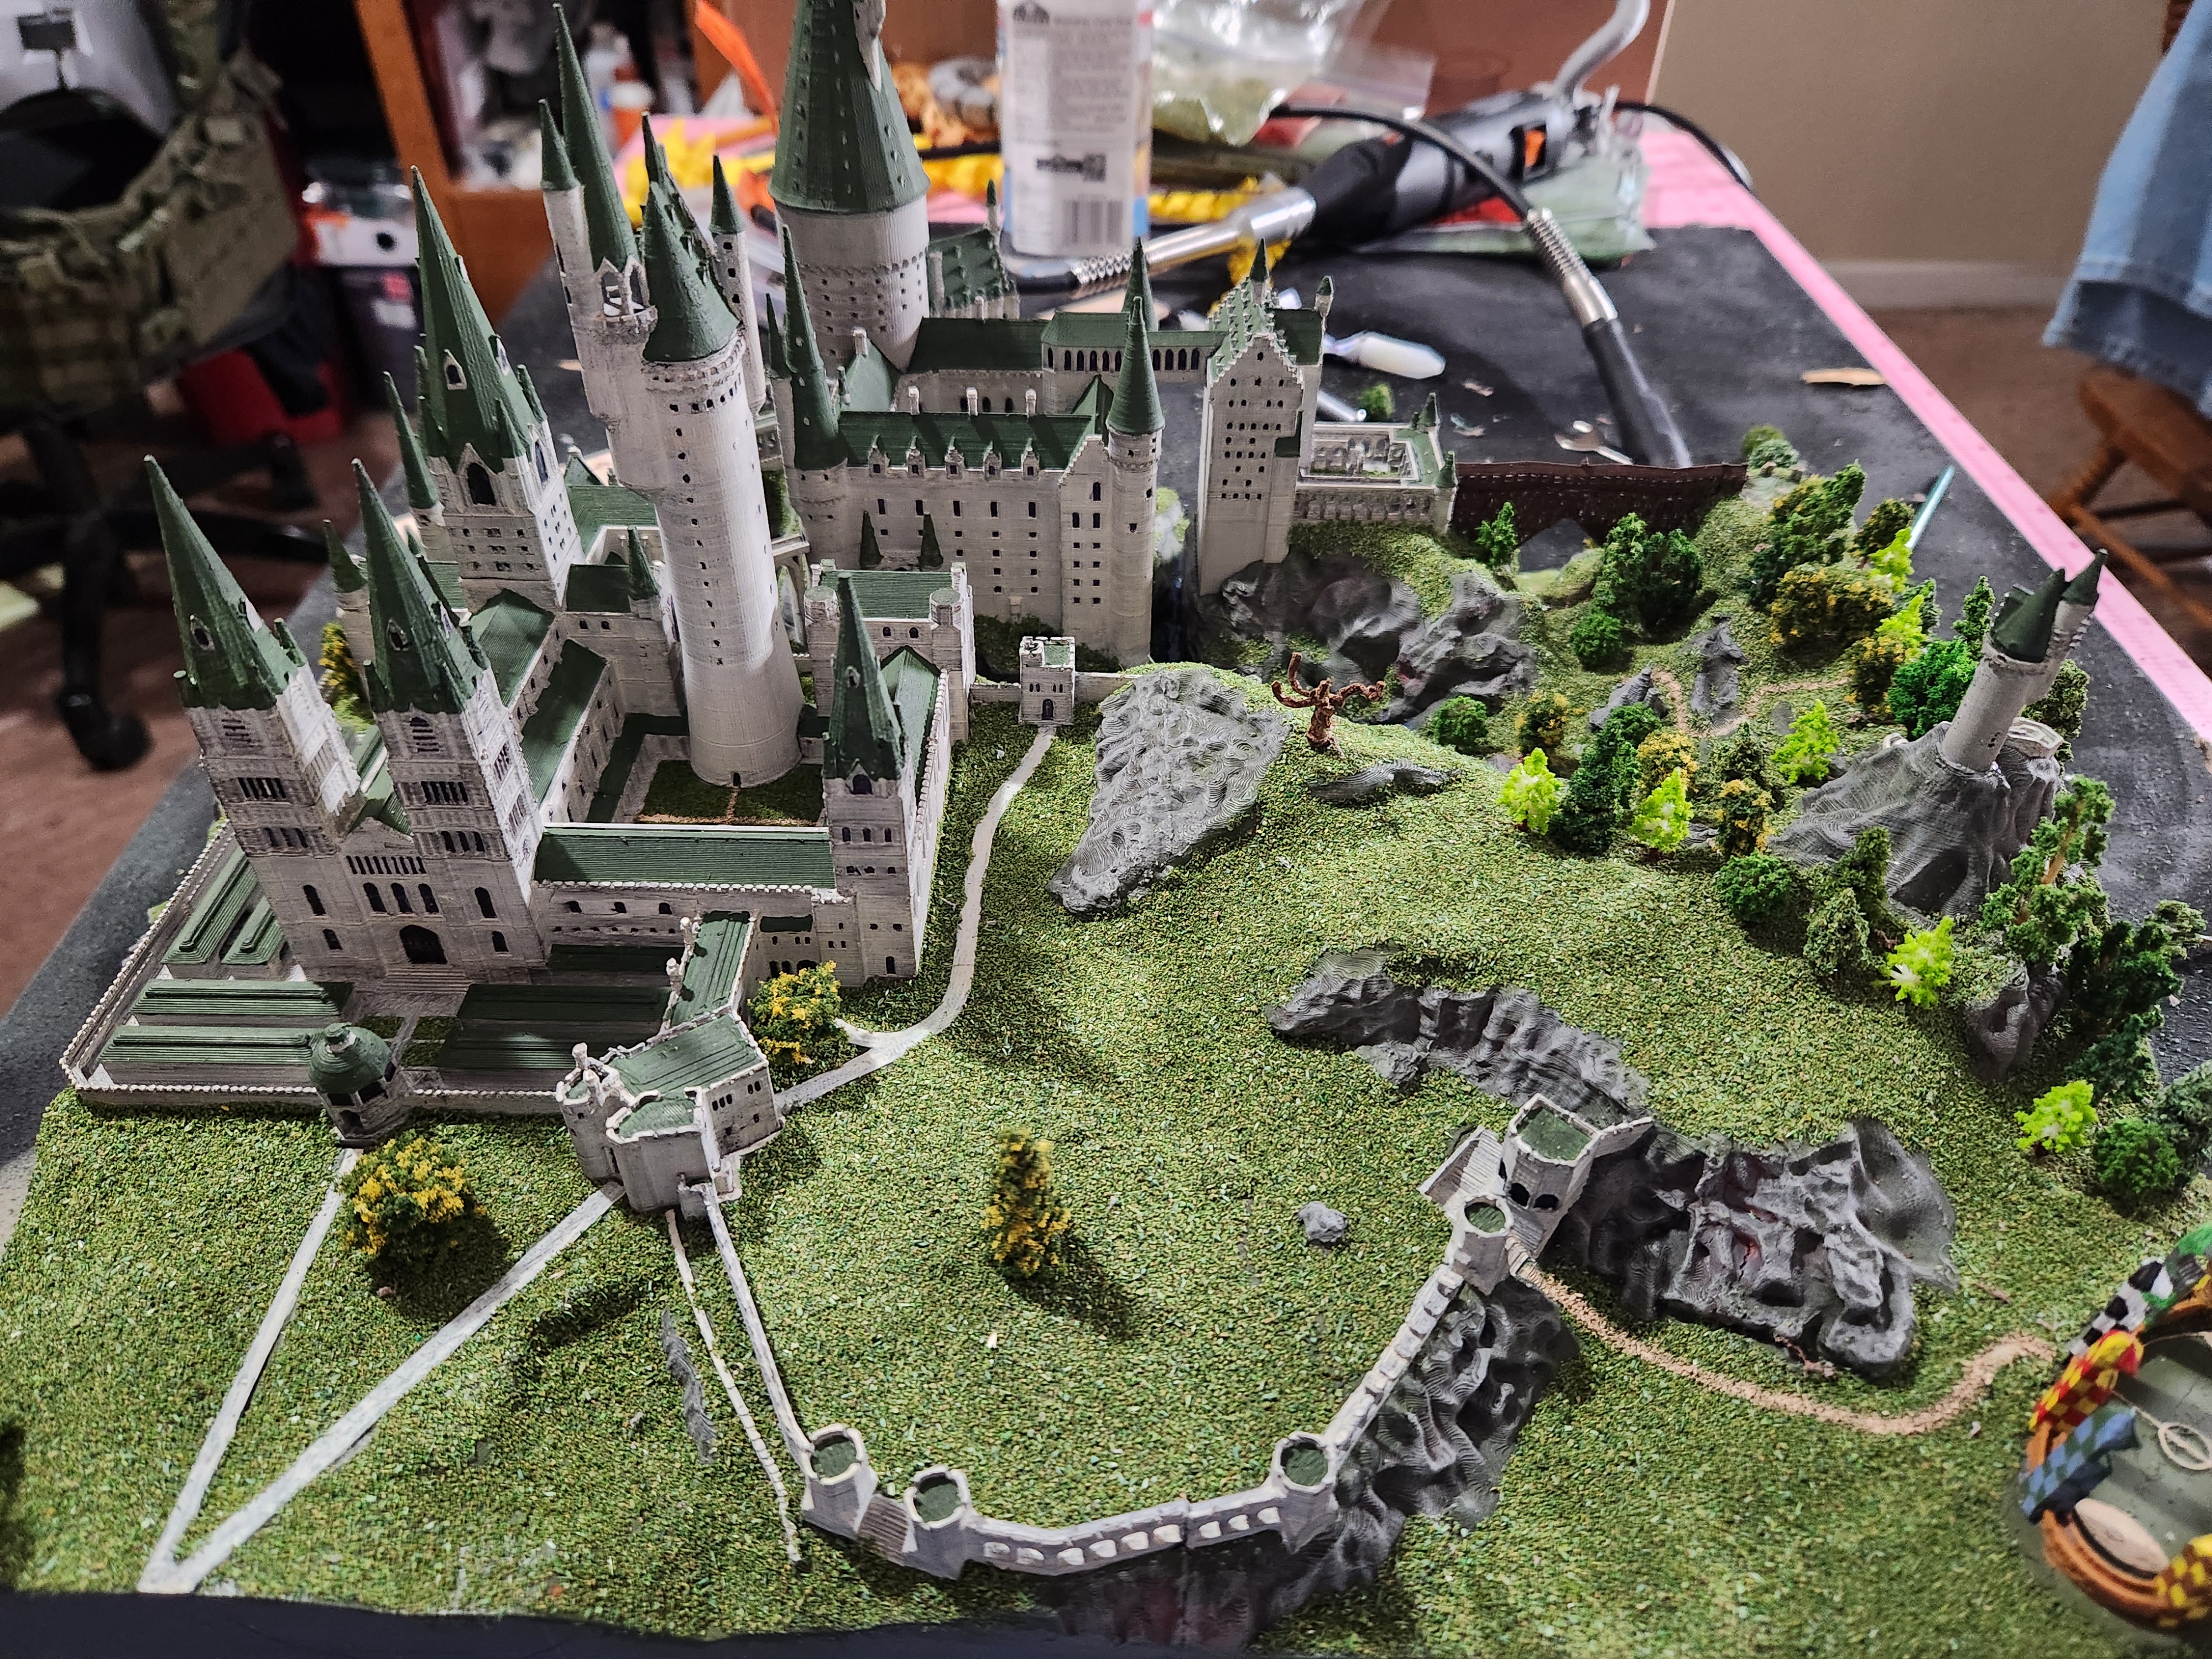
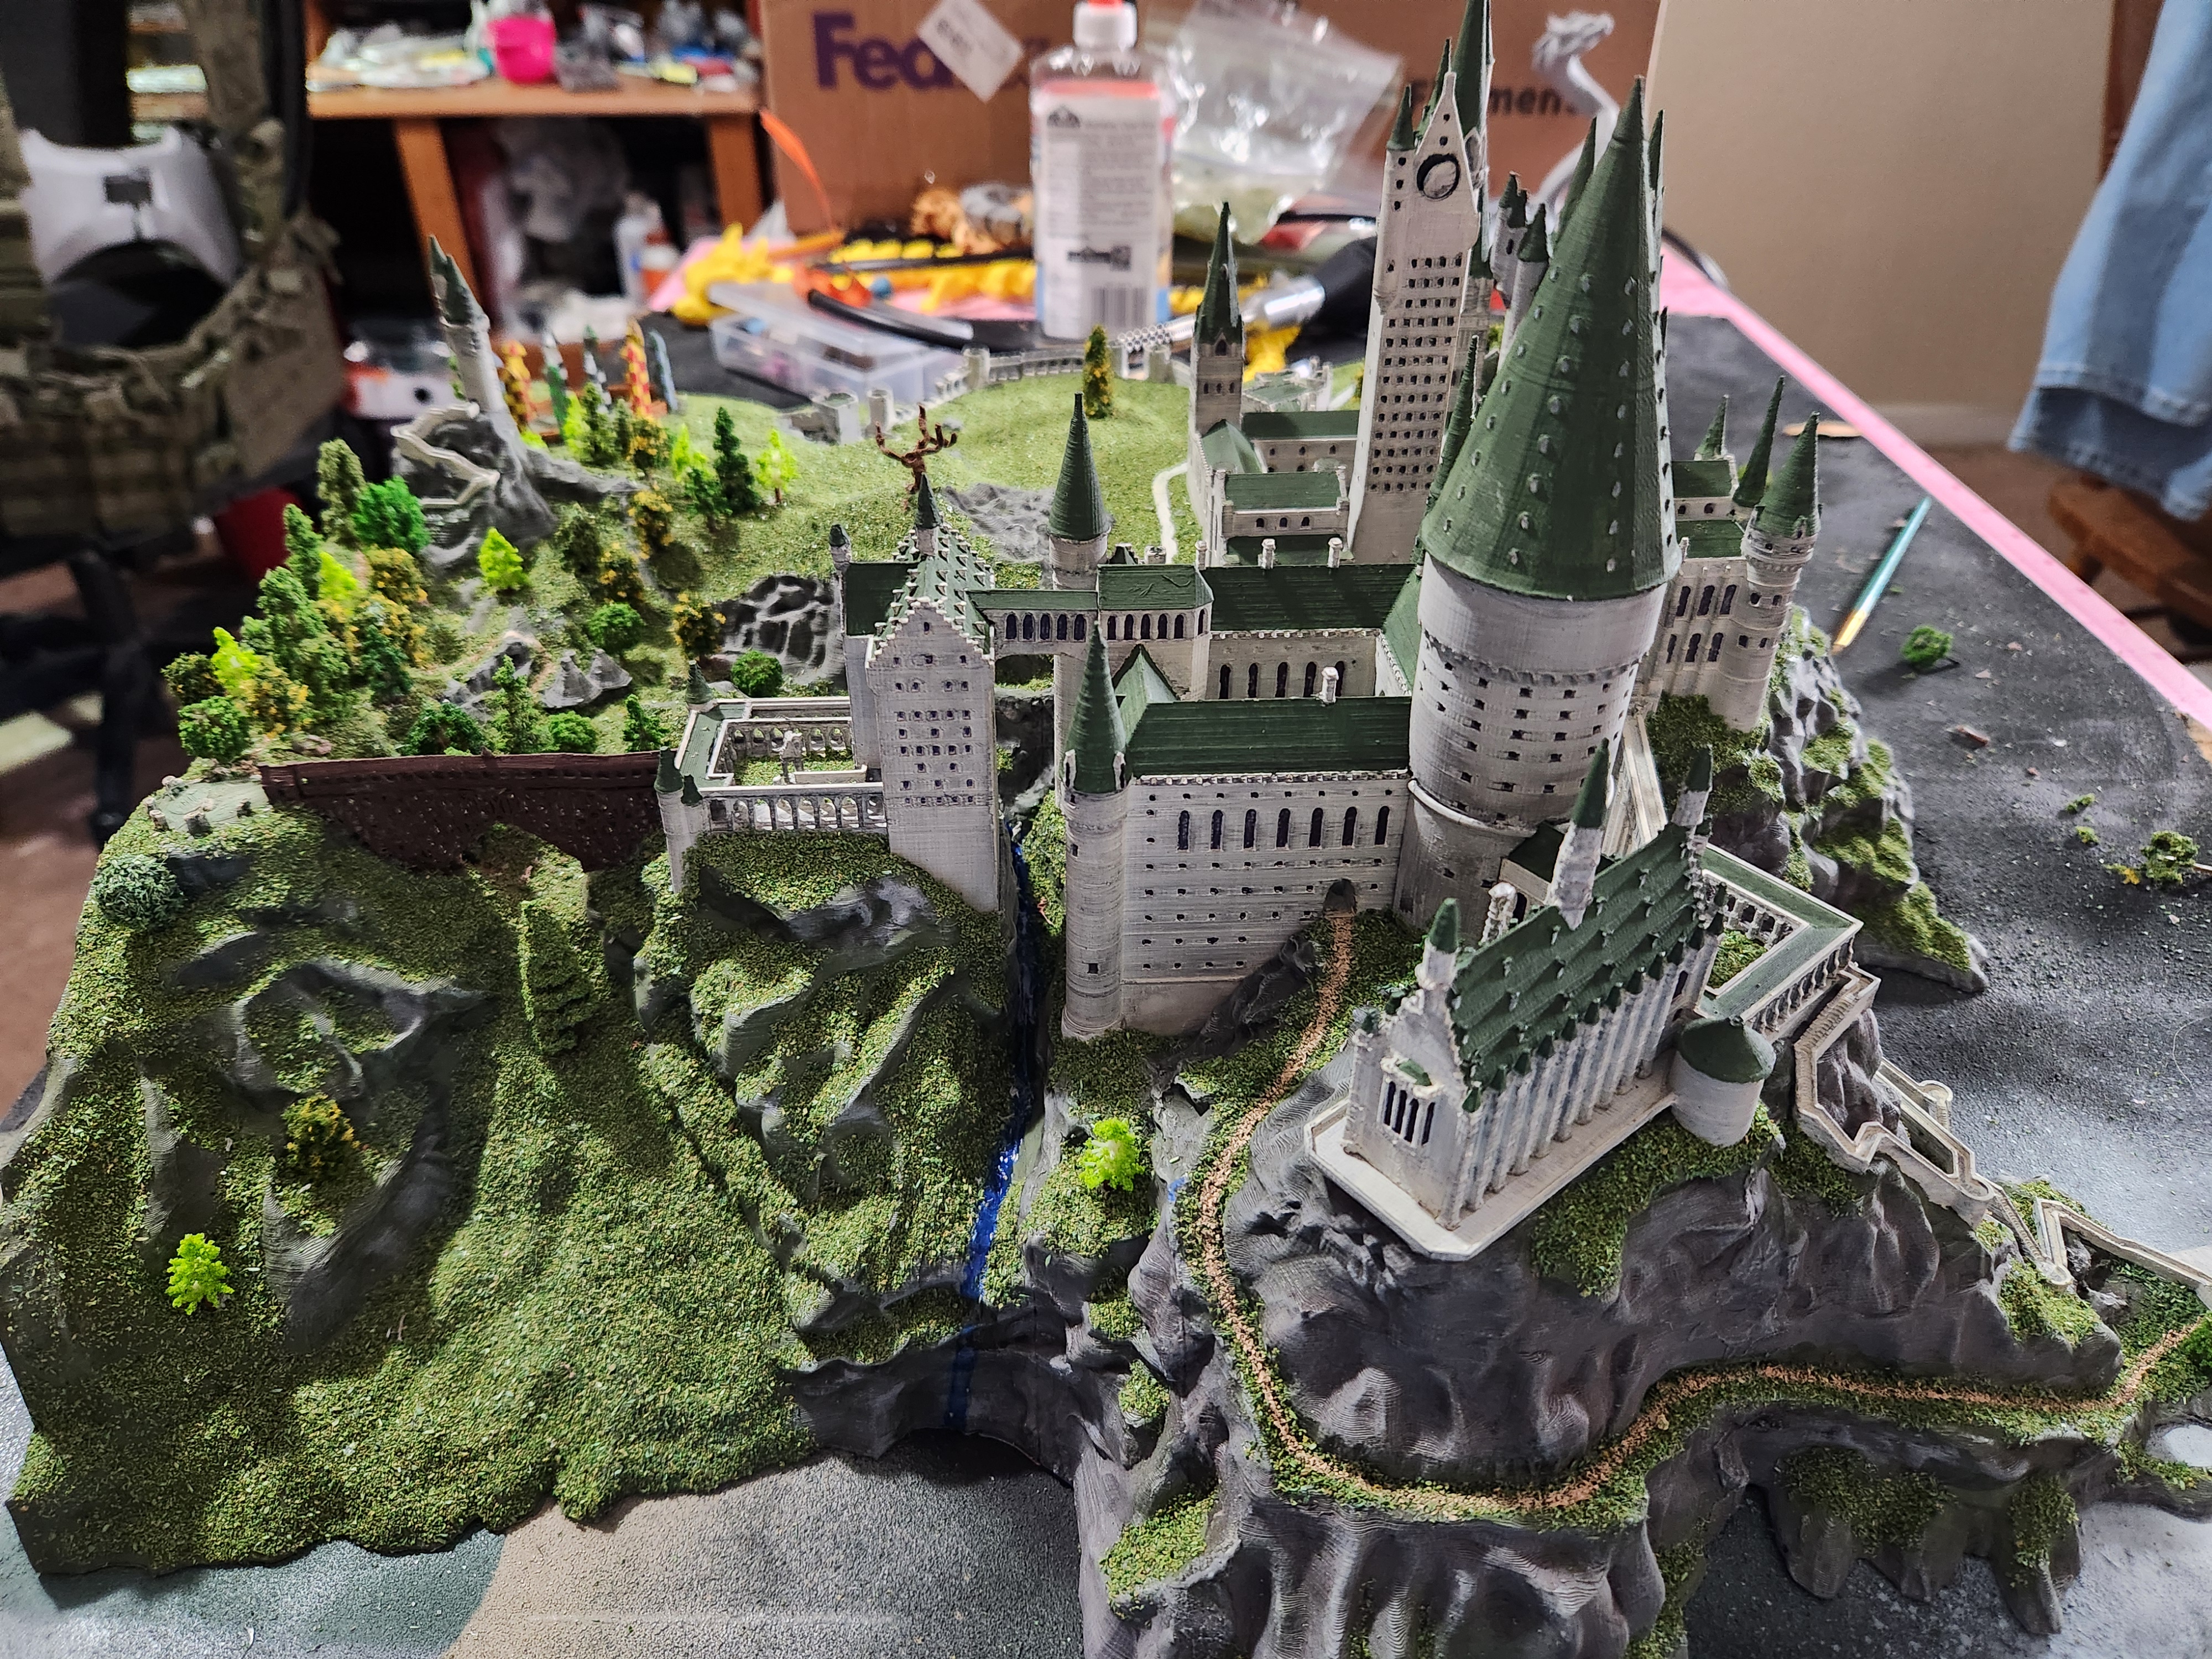
This is my rendition of Hogwarts Castle, as it appears in the Harry Potter film series.
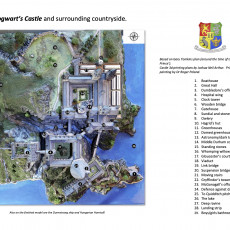
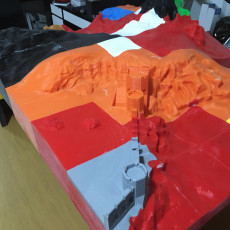
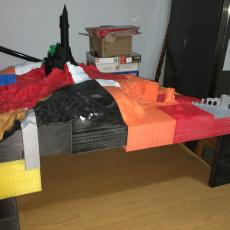
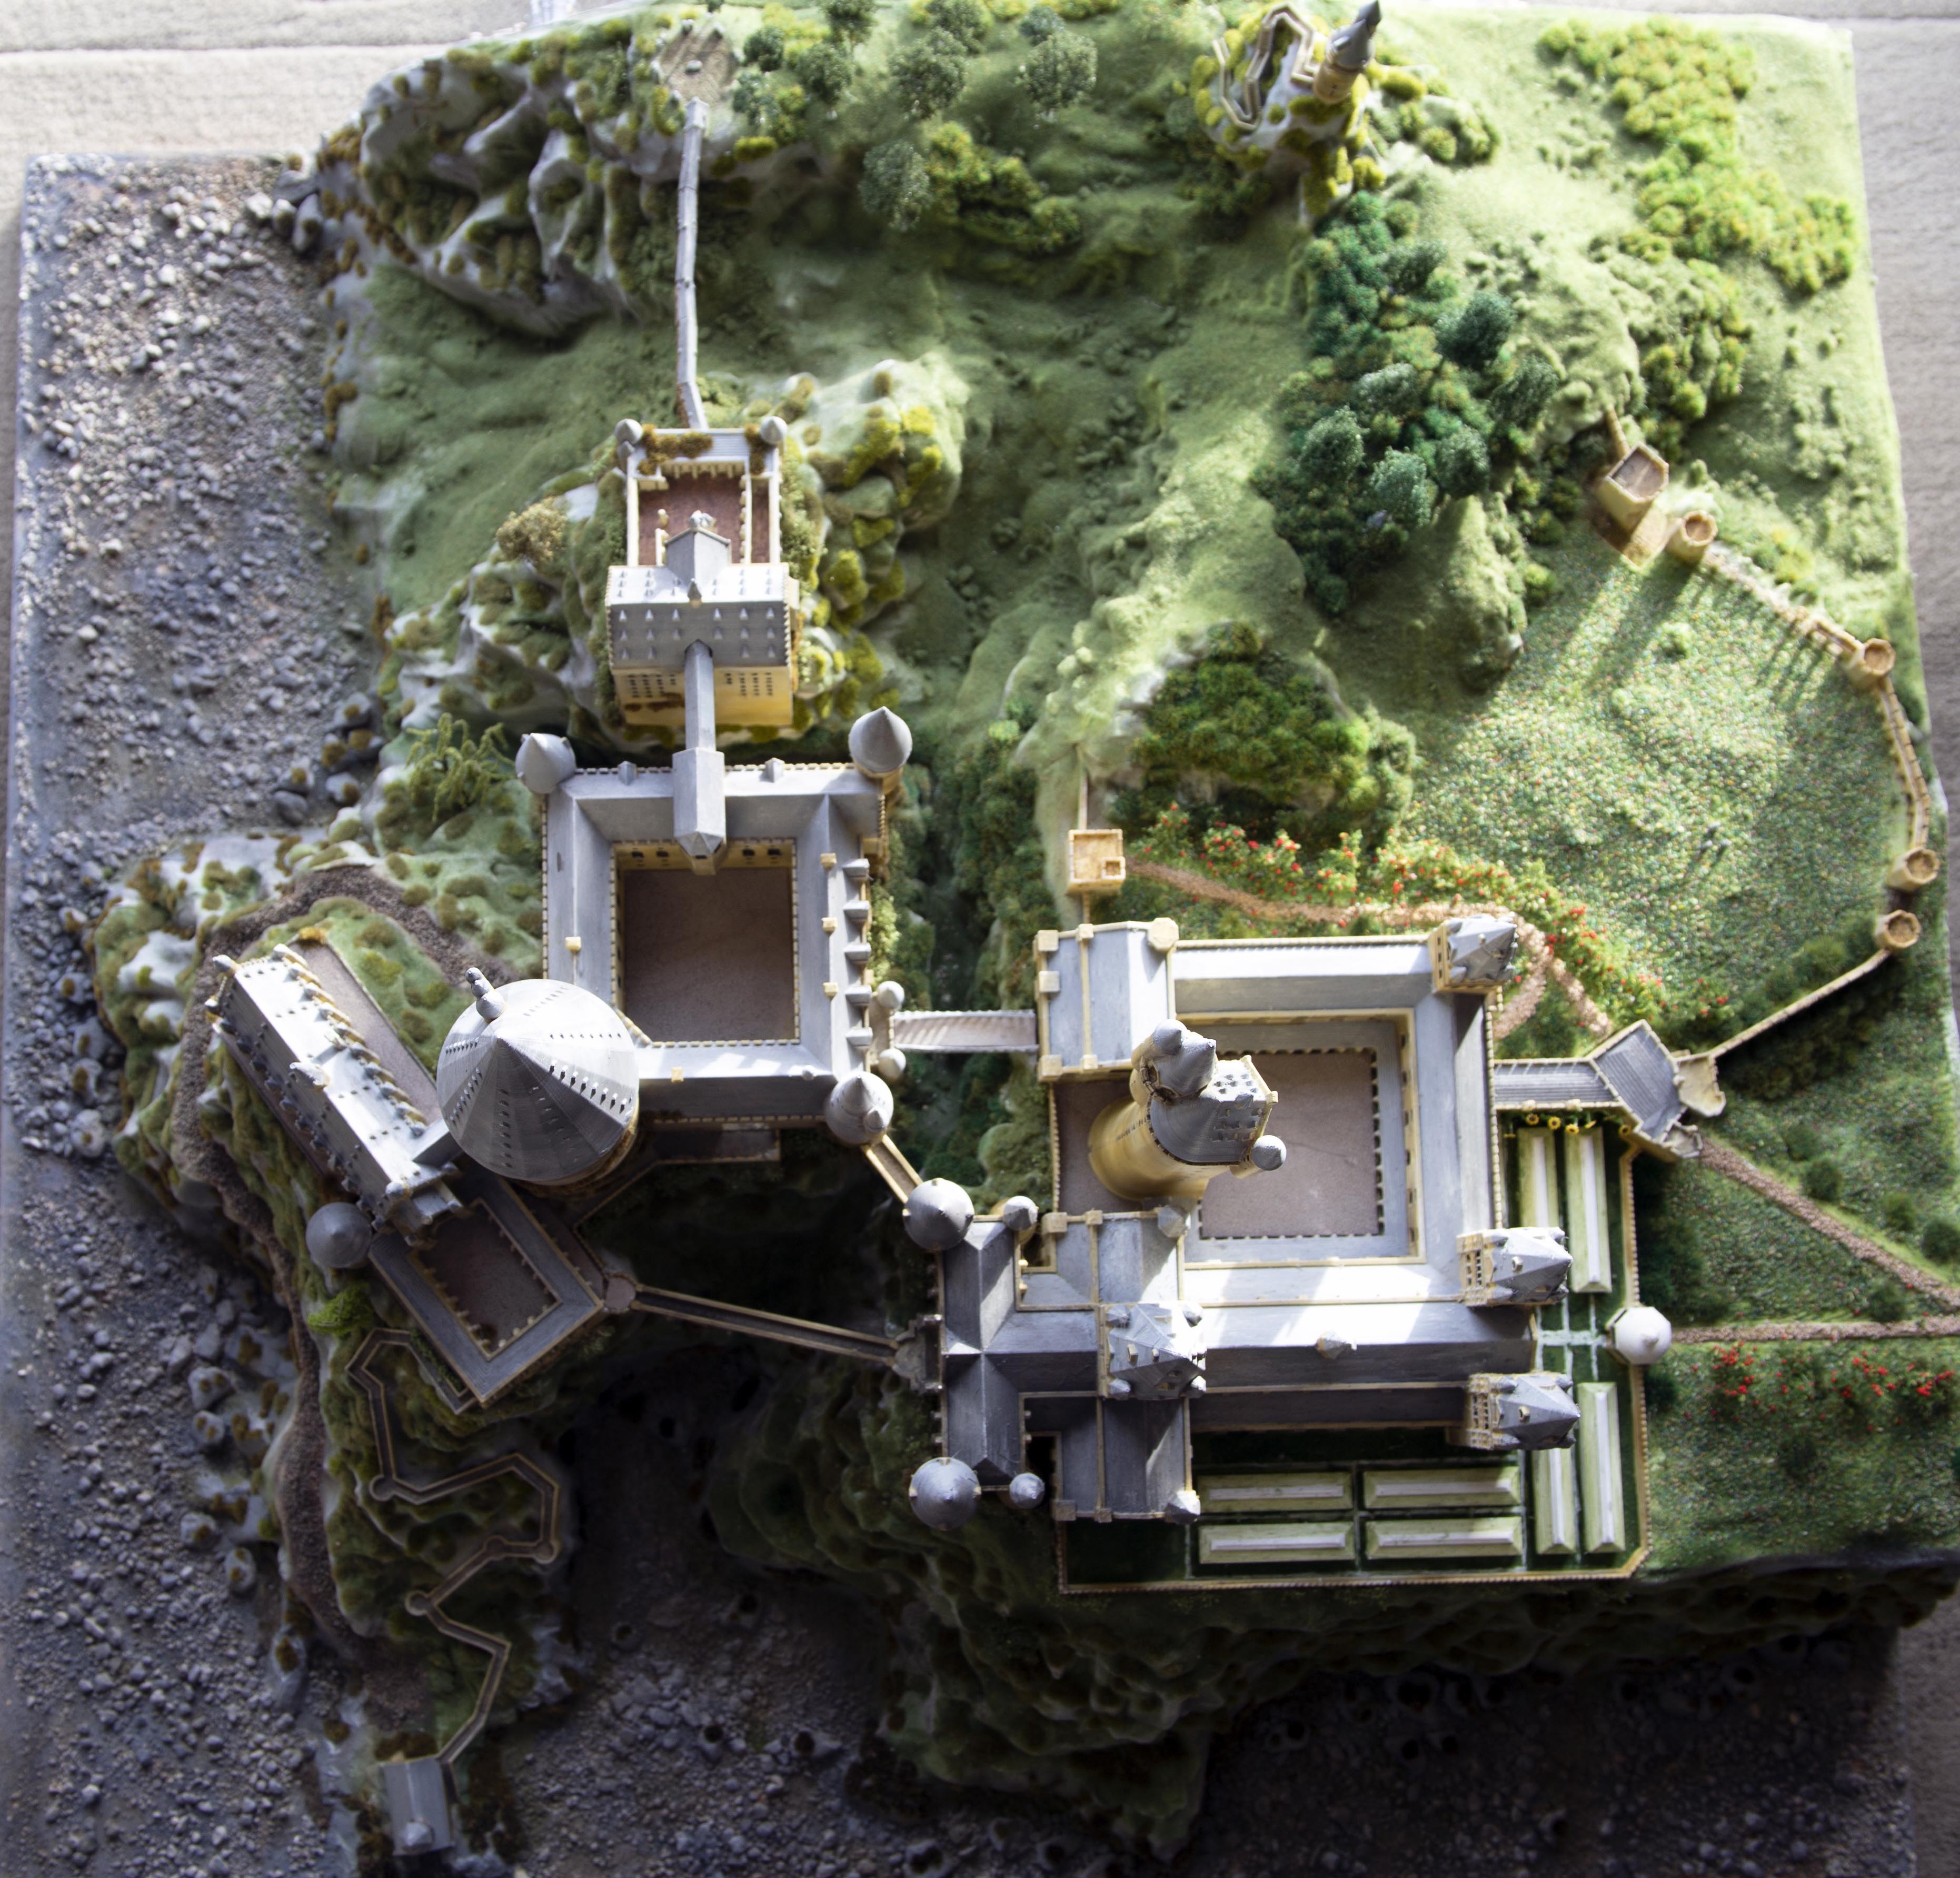
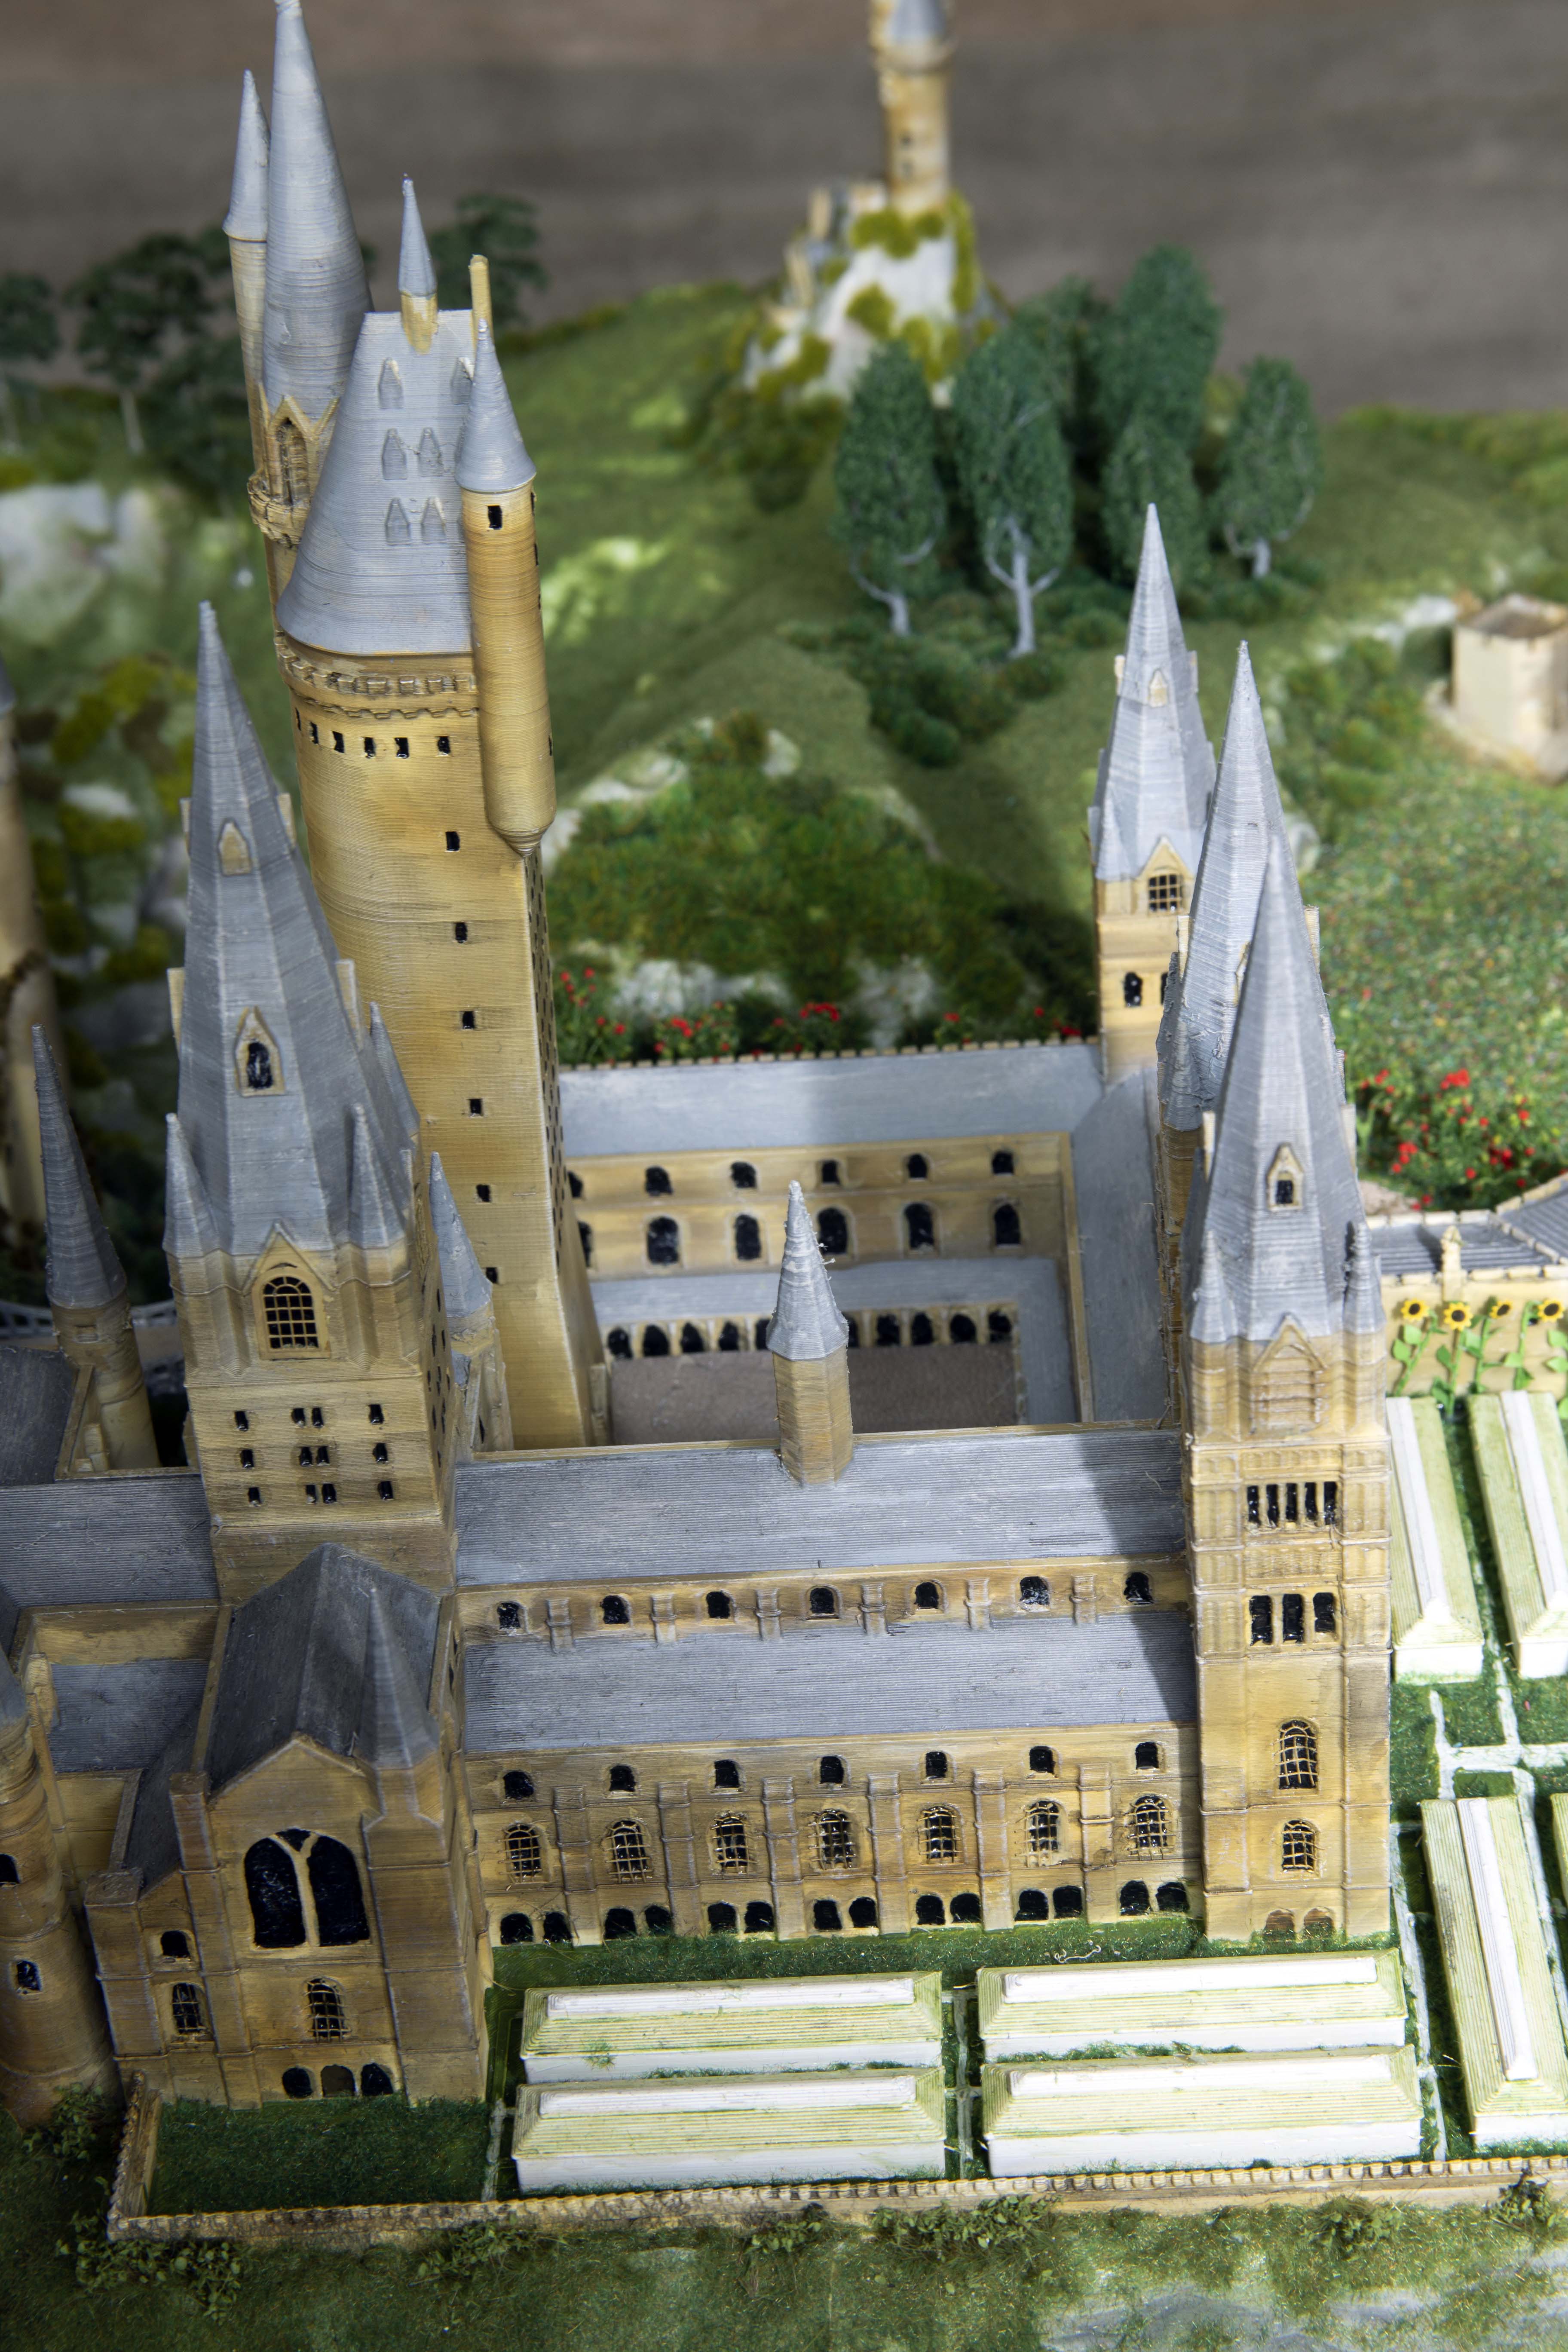
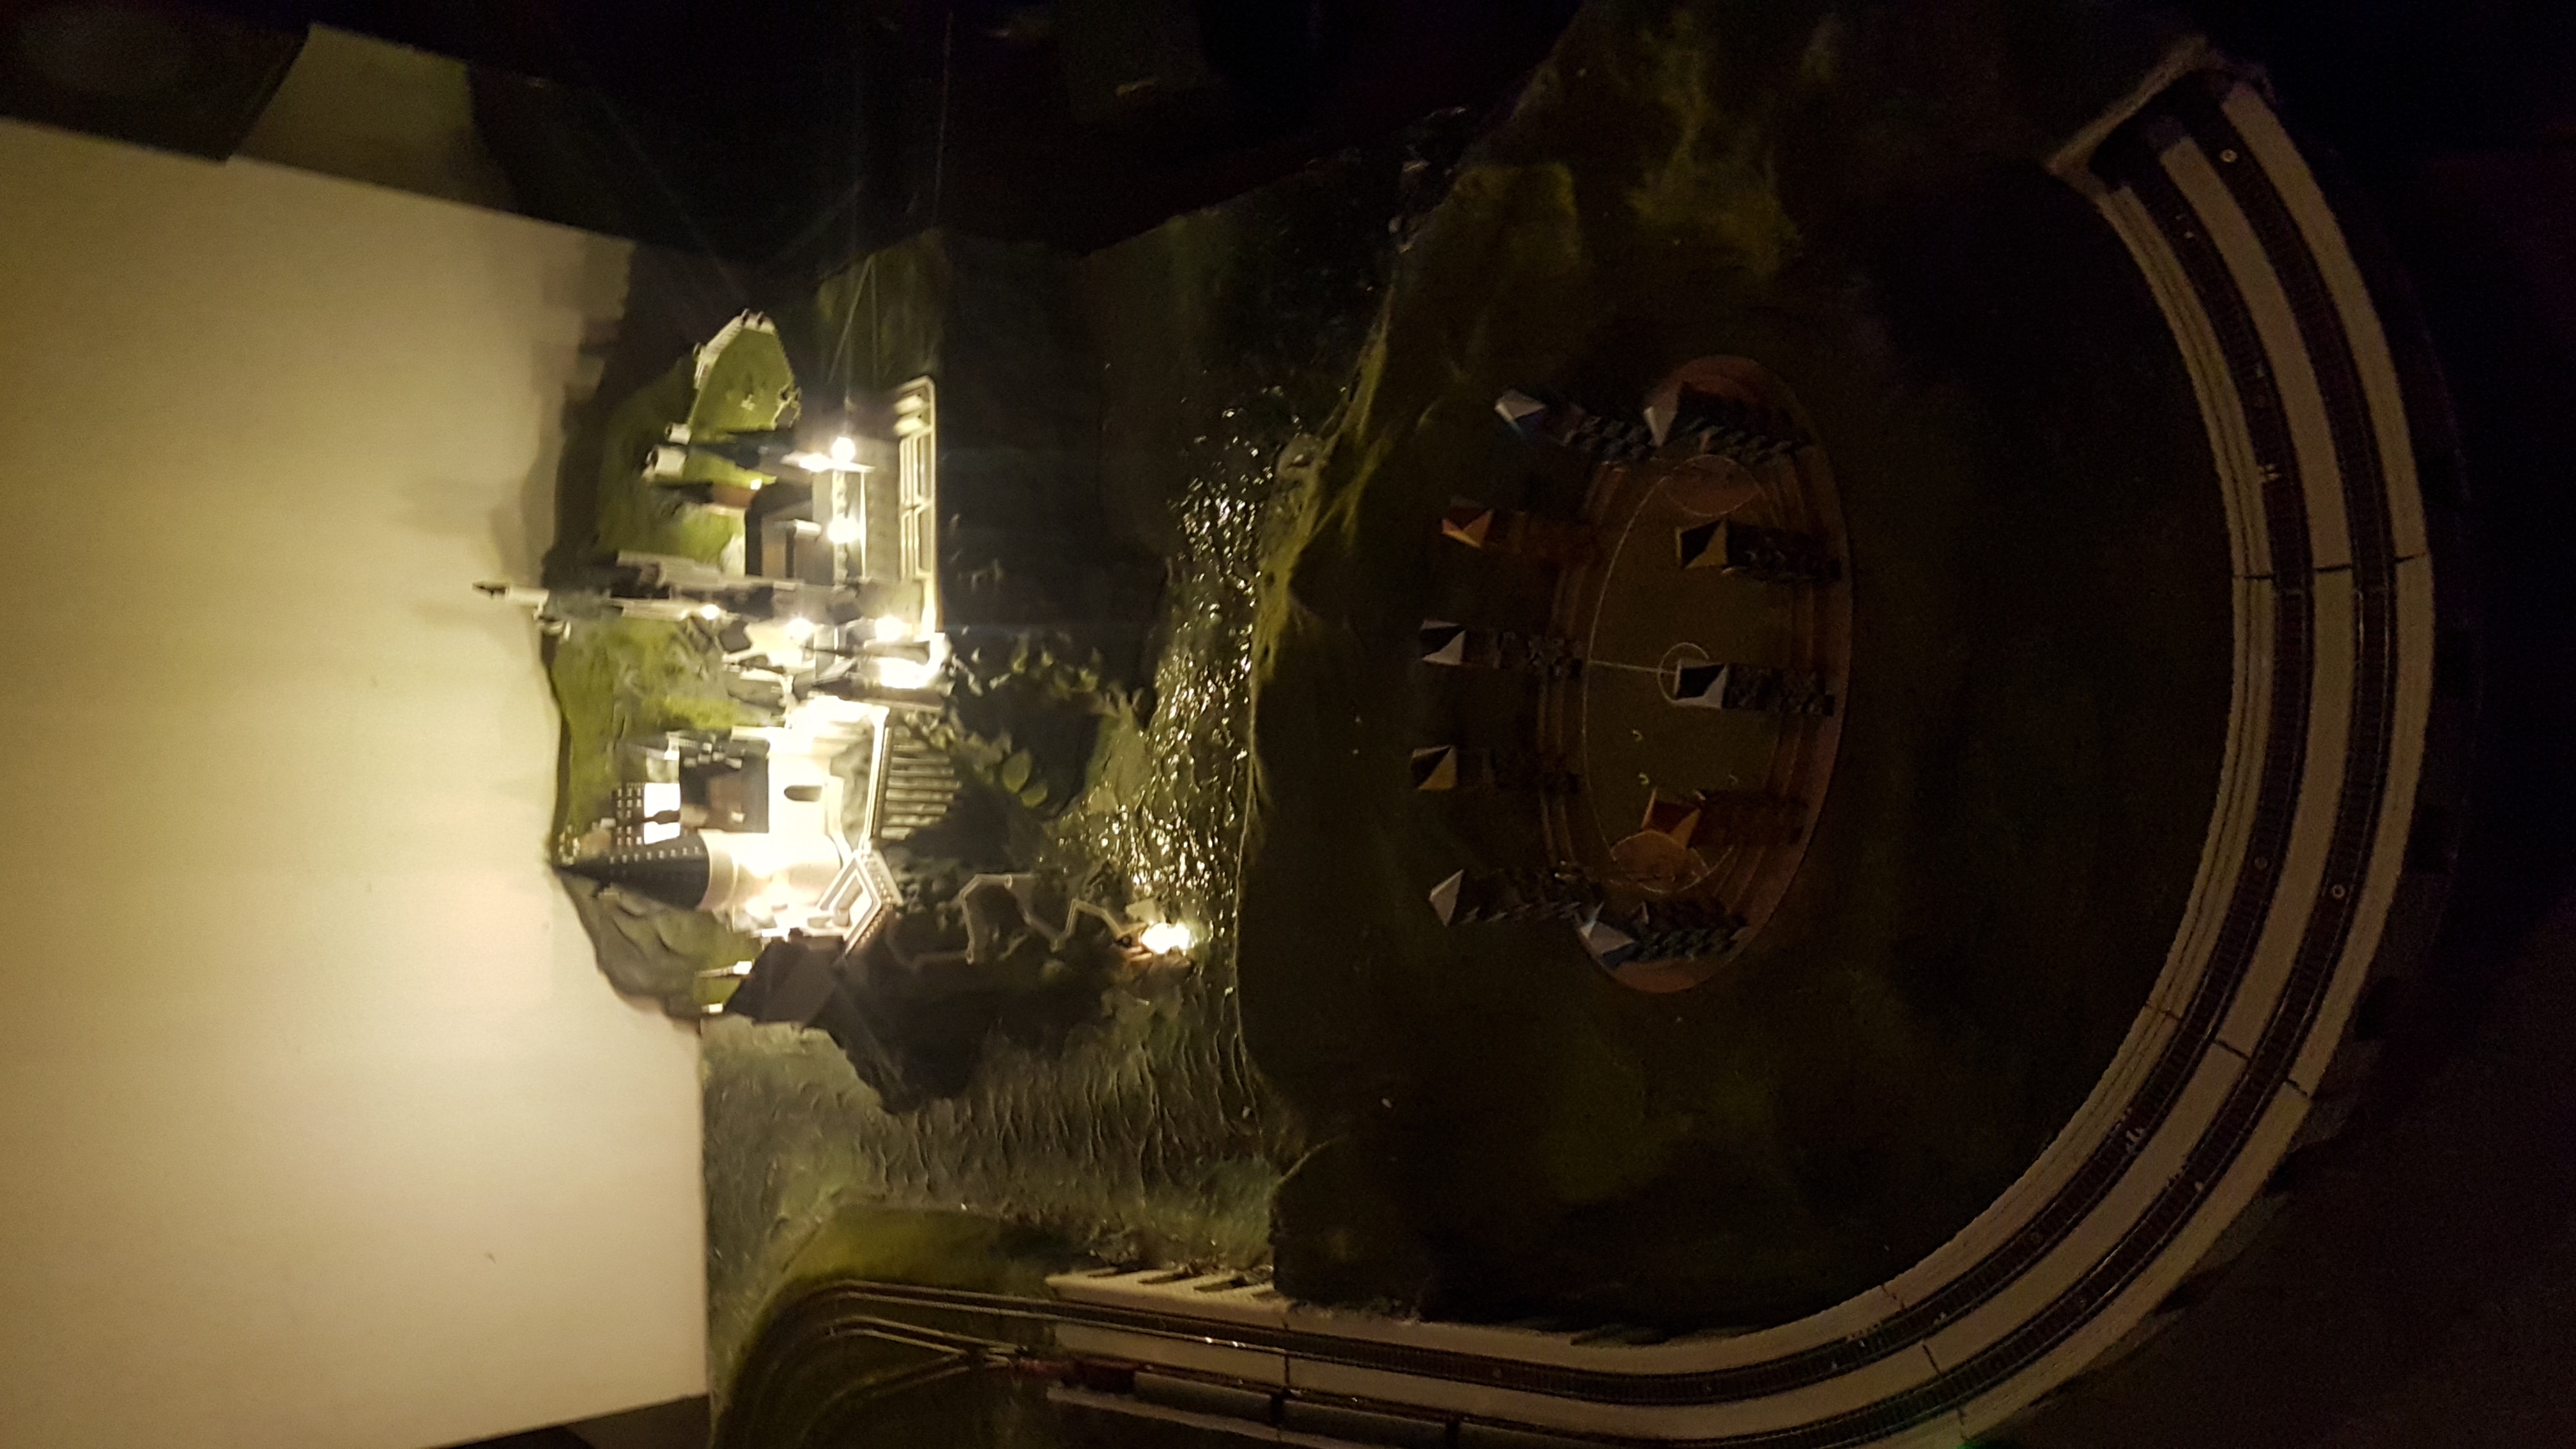
The design is based on the castle layout plan included in the book ‘Harry Potter: Page to Screen’, which represents the version of Hogwarts used in ‘Harry Potter and the Half Blood Prince’. Tower elevations and other details were obtained from film stills and photographs of the model displayed at the Harry Potter studio tour in London. It is not an exact reproduction, particularly with respect to the rock formations, but it attempts to replicate the major features as faithfully as possible.
WARNING:
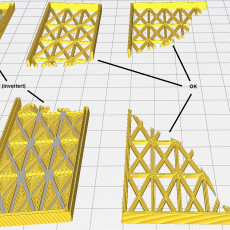
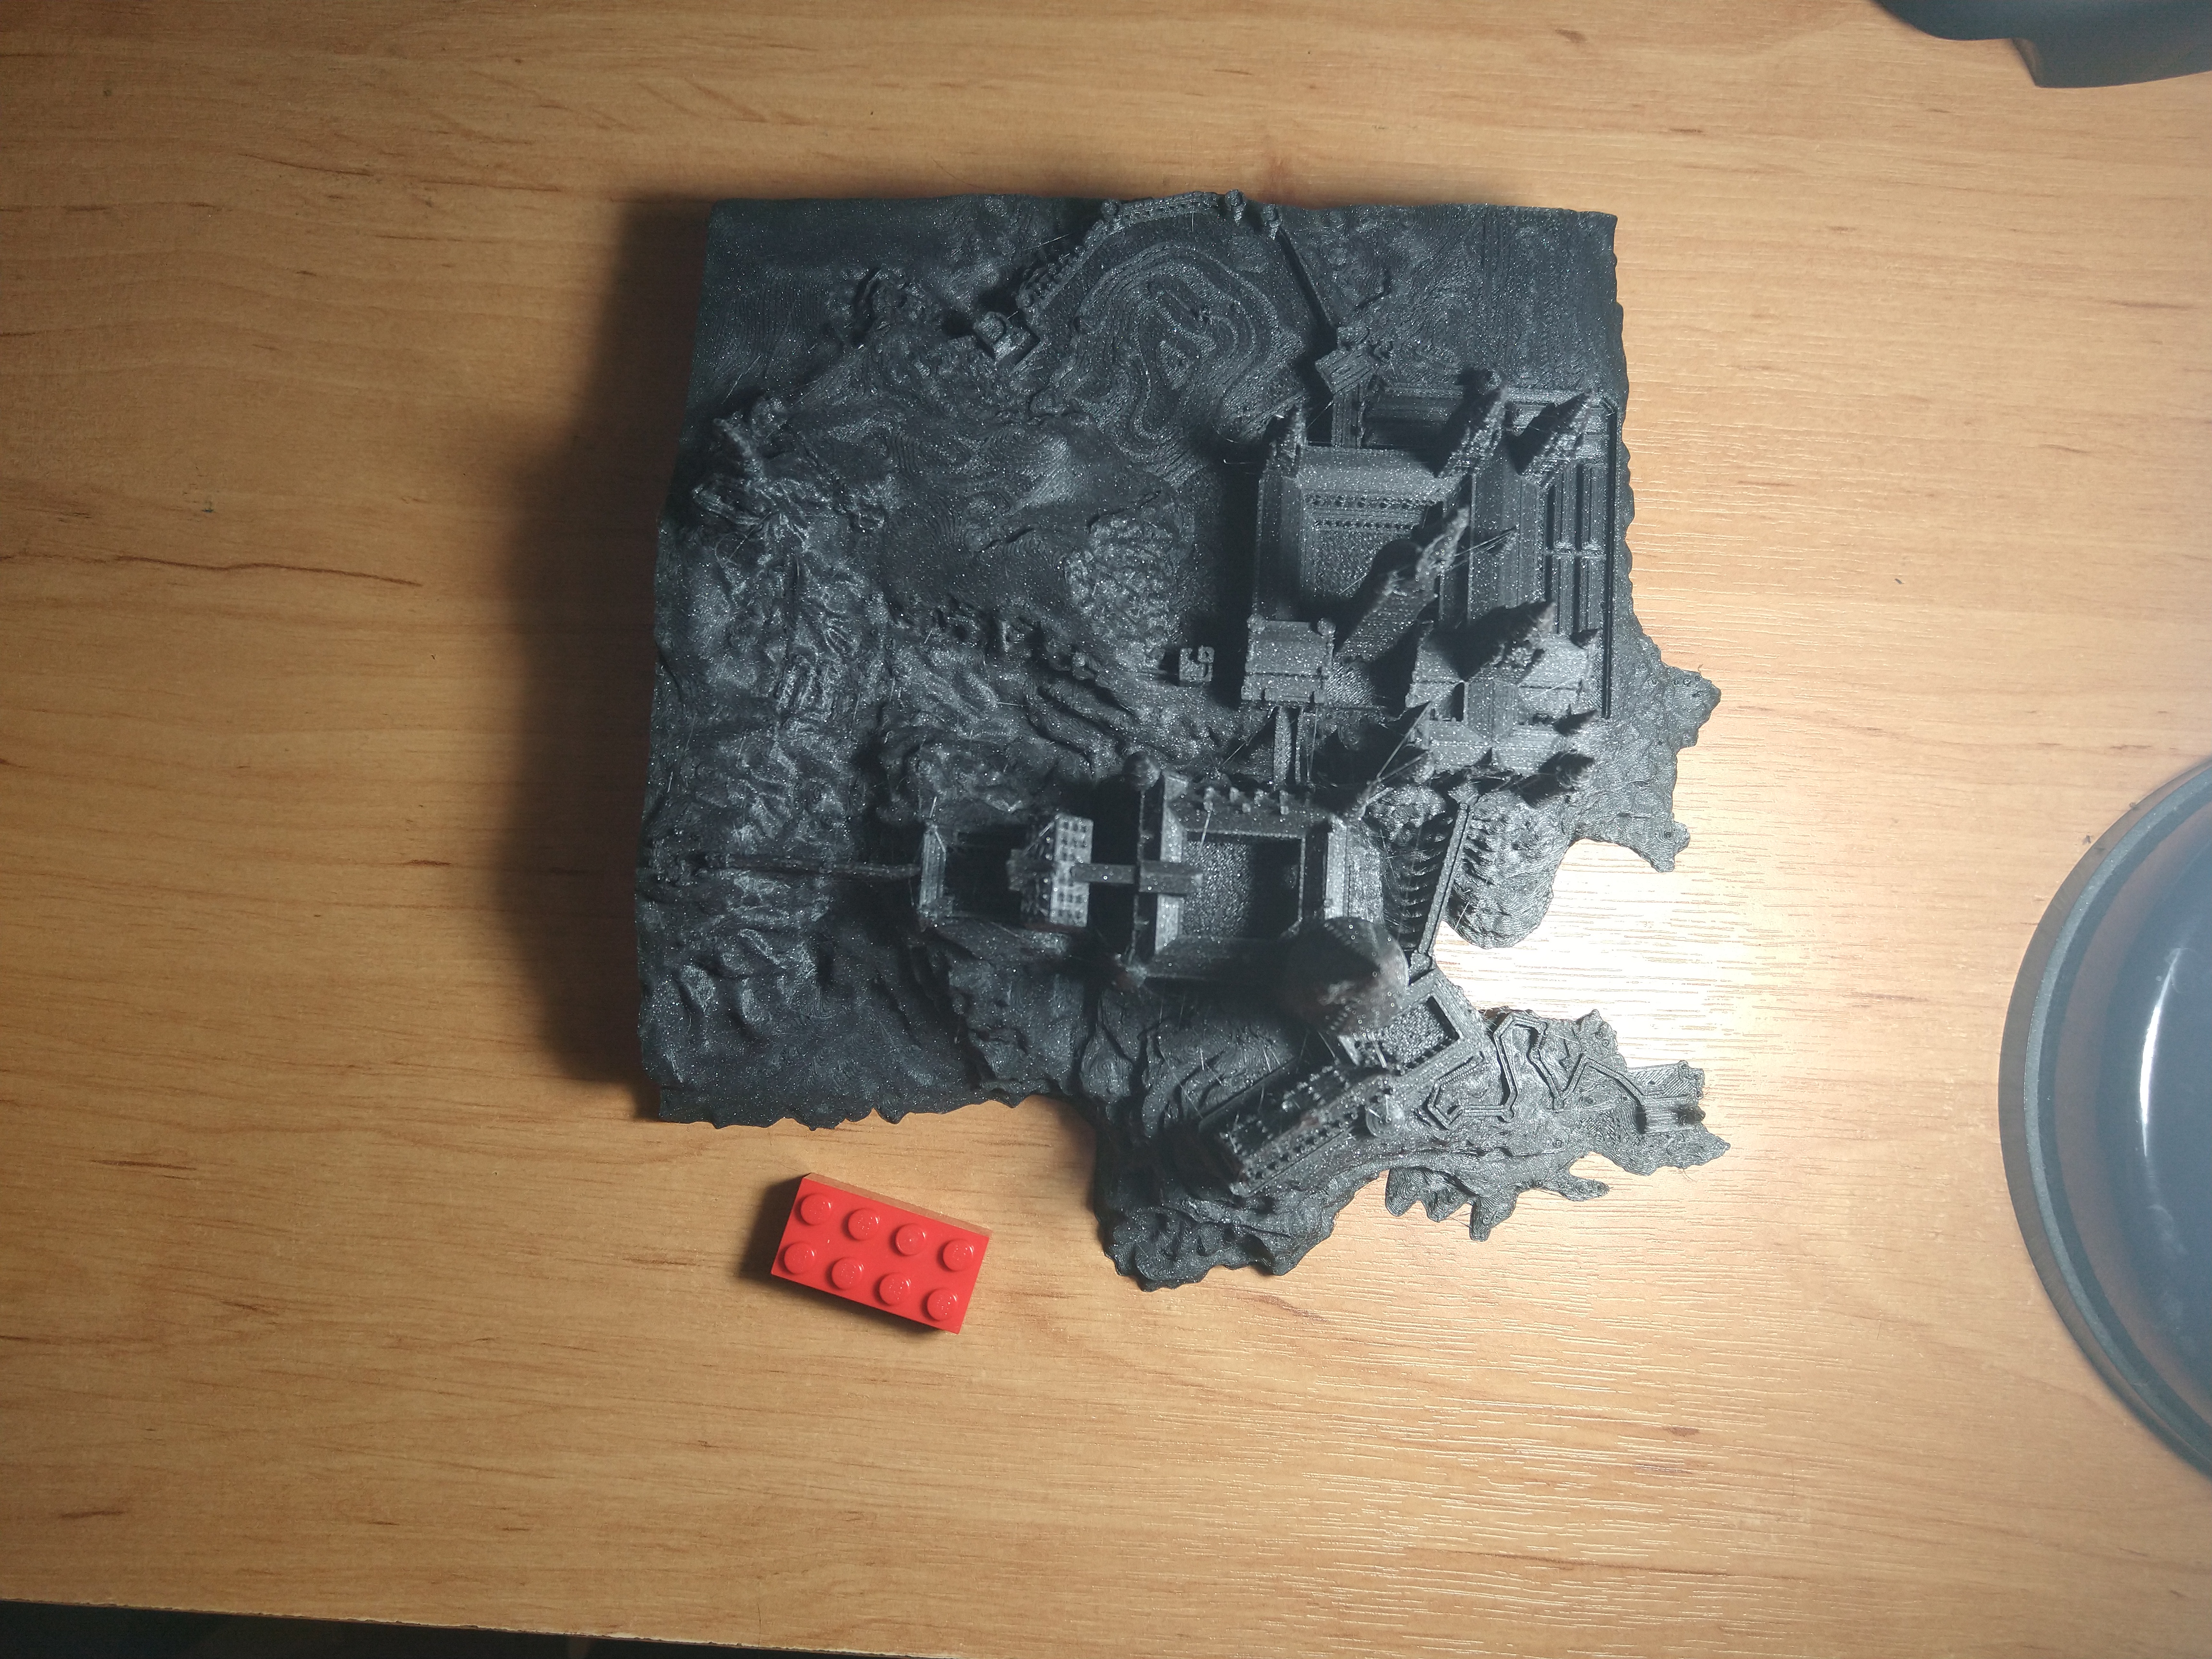
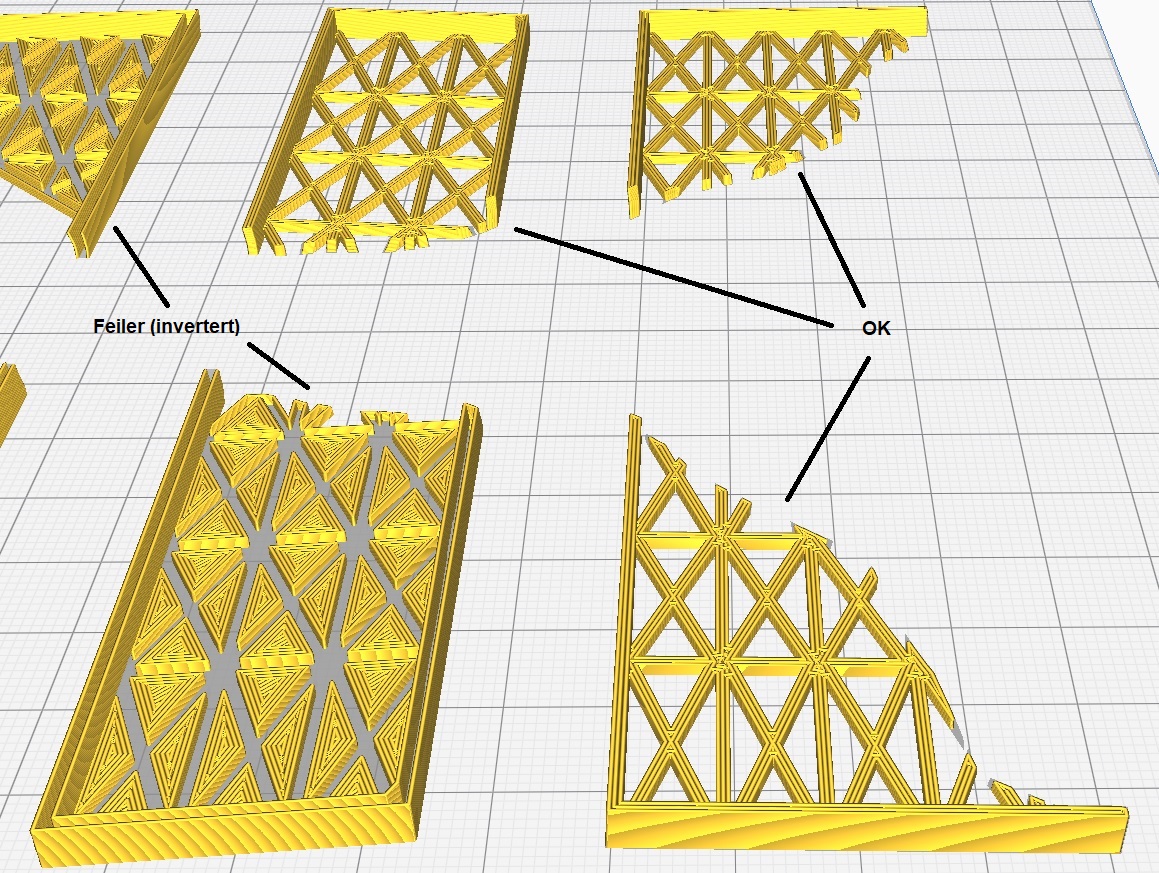
Unfortunately, my STLs are imperfect (e.g. intersecting meshes, non manifold geometries), and may cause errors when slicing. I apologise.
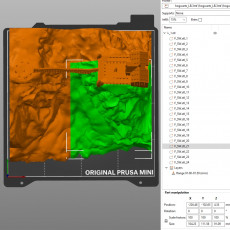
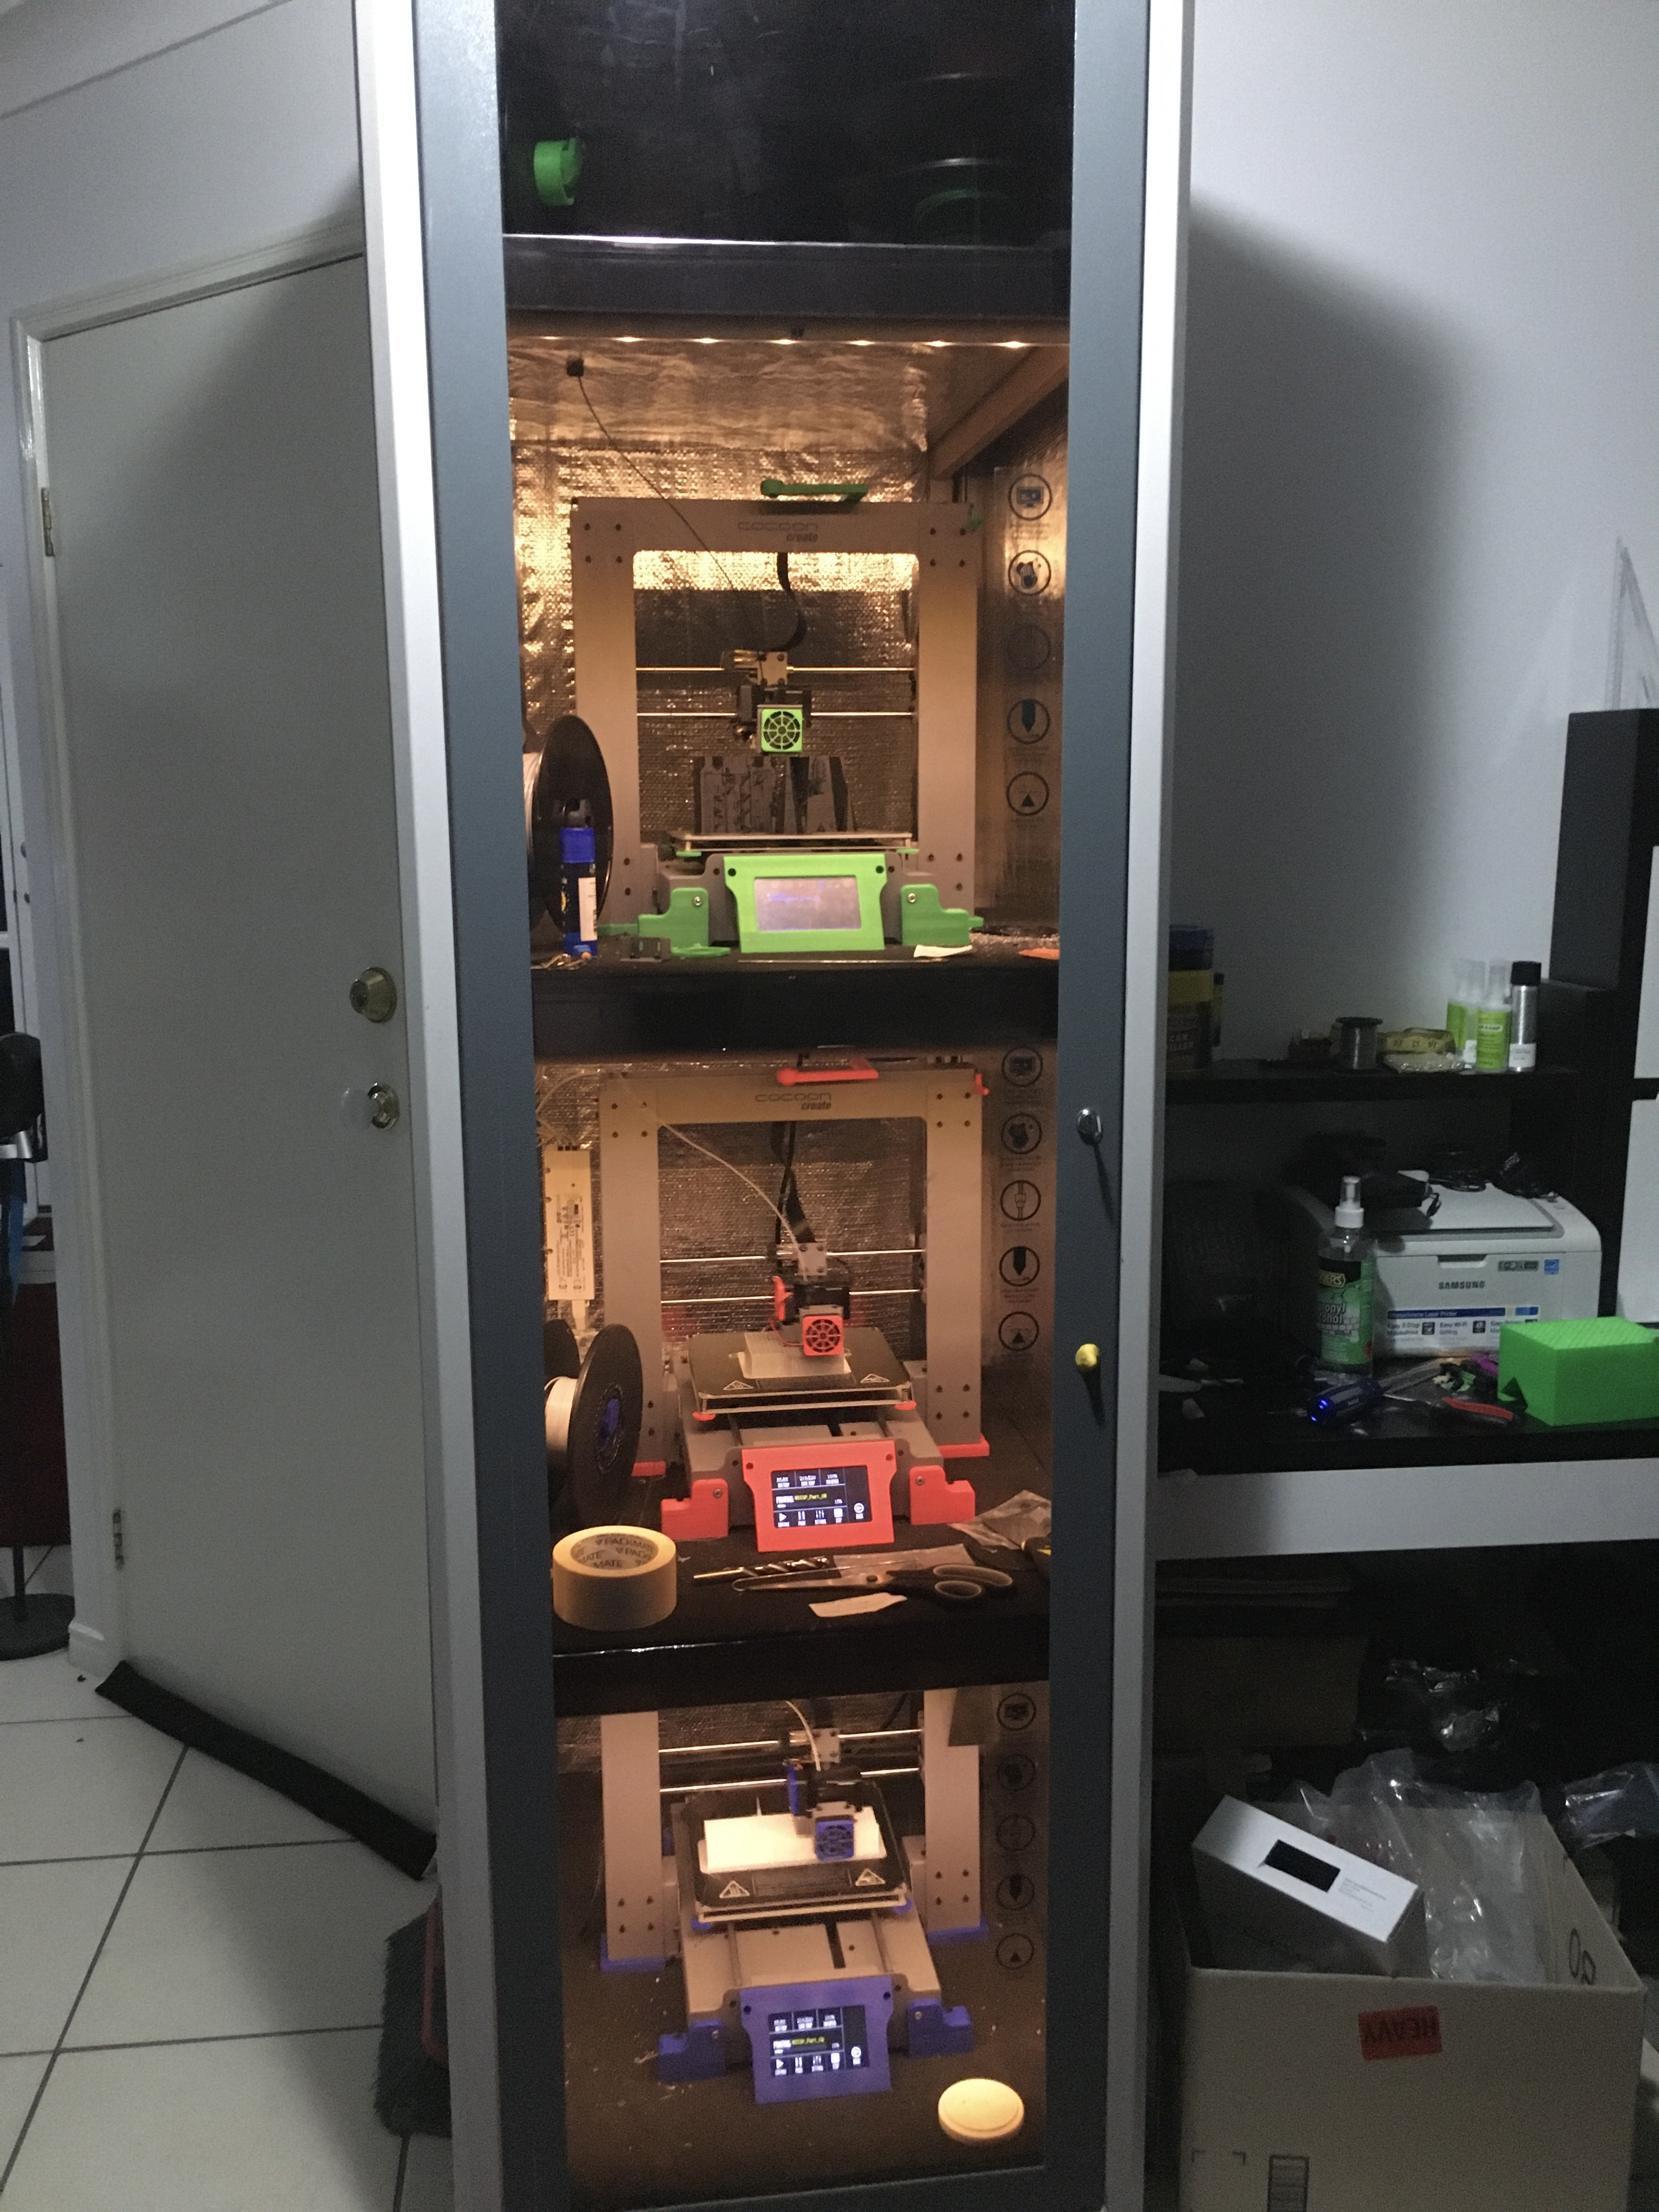
Nevertheless, Cura is fully capable of interpreting the files. With the appropriate Mesh Fixes selected, I was able to make everything to work in Cura 3.0.4.
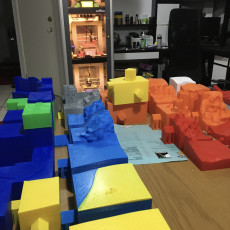
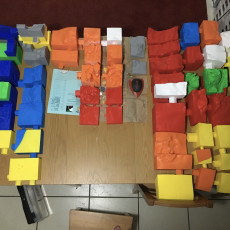
Finishing the model:
See the full 'Printing and Assembly Guide' included in the files as a PDF.
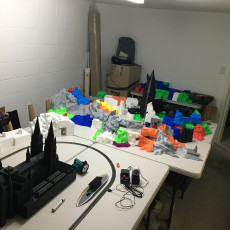
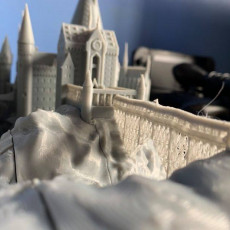
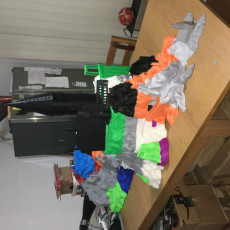
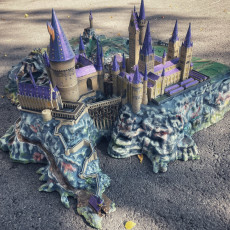
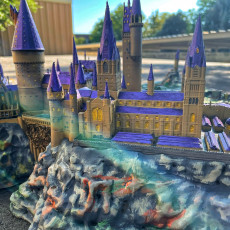
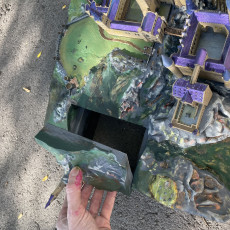
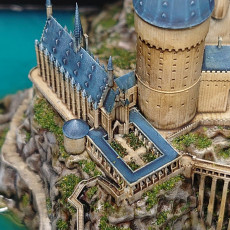
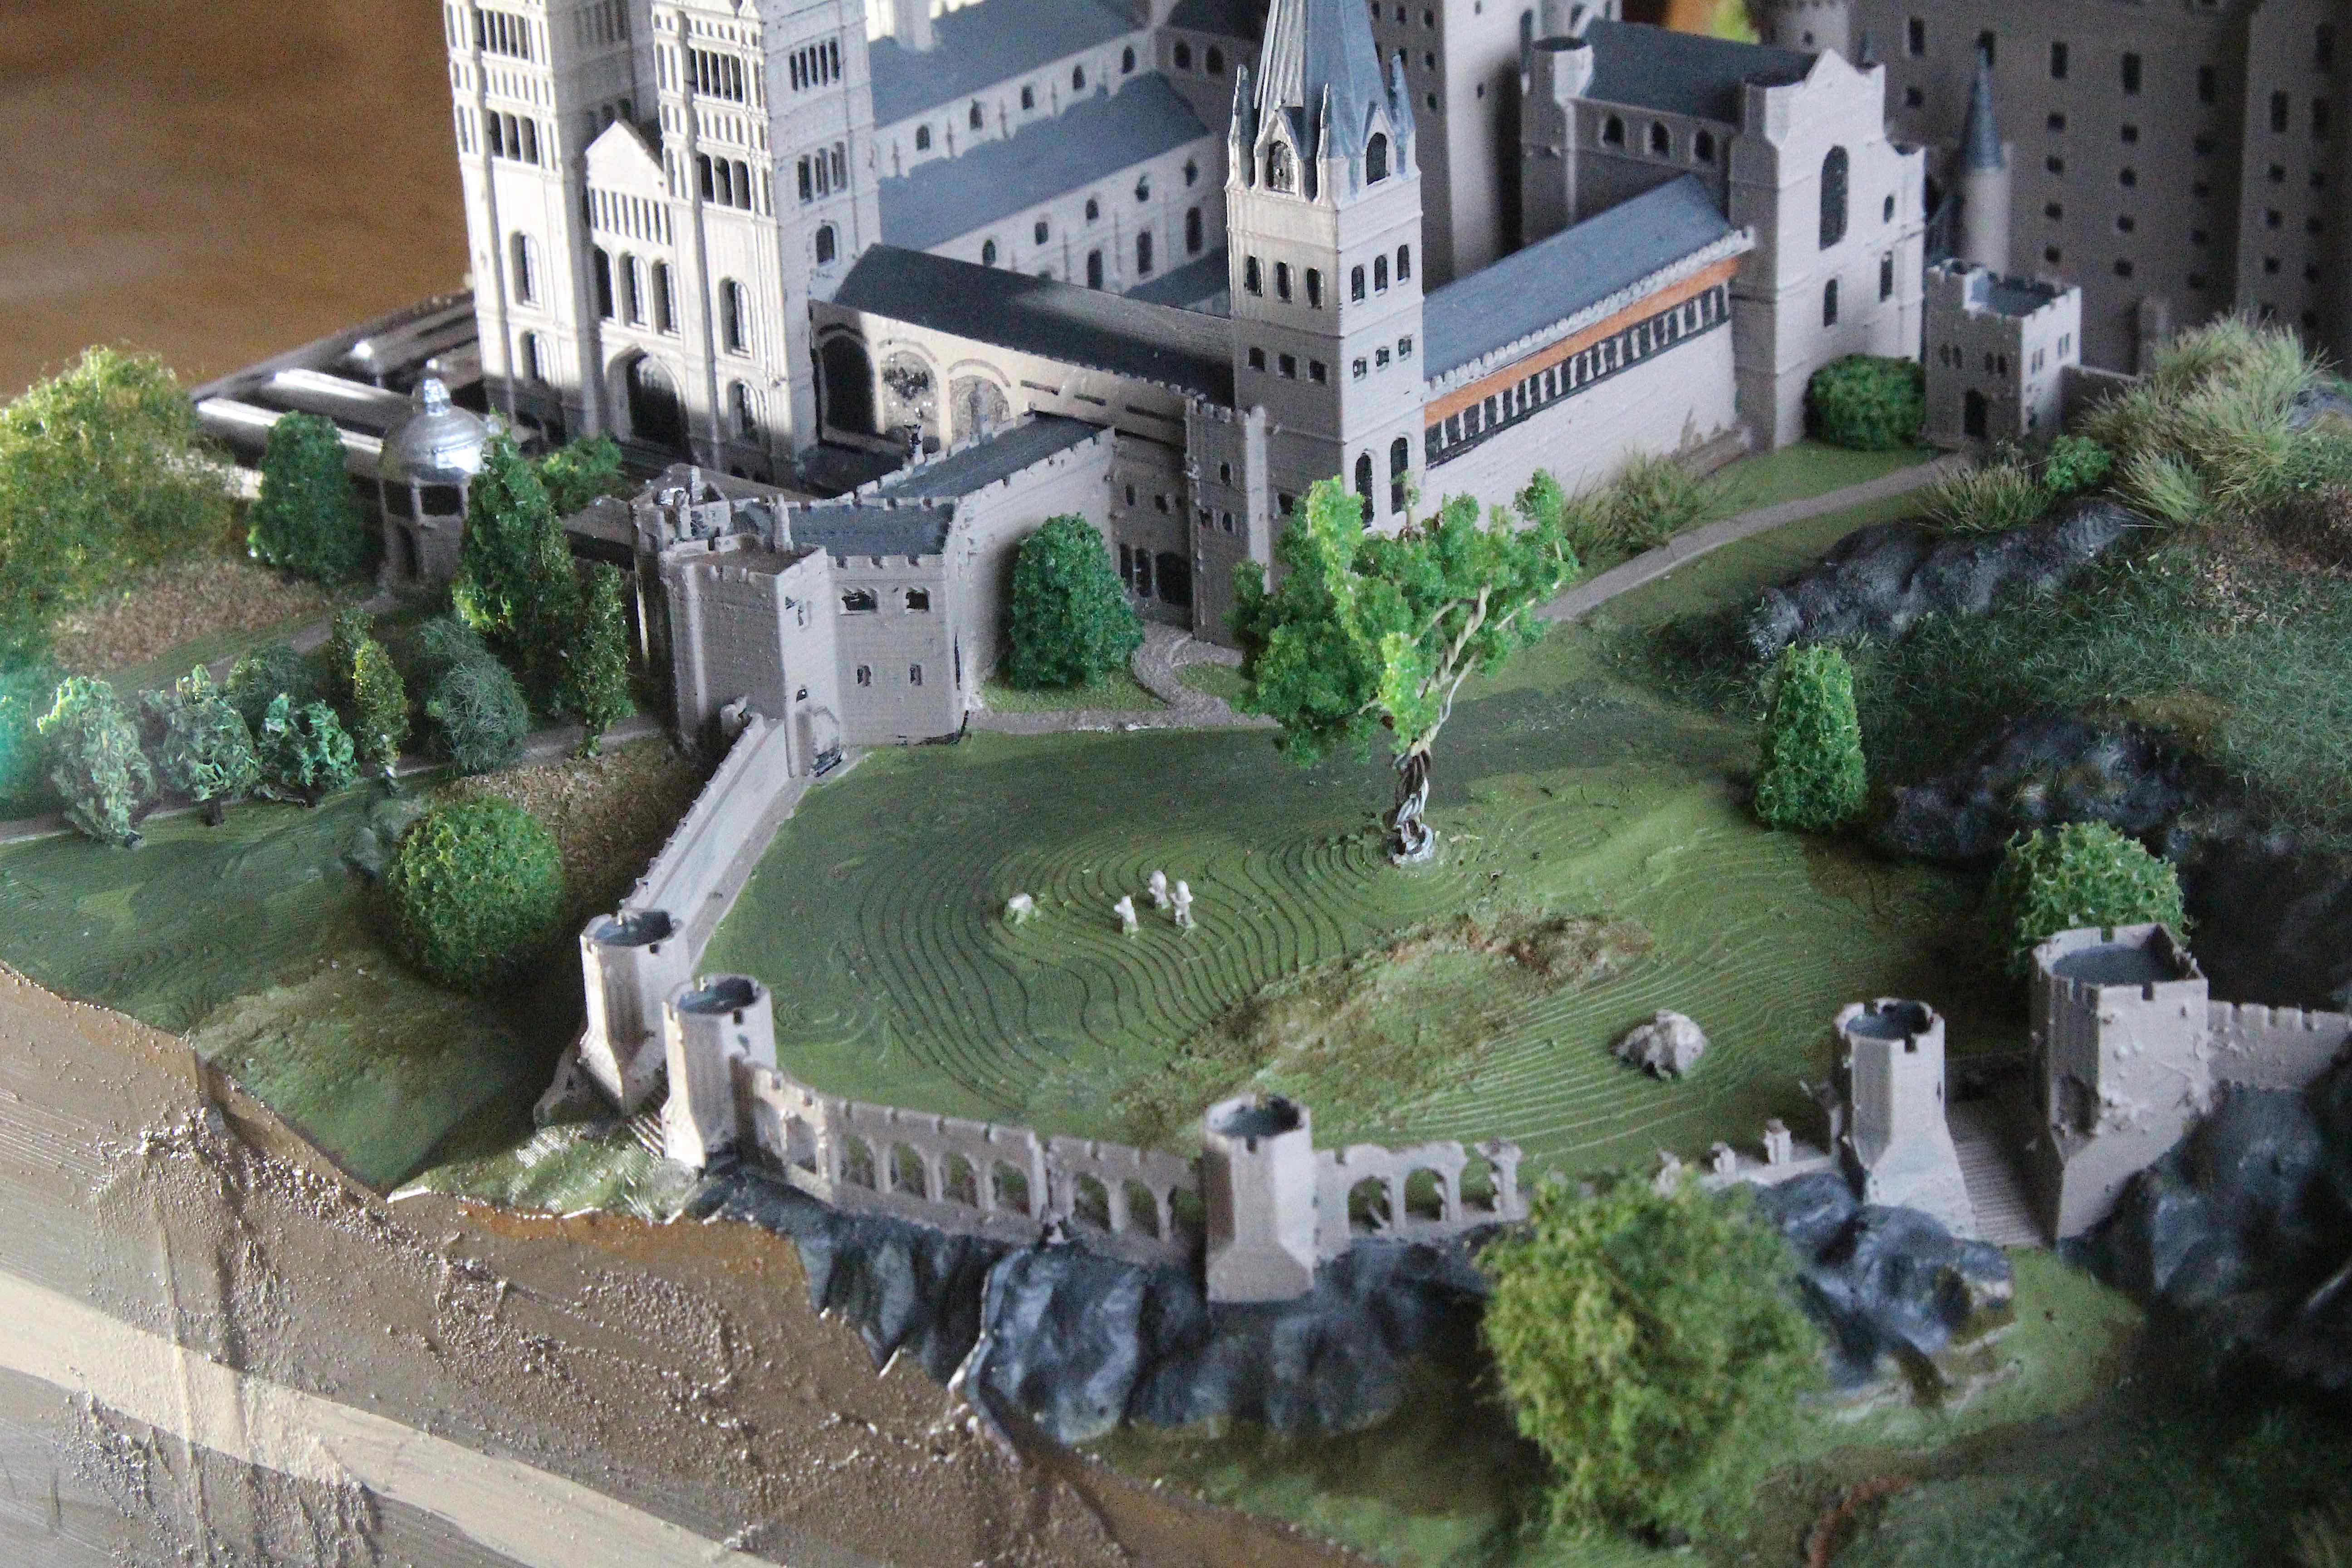
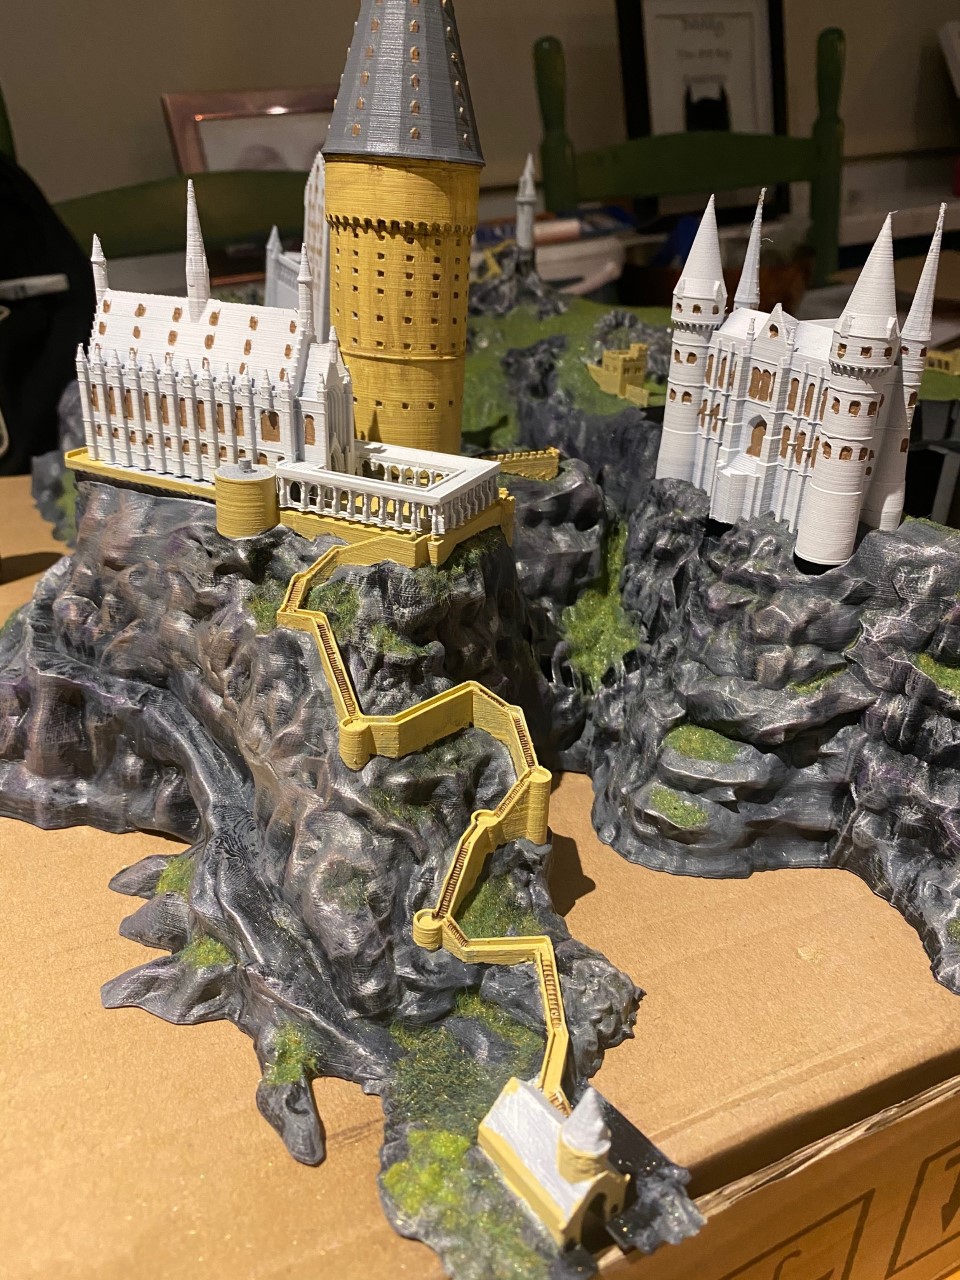
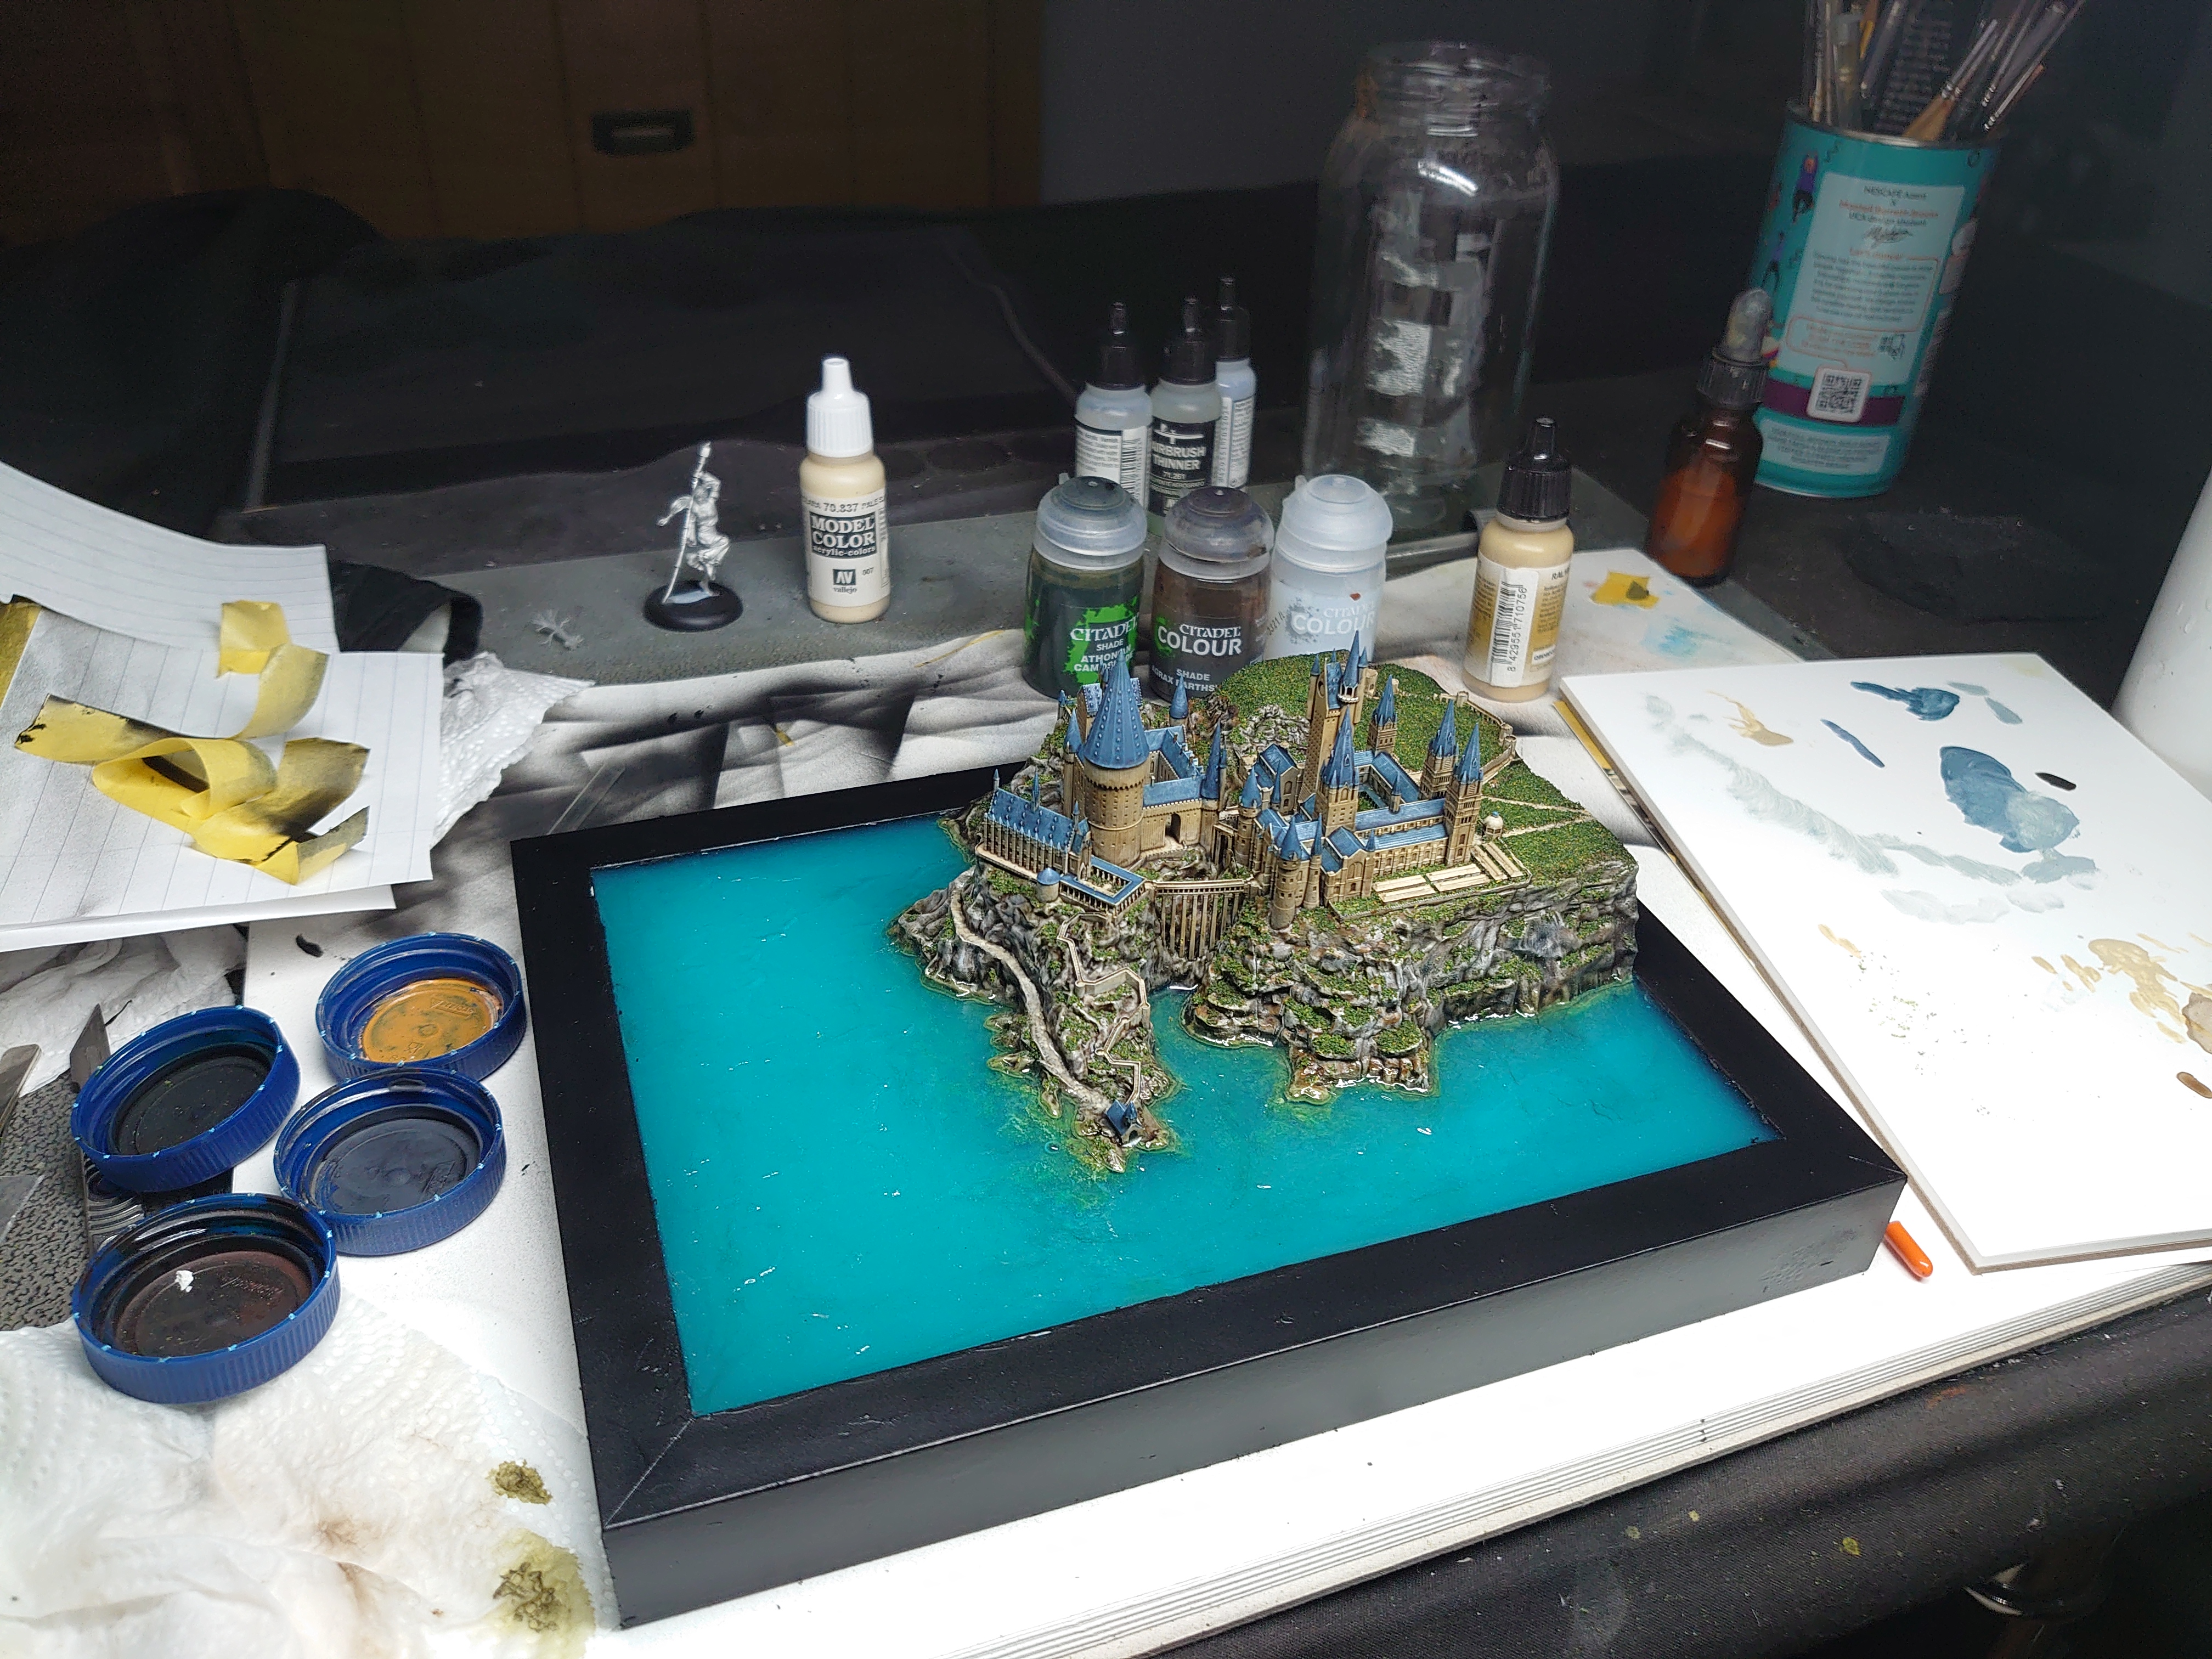
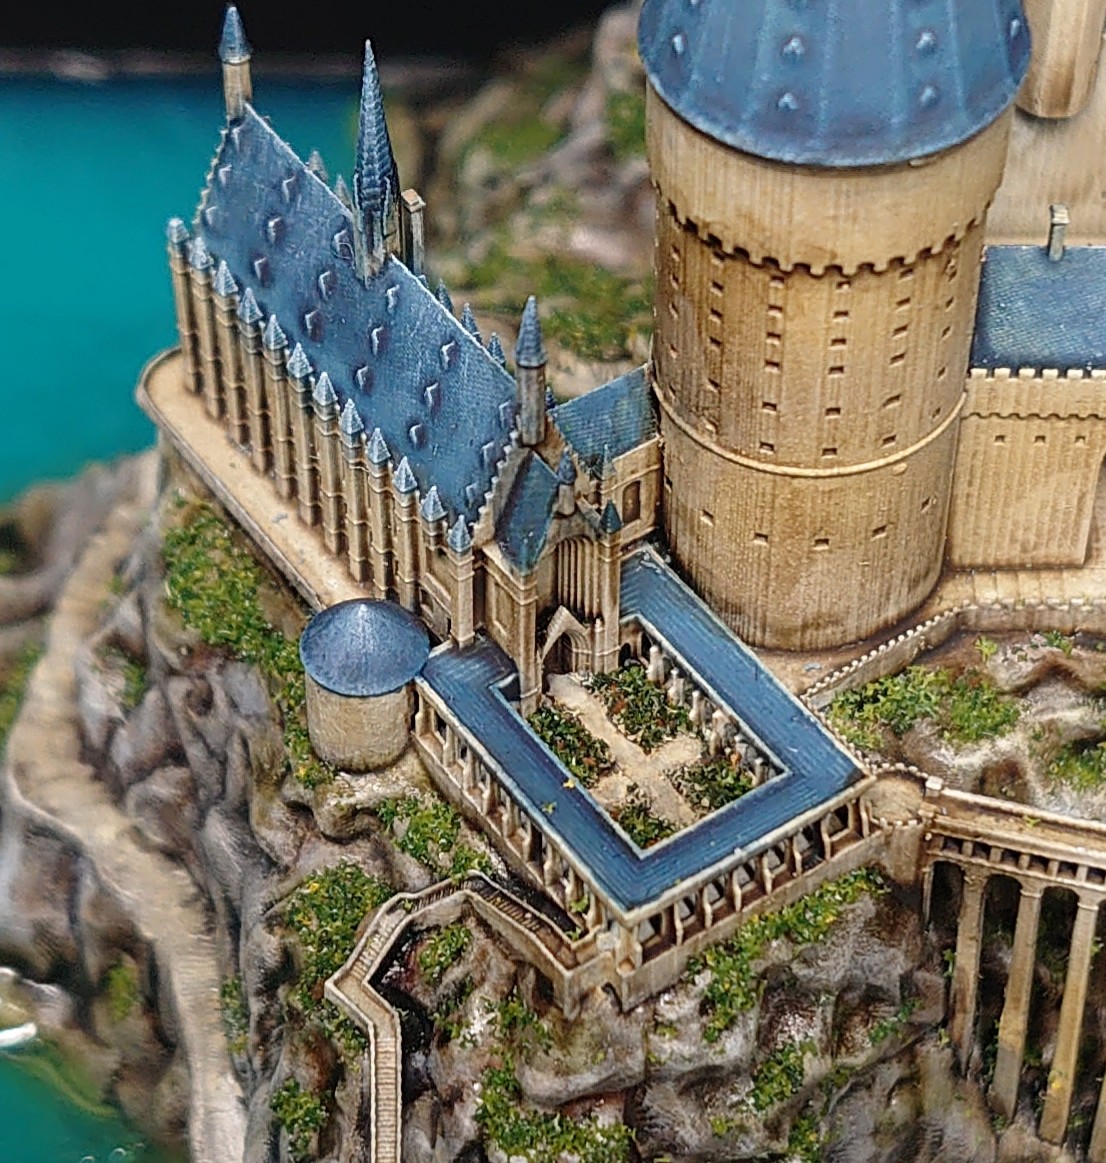
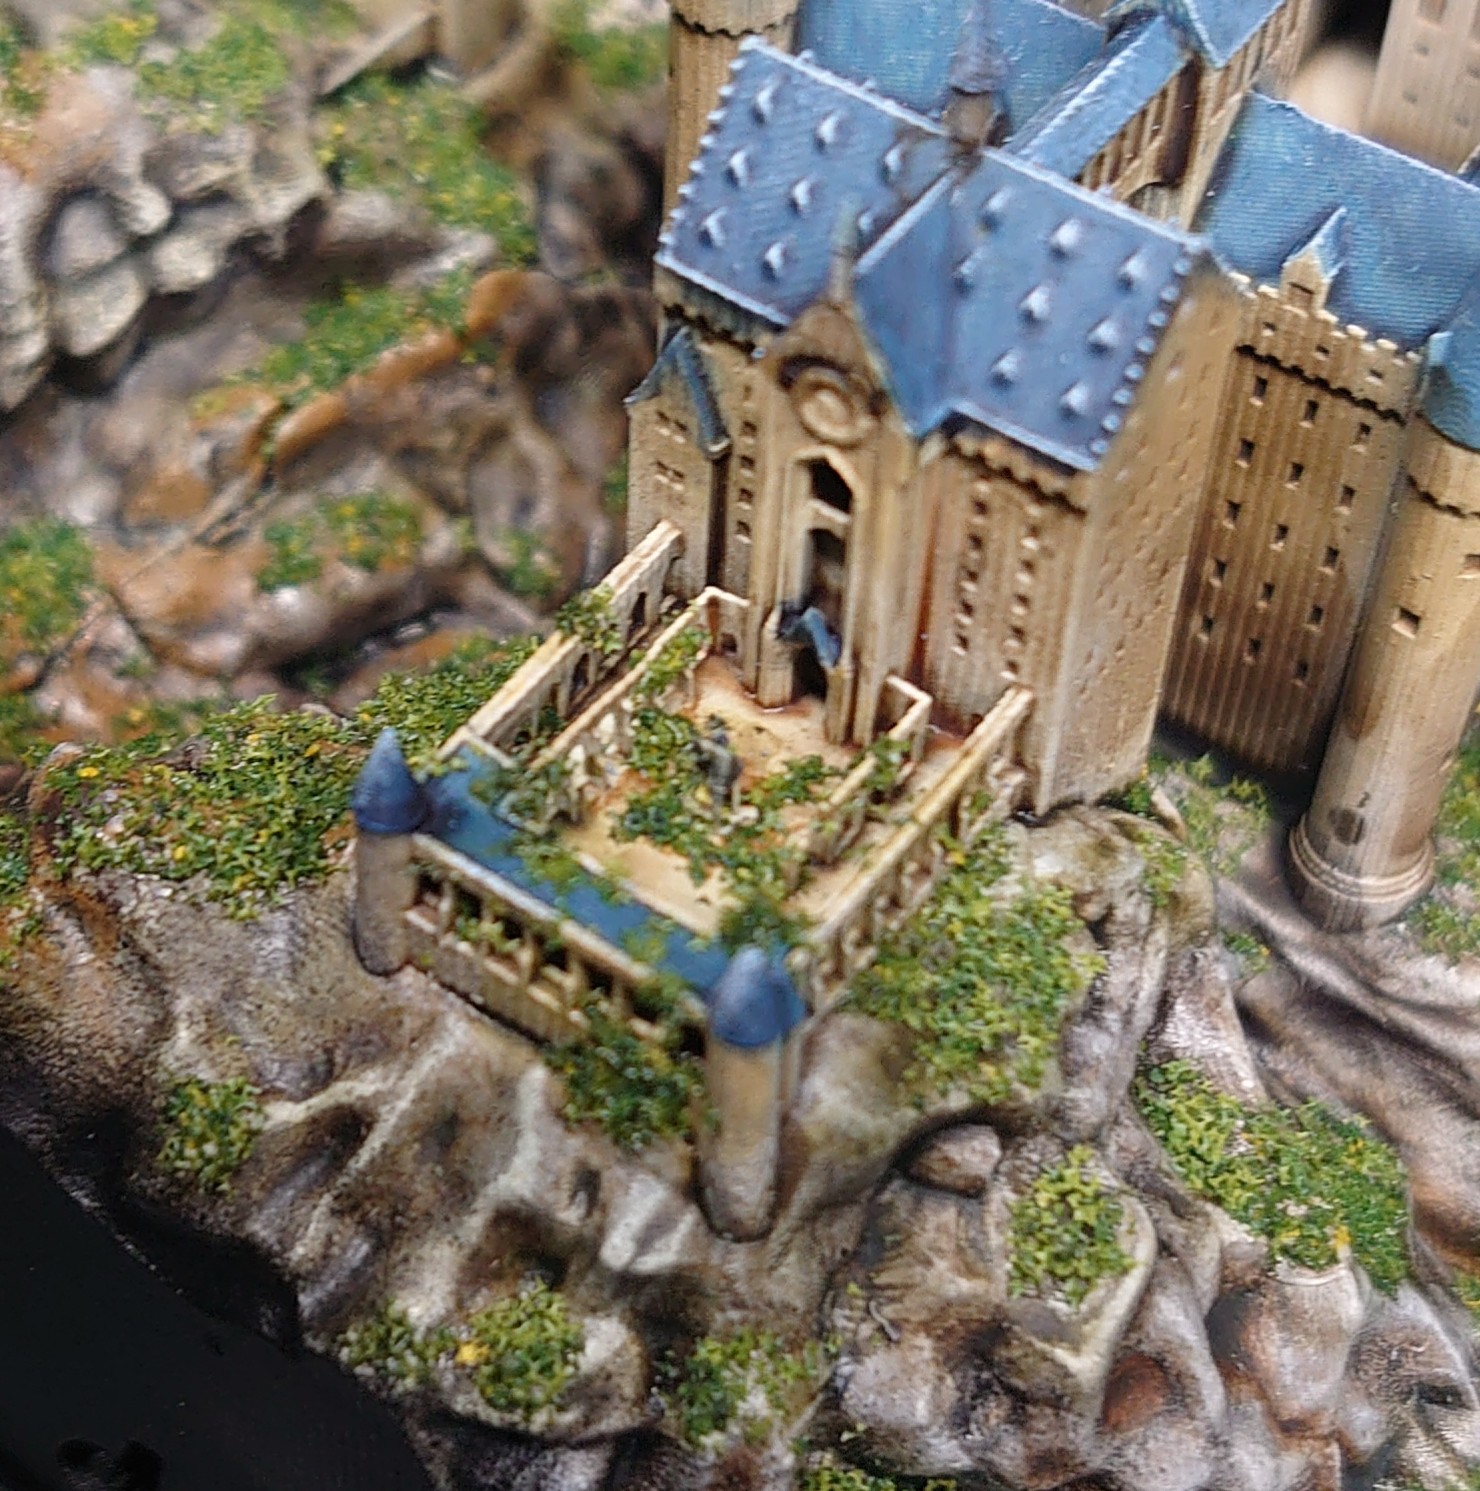
I was able to fill gaps between the seperate pieces effectively with a white wood filler and fine sand paper.
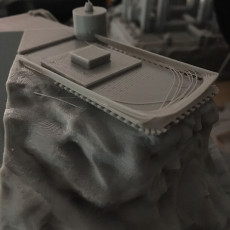
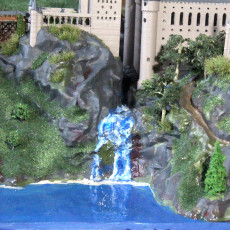
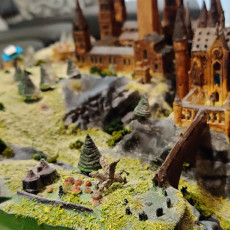
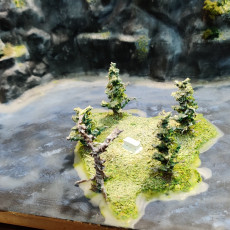
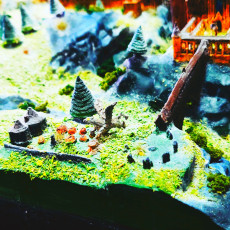
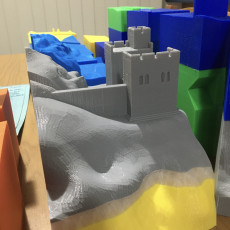
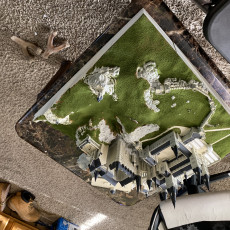
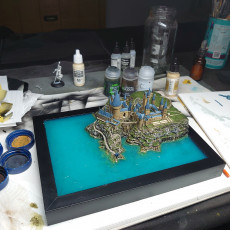
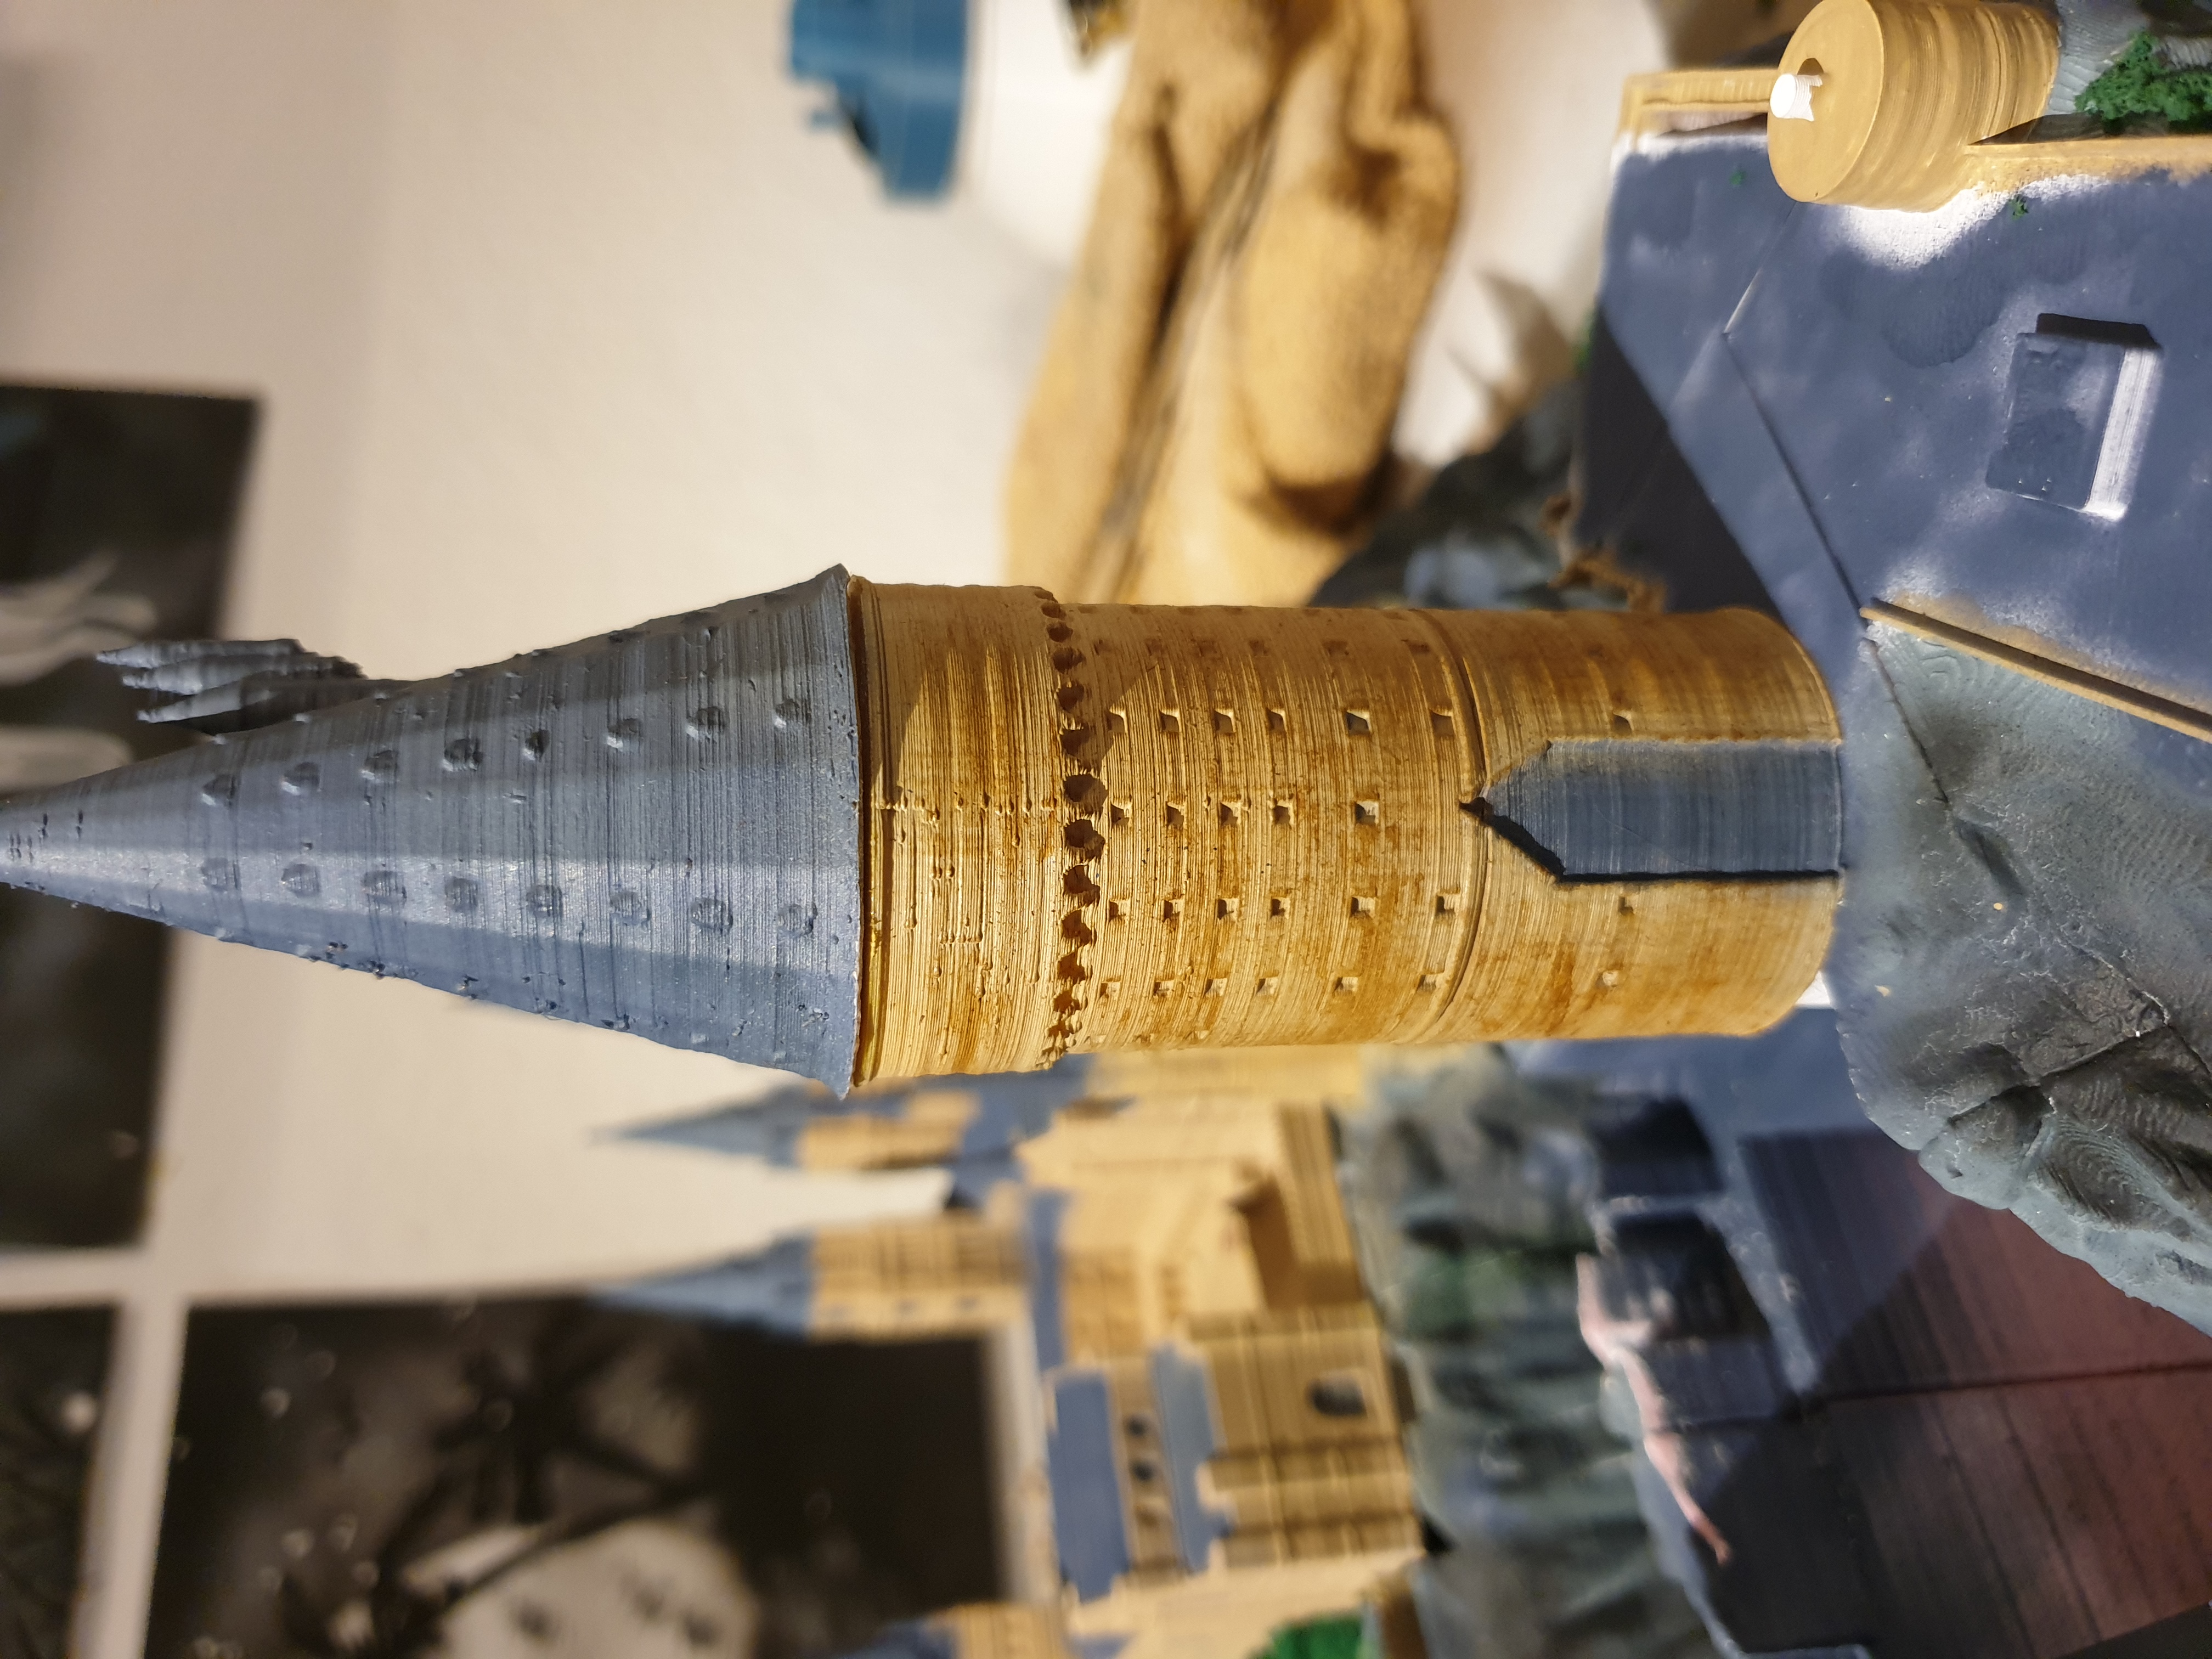
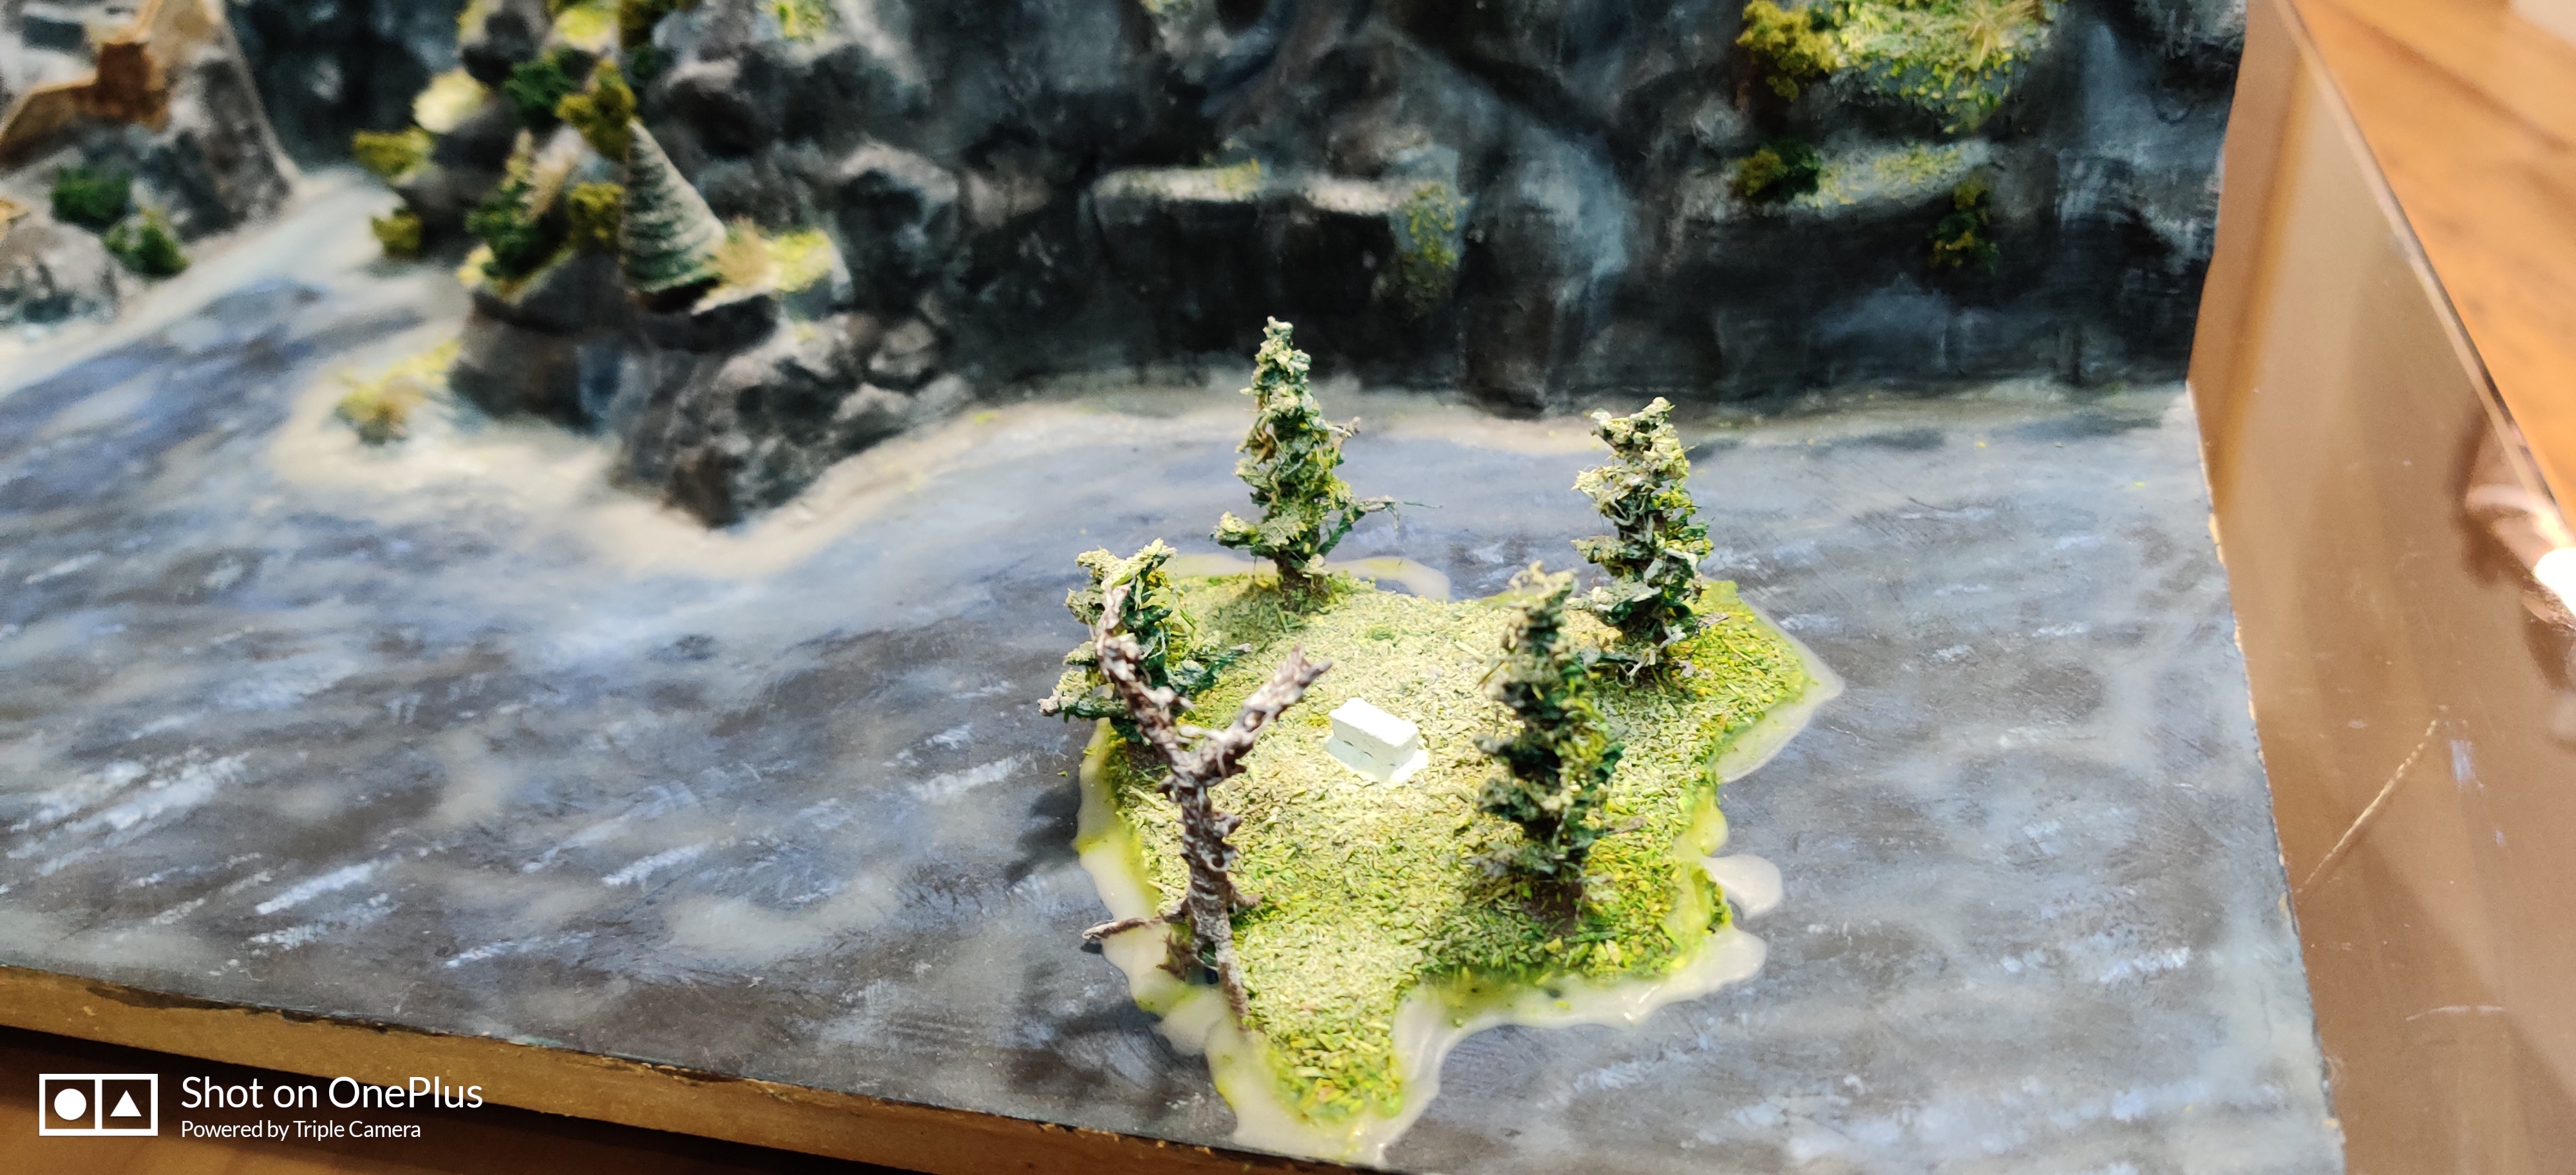
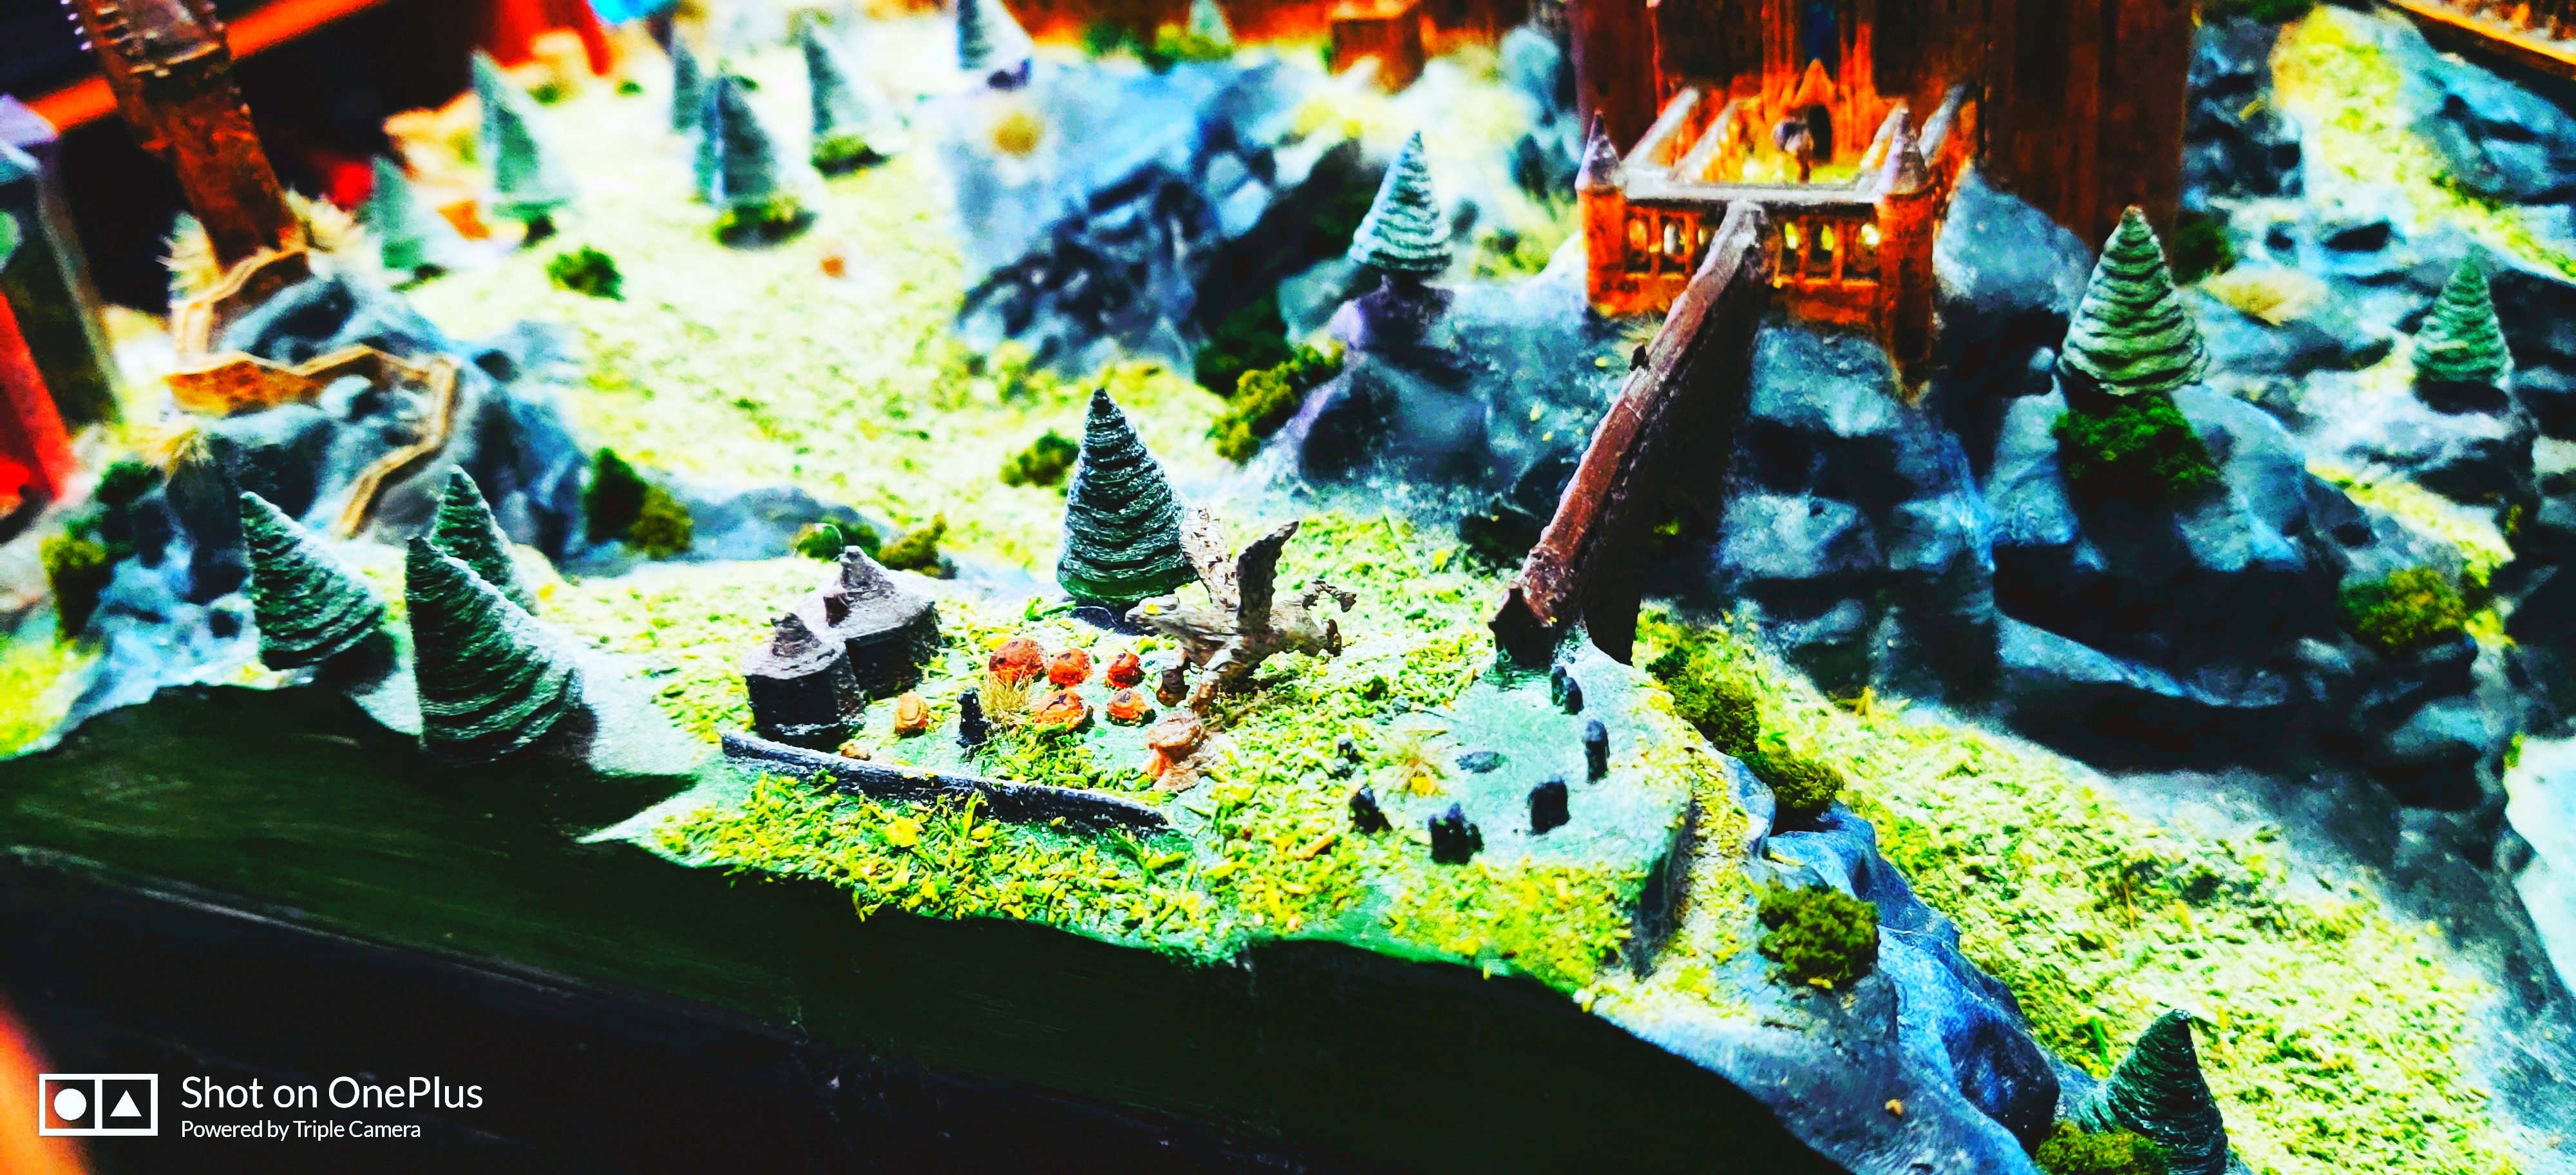
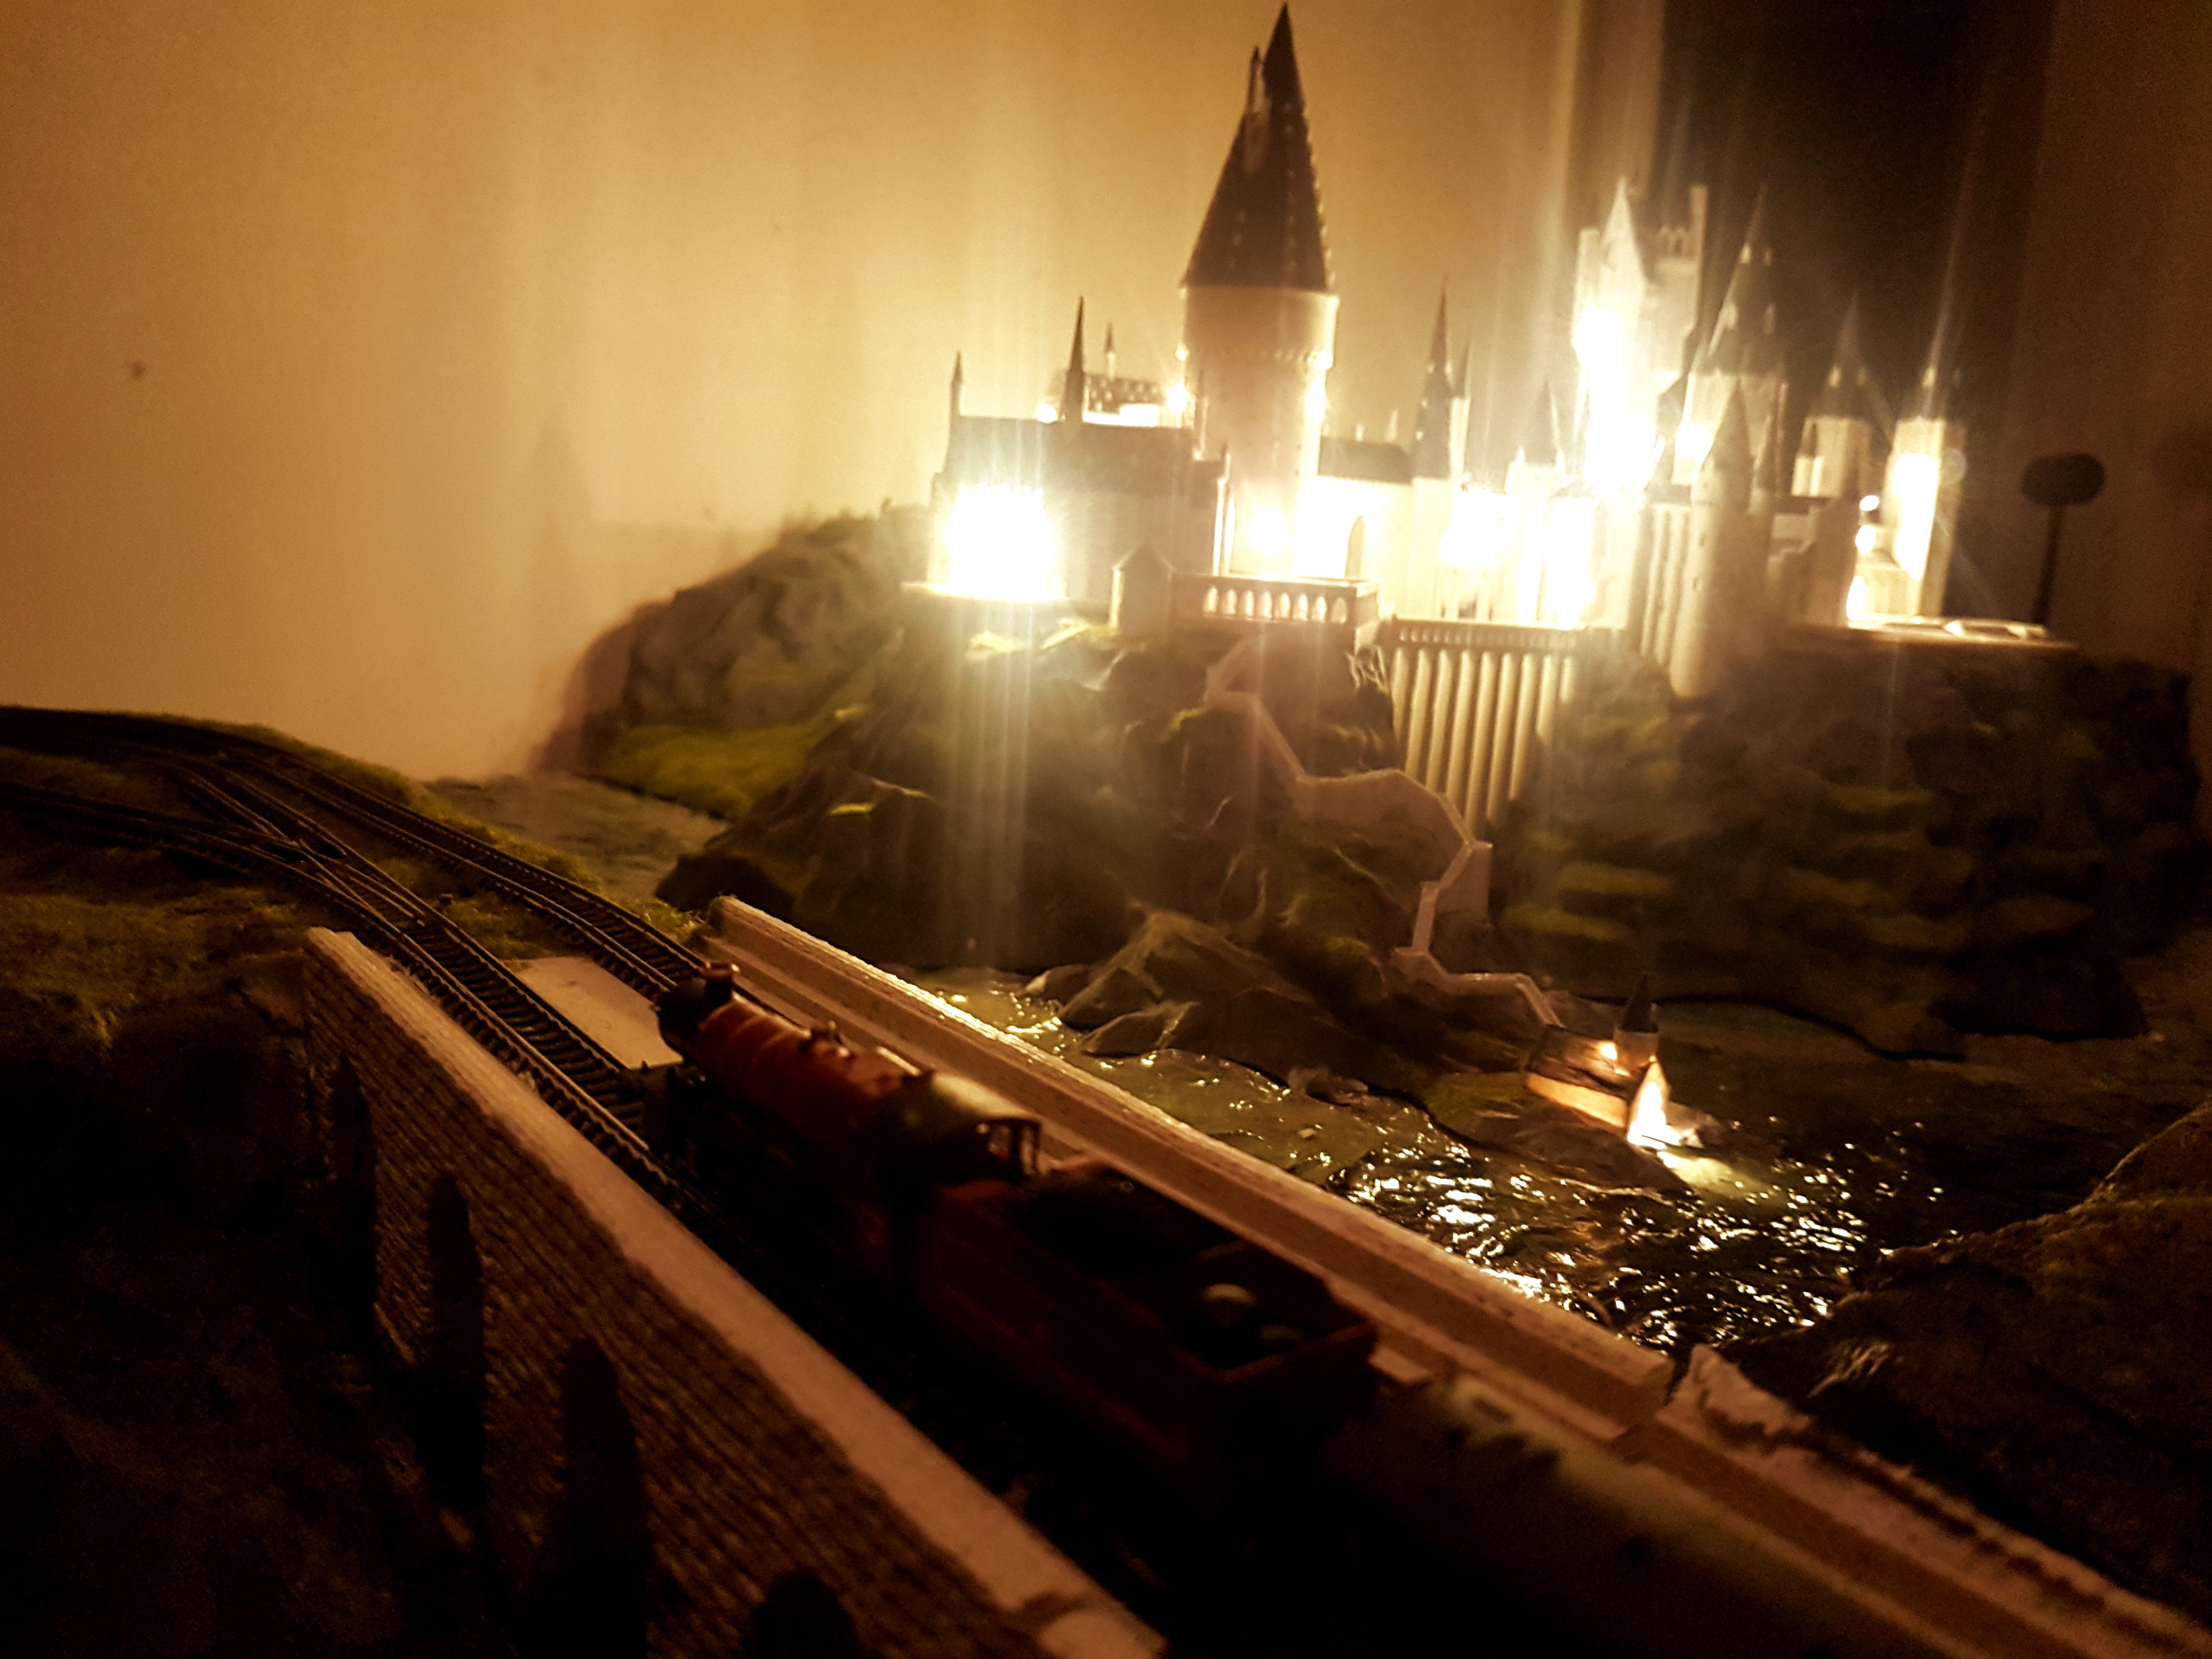
Rocks were painted with a series of grey washes (diluted paint). I used Woodland Scenics fine turf (green grass) for ground cover. The trees were made from painted pipe cleaners.
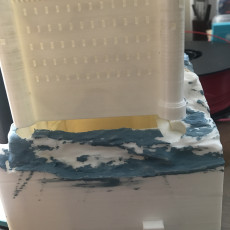
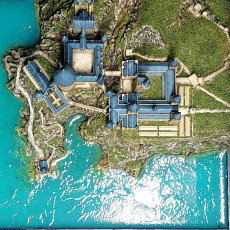
Water effects are accomplished with a painted base board, and covered with a few brushed-on layers of gloss Mod Podge. The final layer was stippled with a brush to give the ripple texture.


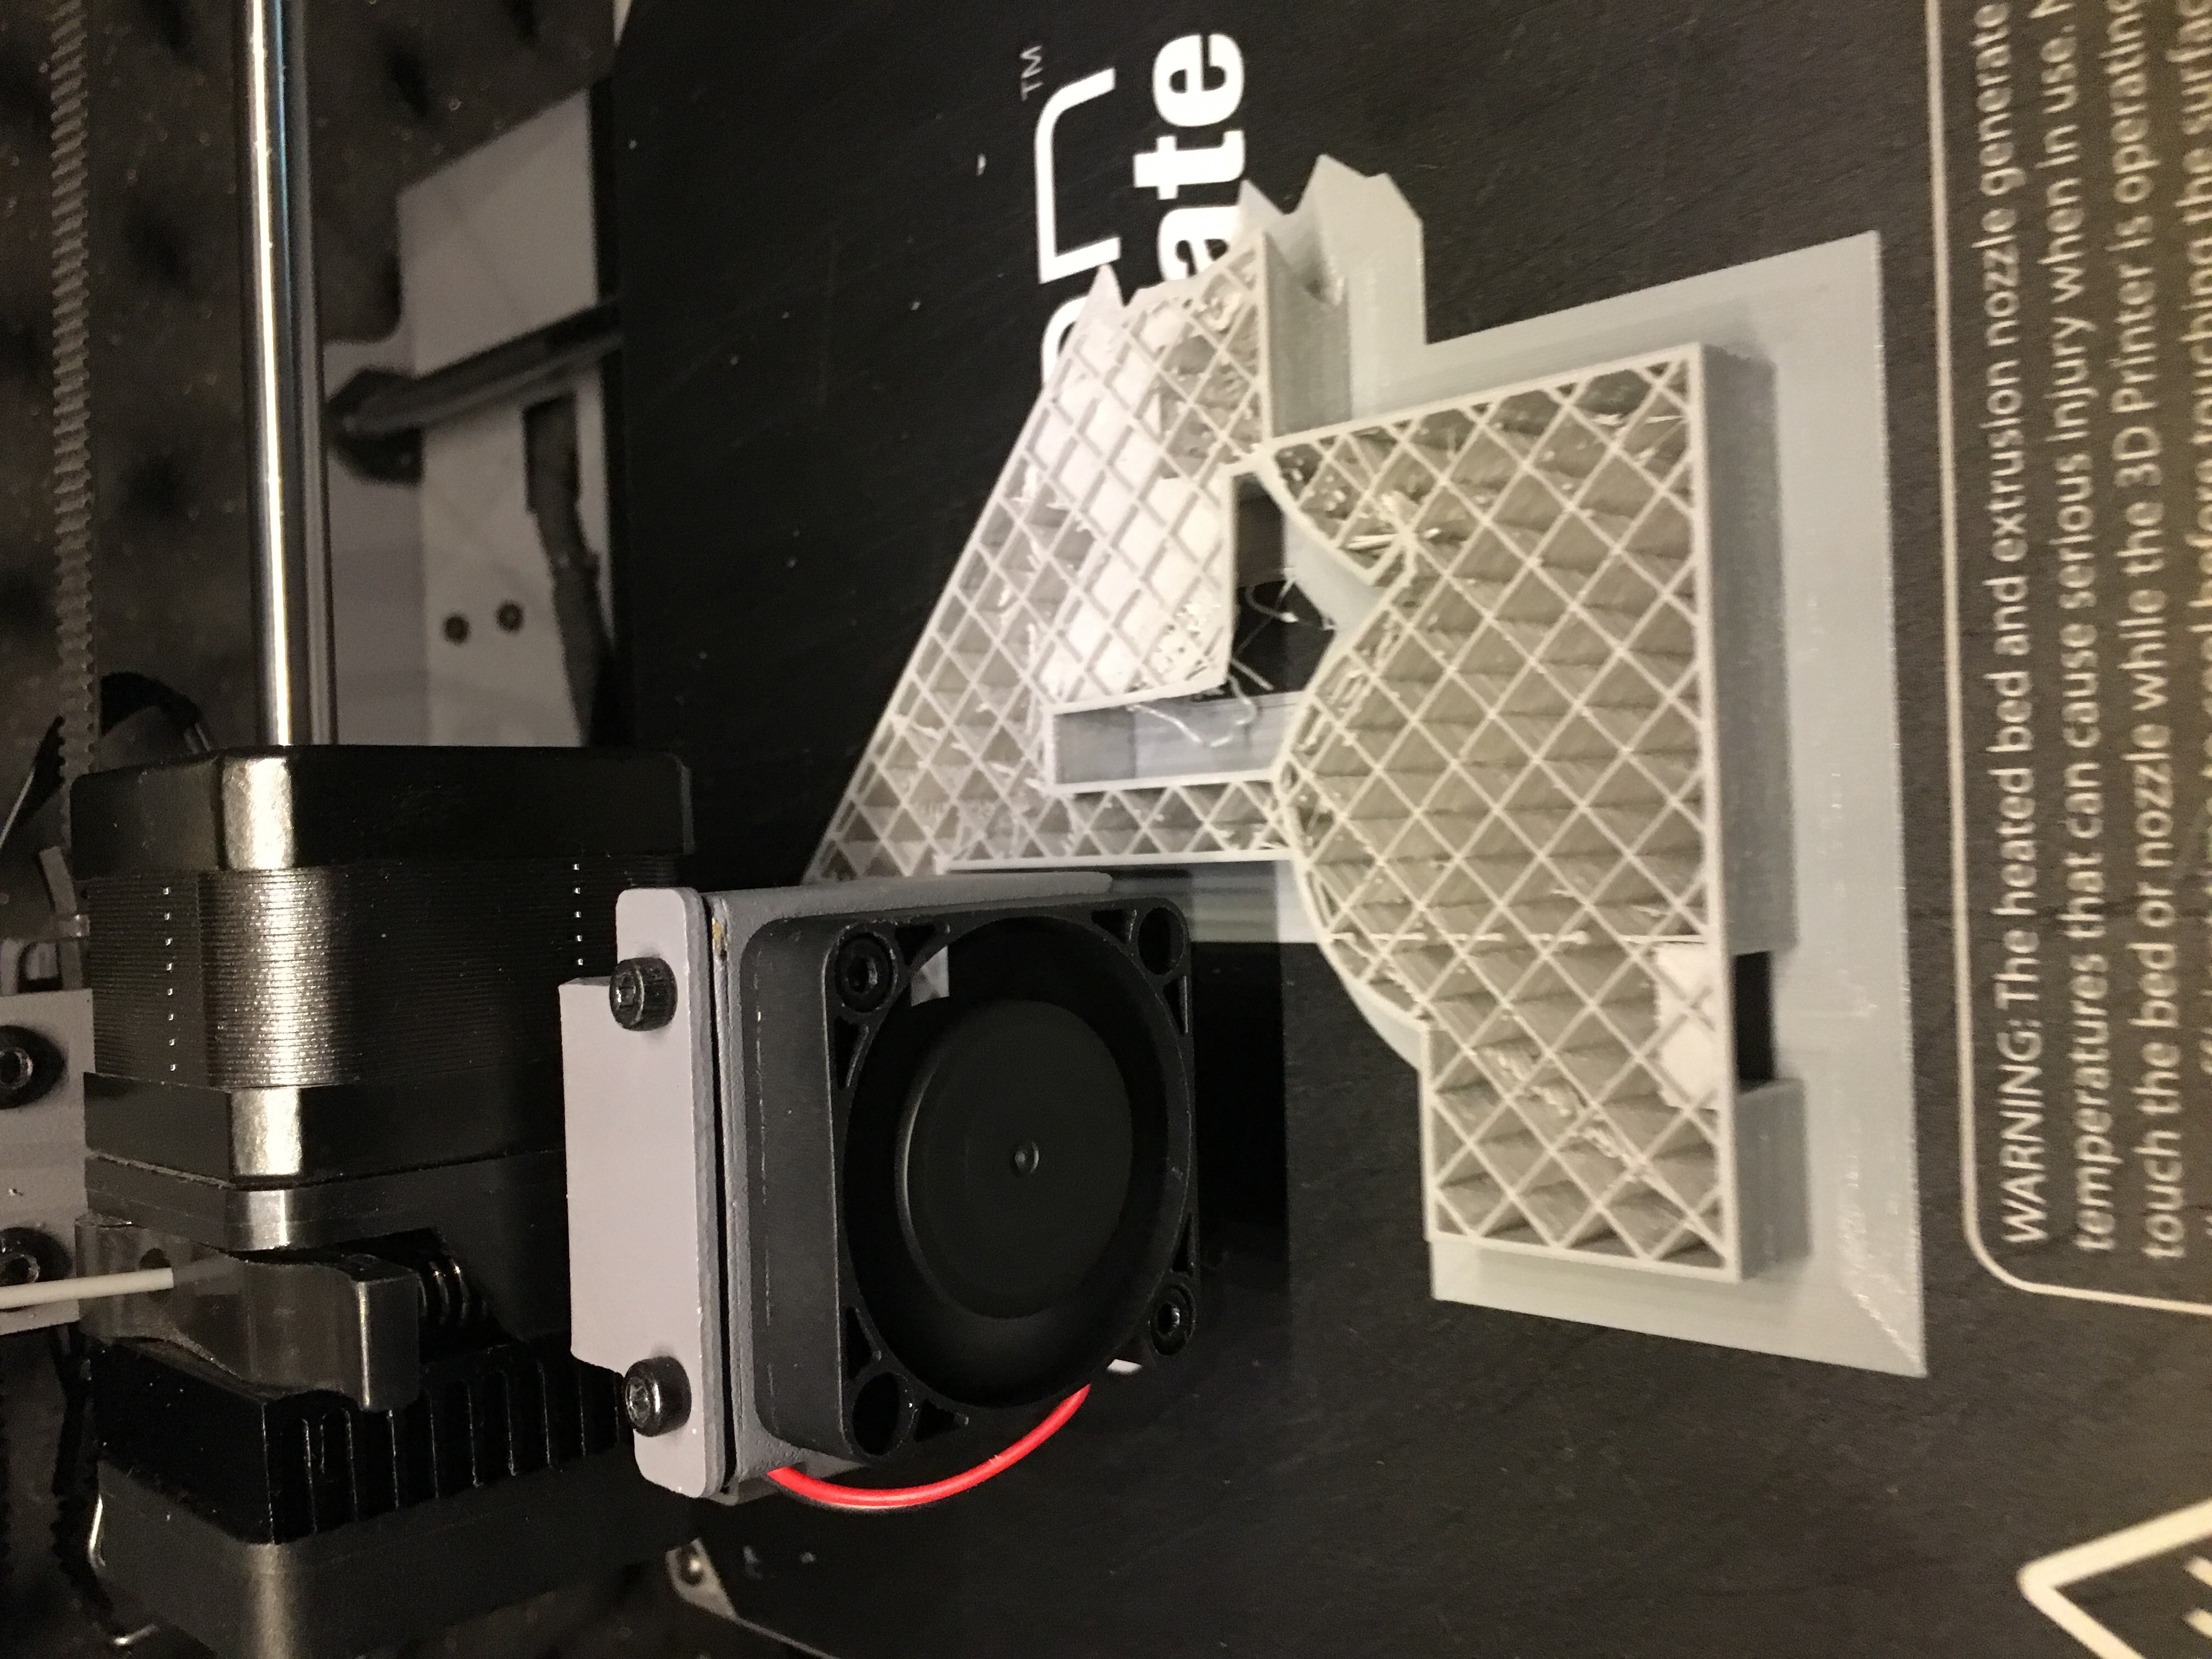
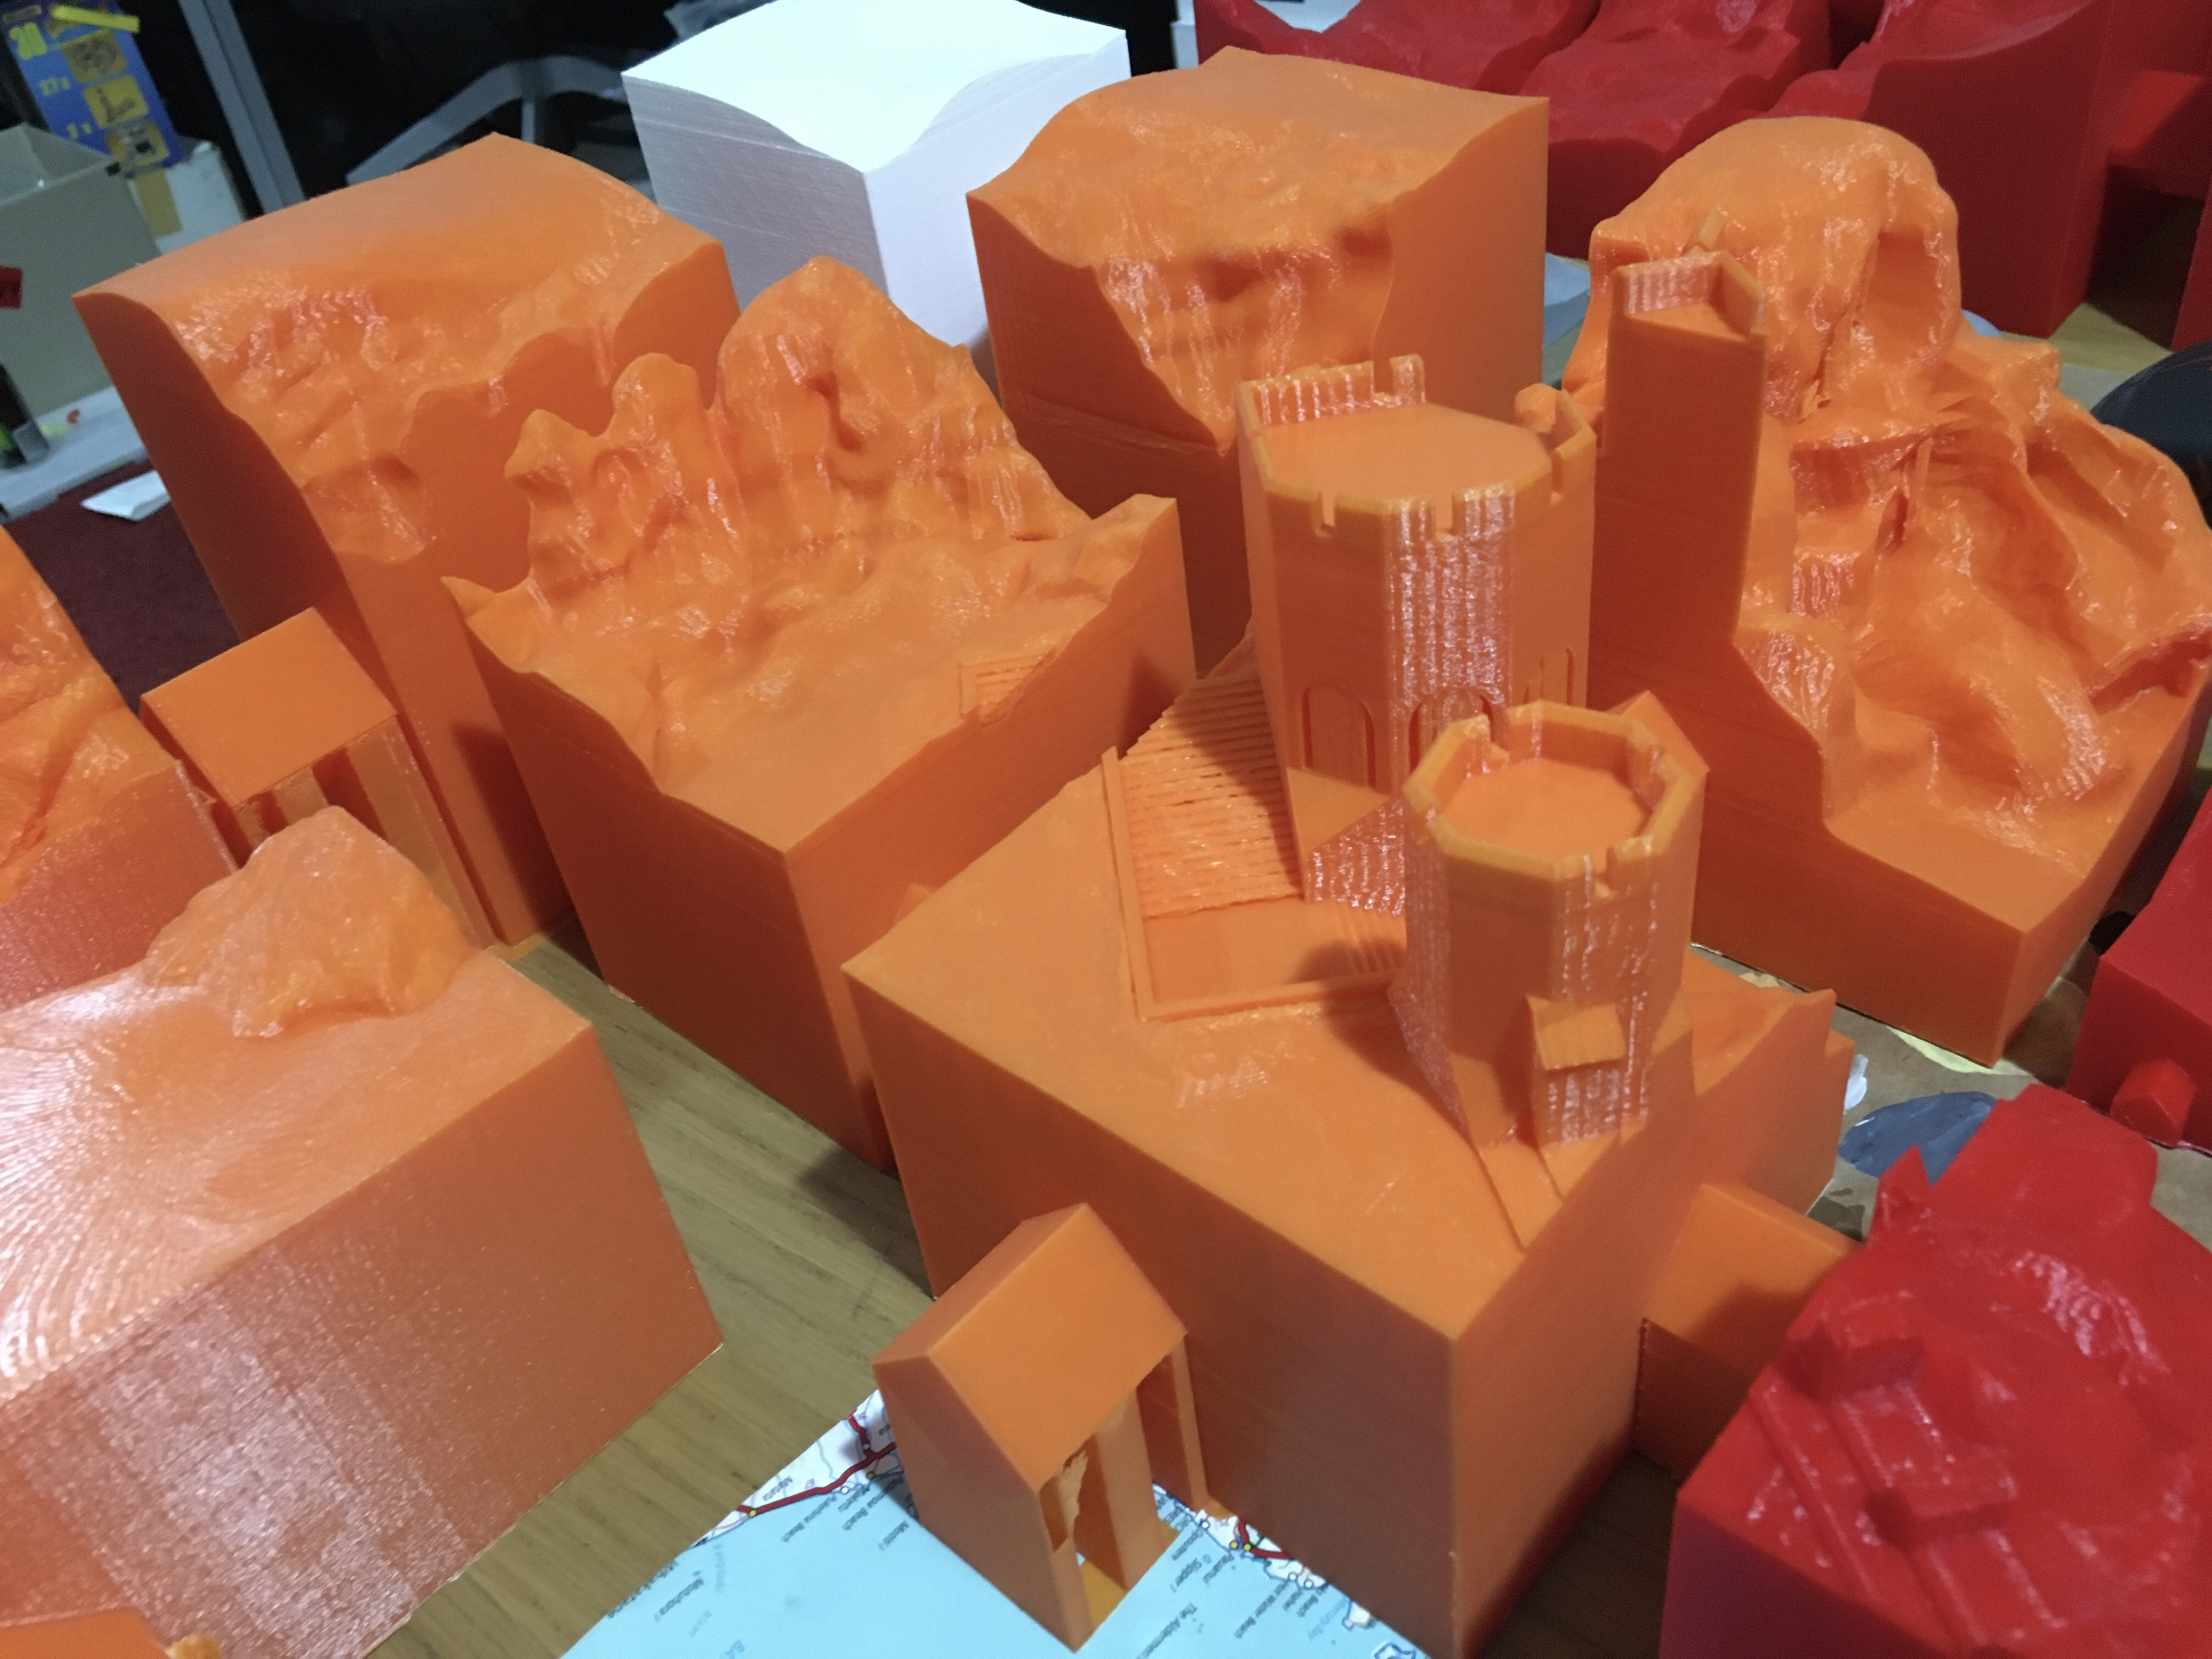
Flaws in the STL files may cause slicing errors. Carefully inspect your GCODE preview before sending to your printer!
I was able to print successfully using Cura and selecting the appropriate ‘Mesh Fixes’.
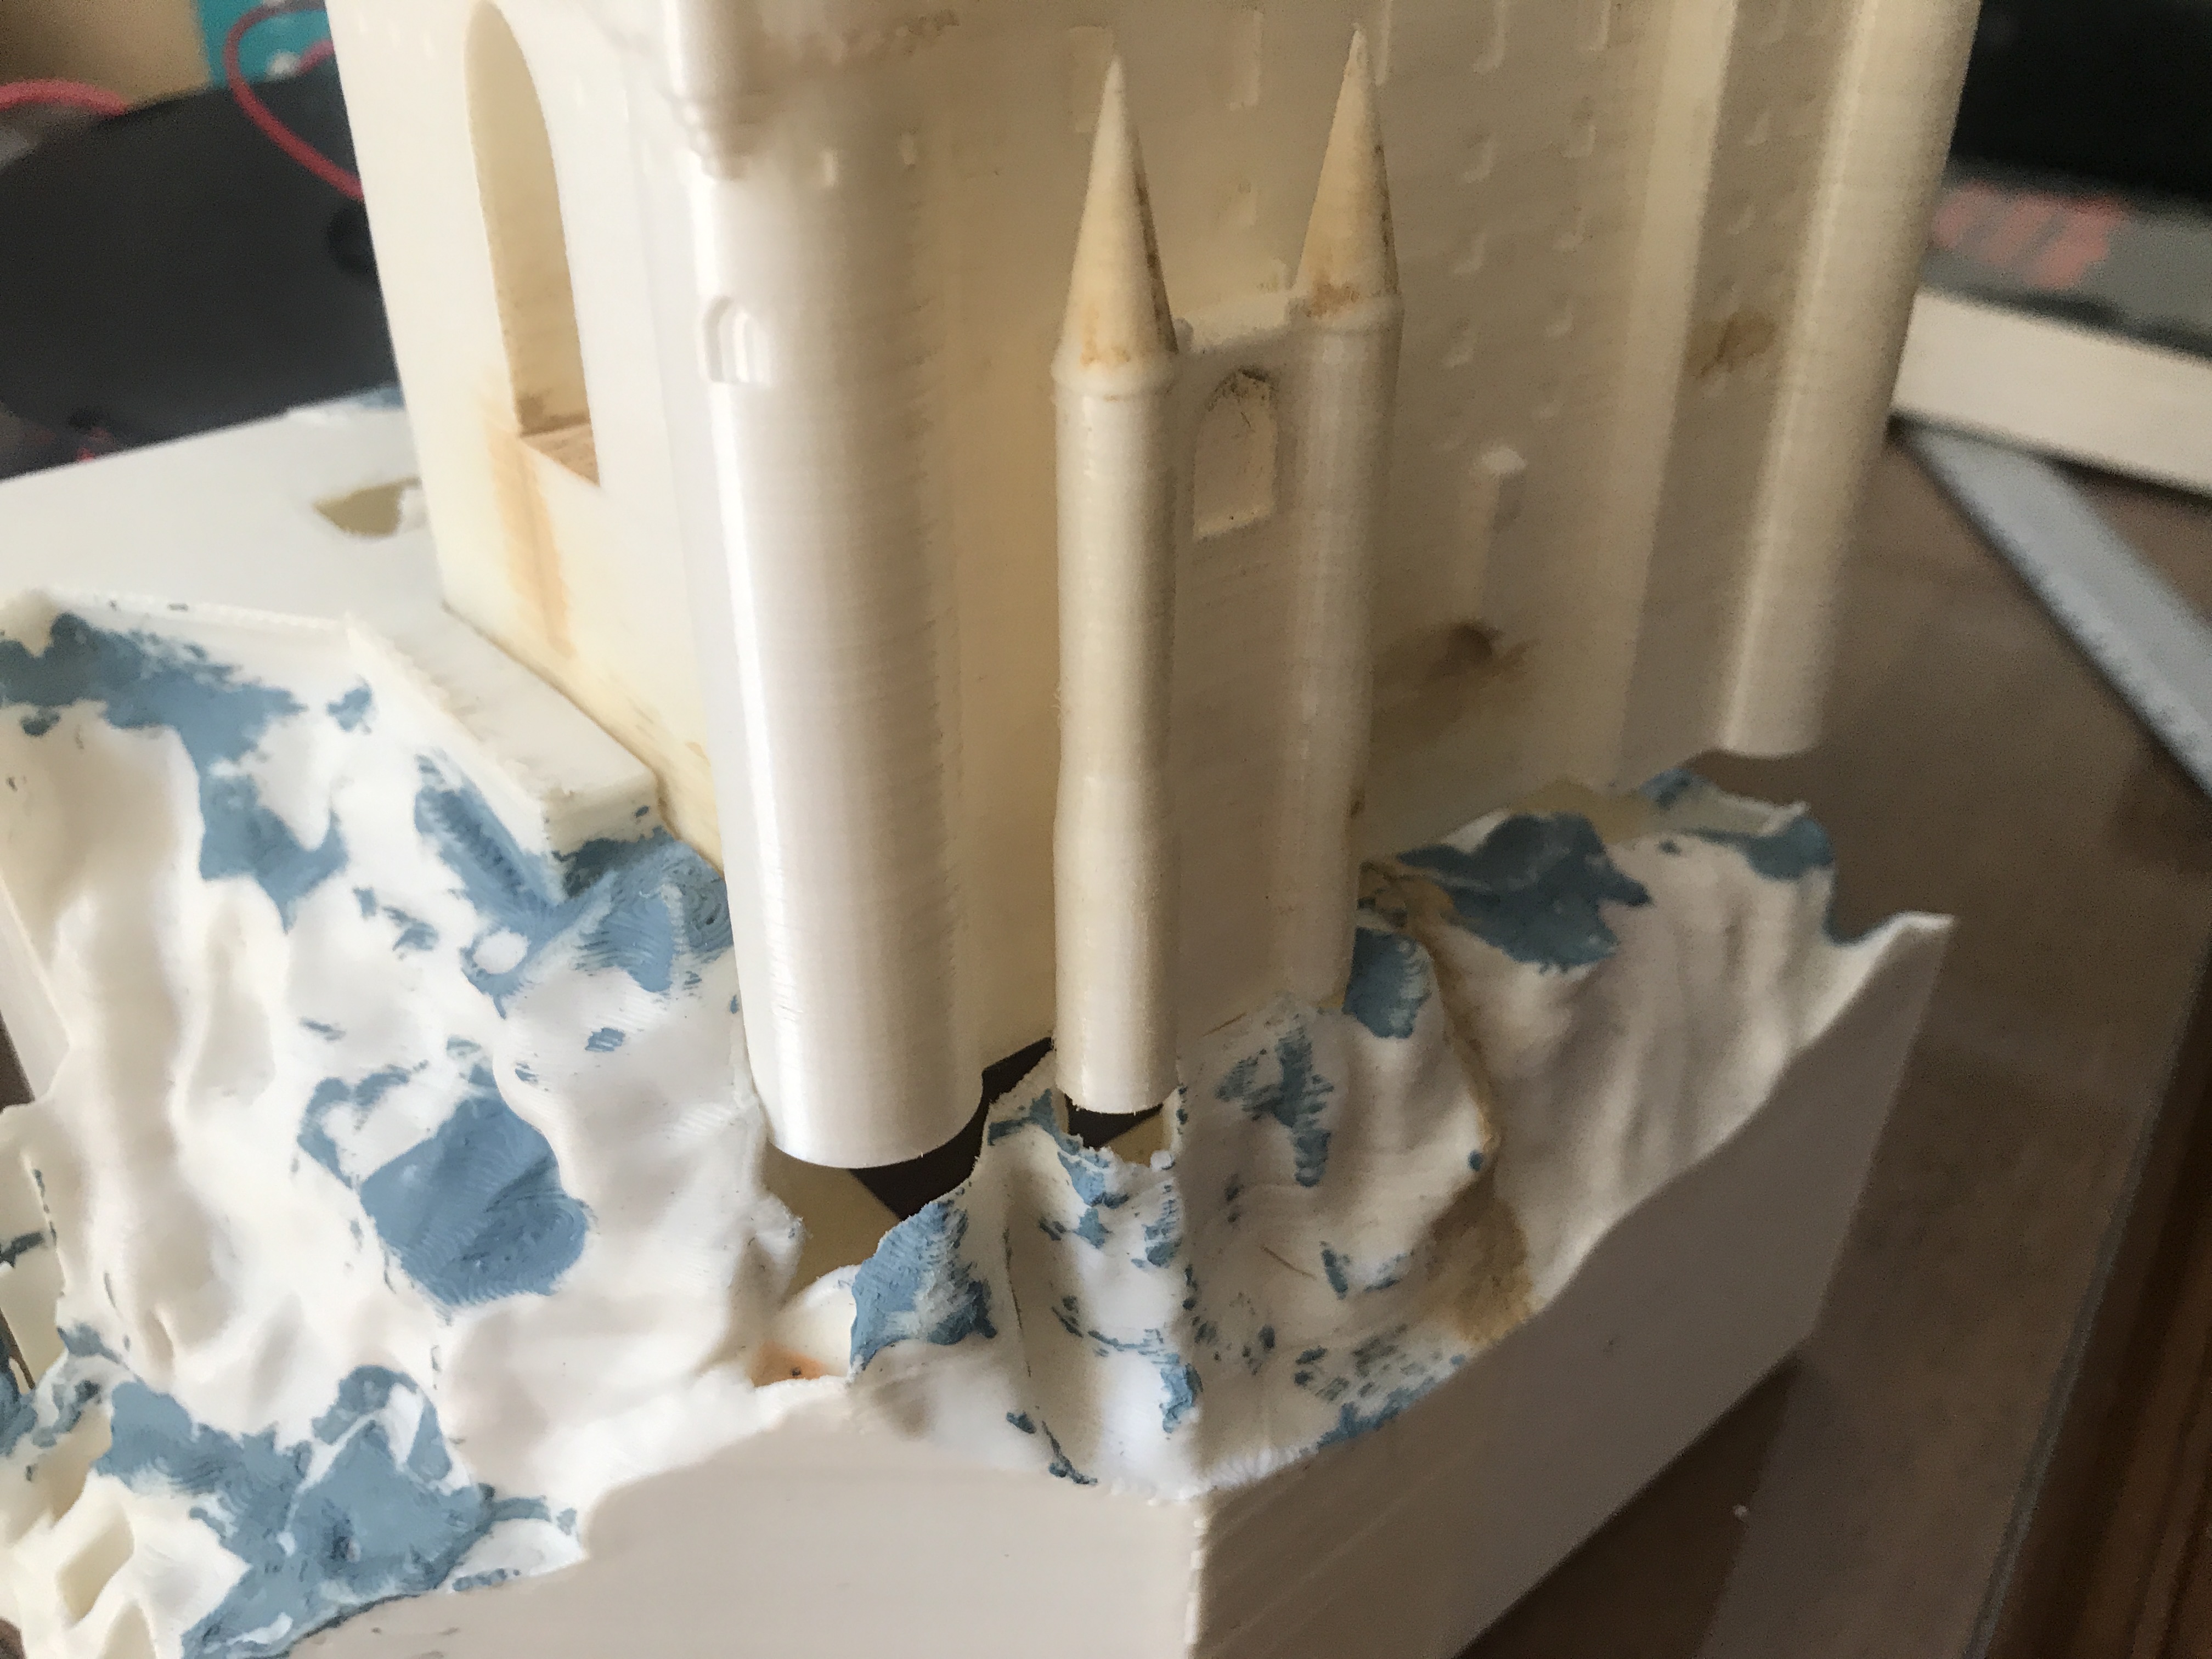
I printed with 0.06 mm layer heights, at low print speeds to ensure maximum detail.
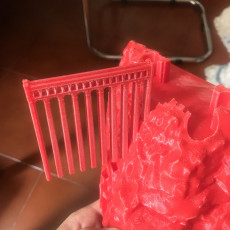
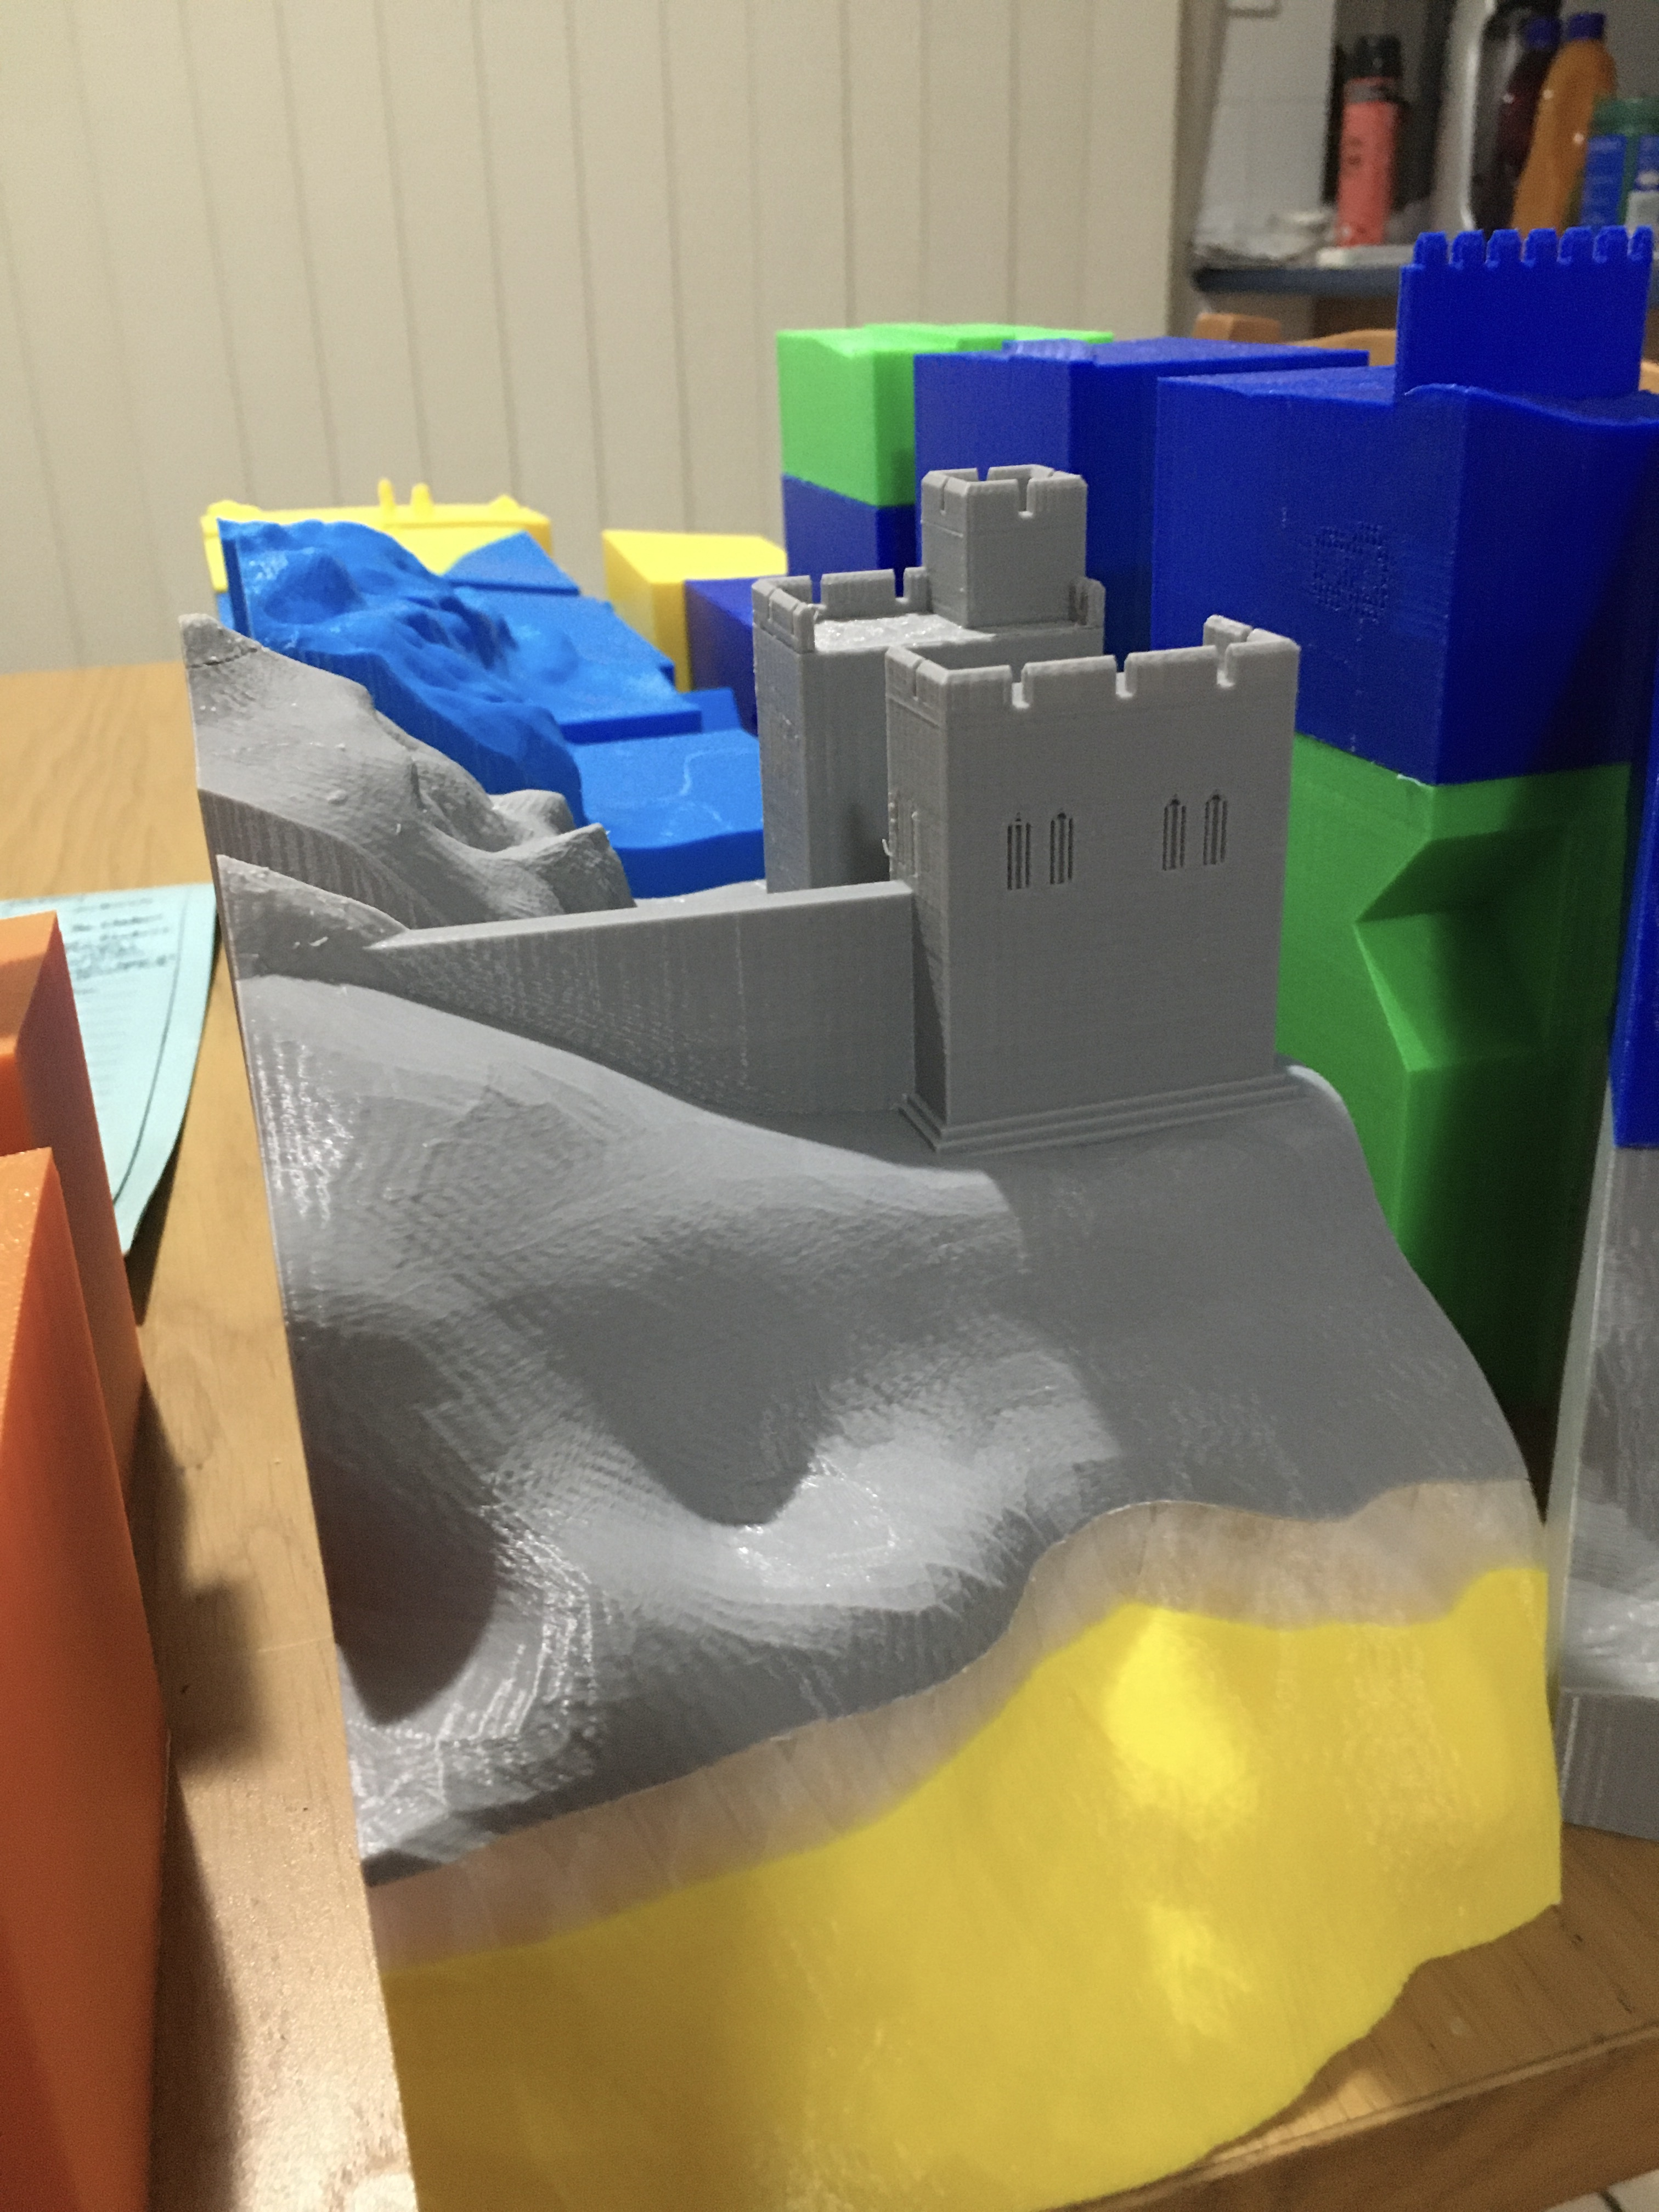
The majority of pieces do not need support.
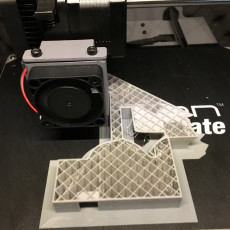
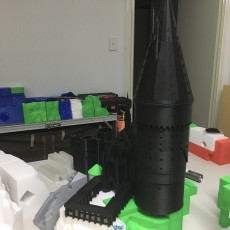
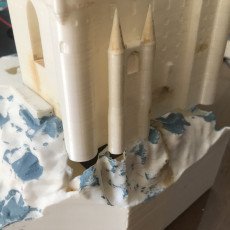
For printing the pointed rooftops, it is important to ensure the printed part has adequate cooling. I found it effective to print a hollow cylinder beside these peices, scaled in the Z axis to match the height of the part. This gives the part extra time to cool between each layer. The cylinder I used for this is included in the files.
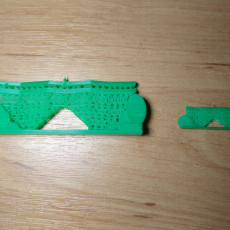
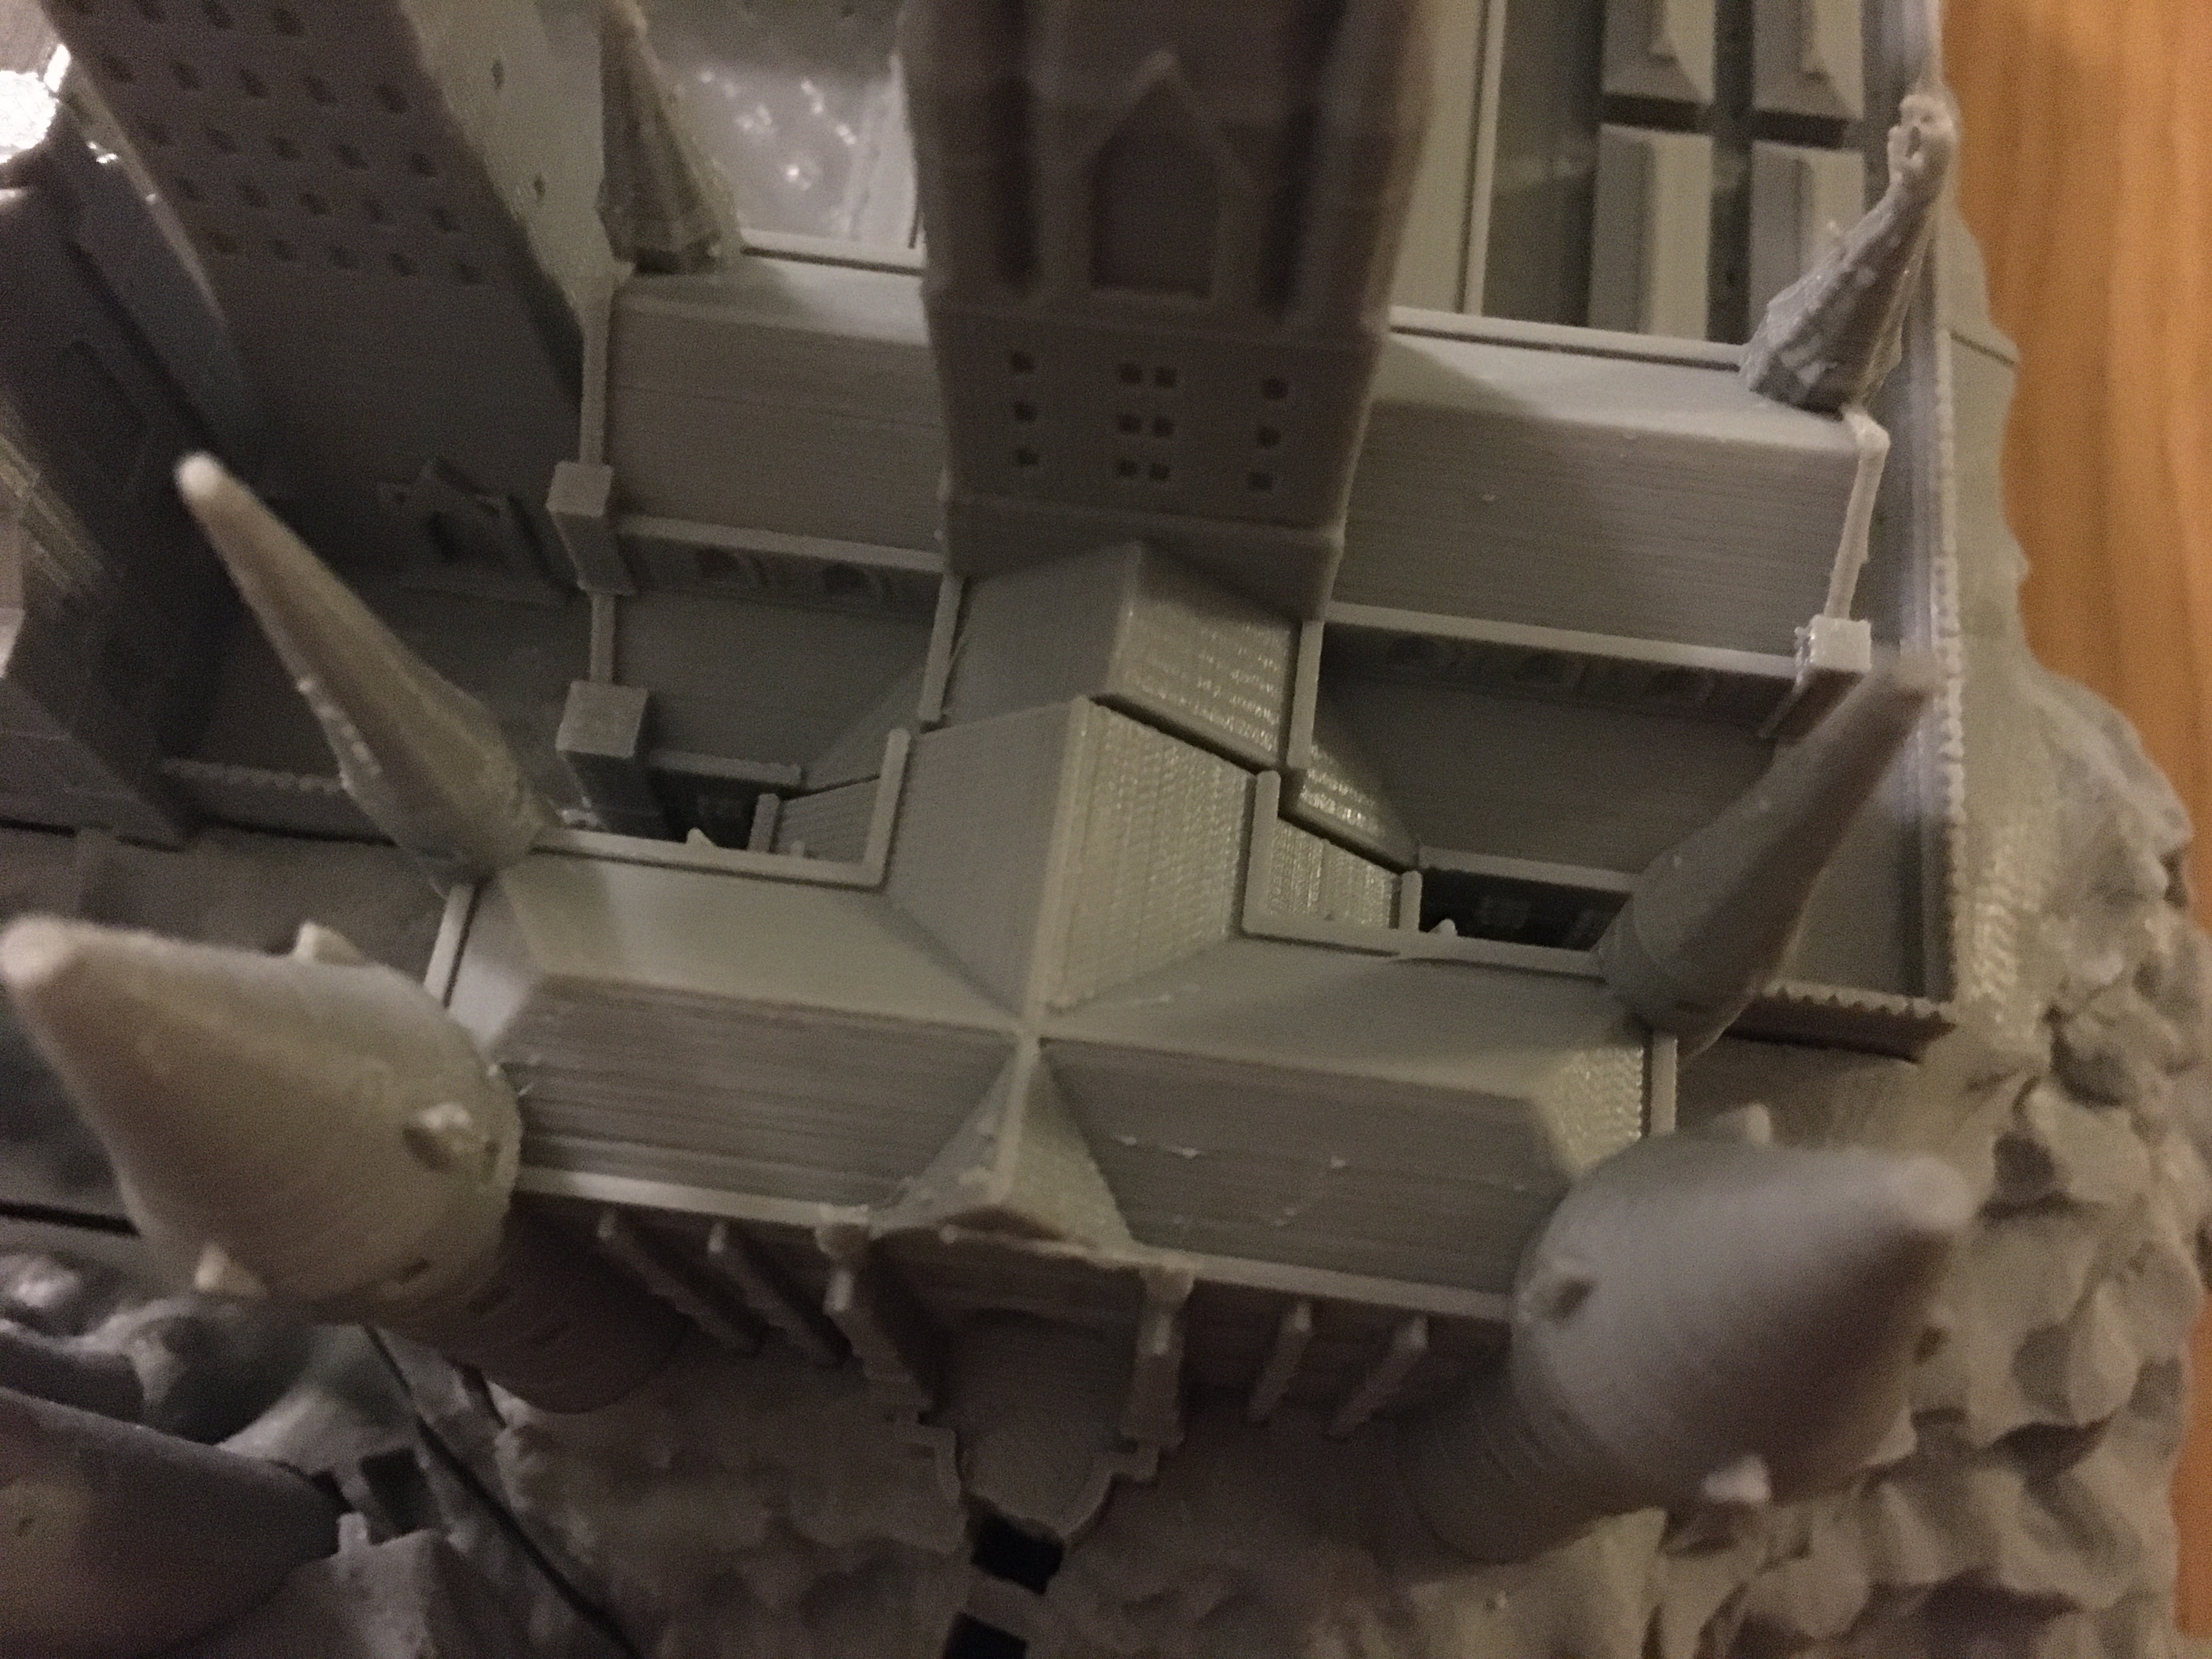
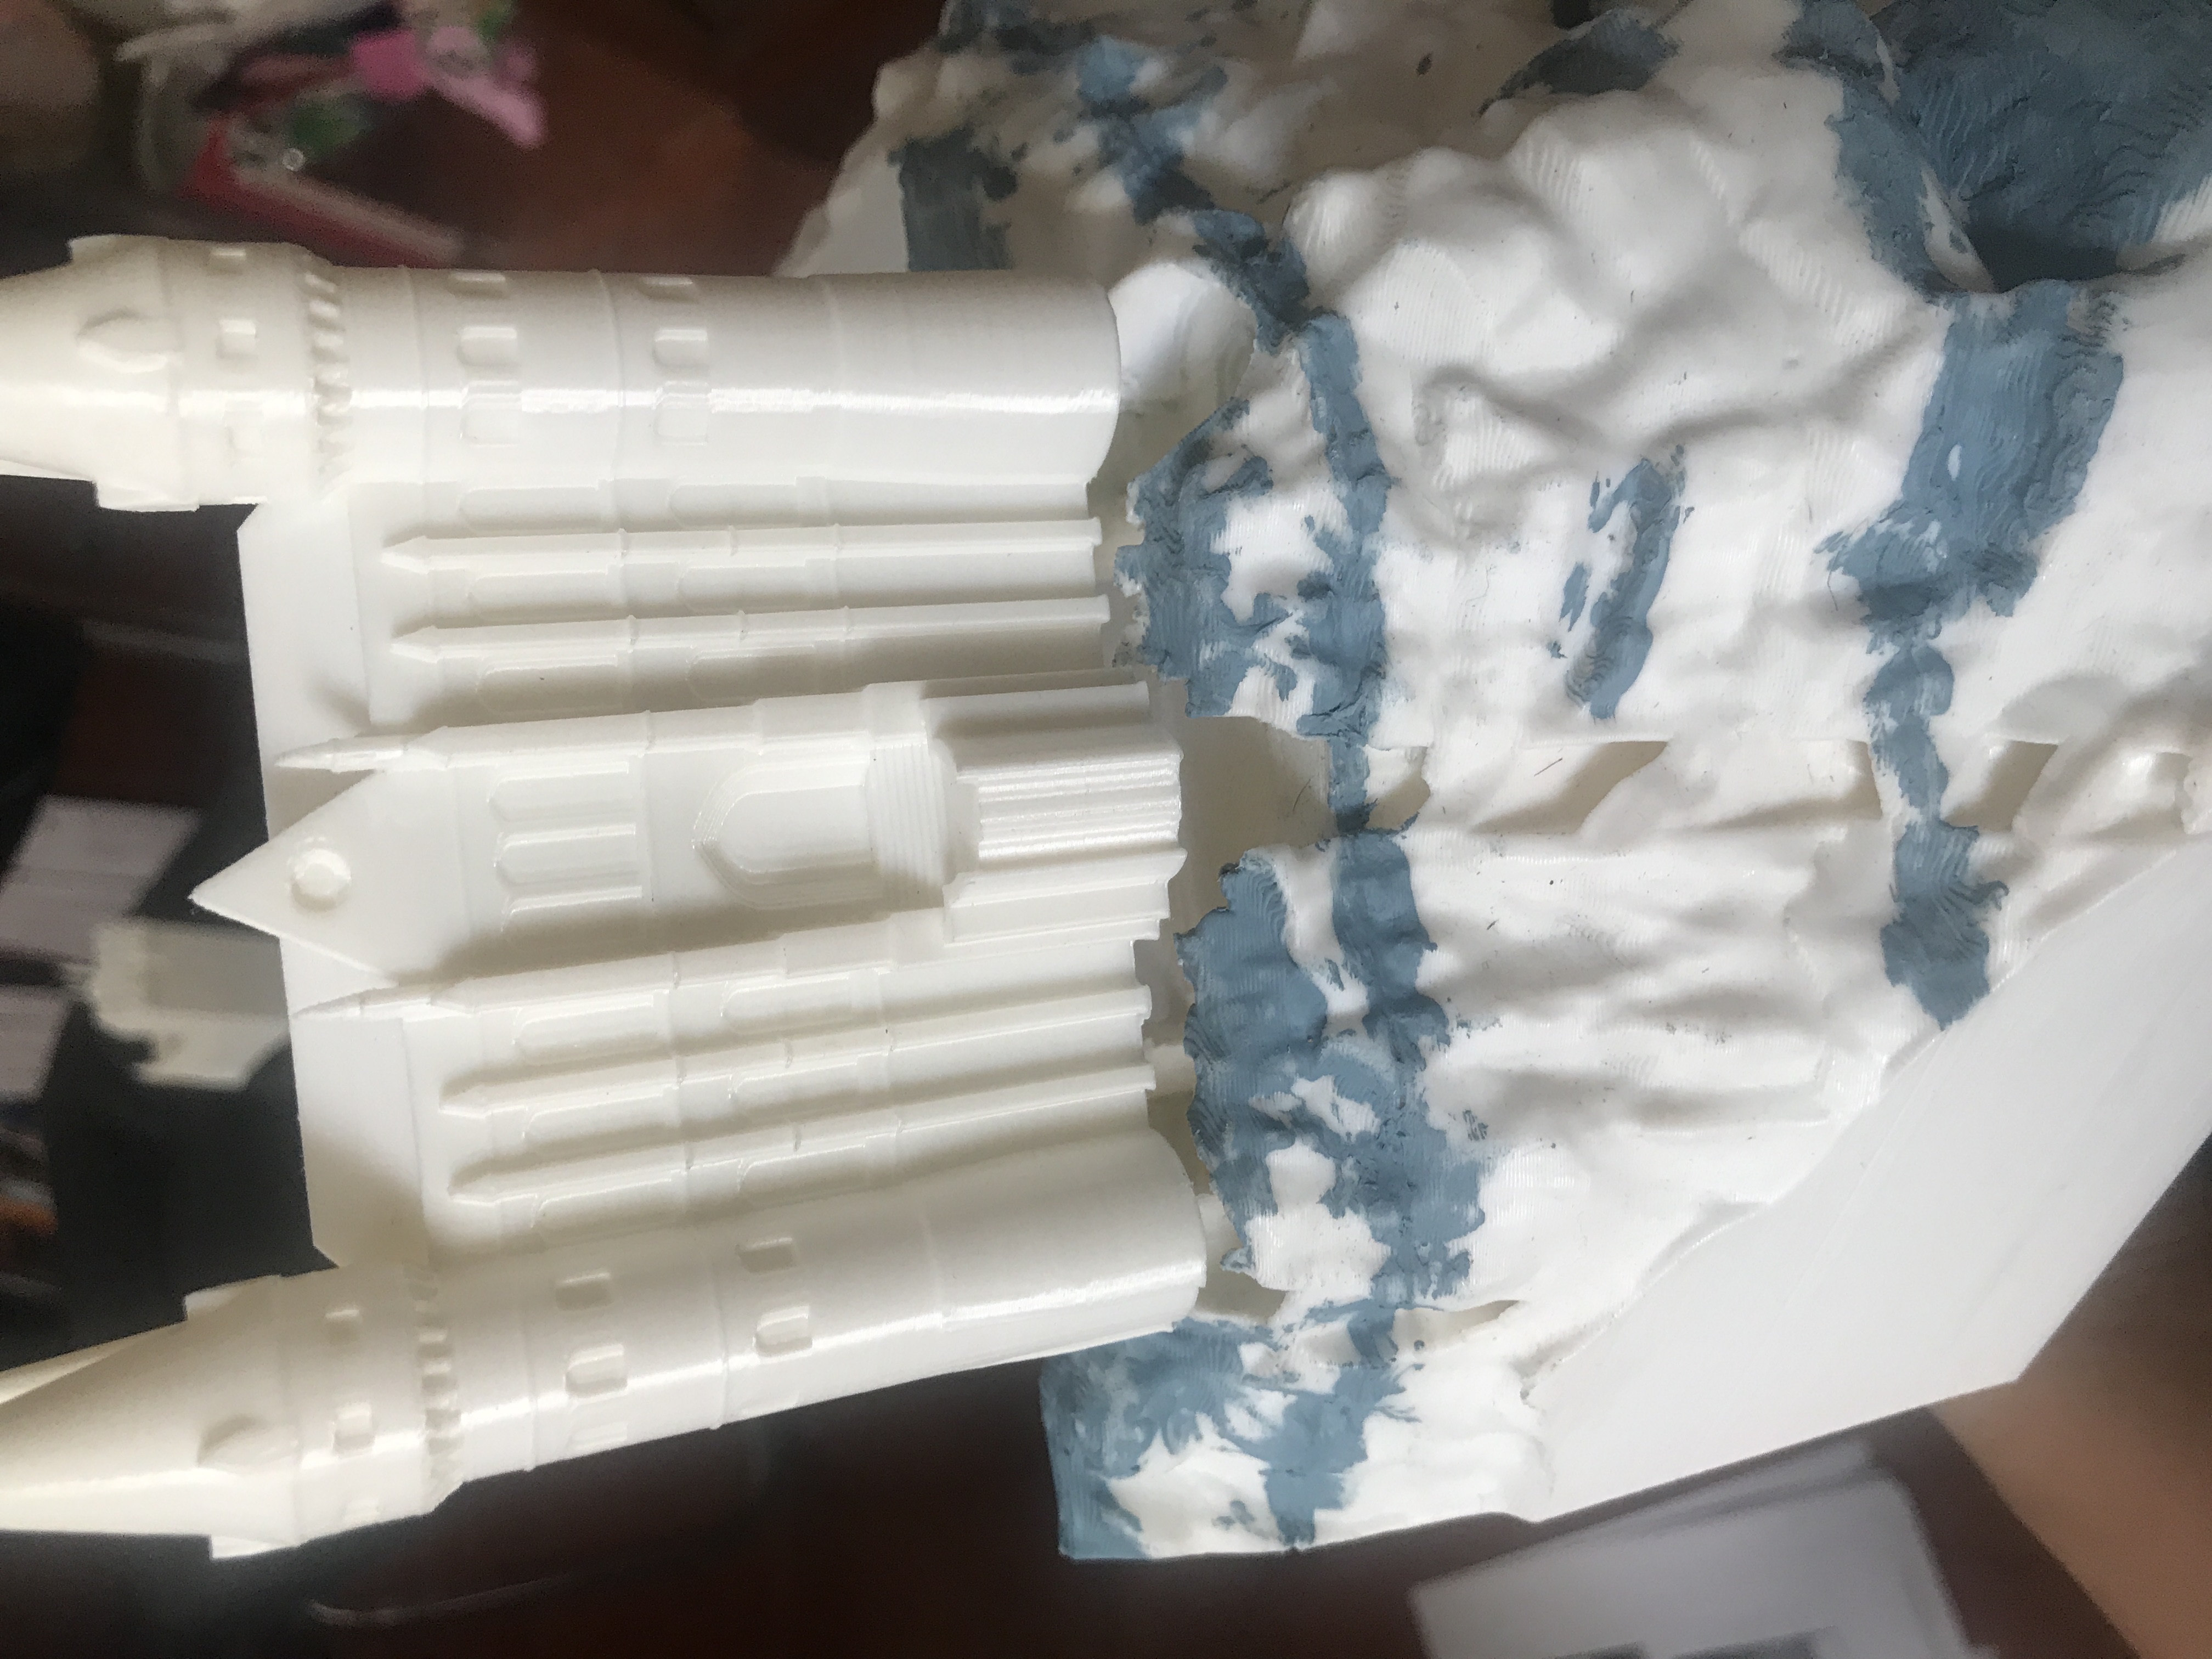
There are two options for printing the major northern wing of the castle. One version is deeper and includes the front section that opens onto the main viaduct. The other version needs to be printed seperately from the front section, and riser blocks need to be printed to make it sit at the correct height. The latter option cuts down the print time of the peice and saves plastic, while the former saves having to hide the seam between the main structure and the front section.
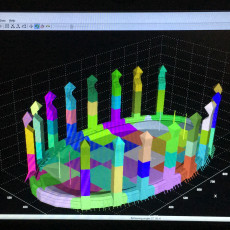
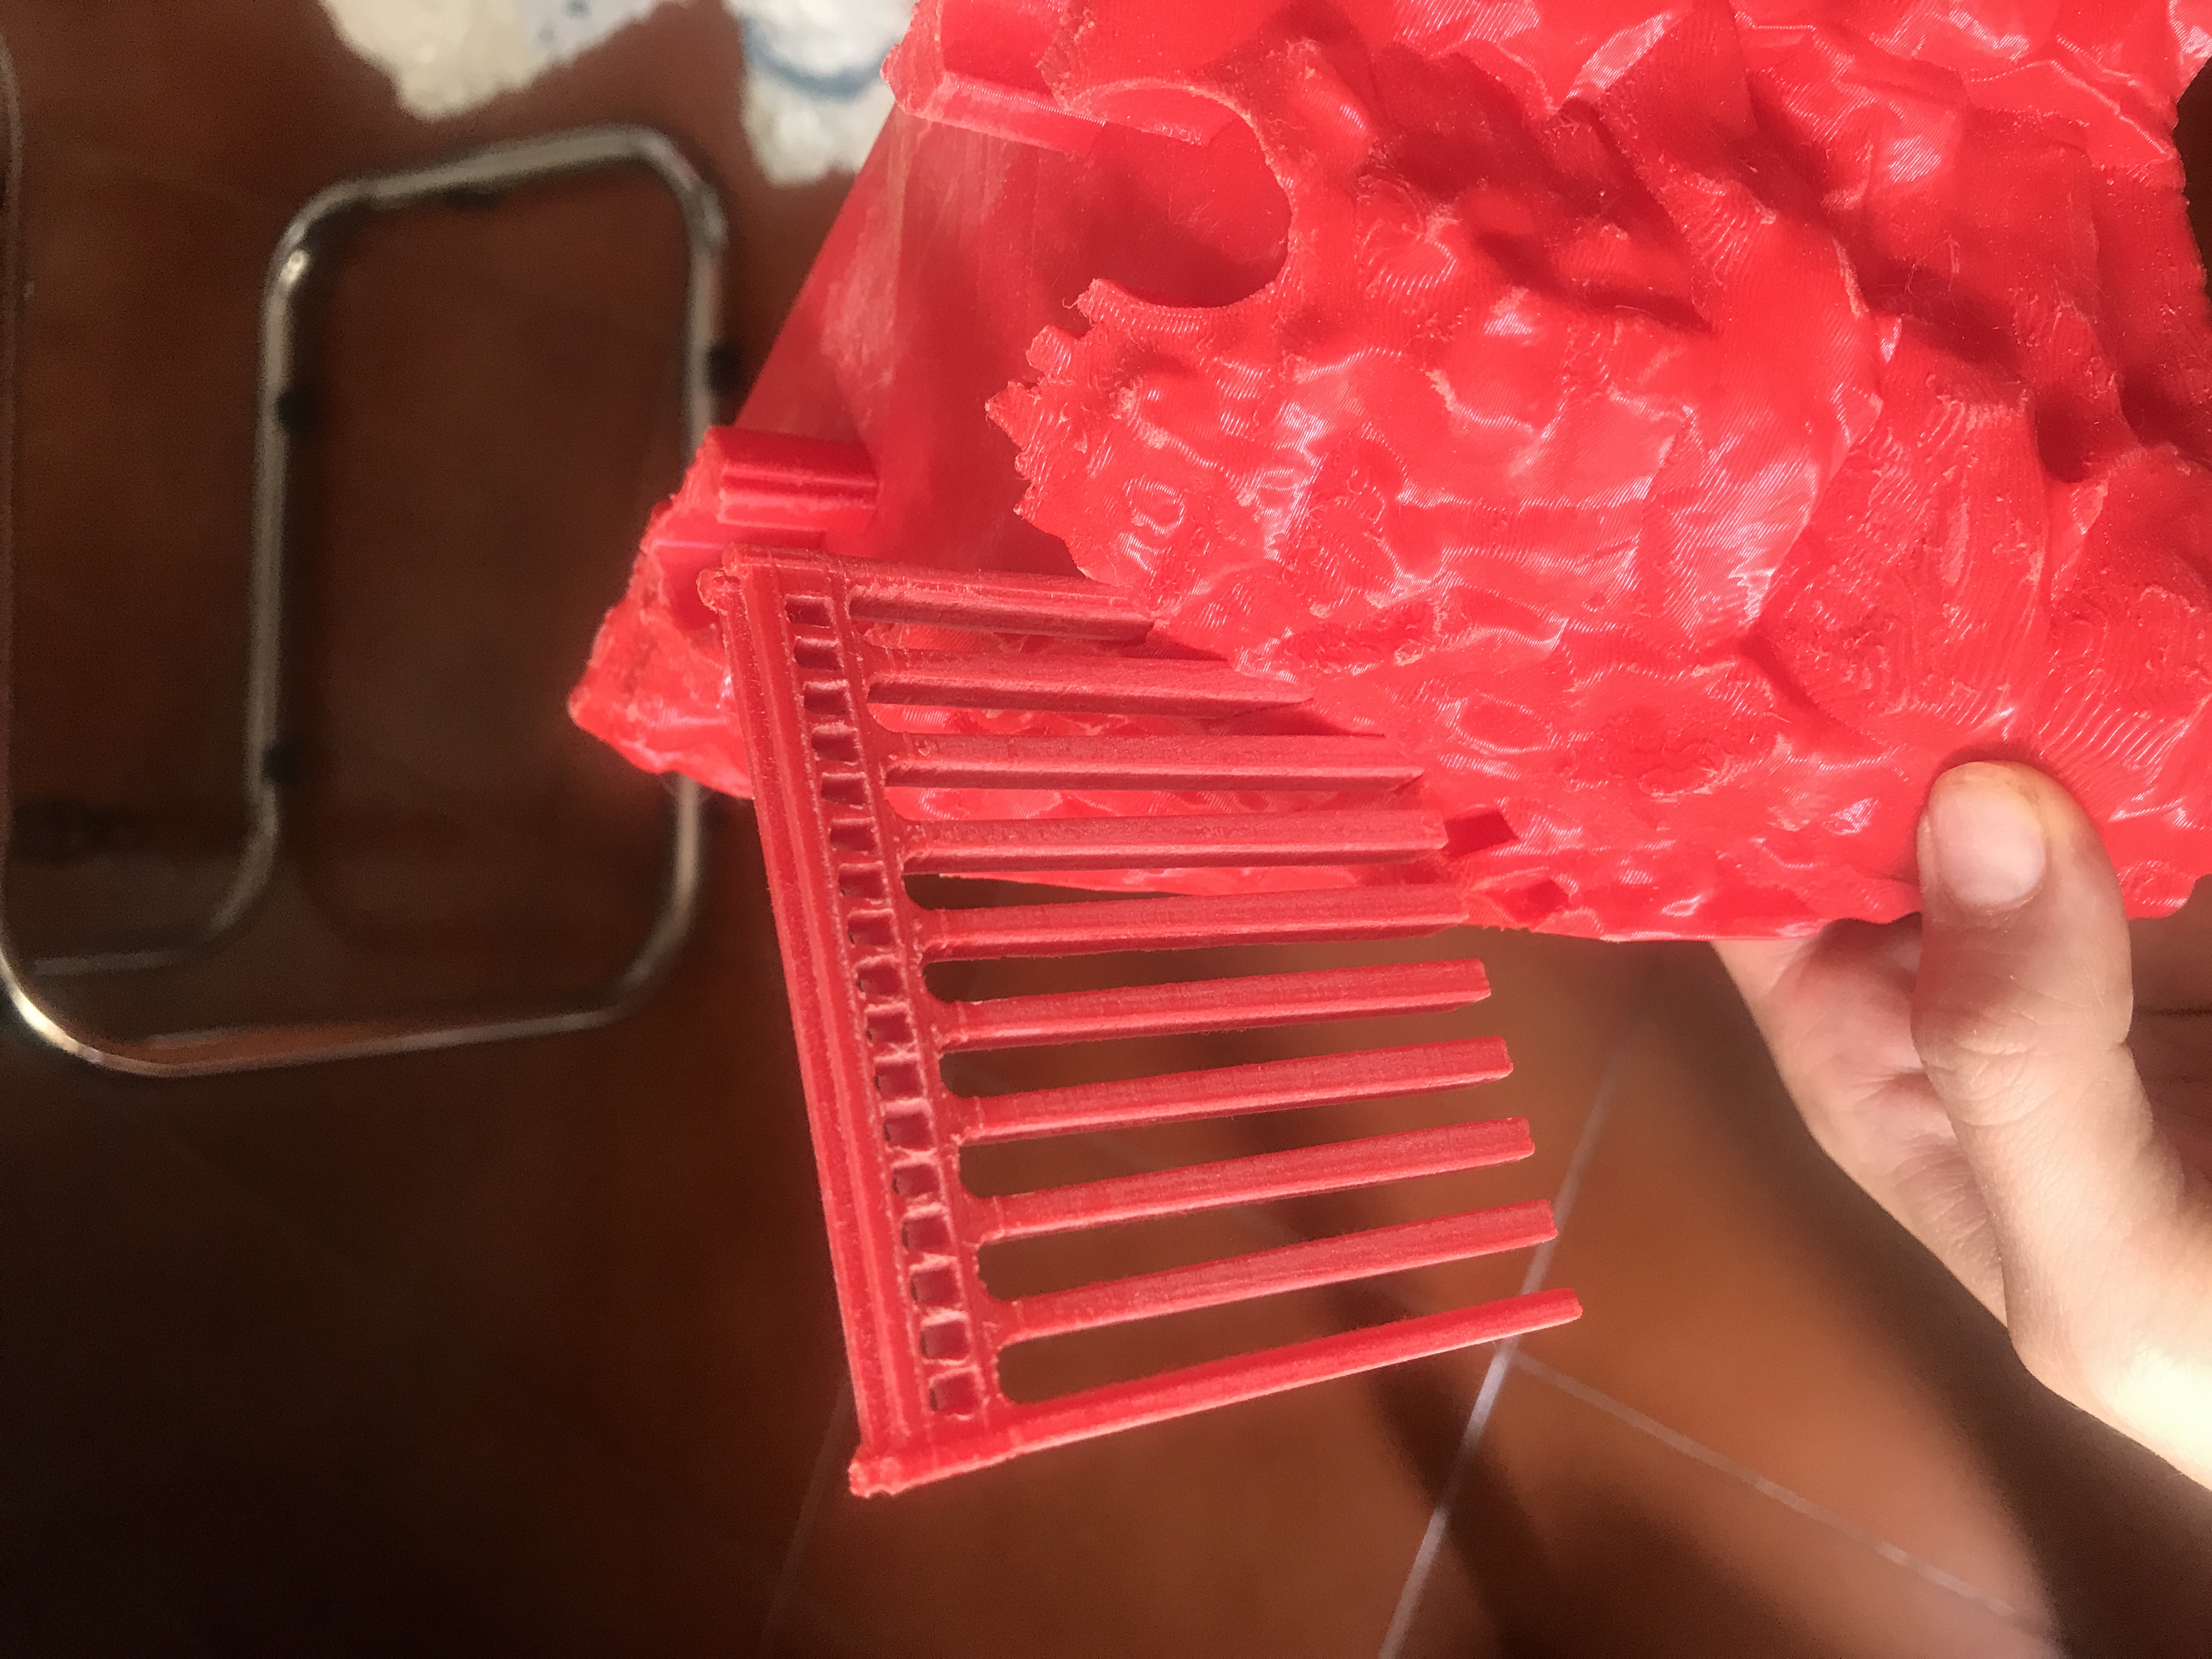
UPDATE: Some people may have difficulty printing the thin walls of the 'stone-circle' landscape piece. MyMiniFactory user 3DPrintingWithAnton has kindly provided a version with thicker walls, which is now uploaded in addition to the original version.
| Date de publication | 01/07/2019 |
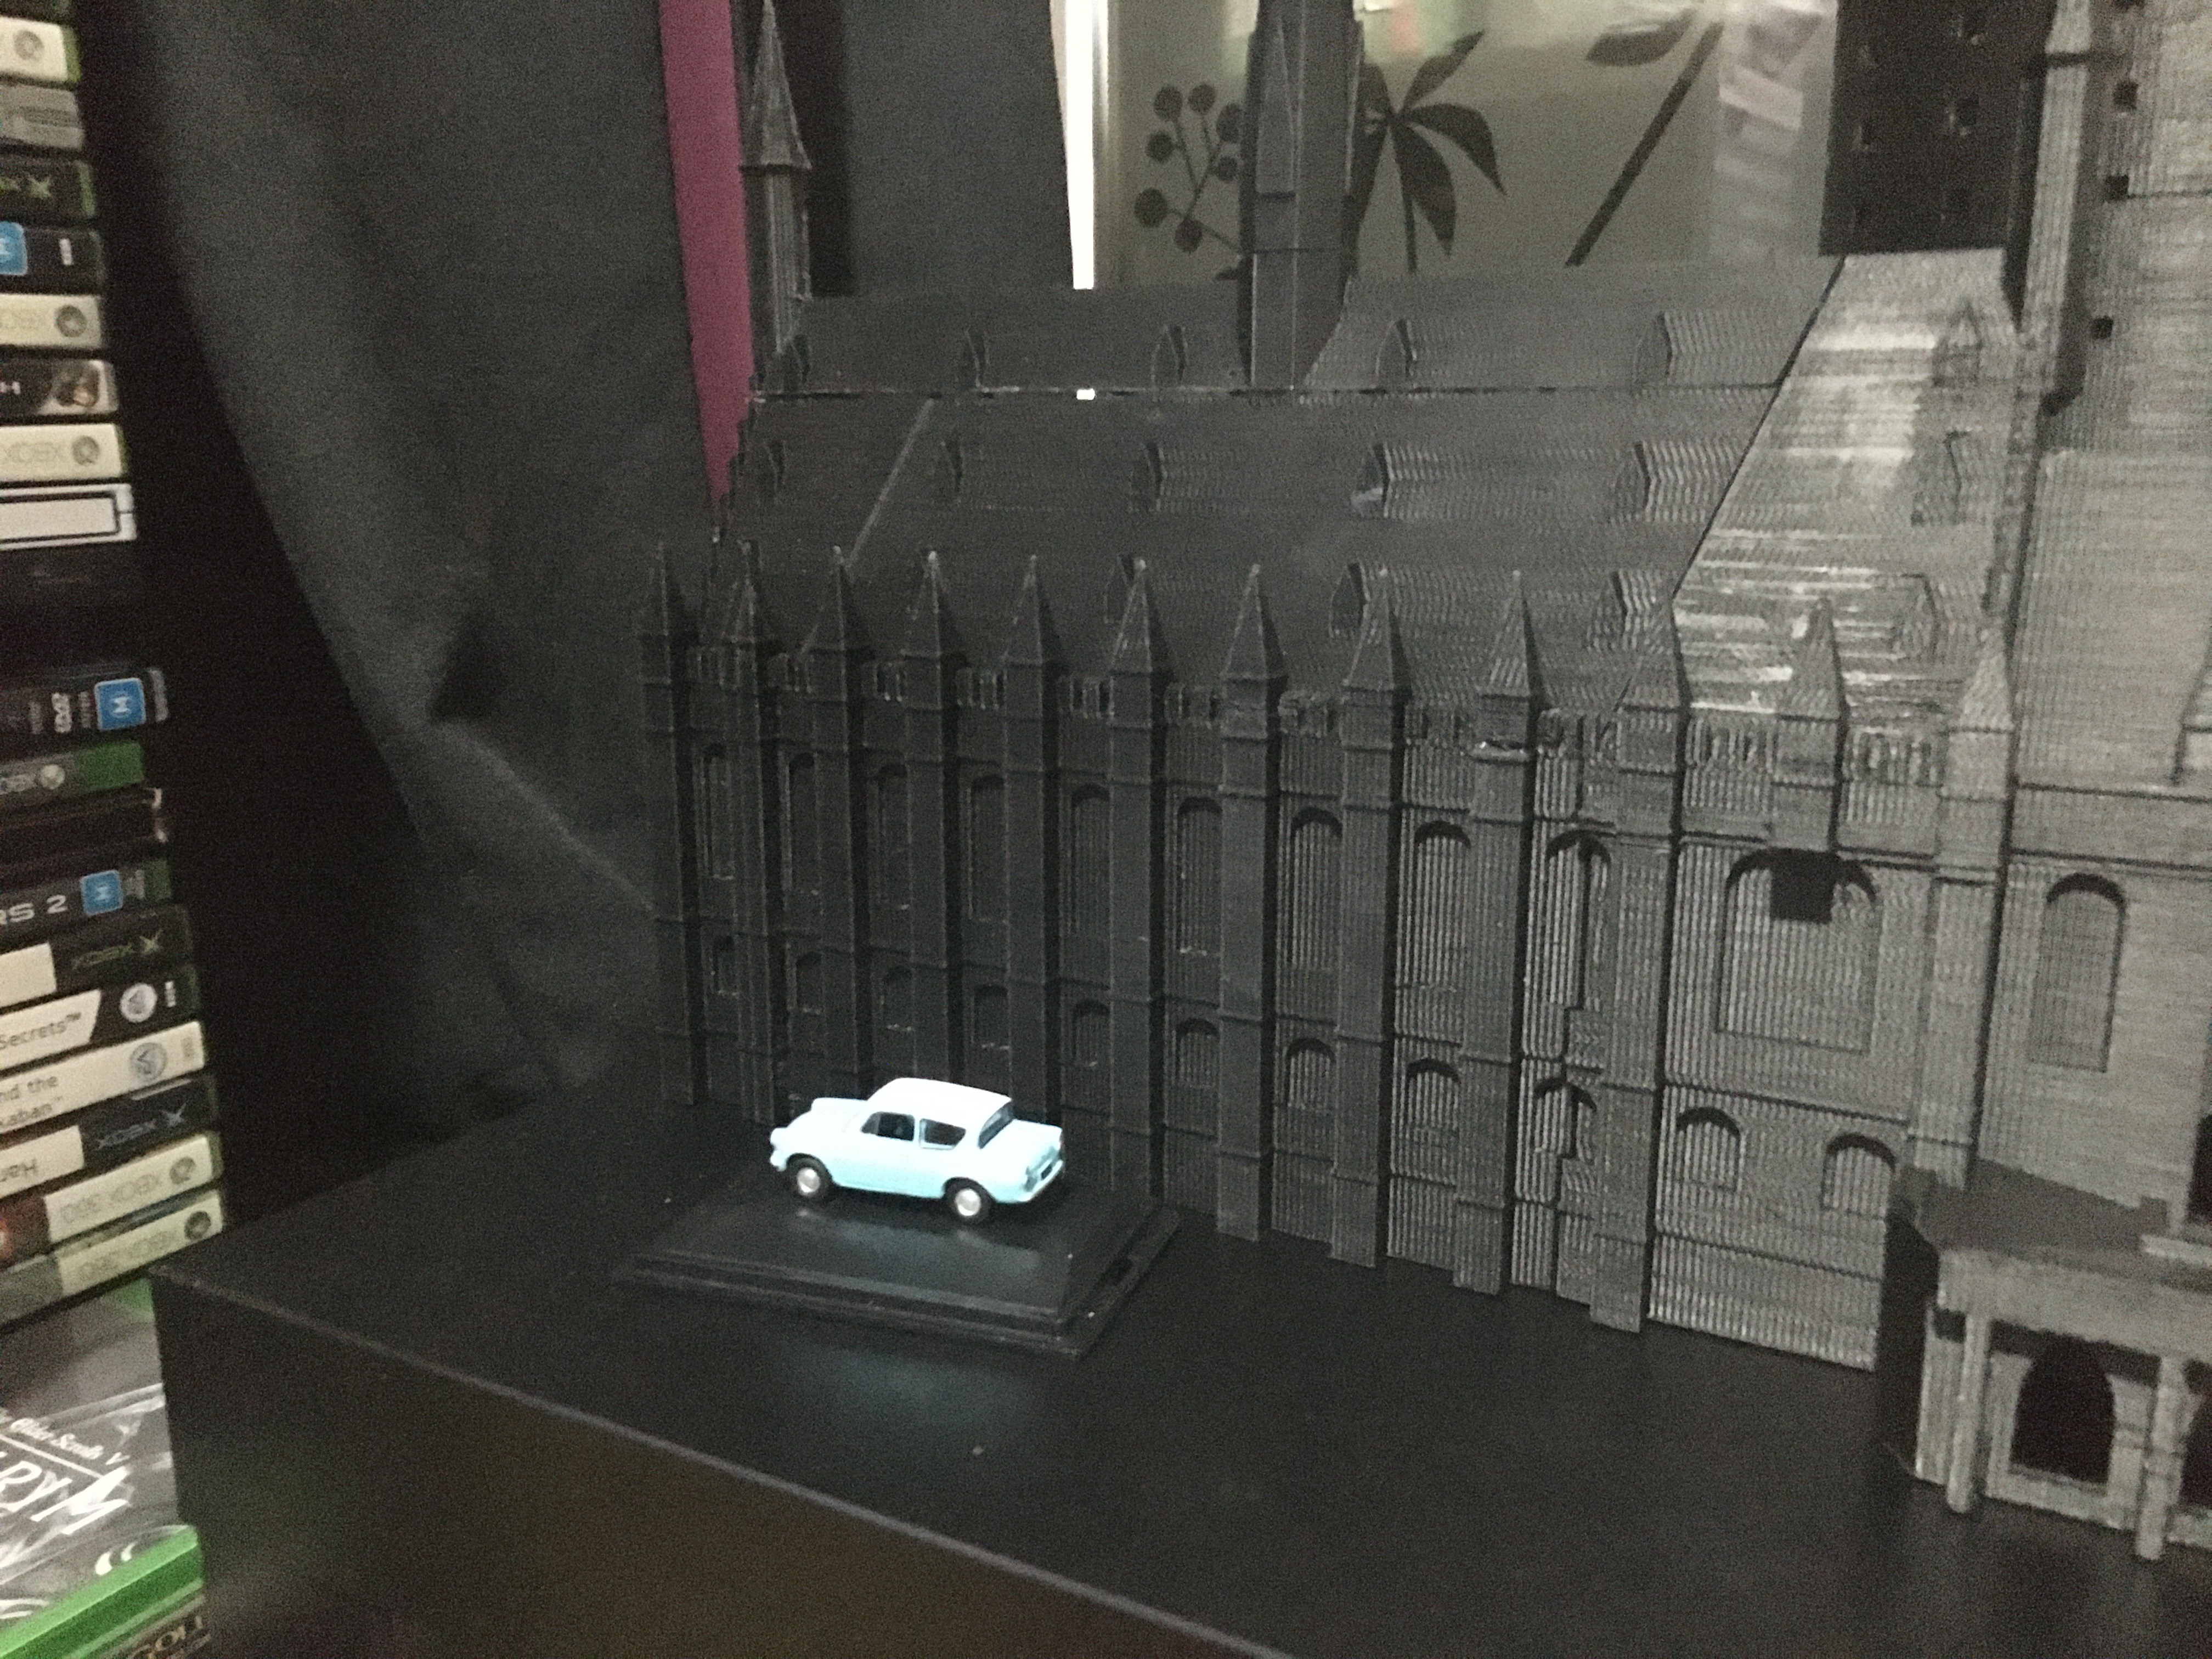
| Dimensions | About 45x45 |


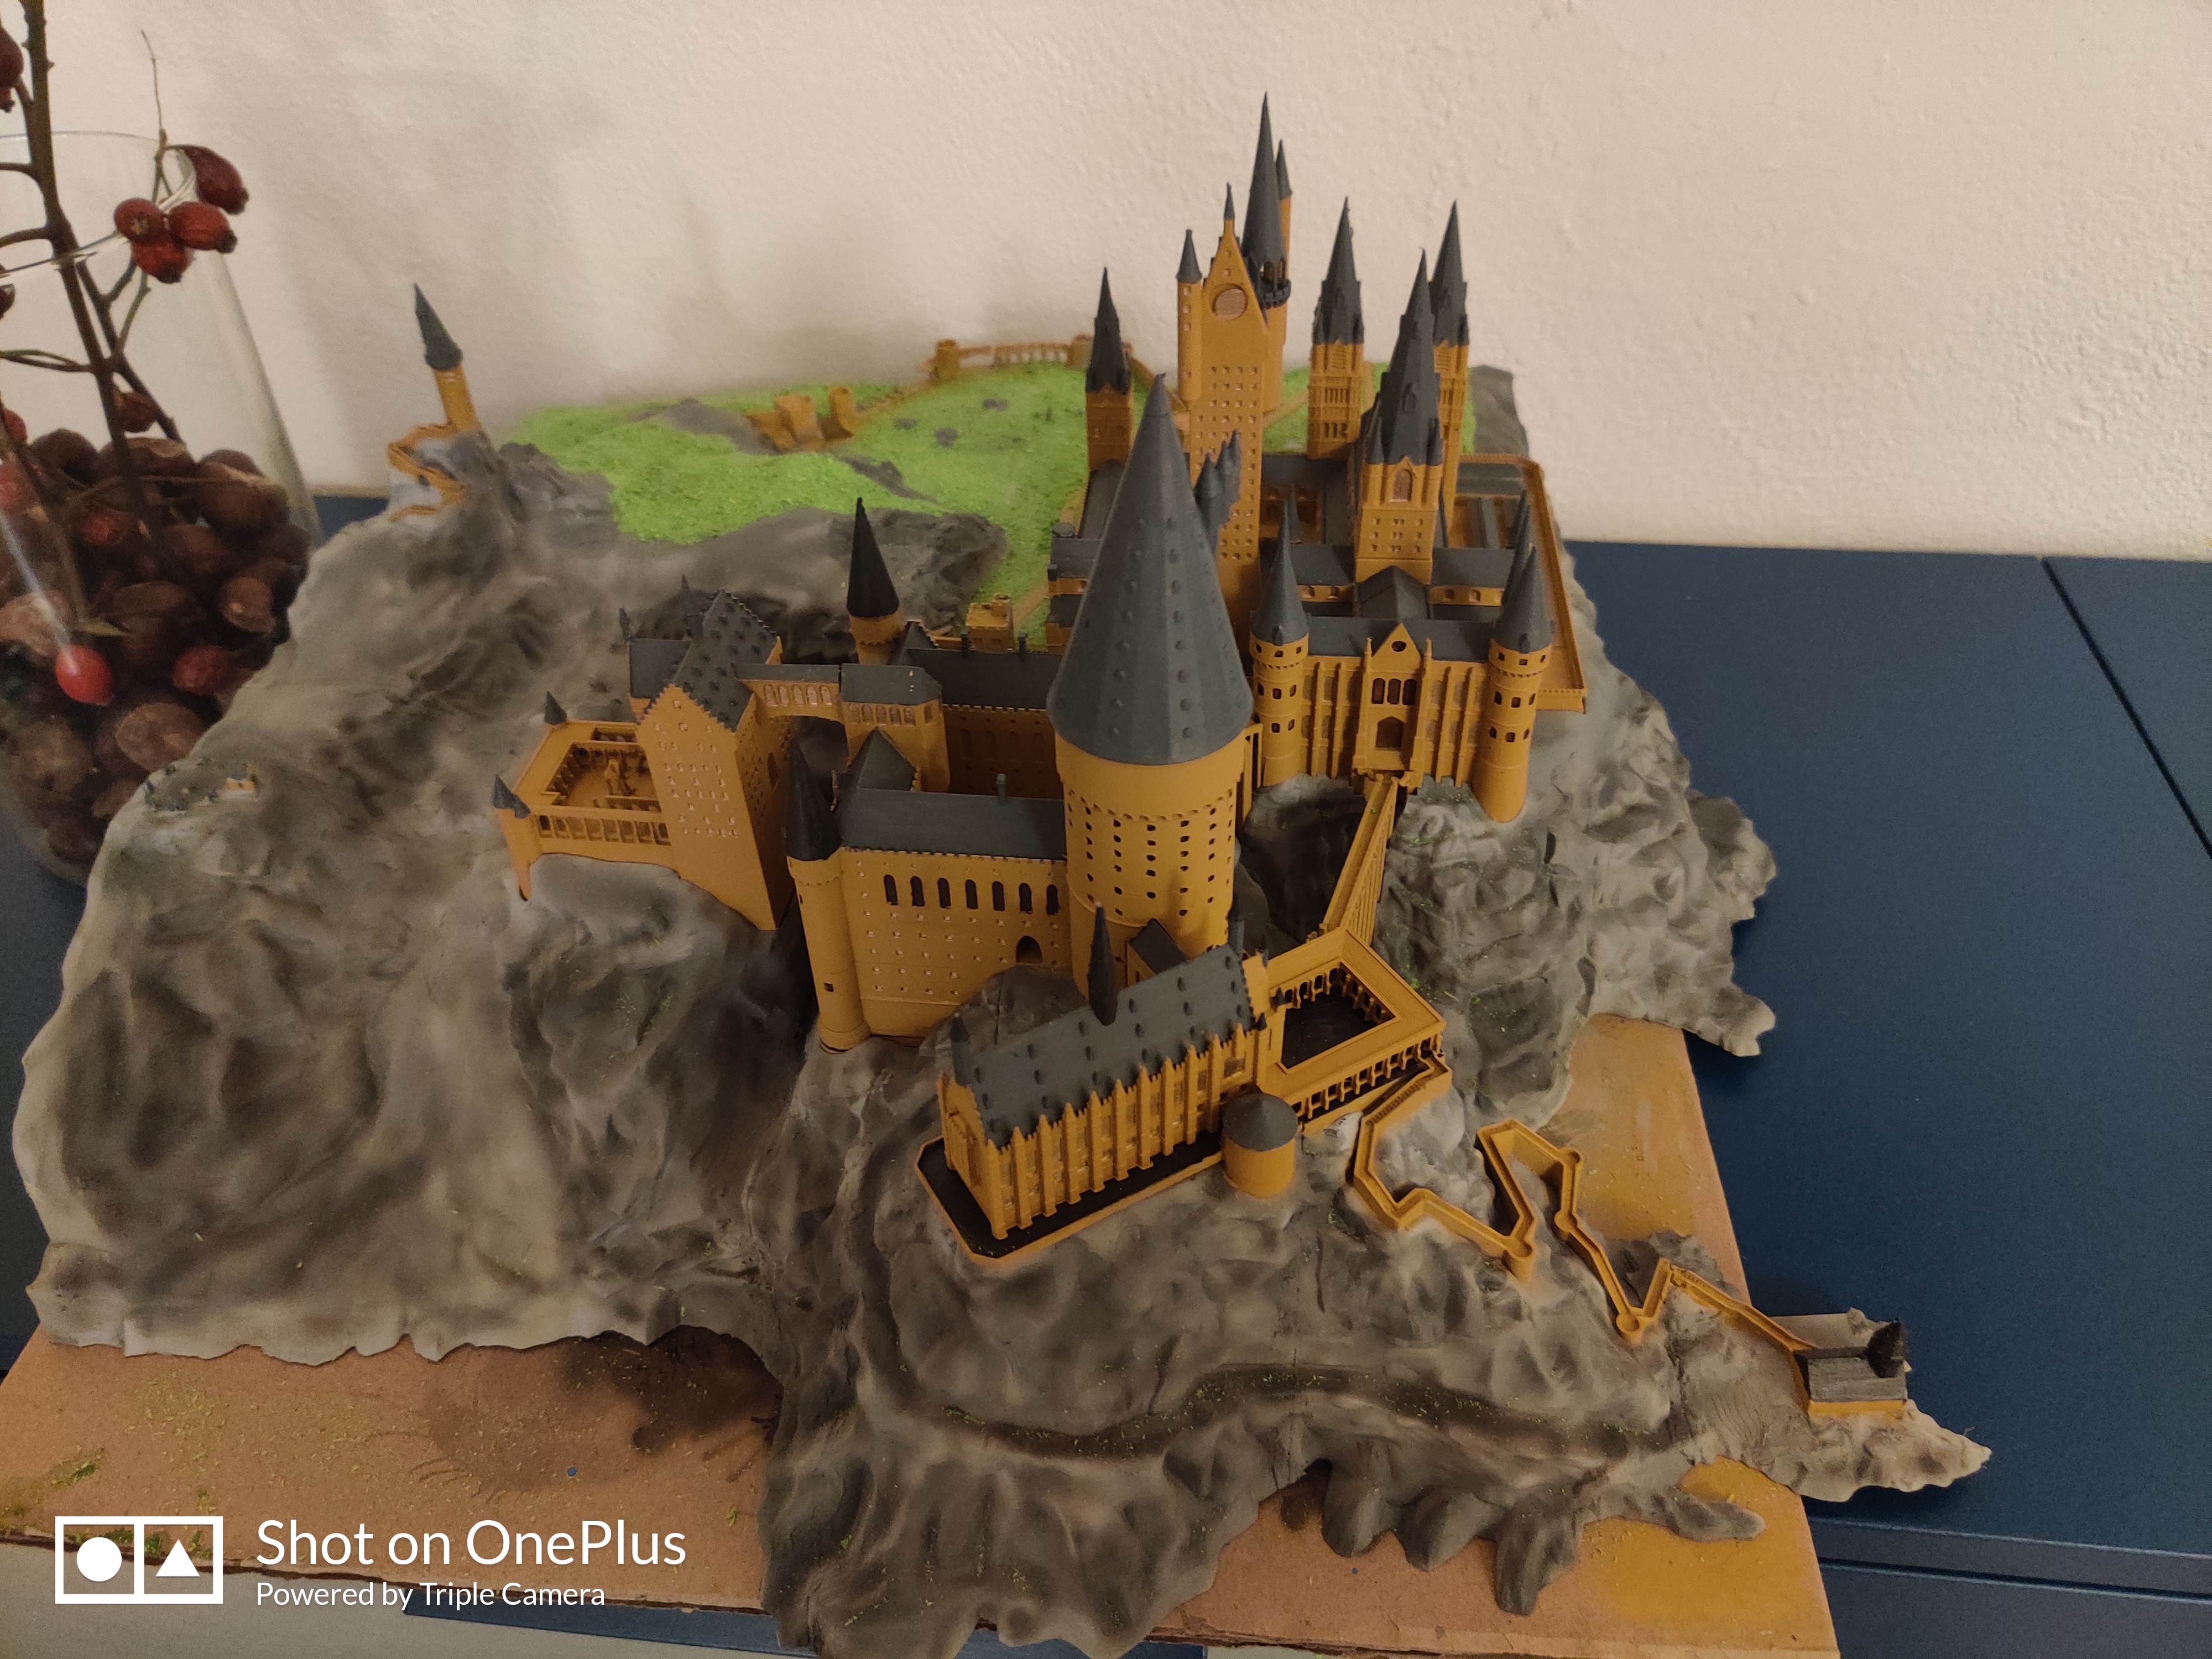


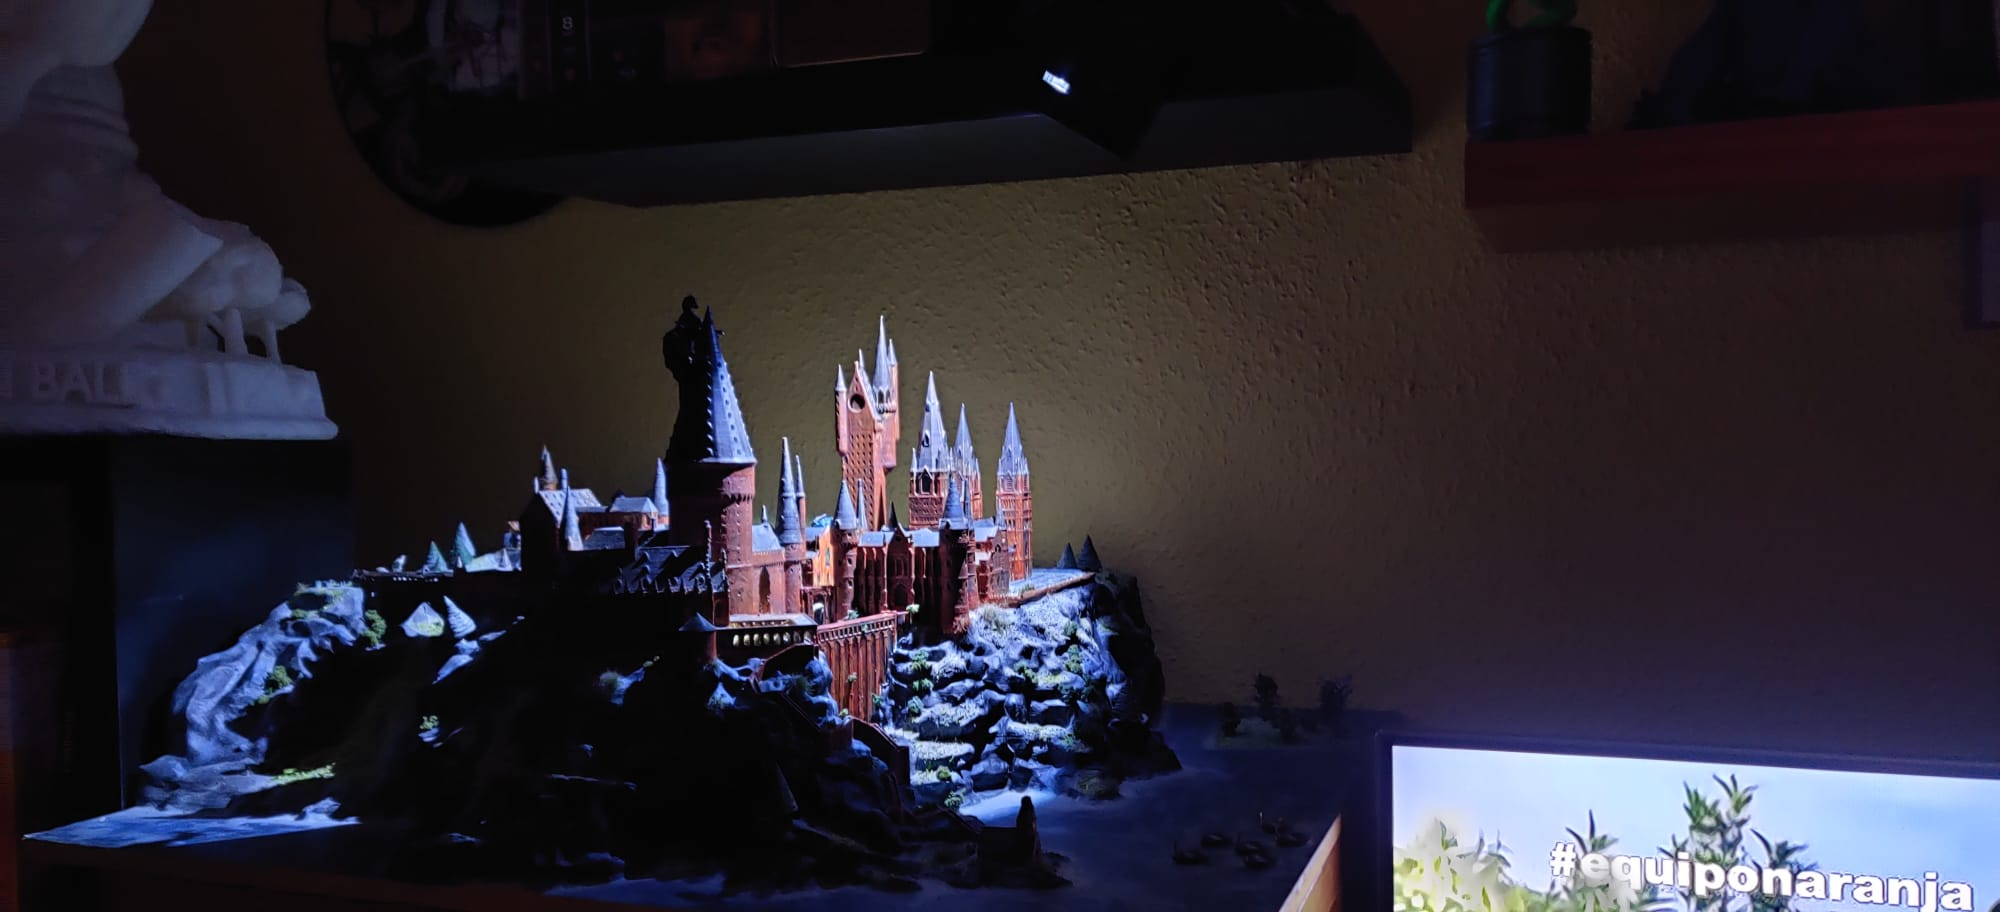
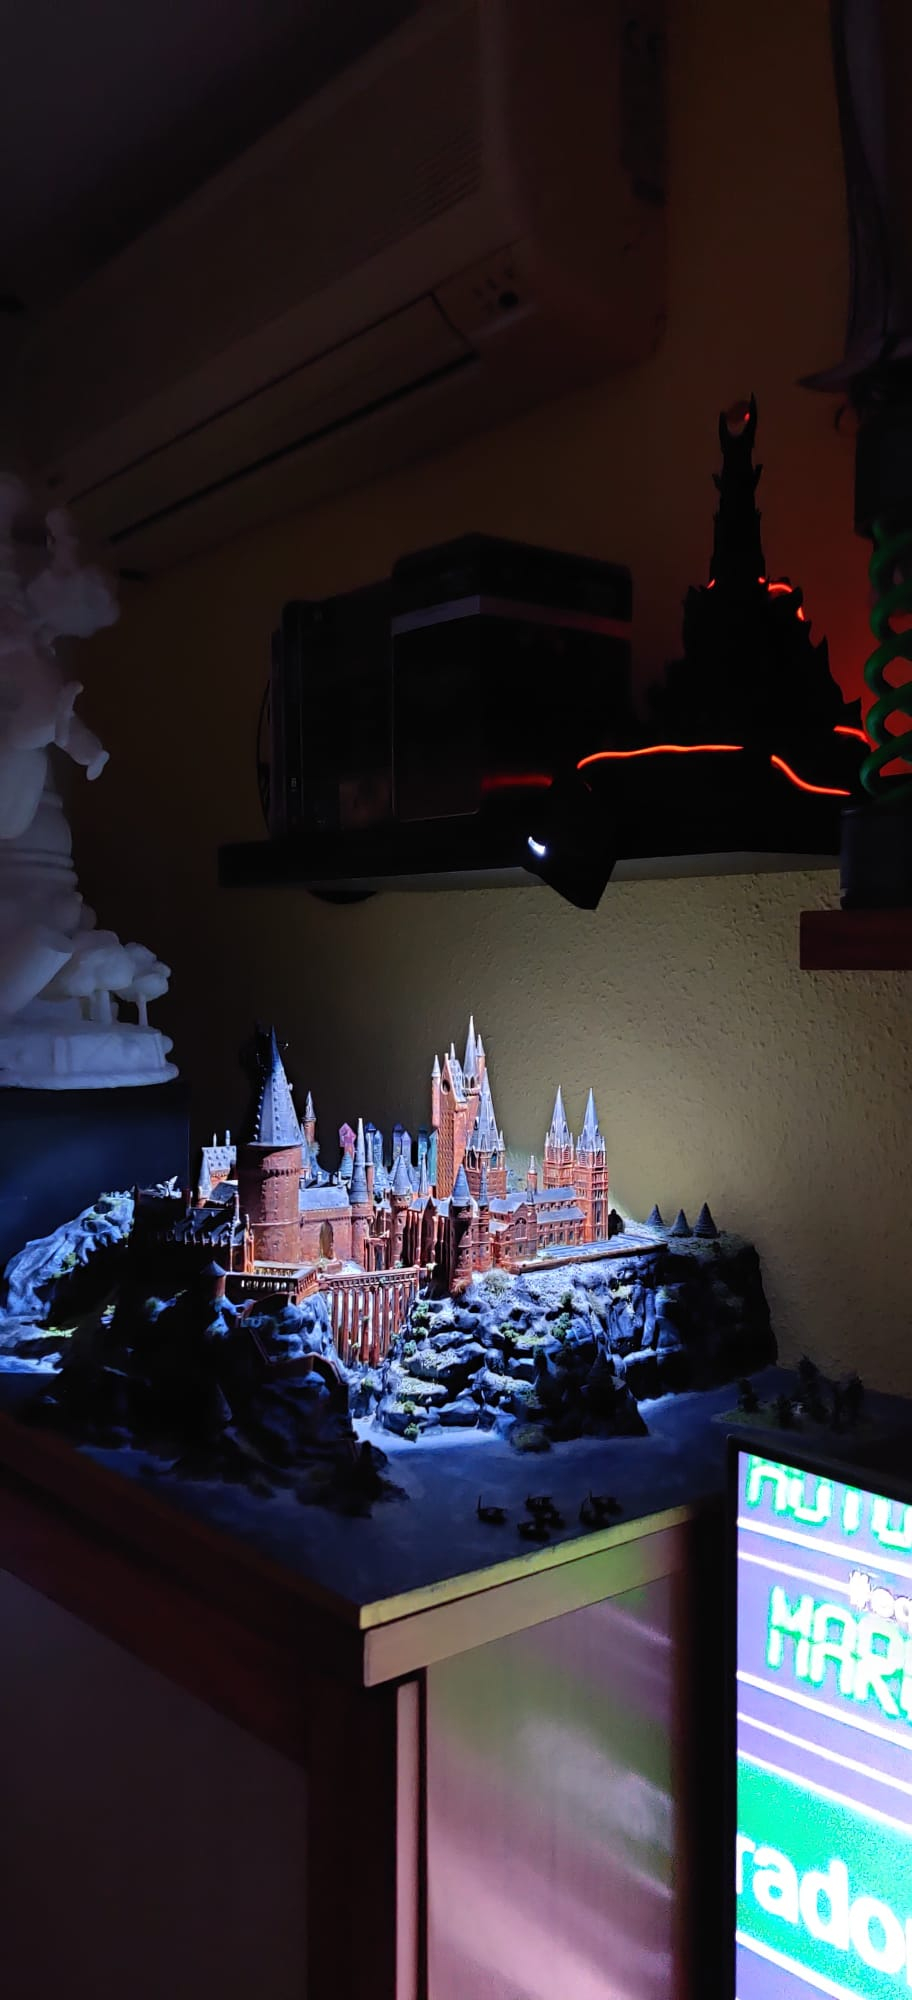
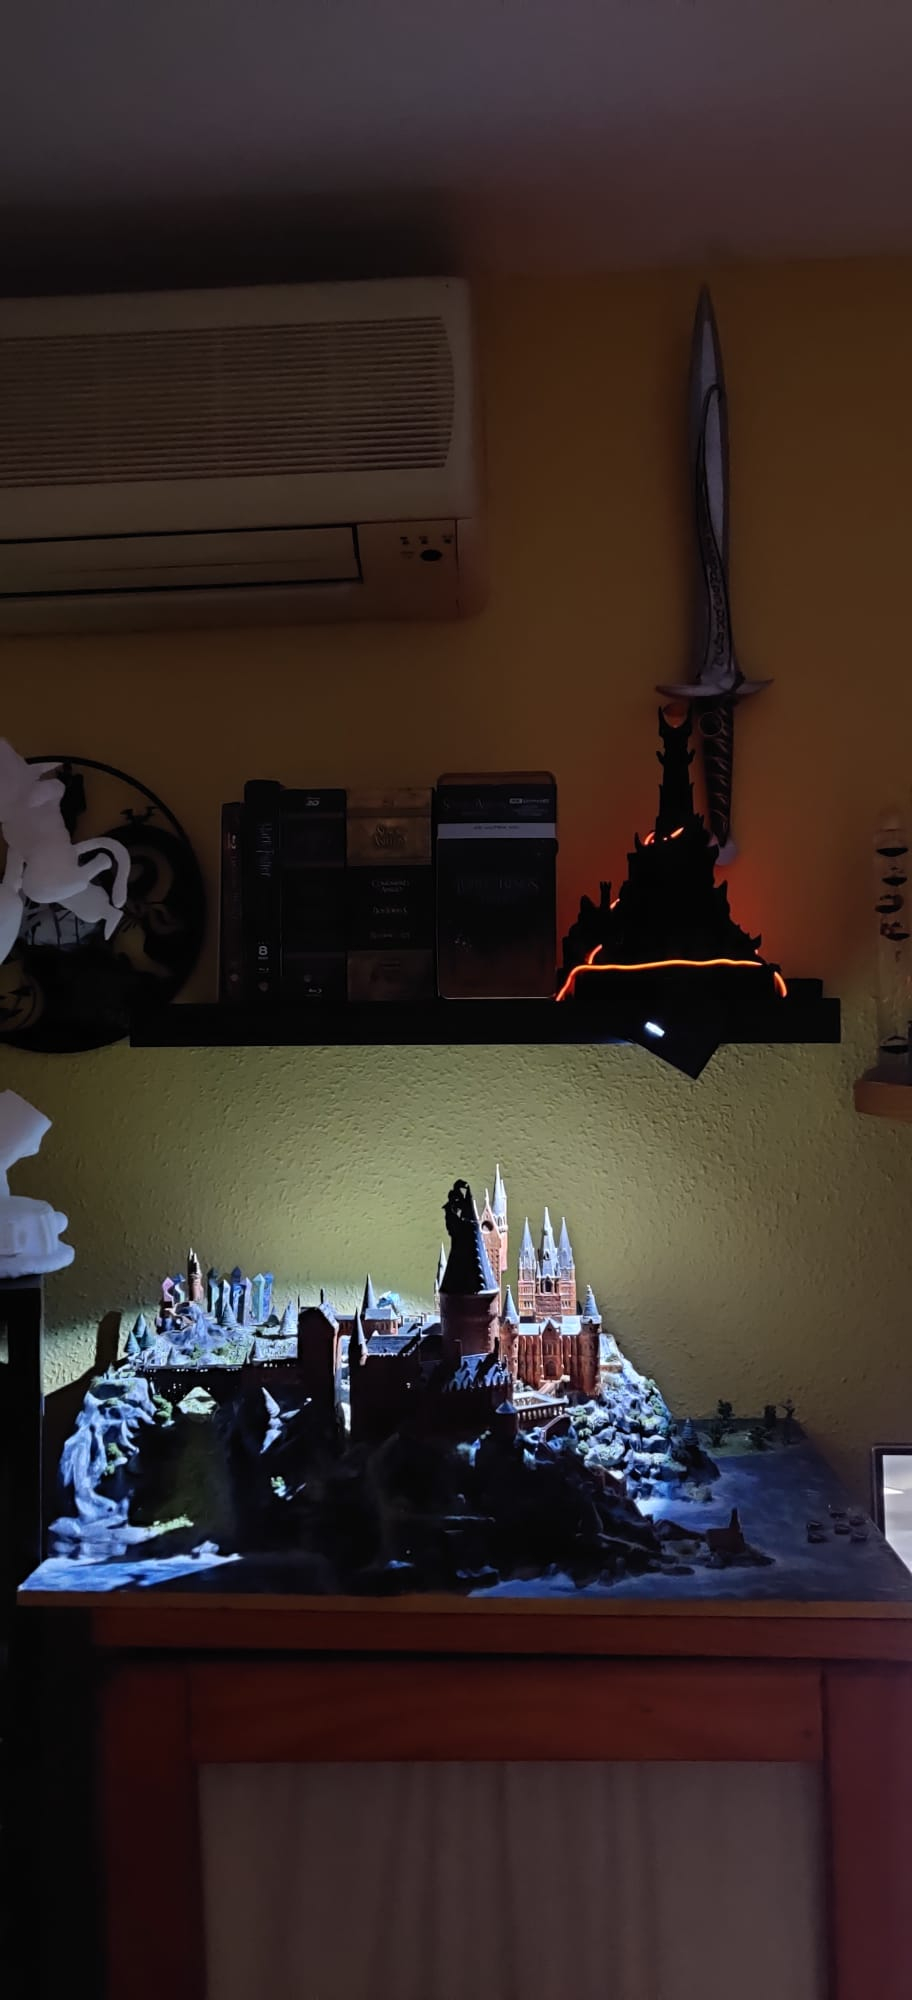


Es fehlen noch ein paar Sachen aber ich liebe es .